Expense and income codes
Expense and income codes are created on the Expense and income codes page. The hierarchical structure lets you group income and expenses according to the lines of the profit tax declaration. Therefore, the list of expense and income codes contains all the income and expense codes that are used in tax reporting. Turnovers on parent income and expense codes consist of the turnovers on child income and expense codes. The list of expense and income codes is synced with the list of financial dimensions selected in the Tax dimension field on the Profit tax tab of the General ledger parameters page. This mechanism is used to calculate the profit tax declaration. For more information, see Profit tax declaration.
You should set the value of the ExpenseAndIncomeCode field in the following places:
- In primary documents such as purchase orders, sales orders, advance reports, and inventory journals, and in master records such as main accounts and fixed assets.
- In vendor, customer, ledger, and inventory transactions.
Create an expense or income code
Go to Tax > Setup > Profit tax > Expense codes.
On the Action Pane, select Tree view to view expense and income codes as a tree, and then select New to create a code.
In the Expense code field, enter the expense or income code. The code should be unique.
Typically, when codes are numbered, you should adhere to a hierarchical principle. For example, if you create a child code for code 90100000, it should start with 901, such as 901010000 or 901020000.
In the Name field, enter a detailed description of the expense or income code.
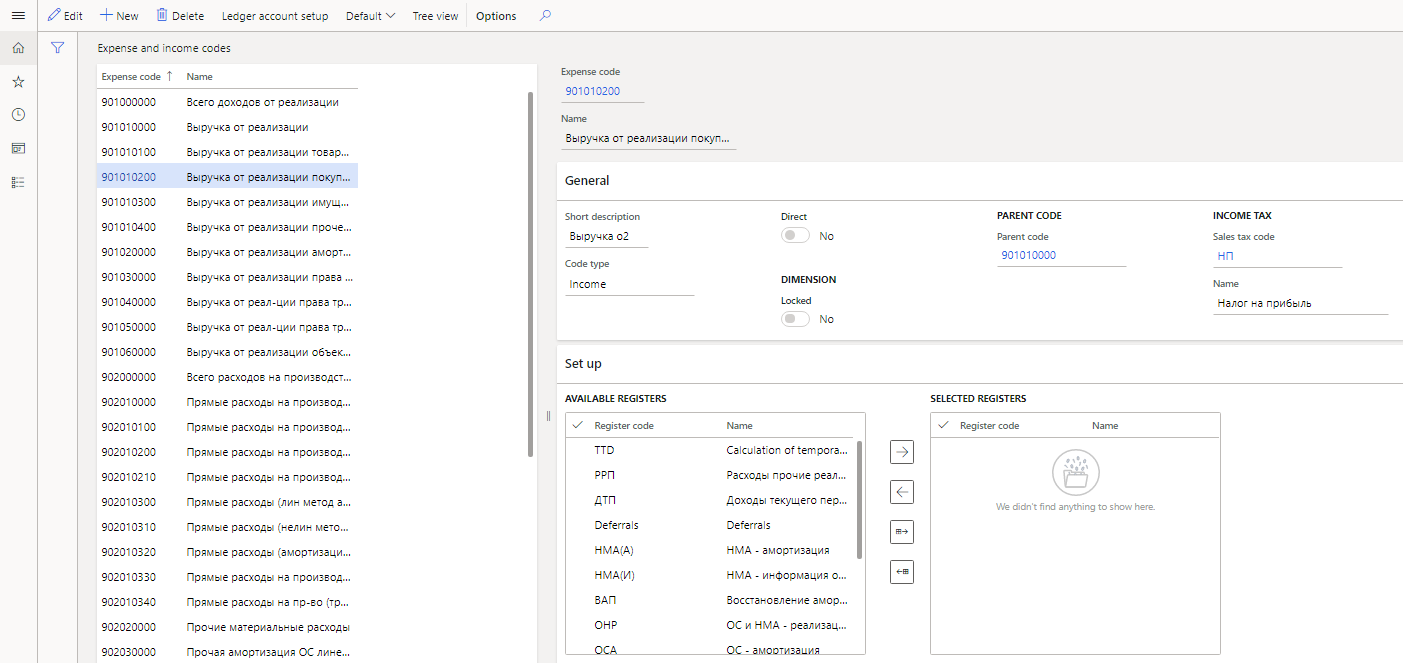
On the General FastTab, set the following fields:
- In the Short description field, enter the short name of the expense or income code.
- In the Code type field, select the type of code: Income, Issue or Unknown.
- In the Dimension section, set the Locked option to Yes to stop synchronization of the selected expense or income code.
- Optional: In the Parent code section, in the Parent code field, select a parent code to create a hierarchical structure.
- In the Income tax section, in the Sales tax code field, select the sales tax code that should be used to calculate the amount of tax assets and tax liabilities for the expense or income code.
On the Set up FastTab, you can select the registers that will be used to calculate the amounts and totals for expense or income codes.
Note
You can select registers only for codes that aren't parent codes.
In the Available registers section, select the registers, and then select the right arrow button to move them to the Selected registers section.
Alternatively, on the Action Pane, select Default > Default. In this case, the system automatically suggests registers and moves them to Selected registers section. A register will be suggested for an income or expense code in the following situations:
- The income or expense code, or its parent code, was selected in the register settings.
- The income or expense code, or its parent code, was used in the sequence of calculation for rated expense register settings.
- The register is preconfigured so that it's used by default when totals are calculated for the expense or income code. You can find an example list of expense and income codes in the RUMF legal entity.
On the Action Pane, select Ledger account setup to select the ledger accounts that transactions will be assigned to for the income or expense code.
For example, amounts for ledger transactions Debit 62.110 and Credit 90.110, where the ExpenseAndIncomeCode financial dimension is either set to 901010200 or left blank, will be assigned to income code 901010200 (Revenue from sales of goods).
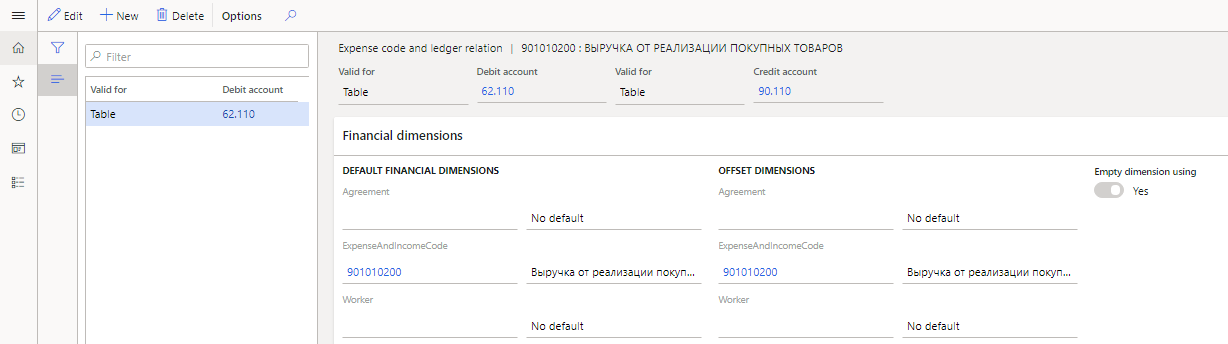
On the Expense code and ledger relation page, in the header, set the following values:
In each of the two Valid for fields, select one of the following values:
- Table – The setting applies to a separate account.
- Group – The setting applies to an account interval group.
- All – The setting applies to all accounts.
Set the Debit account and Credit account fields, based on the value of the corresponding Valid for field:
- If the Valid for field is set to Table, select a ledger account.
- If the Valid for field is set to Group, select the code for an account interval group.
- If the Valid for field is set to All, leave the field blank.
On the Financial dimensions FastTab, in the Default financial dimensions and Offset dimensions sections, you can specify financial dimension codes that account entries will be used for when totals are calculated on the expense or income code, in addition to the setup of ledger accounts that you selected earlier.
For example, in the Agreement, ExpenseAndIncomeCode, and Worker fields, select the dimensions for the account and the offset account.
Note
The ExpenseAndIncomeCode dimension is selected as the dimension for expense and income codes on the General ledger parameters page. It can’t be changed. If you set the Empty dimension using option to Yes, the expense or income code will also include transactions that have the same ledger accounts, but the ExpenseAndIncomeCode field is blank.
Feedback
Coming soon: Throughout 2024 we will be phasing out GitHub Issues as the feedback mechanism for content and replacing it with a new feedback system. For more information see: https://aka.ms/ContentUserFeedback.
Submit and view feedback for