Set up and apply configuration data in the Common Data Service
Applies To: Project Operations for resource/non-stocked based scenarios
Prerequisites
Before you begin to configure data in the Microsoft Dataverse, the following prerequisites must be met:
- Provision a Dataverse environment and a Dynamics 365 Finance environment for Project Operations.
- Legal entity information from Dynamics 365 Finance is shared to the Dataverse environment. This means that the Company entity in Dataverse has the following company records:
- THPM
- USPM
- GBPM
Install setup and configuration data
- Download, unblock, and unzip the Setup and Configuration Data Package.
- Navigate to the unzipped folder and run the executable file, DataMigrationUtility.
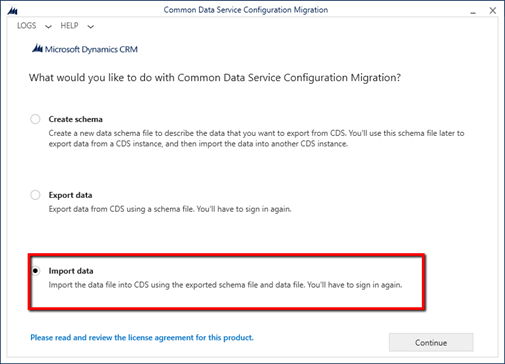
- On page 1 of the Common Data Service Configuration Migration (CMT) Wizard, select Import Data and then select Continue.
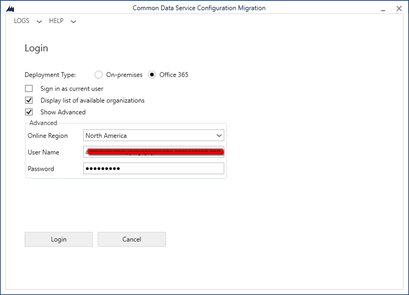
- On Page 2 of the CMT Wizard, select Microsoft 365 as the Deployment Type.
- Select the Display a list of available organizations and Show Advanced check boxes.
- Select the region of your tenant, enter your credentials, and select Login.
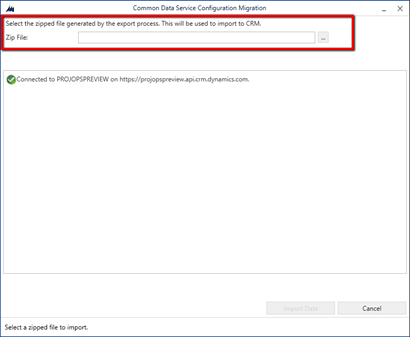
- On page 3, from the list of organizations on the tenant, select the organization you want to import the demo data into and select Login.
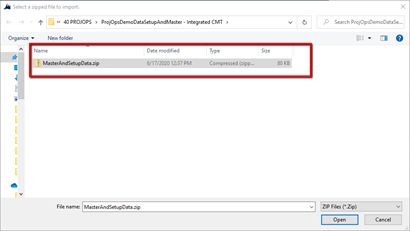
- On page 4, select the zip file, SampleSetupAndConfigData from the unpacked folder.
- After the zip file is selected, select Import Data.
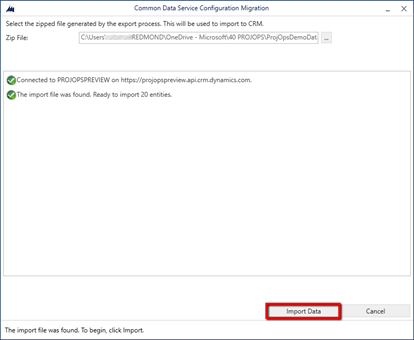
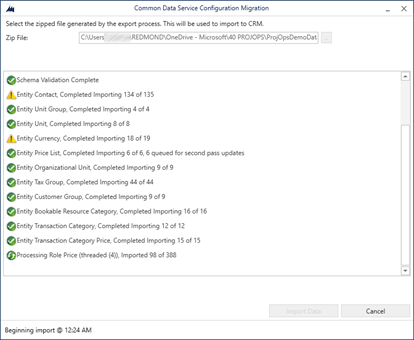
- Import will run for approximately two-ten minutes depending on your network speed. After import completes, exit the CMT Wizard.
- Check your organization for data in the following 26 entities:
- Currency
- Chart of Accounts
- Fiscal Calendar
- Currency Exchange Rate Types
- Payment Day
- Payment Schedule
- Payment Term
- Organizational Unit
- Contact
- Tax Group
- Customer Group
- Vendor Group
- Unit
- Unit Group
- Price List
- Project Parameter Price List
- Invoice Frequency
- Bookable Resource Category
- Transaction Category
- Expense Category
- Role Price
- Transaction Category Price
- Characteristic
- Bookable Resource
- Bookable resource category Assn
- Bookable Resource Characteristic
Update Project Operations configurations
- Navigate to the CE environment. You can find it by opening the Power Platform Admin Center, selecting the environment, and then selecting Open Environment.

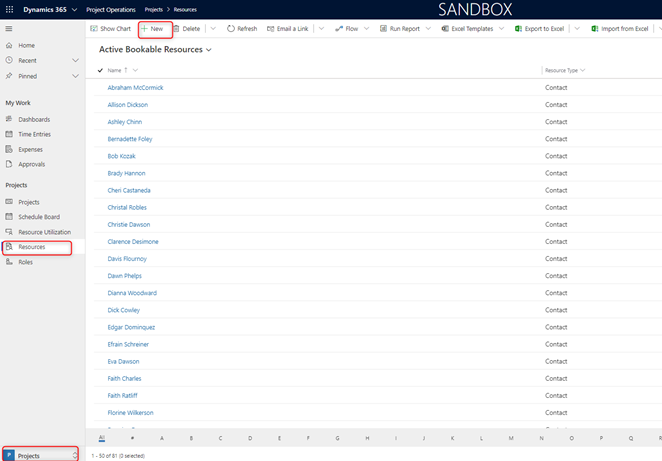
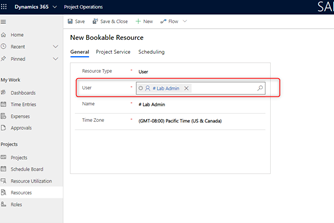
- Go to Projects > Resources and then select New to create a bookable resource for your user.
- On the General tab, select your admin user. Verify that the time zone matches the one you are in.
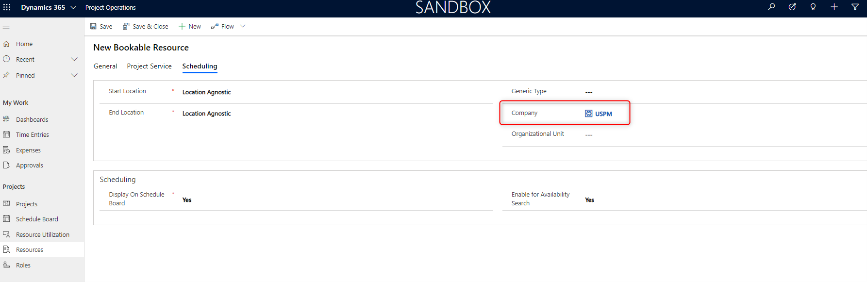
- On the Scheduling tab, in the Company field, pick the USPM company, and then select Save.
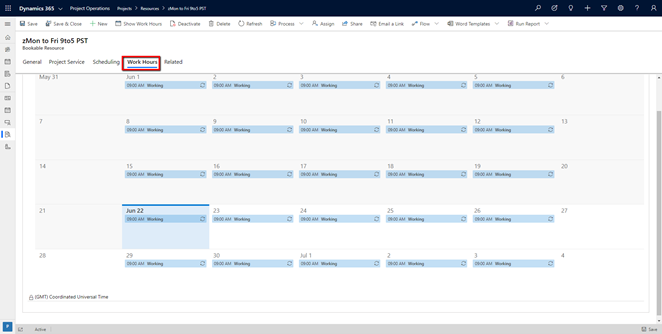
- Select the Work hours tab.
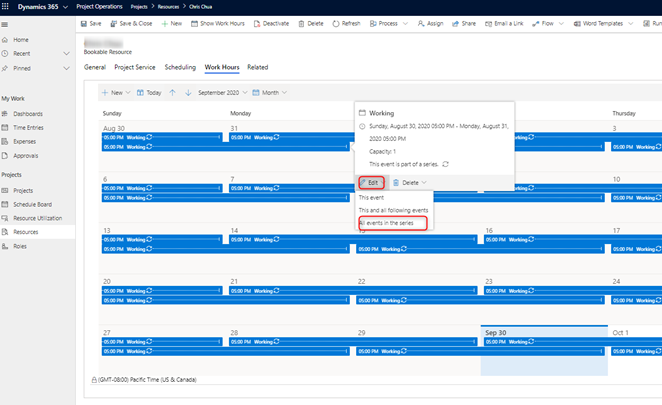
- Double-click on any value in the calendar and select Edit > All events in the series.
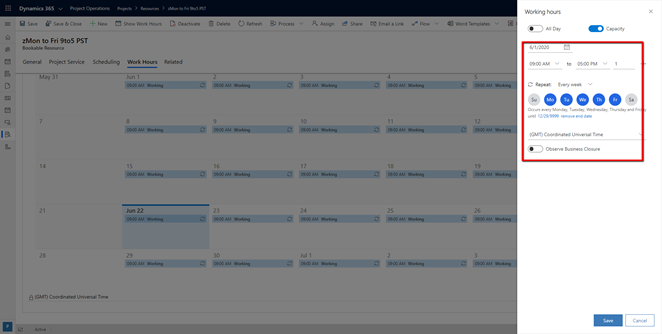
- Change work hours to an eight (8) hour work day, mark weekends as non-work days, and make sure time zone matches yours.
- Select Save and close.
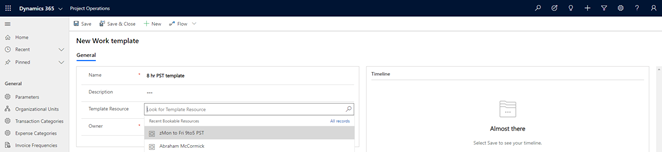
- Go to Settings > Calendar templates and select New.
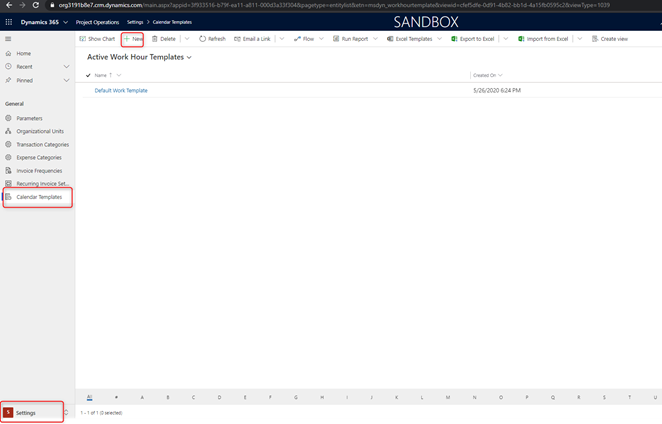
- Enter a name, select the template resource you created, and then select Save.
- Go to Parameters and double-click the record.
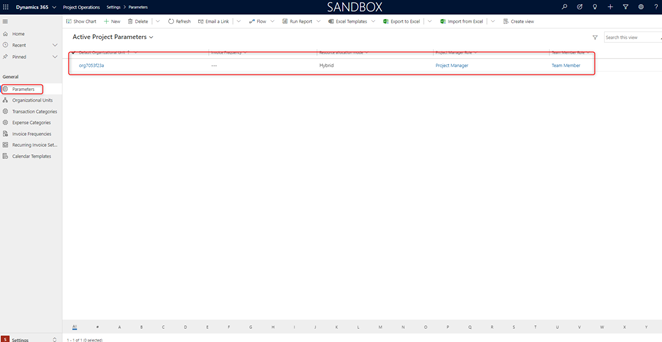
- Update the following fields:
- Default company: USPM
- Default Organizational Unit: Contoso Robotics Global
- Invoice Frequency: Seventh and Last day
- Work hour template: Change to the template you created.
- Select Save.

Feedback
Coming soon: Throughout 2024 we will be phasing out GitHub Issues as the feedback mechanism for content and replacing it with a new feedback system. For more information see: https://aka.ms/ContentUserFeedback.
Submit and view feedback for