Update Project Operations in your Finance environment
Applies To: Project Operations for resource/non-stocked based scenarios
This article provides information about how to update Dynamics 365 Project Operations in your Dynamics 365 Finance environment. There are three procedures that are required to update Project Operations to Update 5 (UR5):
Import the package into your LCS project
- Sign in to Lifecycle Services (LCS) as a Project Owner or Environment manager.
- From the list of projects, select your LCS project.
- On the Project page, in the Environments group, open the environment that you want to update.
- Verify that the environment is running. If it isn't started, start the environment.
- In the New release section under Available updates, select View update for 10.0.15.
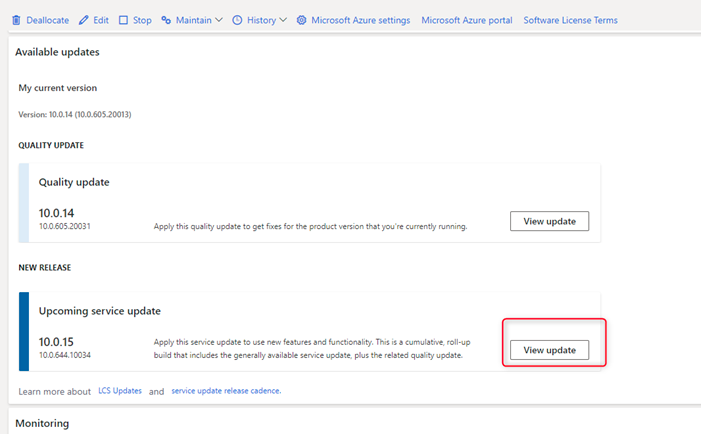
- On the Binary updates page, select Save package.
- On the Review and save updates page, select Save package.
- On the Save package to asset library pane that opens, enter the package name and then select Save package.
- When LCS has finished saving the package, the Done button is enabled. Select Done. LCS will verify the package. Verification can take a few minutes or up to one hour.
Apply the package update
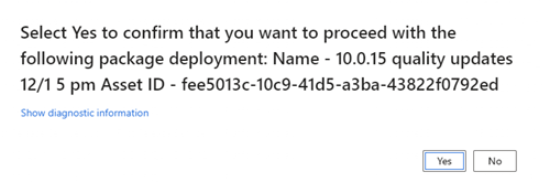
- In LCS, on the Environment details page, select Maintain > Apply Updates.
- From the list, select the package that you saved earlier, and then select Apply.
- Select Yes to confirm that you want to deploy the package.
- Select Yes to confirm that you want to update the application.
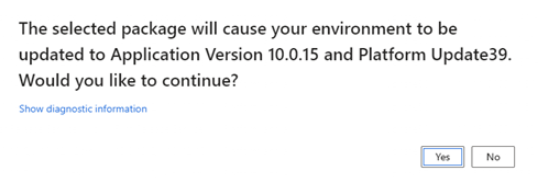
The deployment and application update will start.
On the Environment details page, in the top-right corner, the environment status will update to Servicing. In approximately two hours, the update will be complete. The application release information will update to Microsoft Dynamics 365 for Finance and Operations 10.0.15) and the environment status will update to Deployed.
Update your Dataverse environment
- Sign in to the Power Platform admin center.
- In the list, find and open the environment that you used to install Project Operations.
- On the Environments page, select Resource > Dynamics 365 apps.
- In the list, locate Microsoft Dynamics 365 Project Operations, and in the Status column, select Update Available.
- Select the I agree to the terms of service check box, and then select Update. The latest version of the solution will be installed.
After the installation is complete, you'll have version 4.5.0.134 installed.
Configure new features
Enable dual-write mapping
After you complete the update on the Finance and Dataverse environments, you can enable the required dual-write mappings. Complete the following procedures to enable dual-write mappings.
- Update security settings on Customer Engagement environment
- Refresh data entities
- Update and run the dual-write mappings
Update security settings on the Dataverse environment
The following updates to the security privileges for entities are required as part of the update to UR5.
- In your Dataverse environment, go to Settings, and in the System group, select Security.

Select Security Roles.
From the list of roles, select dual-write app user and select the Custom Entities tab.
Verify that the role has Read and Append To permissions for:
- Currency Exchange Rate Type
- Chart Of Accounts
- Fiscal Calendar
- Ledger
After the security role is updated, go to Settings > Security > Teams. Verify that the dual-write app user role has been applied to the team.
Refresh data entities from the update
- In your Finance environment, open the Data management workspace, and then open the Framework parameters page.
- On the Entity settings tab, select Refresh entity list.
- Select Close to confirm the entity refresh.
Note
This process will take approximately 20 minutes to complete. You will be notified when the refresh is complete.
Update dual-write mappings
In the Data management workspace, select Dual-write.
Select Apply solutions, select both solutions in the list, and then select Apply.
On the Dual-write page, select the following table maps, and then select Stop.
- Project Operations integration actuals (msdyn_actuals)
- Project Operations integration project expense categories (msdyn_expensecategories)
- Project Operations integration actuals project expenses export entity (msdyn_expenses)
On the Table map version page, apply a new version of the map to each of the three entities.
On the Dual-write page, select run to restart the maps.
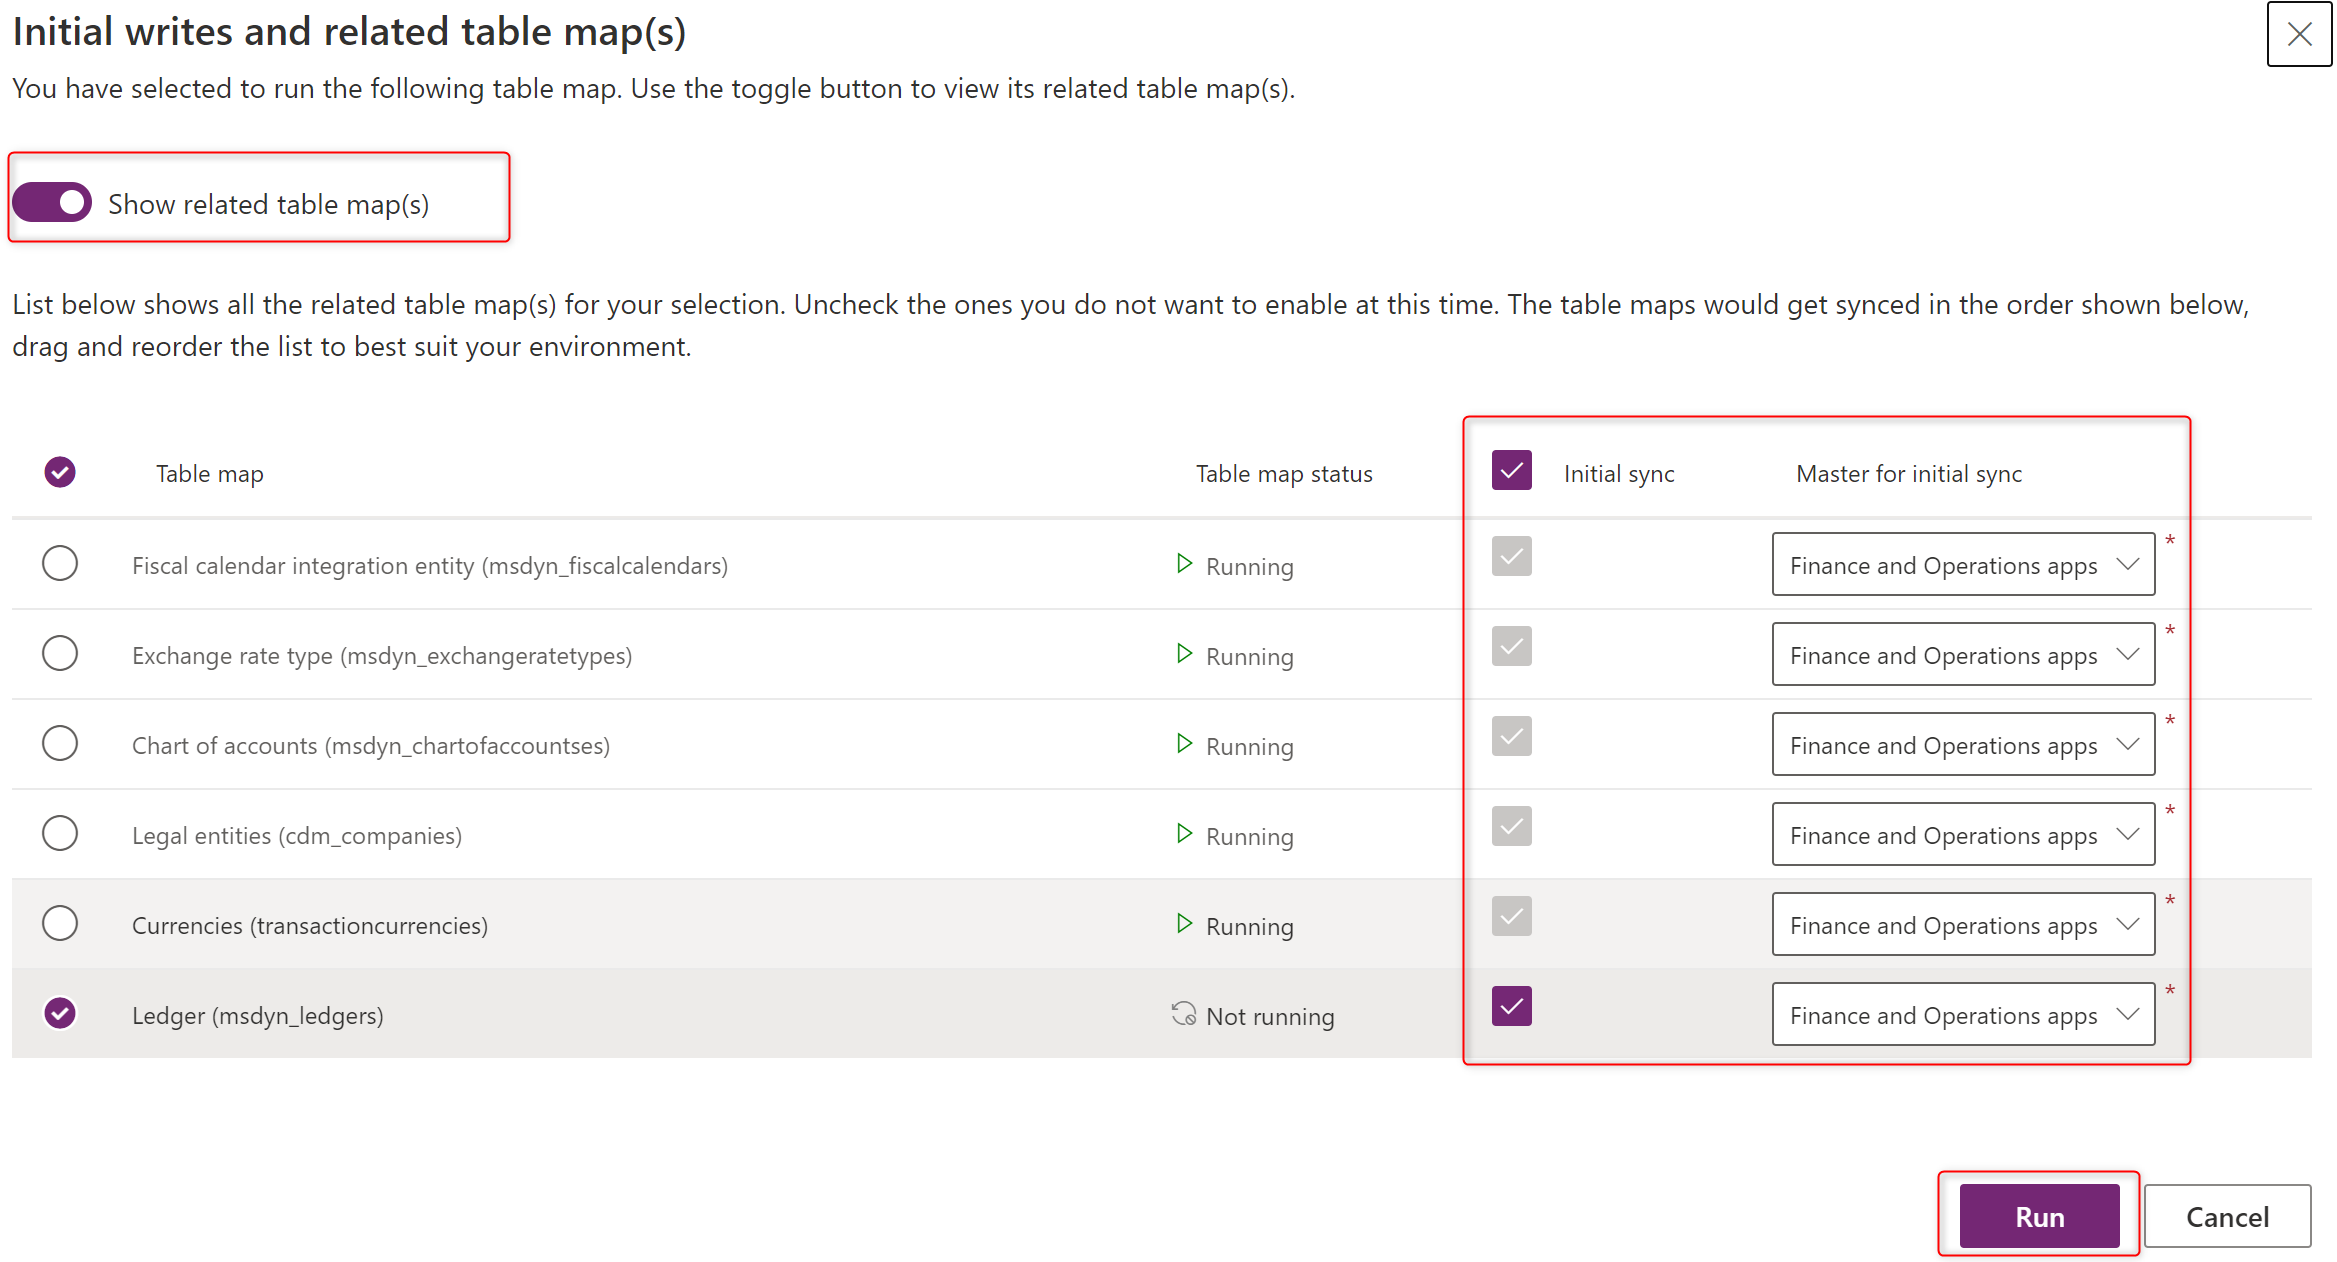
From the list of maps, select the Ledger (msdyn_ledgers) map with all prerequisites and select the Initial sync check box.
In the Master for initial sync field, select Finance and operations apps and then select Run.
Feedback
Coming soon: Throughout 2024 we will be phasing out GitHub Issues as the feedback mechanism for content and replacing it with a new feedback system. For more information see: https://aka.ms/ContentUserFeedback.
Submit and view feedback for