Set up a connector to apply security restrictions to mail sent from Microsoft 365 or Office 365 to your partner organization
This section describes the process of setting up a connector in both the New Exchange admin center (EAC) and the Classic EAC. Before you set up a new connector, do the following tasks:
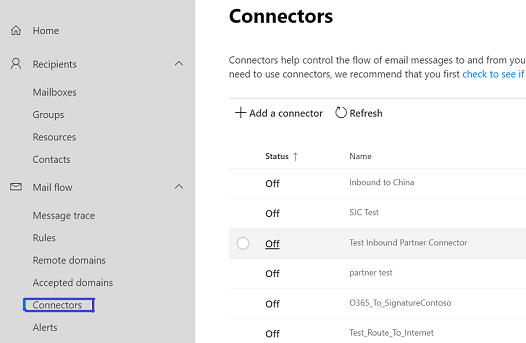
- Check for any connectors that are already listed here for your organization. For example, if you already have a connector set up for a partner organization, you'll see it listed. Ensure you don't create duplicate connectors for a single organizational partner; when this duplication happens, it can cause errors, and your mail might not be delivered.
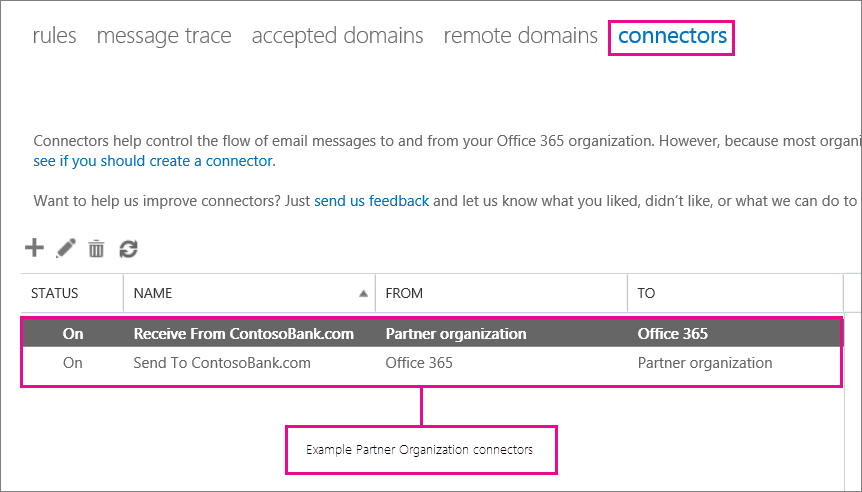
If any connectors already exist for your organization, you can see them listed here, as shown in the below screenshots for New EAC and Classic EAC, respectively.
- Navigate to the new EAC from the Microsoft 365 admin center by selecting Exchange under the Admin centers pane.
Below are the procedures to set up a new connector.
For New EAC
Navigate to Mail flow > Connectors. The Connectors screen appears.
Select +Add a connector. The New connector screen appears.
Under Connection from, choose Office 365.
Under Connection to, choose Partner Organization.
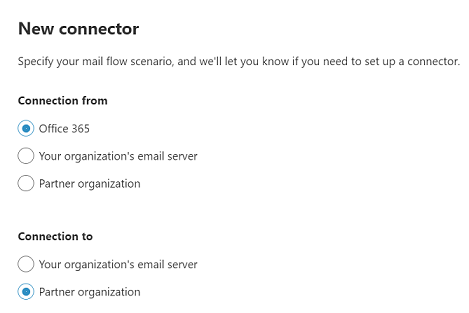
Select Next. The Connector name screen appears.
Provide a name for the connector and select Next. The Use of connector screen appears.
Choose any one of the two options between Only when I have a transport rule set up that redirects messages to this connector and Only when email messages are sent to these domains.
Note
If you choose the second option, provide the name of any one of the domains that are part of your organization. If there is only one domain for your organization, enter its name.
- Click + (after entering the domain name, if you have chosen Only when email messages are sent to these domains)
The domain name is displayed under the text box.
Select Next. The Routing screen appears.
Choose any of the two options between Use the MX record associated with the partner's domain and Route email through these smart hosts.
Select Next. The Security restrictions screen appears.
Note
If you choose the first option, you need not mention the details of smart host. If you choose second option, enter the domain name of the smart host in the text box.
- Check the Always use Transport Layer Security (TLS) to secure the connection (recommended) checkbox.
Note
It's not mandatory to configure the TLS settings on the Security restrictions page. You can navigate to the next screen without choosing anything on this screen. The need to define TLS settings on this page depends on whether the destination server supports TLS or not.
- Choose one of the options under Connect only if the recipient's email server certificate matches this criteria.
Note
If you're choosing the Issue by a trusted certificate authority (CA) option, the Add the subject name or subject alternative name (SAN) matches this domain name option is activated.
It's optional to choose the Add the subject name or subject alternative name (SAN) matches this domain name option. However, if you choose it, you must enter the domain name to which the certificate name matches.
Select Next. The Validation email screen appears.
Enter an email address that's part of the mailbox in your organization's email server.
Click +.
Select Validate. The validation process starts.
Once the validation process is completed, select Next. The Review connector screen appears.
Review the settings you've configured, and select Create connector.
The connector is created.
Note
For more information about the setup, select the Help or Learn More links.
- At the end, ensure your connector validates. If the connector doesn't validate, see Validate connectors for help with resolving issues.
For Classic EAC
Navigate to the Classic EAC portal by selecting Classic Exchange admin center. Select mail flow and then connectors.
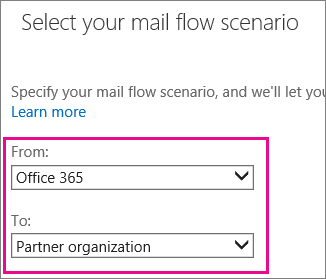
To start the wizard, click +. On the first screen, choose the options that are depicted in the following screenshot:
Select Next, and follow the instructions in the wizard. For more information, select the Help or Learn More links. The wizard will guide you through the setup. At the end, ensure your connector validates. If the connector doesn't validate, see Validate connectors for help with resolving issues.
If you want to create a secure channel with your partner organization in both directions, set up a connector that restricts mail flow from your partner organization to Microsoft 365 or Office 365.