Tutorial: Deploy an ASP.NET Core app and Database to Azure Container Apps using GitHub Actions
In this tutorial, you'll learn how to deploy an ASP.NET Core app and SQL Database to Azure Container Apps using Visual Studio and GitHub Actions. You'll also learn how to manage Entity Framework migrations and database updates in GitHub Actions, though the concepts can also be applied to other CI/CD tools and environments.
Prerequisites
You need Visual Studio 2022 installed with the ASP.NET and web development and Azure development workload.
If you've already installed Visual Studio:
- Install the latest updates in Visual Studio by selecting Help > Check for Updates.
- Verify the ASP.NET and web development and Azure development workloads are installed by selecting Tools > Get Tools and Features.
Set up the sample app locally
Use the TODO sample app to follow along with this tutorial. Clone the app from GitHub using the following command:
git clone https://github.com/Azure-Samples/msdocs-app-service-sqldb-dotnetcore.git
cd msdocs-app-service-sqldb-dotnetcore
Navigate into the project folder and open the DotNetCoreSqlDb.sln solution in Visual Studio.
The TODO application is ready to go, but you'll need to establish a connection to the localdb SQL Server that is available in Visual Studio. Connecting to localdb will allow you to run the app and persist todos while working locally.
- Right-click on the Connected Services node in the Visual Studio Solution Explorer and select Add > SQL Server Database.
- On the Connect to dependency dialog, select SQL Server Express LocalDB (Local) and then select Next.
- On the Connect to SQL Server Express LocalDB (Local) dialog, set the following values:
- Connection string name: Leave the default value.
- Connection string value: Leave the default value.
- Save connection string value in: Select None.
- Select Next
- On the Summary of changes screen, leave the settings at their default values and select Finish to complete the workflow.
Visual Studio displays a summary of the service dependencies, including the connection to LocalDB.

Next you'll need to create an initial migration and use it to update the local database with the correct schema for the TODO app.
- Select the ... icon on the right of the service dependencies list next to the
LocalDBconnection and choose Add migration. - On the Entity Framework Migrations dialog, wait a moment for Visual Studio to locate the
DbContextclass that is included in the project. Once the values have loaded, select Finish. - Visual Studio generates a
Migrationsfolder in the project and create an initial migrations class. This class can be used to update the database with the correct schema. - Select the ... icon next to the
LocalDBservice again and select Update database. - On the Entity Framework Migrations dialog, wait a moment for Visual Studio to locate the
DbContextclass again, and then choose Finish. Visual Studio run the migration and create the schema for the database in theLocalDBserver.
Launch the project by selecting the DotNetCoreSqlDb run button at the top of Visual Studio.
When the app loads, verify the database is working correctly by entering a new TODO. The TODO appears on the main list view on the app home page.
Explore the app startup configuration
The sample app includes the following code in the Program.cs file:
if(builder.Environment.IsDevelopment())
{
    builder.Services.AddDbContext<MyDatabaseContext>(options =>
        options.UseSqlServer(builder.Configuration.GetConnectionString("Default")));
}
else
{
    builder.Services.AddDbContext<MyDatabaseContext>(options =>
        options.UseSqlServer(Environment.GetEnvironmentVariable("AZURE_SQL_CONNECTIONSTRING")));
}
This code applies the following configurations:
- When the app runs locally, the
localdbconnection string is pulled from theappsettings.jsonfile and provided to Entity Framework. This configuration allows thelocaldbconnection string to be checked into source control so other developers can easily connect to a local database during development. It also allows Entity Framework migrations to be run locally. By default, Entity Framework won't discover connection strings stored in environment variable when running migrations. - When the app runs in GitHub Actions workflows or in Production, the connection string is pulled from environment variables. Environment variables can prevent production secure connection strings from being checked into source control or being included in config files.
Create the Azure services
The app will require the following Azure services to be created for a successful deployment:
- Container App: Required to host and run the deployed application.
- Container Registry: Stores the built image artifact of the containerized app.
- SQL Database: An Azure SQL database to store the data of the app.
The publishing features of Visual Studio can handle creating these resources for you.
Create the Azure Container App and Azure Container Registry
In Visual Studio Solution Explorer, right-click on the top level project node and select Publish.
In the publishing dialog, select Azure as the deployment target, and then select Next.
For the specific target, select Azure Container Apps (Linux), and then select Next.
Create a new container app to deploy to. Select the + Create new button to open a new dialog and enter the following values:
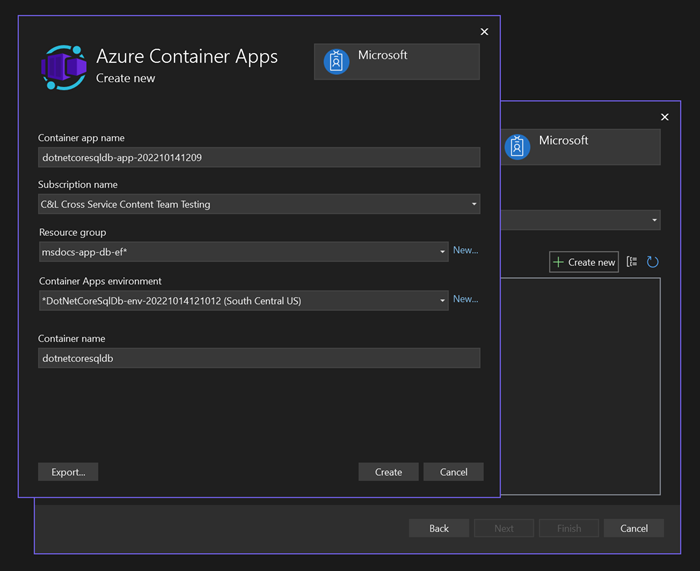
- Container app name: Leave the default value or enter a name.
- Subscription name: Select the subscription to deploy to.
- Resource group: Select New and create a new resource group called msdocs-app-db-ef.
- Container apps environment: Select New to open the container apps environment dialog and enter the following values:
- Environment name: Keep the default value.
- Location: Select a location near you.
- Azure Log Analytics Workspace: Select New to open the Log Analytics workspace dialog.
- Name: Leave the default value.
- Location: Select a location near you and then select Ok to close the dialog.
- Select Ok to close the container apps environment dialog.
- Select Create to close the original container apps dialog. Visual Studio creates the container app resource in Azure.
Once the resource is created, make sure it's selected in the list of container apps, and then select Next.
You'll need to create an Azure container registry to store the published image artifact for your app. Select the green + icon on the Container Registry screen.

Leave the default values, and then select Create.
After the container registry is created, make sure it's selected, and then select next.
On the Deployment type screen, select CI/CD using GitHub Actions workflows (generates yml file) and then choose Finish. If Visual Studio prompts you to enable the Admin user to access the published Docker container, select Yes.


Visual Studio creates and displays the publishing profile. Most of the publishing steps and details are described in the GitHub Actions .yml file, which can be viewed by clicking on the Edit workflow button on the publishing profile summary view. This file is covered in greater depth later in the article.
Create the Azure SQL Database
- In the Solution Explorer, right-click on the Connected Services node and select Add > SQL Server Database.
- In the Connect to dependency dialog, select Azure SQL Database and then choose Next.
- Select + Create New to add a new database.
- In the Azure SQL Database dialog, enter the following values:
- Database Name: Leave the default value.
- Subscription Name: Select the same subscription as previously.
- Resource Group: Select the same
msdocs-app-db-efgroup created previously. - Database Server: Select New... and then enter the following values in the new POP-up:
- Database Server Name: Enter a unique server name, or append random numbers to the end of the autogenerated name.
- Location: Select a location that is close to you.
- Administrator username: Enter a value of your choosing.
- Administrator password: Enter a value of your choosing.
- Administrator password (confirm): Enter the same password to confirm. Select OK to close the SQL Server dialog
- Select Create to create the SQL Server and database.
- When the operation completes, select the server from the list and choose Next
- On the Connect to Azure SQL Database dialog, leave the default values, but make sure None is selected at the bottom for the Save connection string value in option.
- Select Finish and Visual Studio will create the SQL resources.
Connect the Container App to Azure SQL
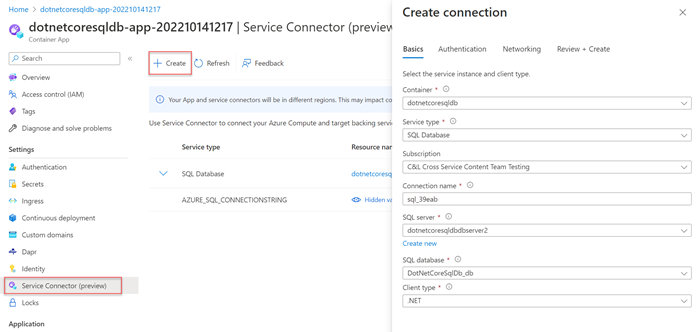
On the overview page of the Container App you created, select Service Connector (preview) on the left navigation.
Select + Create to create a new connection.
In the Create connection flyout, enter the following values:
Container: Select the dotnetcoresqldb container you created.
Service Type: Select SQL Database.
Subscription: Select the same subscription you used to create the container app.
Connection name: Leave the default value.
SQL Server: Select the database server you created earlier.
SQL database: Select the database you created earlier.
Client type: Select .NET.
Select Next: Authentication and enter the following values:
- Select Connection string for the authentication type.
- Username: Enter the username you used when creating the database server.
- Password: Enter the password you used when creating the database server.
Leave the rest of the settings at their default and select Next: Networking.
Leave the default value selected and choose Next: Review + Create.
After Azure validates, the settings, select Create.

After a moment, the connection to the SQL database should appear. Select the arrow to expand the connection and see the AZURE_SQL_CONNECTIONSTRING value. This connection name matches the name of the environment variable connection string defined in the sample app.
Configure the GitHub Actions workflow
The GitHub Actions workflow file generated by Visual Studio can be used by GitHub to build and deploy the app to Azure when changes are pushed. Currently this process would work, but the deployed app would throw an exception. Although the Azure SQL database was created, a step must be added to the GitHub Actions workflow to generate the schema. The connection string for the Azure SQL database can be stored securely as a secret in GitHub and retrieved by the workflow when it runs.
Retrieve the connection string and add it to GitHub secrets
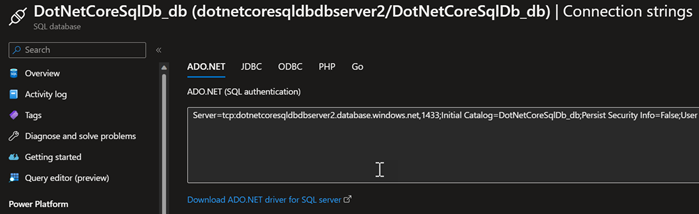
In the Azure portal, search for the database you created in the main search bar and select it from the results.
On the database overview page, select Connection strings from the left navigation.
On the ADO.NET tab, copy the connection string out of the form field.
Navigate to the forked GitHub repository of the app.
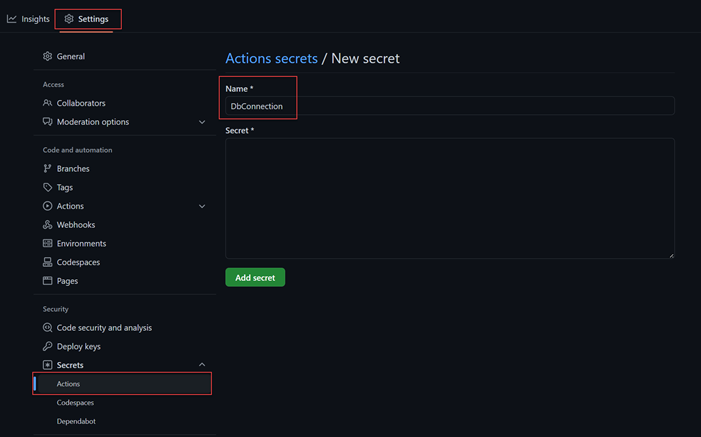
Under the Settings tab, select Secrets > Actions from the left navigation, and then choose New repository secret.
On the New secret page, enter the following values:
Name: Enter a name of
DbConnection.Secret: Paste the connection string copied from Azure. Make sure to replace the password placeholder in the connection string with the password you chose when creating the database.
Select Add secret.


The connection string is now stored securely in the GitHub repository secrets and can be retrieved using a GitHub workflow.
Modify the GitHub Actions workflow to enable migrations
Open the GitHub Actions workflow
.ymlfile generated by Visual Studio by selecting the Edit Workflow button on the publishing summary page.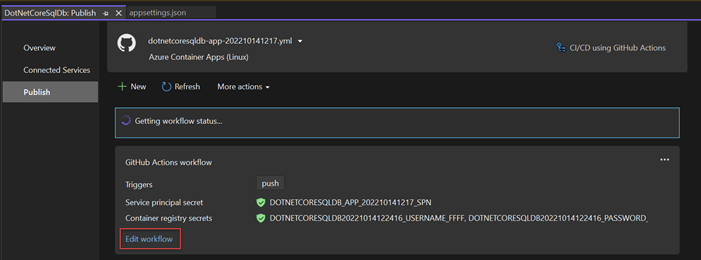
Append the following yaml to the end of the workflow file:
- name: Run EF
  run: |
    dotnet tool install --global dotnet-ef
    dotnet tool restore
    dotnet ef database update -p DotNetCoreSqlDb --connection '${{ secrets.DBConnection }}'
This code installs the entity framework command line tooling and runs the app migrations. When the workflow runs, the code also uses the
connectionparameter of thedatabase updatecommand to override thelocaldbconnection string stored in theappsettings.jsonfile with the value that was added to GitHub secrets.

Run the GitHub Actions workflow and test the deployment
Commit the changes to the application and push to the forked repo using the following command:
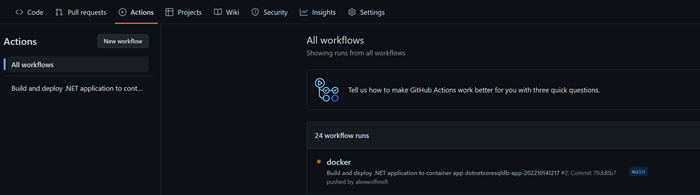
git add --all
git commit -m "Added GitHub Actions workflow"
git push
Navigate to the GitHub repository and select the Actions tab. A workflow run should have triggered automatically if the push was successful.
Select the active workflow to view the log details for each step as they complete. The migration runs last to update the database in Azure.

After the workflow completes, the application is deployed to Azure Container Apps and connected to the database with an updated schema.
You can test the deployment by navigating to the home page of the container app and creating a TODO, just like you did locally. You can always find the URL to your container app on the overview page for the app in the Azure portal.
Feedback
Coming soon: Throughout 2024 we will be phasing out GitHub Issues as the feedback mechanism for content and replacing it with a new feedback system. For more information see: https://aka.ms/ContentUserFeedback.
Submit and view feedback for