Deploy Windows 10 in a test lab using Microsoft Deployment Toolkit
Applies to:
- Windows 10
Important
This guide leverages the proof of concept (PoC) environment configured using procedures in the following guide:
Step by step guide: Configure a test lab to deploy Windows 10
Complete all steps in the prerequisite guide before starting this guide. This guide requires about 5 hours to complete, but can require less time or more time depending on the speed of the Hyper-V host. After completing the current guide, also see the companion guide:
Deploy Windows 10 in a test lab using Microsoft Configuration Manager
The PoC environment is a virtual network running on Hyper-V with three virtual machines (VMs):
- DC1: A contoso.com domain controller, DNS server, and DHCP server.
- SRV1: A dual-homed contoso.com domain member server, DNS server, and default gateway providing NAT service for the PoC network.
- PC1: A contoso.com member computer running Windows 7, Windows 8, or Windows 8.1 that has been shadow-copied from a physical computer on your corporate network.
This guide uses the Hyper-V server role. If you don't complete all steps in a single session, consider using checkpoints to pause, resume, or restart your work.
In this guide
This guide provides instructions to install and configure the Microsoft Deployment Toolkit (MDT) to deploy a Windows 10 image.
Topics and procedures in this guide are summarized in the following table. An estimate of the time required to complete each procedure is also provided. Time required to complete procedures will vary depending on the resources available to the Hyper-V host and assigned to VMs, such as processor speed, memory allocation, disk speed, and network speed.
| Topic | Description | Time |
|---|---|---|
| About MDT | A high-level overview of the Microsoft Deployment Toolkit (MDT). | Informational |
| Install MDT | Download and install MDT. | 40 minutes |
| Create a deployment share and reference image | A reference image is created to serve as the template for deploying new images. | 90 minutes |
| Deploy a Windows 10 image using MDT | The reference image is deployed in the PoC environment. | 60 minutes |
| Refresh a computer with Windows 10 | Export user data from an existing client computer, wipe the computer, install a new operating system, and then restore user data and settings. | 60 minutes |
| Replace a computer with Windows 10 | Back up an existing client computer, then restore this backup to a new computer. | 60 minutes |
| Troubleshooting logs, events, and utilities | Log locations and troubleshooting hints. | Informational |
About MDT
MDT performs deployments by using the Lite Touch Installation (LTI), Zero Touch Installation (ZTI), and User-Driven Installation (UDI) deployment methods.
LTI is the deployment method used in the current guide, requiring only MDT and performed with a minimum amount of user interaction.
ZTI is fully automated, requiring no user interaction and is performed using MDT and Microsoft Configuration Manager. After completing the steps in the current guide, see Step by step: Deploy Windows 10 in a test lab using Microsoft Configuration Manager to use the ZTI deployment method in the PoC environment.
UDI requires manual intervention to respond to installation prompts such as machine name, password and language settings. UDI requires MDT and Microsoft Configuration Manager.
Install MDT
On SRV1, temporarily disable IE Enhanced Security Configuration for Administrators by typing the following commands at an elevated Windows PowerShell prompt:
$AdminKey = "HKLM:\SOFTWARE\Microsoft\Active Setup\Installed Components\{A509B1A7-37EF-4b3f-8CFC-4F3A74704073}"
Set-ItemProperty -Path $AdminKey -Name "IsInstalled" -Value 0
Stop-Process -Name Explorer
Download and install the 64-bit version of Microsoft Deployment Toolkit (MDT) on SRV1 using the default options.
Download and install the latest Windows Assessment and Deployment Kit (ADK) on SRV1 using the default installation settings. Installation might require several minutes to acquire all components.
If desired, re-enable IE Enhanced Security Configuration:
Set-ItemProperty -Path $AdminKey -Name "IsInstalled" -Value 1
Stop-Process -Name Explorer
Create a deployment share and reference image
A reference image serves as the foundation for Windows 10 devices in your organization.
In Step by step guide: Configure a test lab to deploy Windows 10, the Windows 10 Enterprise .iso file was saved to the c:\VHD directory as c:\VHD\w10-enterprise.iso. The first step in creating a deployment share is to mount this file on SRV1. To mount the Windows 10 Enterprise DVD on SRV1, open an elevated Windows PowerShell prompt on the Hyper-V host computer and enter the following command:
Set-VMDvdDrive -VMName SRV1 -Path c:\VHD\w10-enterprise.isoOn SRV1, verify that the Windows Enterprise installation DVD is mounted as drive letter D.
The Windows 10 Enterprise installation files will be used to create a deployment share on SRV1 using the MDT deployment workbench. To open the deployment workbench, select Start, type deployment, and then select Deployment Workbench.
To enable quick access to the application, right-click Deployment Workbench on the taskbar and then select Pin this program to the taskbar.
In the Deployment Workbench console, right-click Deployment Shares and select New Deployment Share.
Use the following settings for the New Deployment Share Wizard:
- Deployment share path: C:\MDTBuildLab
- Share name: MDTBuildLab$
- Deployment share description: MDT build lab
- Options: Select Next to accept the default
- Summary: Select Next
- Progress: settings will be applied
- Confirmation: Select Finish
- Deployment share path: C:\MDTBuildLab
Expand the Deployment Shares node, and then expand MDT build lab.
Right-click the Operating Systems node, and then select New Folder. Name the new folder Windows 10. Complete the wizard using default values and select Finish.
Right-click the Windows 10 folder created in the previous step, and then select Import Operating System.
Use the following settings for the Import Operating System Wizard:
- OS Type: Full set of source files
- Source: D:\
- Destination: W10Ent_x64
- Summary: Select Next
- Progress: wait for files to be copied
- Confirmation: Select Finish
For purposes of this test lab, we'll only add the prerequisite .NET Framework feature. Commercial applications (ex: Microsoft Office) won't be added to the deployment share. For information about adding applications, see the Add applications section of the Create a Windows 10 reference image article.
- OS Type: Full set of source files
The next step is to create a task sequence to reference the operating system that was imported. To create a task sequence, right-click the Task Sequences node and then select New Task Sequence. Use the following settings for the New Task Sequence Wizard:
- Task sequence ID: REFW10X64-001
- Task sequence name: Windows 10 Enterprise x64 Default Image
- Task sequence comments: Reference Build
- Template: Standard Client Task Sequence
- Select OS: Select Windows 10 Enterprise Evaluation in W10Ent_x64 install.wim
- Specify Product Key: Do not specify a product key at this time
- Full Name: Contoso
- Organization: Contoso
- Internet Explorer home page:
http://www.contoso.com - Admin Password: Do not specify an Administrator password at this time
- Summary: Select Next
- Confirmation: Select Finish
- Task sequence ID: REFW10X64-001
Edit the task sequence to add the Microsoft NET Framework 3.5, which is required by many applications. To edit the task sequence, double-click Windows 10 Enterprise x64 Default Image that was created in the previous step.
Select the Task Sequence tab. Under State Restore select Tattoo to highlight it, then select Add and choose New Group.
On the Properties tab of the group that was created in the previous step, change the Name from New Group to Custom Tasks (Pre-Windows Update) and then select Apply. Select another location in the window to see the name change.
Select the Custom Tasks (Pre-Windows Update) group again, select Add, point to Roles, and then select Install Roles and Features.
Under Select the roles and features that should be installed, select .NET Framework 3.5 (includes .NET 2.0 and 3.0) and then select Apply.
Enable Windows Update in the task sequence by clicking the Windows Update (Post-Application Installation) step, clicking the Options tab, and clearing the Disable this step checkbox.
Note
Since we are not installing applications in this test lab, there is no need to enable the Windows Update Pre-Application Installation step. However, you should enable this step if you are also installing applications.
Select OK to complete editing the task sequence.
The next step is to configure the MDT deployment share rules. To configure rules in the Deployment Workbench, right-click MDT build lab (C:\MDTBuildLab) and select Properties, and then select the Rules tab.
Replace the default rules with the following text:
[Settings]
Priority=Default

[Default]
_SMSTSORGNAME=Contoso
UserDataLocation=NONE
DoCapture=YES
OSInstall=Y
AdminPassword=pass@word1
TimeZoneName=Pacific Standard Time
OSDComputername=#Left("PC-%SerialNumber%",7)#
JoinWorkgroup=WORKGROUP
HideShell=YES
FinishAction=SHUTDOWN
DoNotCreateExtraPartition=YES
ApplyGPOPack=NO
SkipAdminPassword=YES
SkipProductKey=YES
SkipComputerName=YES
SkipDomainMembership=YES
SkipUserData=YES
SkipLocaleSelection=YES
SkipTaskSequence=NO
SkipTimeZone=YES
SkipApplications=YES
SkipBitLocker=YES
SkipSummary=YES
SkipRoles=YES
SkipCapture=NO
SkipFinalSummary=NO
Select Apply and then select Edit Bootstrap.ini. Replace the contents of the Bootstrap.ini file with the following text, and save the file:
[Settings]
Priority=Default

[Default]
DeployRoot=\\SRV1\MDTBuildLab$
UserDomain=CONTOSO
UserID=MDT_BA
UserPassword=pass@word1
SkipBDDWelcome=YES
Select OK to complete the configuration of the deployment share.
Right-click MDT build lab (C:\MDTBuildLab) and then select Update Deployment Share.
Accept all default values in the Update Deployment Share Wizard by clicking Next twice. The update process will take 5 to 10 minutes. When it has completed, select Finish.
Copy c:\MDTBuildLab\Boot\LiteTouchPE_x86.iso on SRV1 to the c:\VHD directory on the Hyper-V host computer. In MDT, the x86 boot image can deploy both x86 and x64 operating systems, except on computers based on Unified Extensible Firmware Interface (UEFI).
Tip
To copy the file, right-click the LiteTouchPE_x86.iso file and click Copy on SRV1, then open the c:\VHD folder on the Hyper-V host, right-click inside the folder and click Paste.
Open a Windows PowerShell prompt on the Hyper-V host computer and enter the following commands:
New-VM REFW10X64-001 -SwitchName poc-internal -NewVHDPath "c:\VHD\REFW10X64-001.vhdx" -NewVHDSizeBytes 60GB
Set-VMMemory REFW10X64-001 -DynamicMemoryEnabled $true -MinimumBytes 1024MB -MaximumBytes 1024MB -Buffer 20
Set-VMDvdDrive REFW10X64-001 -Path c:\VHD\LiteTouchPE_x86.iso
Start-VM REFW10X64-001
vmconnect localhost REFW10X64-001
The VM will require a few minutes to prepare devices and boot from the LiteTouchPE_x86.iso file.
In the Windows Deployment Wizard, select Windows 10 Enterprise x64 Default Image, and then select Next.
Accept the default values on the Capture Image page, and select Next. Operating system installation will complete after 5 to 10 minutes, and then the VM will reboot automatically. Allow the system to boot normally (don't press a key). The process is fully automated.
Additional system restarts will occur to complete updating and preparing the operating system. Setup will complete the following procedures:
- Install the Windows 10 Enterprise operating system.
- Install added applications, roles, and features.
- Update the operating system using Windows Update (or WSUS if optionally specified).
- Stage Windows PE on the local disk.
- Run System Preparation (Sysprep) and reboot into Windows PE.
- Capture the installation to a Windows Imaging (WIM) file.
- Turn off the virtual machine.
This step requires from 30 minutes to 2 hours, depending on the speed of the Hyper-V host. After some time, you'll have a Windows 10 Enterprise x64 image that is fully patched and has run through Sysprep. The image is located in the C:\MDTBuildLab\Captures folder on your deployment server (SRV1). The file name is REFW10X64-001.wim.
Deploy a Windows 10 image using MDT
This procedure will demonstrate how to deploy the reference image to the PoC environment using MDT.
On SRV1, open the MDT Deployment Workbench console, right-click Deployment Shares, and then select New Deployment Share. Use the following values in the New Deployment Share Wizard:
- Deployment share path: C:\MDTProd
- Share name: MDTProd$
- Deployment share description: MDT Production
- Options: accept the default
Select Next, verify the new deployment share was added successfully, then select Finish.
In the Deployment Workbench console, expand the MDT Production deployment share, right-click Operating Systems, and then select New Folder. Name the new folder Windows 10 and complete the wizard using default values.
Right-click the Windows 10 folder created in the previous step, and then select Import Operating System.
On the OS Type page, choose Custom image file and then select Next.
On the Image page, browse to the C:\MDTBuildLab\Captures\REFW10X64-001.wim file created in the previous procedure, select Open, and then select Next.
On the Setup page, select Copy Windows 7, Windows Server 2008 R2, or later setup files from the specified path.
Under Setup source directory, browse to C:\MDTBuildLab\Operating Systems\W10Ent_x64 select OK and then select Next.
On the Destination page, accept the default Destination directory name of REFW10X64-001, select Next twice, wait for the import process to complete, and then select Finish.
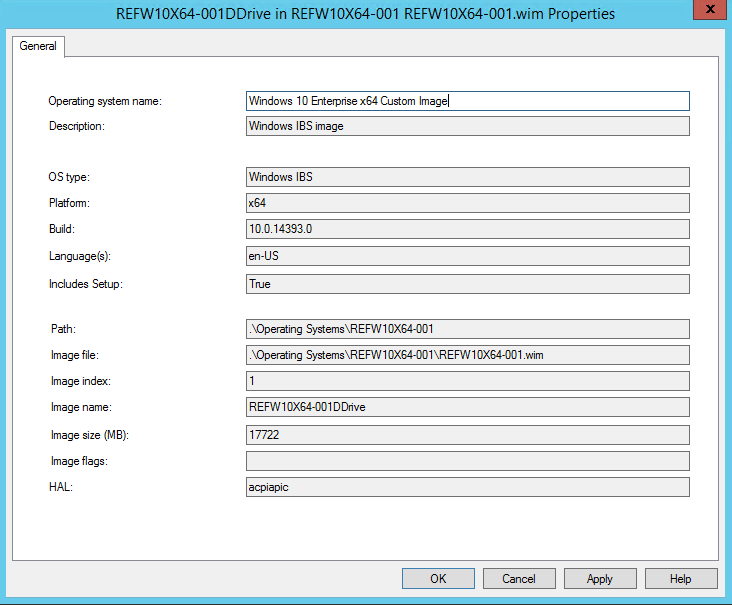
In the Operating Systems > Windows 10 node, double-click the operating system that was added to view its properties. Change the operating system name to Windows 10 Enterprise x64 Custom Image and then select OK. See the following example:
Create the deployment task sequence
Using the Deployment Workbench, right-click Task Sequences under the MDT Production node, select New Folder and create a folder with the name: Windows 10.
Right-click the Windows 10 folder created in the previous step, and then select New Task Sequence. Use the following settings for the New Task Sequence Wizard:
- Task sequence ID: W10-X64-001
- Task sequence name: Windows 10 Enterprise x64 Custom Image
- Task sequence comments: Production Image
- Select Template: Standard Client Task Sequence
- Select OS: Windows 10 Enterprise x64 Custom Image
- Specify Product Key: Don't specify a product key at this time
- Full Name: Contoso
- Organization: Contoso
- Internet Explorer home page:
http://www.contoso.com - Admin Password: pass@word1
Configure the MDT production deployment share
On SRV1, open an elevated Windows PowerShell prompt and enter the following commands:
copy-item "C:\Program Files\Microsoft Deployment Toolkit\Templates\Bootstrap.ini" C:\MDTProd\Control\Bootstrap.ini -Force
copy-item "C:\Program Files\Microsoft Deployment Toolkit\Templates\CustomSettings.ini" C:\MDTProd\Control\CustomSettings.ini -Force
In the Deployment Workbench console on SRV1, right-click the MDT Production deployment share and then select Properties.
Select the Rules tab and replace the rules with the following text (don't select OK yet):
[Settings]
Priority=Default

[Default]
_SMSTSORGNAME=Contoso
OSInstall=YES
UserDataLocation=AUTO
TimeZoneName=Pacific Standard Time
OSDComputername=#Left("PC-%SerialNumber%",7)#
AdminPassword=pass@word1
JoinDomain=contoso.com
DomainAdmin=administrator
DomainAdminDomain=CONTOSO
DomainAdminPassword=pass@word1
ScanStateArgs=/ue:*\* /ui:CONTOSO\*
USMTMigFiles001=MigApp.xml
USMTMigFiles002=MigUser.xml
HideShell=YES
ApplyGPOPack=NO
SkipAppsOnUpgrade=NO
SkipAdminPassword=YES
SkipProductKey=YES
SkipComputerName=YES
SkipDomainMembership=YES
SkipUserData=YES
SkipLocaleSelection=YES
SkipTaskSequence=NO
SkipTimeZone=YES
SkipApplications=NO
SkipBitLocker=YES
SkipSummary=YES
SkipCapture=YES
SkipFinalSummary=NO
EventService=http://SRV1:9800
Note
The contents of the Rules tab are added to c:\MDTProd\Control\CustomSettings.ini.
In this example, a MachineObjectOU entry isn't provided. Normally this entry describes the specific OU where new client computer objects are created in Active Directory. However, for the purposes of this test lab, clients are added to the default computers OU, which requires that this parameter be unspecified.
If desired, edit the following line to include or exclude other users when migrating settings. Currently, the command is set to user exclude (
ue) all users except for CONTOSO users specified by the user include option (ui):ScanStateArgs=/ue:*\* /ui:CONTOSO\*For example, to migrate all users on the computer, replace this line with the following line:
ScanStateArgs=/allFor more information, see ScanState Syntax.
Select Edit Bootstap.ini and replace text in the file with the following text:
[Settings]
Priority=Default

[Default]
DeployRoot=\\SRV1\MDTProd$
UserDomain=CONTOSO
UserID=MDT_BA
UserPassword=pass@word1
SkipBDDWelcome=YES
Select OK when finished.
Update the deployment share
Right-click the MDT Production deployment share and then select Update Deployment Share.
Use the default options for the Update Deployment Share Wizard. The update process requires 5 to 10 minutes to complete.
Select Finish when the update is complete.
Enable deployment monitoring
In the Deployment Workbench console, right-click MDT Production and then select Properties.
On the Monitoring tab, select the Enable monitoring for this deployment share checkbox, and then select OK.
Verify the monitoring service is working as expected by opening the following link on SRV1:
http://localhost:9800/MDTMonitorEvent/. If you don't see "You have created a service" at the top of the page, see Troubleshooting MDT 2012 Monitoring.Close Internet Explorer.
Configure Windows Deployment Services
Initialize Windows Deployment Services (WDS) by typing the following command at an elevated Windows PowerShell prompt on SRV1:
WDSUTIL.exe /Verbose /Progress /Initialize-Server /Server:SRV1 /RemInst:"C:\RemoteInstall"
WDSUTIL.exe /Set-Server /AnswerClients:All
Select Start, type Windows Deployment, and then select Windows Deployment Services.
In the Windows Deployment Services console, expand Servers, expand SRV1.contoso.com, right-click Boot Images, and then select Add Boot Image.
Browse to the C:\MDTProd\Boot\LiteTouchPE_x64.wim file, select Open, select Next, and accept the defaults in the Add Image Wizard. Select Finish to complete adding a boot image.
Deploy the client image
Before using WDS to deploy a client image, you must temporarily disable the external network adapter on SRV1. This configuration is just an artifact of the lab environment. In a typical deployment environment WDS wouldn't be installed on the default gateway.
Note
Do not disable the internal network interface. To quickly view IP addresses and interface names configured on the VM, enter `Get-NetIPAddress | ft interfacealias, ipaddress in a PowerShell prompt.
Assuming the external interface is named "Ethernet 2", to disable the external interface on SRV1, open a Windows PowerShell prompt on SRV1 and enter the following command:
Disable-NetAdapter "Ethernet 2" -Confirm:$falseWait until the disable-netadapter command completes before proceeding.
Next, switch to the Hyper-V host and open an elevated Windows PowerShell prompt. Create a generation 2 VM on the Hyper-V host that will load its OS using PXE. To create this VM, enter the following commands at an elevated Windows PowerShell prompt:
New-VM -Name "PC2" -NewVHDPath "c:\vhd\pc2.vhdx" -NewVHDSizeBytes 60GB -SwitchName poc-internal -BootDevice NetworkAdapter -Generation 2
Set-VMMemory -VMName "PC2" -DynamicMemoryEnabled $true -MinimumBytes 720MB -MaximumBytes 2048MB -Buffer 20
Dynamic memory is configured on the VM to conserve resources. However, dynamic memory can cause memory allocation to be reduced below what is required to install an operating system. If memory is reduced below what is required, reset the VM and begin the OS installation task sequence immediately. The reset ensures the VM memory allocation isn't decreased too much while it's idle.
Start the new VM and connect to it:
Start-VM PC2
vmconnect localhost PC2
When prompted, hit ENTER to start the network boot process.
In the Windows Deployment Wizard, choose the Windows 10 Enterprise x64 Custom Image and then select Next.
After MDT lite touch installation has started, be sure to re-enable the external network adapter on SRV1. Re-enabling the external network adapter is needed so the client can use Windows Update after operating system installation is complete. To re-enable the external network interface, open an elevated Windows PowerShell prompt on SRV1 and enter the following command:
Enable-NetAdapter "Ethernet 2"On SRV1, in the Deployment Workbench console, select on Monitoring and view the status of installation. Right-click Monitoring and select Refresh if no data is displayed.
OS installation requires about 10 minutes. When the installation is complete, the system will reboot automatically, configure devices, and install updates, requiring another 10-20 minutes. When the new client computer is finished updating, select Finish. You'll be automatically signed in to the local computer as administrator.

This completes the demonstration of how to deploy a reference image to the network. To conserve resources, turn off the PC2 VM before starting the next section.
Refresh a computer with Windows 10
This section will demonstrate how to export user data from an existing client computer, wipe the computer, install a new operating system, and then restore user data and settings. The scenario will use PC1, a computer that was cloned from a physical device to a VM, as described in Step by step guide: Deploy Windows 10 in a test lab.
If the PC1 VM isn't already running, then start and connect to it:
Start-VM PC1
vmconnect localhost PC1
Switch back to the Hyper-V host and create a checkpoint for the PC1 VM so that it can easily be reverted to its current state for troubleshooting purposes and performing additional scenarios. Checkpoints are also known as snapshots. To create a checkpoint for the PC1 VM, enter the following command at an elevated Windows PowerShell prompt on the Hyper-V host:
Checkpoint-VM -Name PC1 -SnapshotName BeginStateSign on to PC1 using the CONTOSO\Administrator account.
Specify contoso\administrator as the user name to ensure you don't sign on using the local administrator account. You must sign in with this account so that you have access to the deployment share.
Open an elevated command prompt on PC1 and enter the following command:
cscript.exe \\SRV1\MDTProd$\Scripts\Litetouch.vbsNote
For more information on tools for viewing log files and to assist with troubleshooting, see Configuration Manager Tools.
Choose the Windows 10 Enterprise x64 Custom Image and then select Next.
Choose Do not back up the existing computer and select Next.
Note
The USMT will still back up the computer.
Lite Touch Installation will perform the following actions:
Back up user settings and data using USMT.
Install the Windows 10 Enterprise X64 operating system.
Update the operating system via Windows Update.
Restore user settings and data using USMT.
You can review the progress of installation on SRV1 by clicking on the Monitoring node in the deployment workbench. When OS installation is complete, the computer will restart, set up devices, and configure settings.
Sign in with the CONTOSO\Administrator account and verify that all CONTOSO domain user accounts and data have been migrated to the new operating system, or other user accounts as specified previously.
Create another checkpoint for the PC1 VM so that you can review results of the computer refresh later. To create a checkpoint, enter the following command at an elevated Windows PowerShell prompt on the Hyper-V host:
Checkpoint-VM -Name PC1 -SnapshotName RefreshStateRestore the PC1 VM to its previous state in preparation for the replace procedure. To restore a checkpoint, enter the following command at an elevated Windows PowerShell prompt on the Hyper-V host:
Restore-VMSnapshot -VMName PC1 -Name BeginState -Confirm:$false
Start-VM PC1
vmconnect localhost PC1
Sign in to PC1 using the contoso\administrator account.
Replace a computer with Windows 10
At a high level, the computer replace process consists of:
- A special replace task sequence that runs the USMT backup and an optional full Windows Imaging (WIM) backup.
- A standard OS deployment on a new computer. At the end of the deployment, the USMT backup from the old computer is restored.
Create a backup-only task sequence
On SRV1, in the deployment workbench console, right-click the MDT Production deployment share, select Properties, select the Rules tab, and change the line SkipUserData=YES to SkipUserData=NO.
Select OK, right-click MDT Production, select Update Deployment Share and accept the default options in the wizard to update the share.
enter the following commands at an elevated Windows PowerShell prompt on SRV1:
New-Item -Path C:\MigData -ItemType directory
New-SmbShare -Name MigData$ -Path C:\MigData -ChangeAccess EVERYONE
icacls C:\MigData /grant '"contoso\administrator":(OI)(CI)(M)'
On SRV1 in the deployment workbench, under MDT Production, right-click the Task Sequences node, and select New Folder.
Name the new folder Other, and complete the wizard using default options.
Right-click the Other folder and then select New Task Sequence. Use the following values in the wizard:
- Task sequence ID: REPLACE-001
- Task sequence name: Backup Only Task Sequence
- Task sequence comments: Run USMT to back up user data and settings
- Template: Standard Client Replace Task Sequence (note: this template isn't the default template)
Accept defaults for the rest of the wizard and then select Finish. The replace task sequence will skip OS selection and settings.
Open the new task sequence that was created and review it. Note the enter of capture and backup tasks that are present. Select OK when you're finished reviewing the task sequence.
Run the backup-only task sequence
If you aren't already signed on to PC1 as contoso\administrator, sign in using this account. To verify the currently signed in account, enter the following command at an elevated command prompt:
whoami.exeTo ensure a clean environment before running the backup task sequence, enter the following commands at an elevated Windows PowerShell prompt on PC1:
Remove-Item c:\minint -recurse
Remove-Item c:\_SMSTaskSequence -recurse
Restart-Computer
Sign in to PC1 using the contoso\administrator account, and then enter the following command at an elevated command prompt:
cscript.exe \\SRV1\MDTProd$\Scripts\Litetouch.vbsComplete the deployment wizard using the following settings:
- Task Sequence: Backup Only Task Sequence
- User Data: Specify a location: \\SRV1\MigData$\PC1
- Computer Backup: Don't back up the existing computer.
While the task sequence is running on PC1, open the deployment workbench console on SRV1 and select the *Monitoring node. Press F5 to refresh the console, and view the status of current tasks.
On PC1, verify that The user state capture was completed successfully is displayed, and select Finish when the capture is complete.
On SRV1, verify that the file USMT.MIG was created in the C:\MigData\PC1\USMT directory. See the following example:
dir C:\MigData\PC1\USMT

    Directory: C:\MigData\PC1\USMT

Mode                LastWriteTime     Length Name
----                -------------     ------ ----
-a---          9/6/2016  11:34 AM   14248685 USMT.MIG
Deploy PC3
On the Hyper-V host, enter the following commands at an elevated Windows PowerShell prompt:
New-VM -Name "PC3" -NewVHDPath "c:\vhd\pc3.vhdx" -NewVHDSizeBytes 60GB -SwitchName poc-internal -BootDevice NetworkAdapter -Generation 2
Set-VMMemory -VMName "PC3" -DynamicMemoryEnabled $true -MinimumBytes 512MB -MaximumBytes 2048MB -Buffer 20
Temporarily disable the external network adapter on SRV1 again, so that we can successfully boot PC3 from WDS. To disable the adapter, enter the following command at an elevated Windows PowerShell prompt on SRV1:
Disable-NetAdapter "Ethernet 2" -Confirm:$falseAs mentioned previously, ensure that you disable the external network adapter, and wait for the command to complete before proceeding.
Start and connect to PC3 by typing the following commands at an elevated Windows PowerShell prompt on the Hyper-V host:
Start-VM PC3
vmconnect localhost PC3
When prompted, press ENTER for network boot.
On PC3, use the following settings for the Windows Deployment Wizard:
- Task Sequence: Windows 10 Enterprise x64 Custom Image
- Move Data and Settings: Don't move user data and settings
- User Data (Restore): Specify a location: \\SRV1\MigData$\PC1
When OS installation has started on PC1, re-enable the external network adapter on SRV1 by typing the following command on SRV1:
Enable-NetAdapter "Ethernet 2"Setup will install the Windows 10 Enterprise operating system, update via Windows Update, and restore the user settings and data from PC1.
When PC3 has completed installing the OS, sign in to PC3 using the contoso\administrator account. When the PC completes updating, select Finish.
Verify that settings have been migrated from PC1. This completes demonstration of the replace procedure.
Shut down PC3 in preparation for the next procedure.
Troubleshooting logs, events, and utilities
Deployment logs are available on the client computer in the following locations:
- Before the image is applied: X:\MININT\SMSOSD\OSDLOGS
- After the system drive has been formatted: C:\MININT\SMSOSD\OSDLOGS
- After deployment: %WINDIR%\TEMP\DeploymentLogs
You can review WDS events in Event Viewer at: Applications and Services Logs > Microsoft > Windows > Deployment-Services-Diagnostics. By default, only the Admin and Operational logs are enabled. To enable other logs, right-click the log and then select Enable Log.
Also see Resolve Windows 10 upgrade errors for detailed troubleshooting information.