SharePoint
The SharePoint group of actions allows the utilization of the SharePoint connector from within desktop flows, alleviating the need to create a cloud flow in order to use its actions. This connector is the same as the one used across Power Automate cloud flows, PowerApps, and Logic Apps. It uses the same parameters and returns the same type of data.
Prerequisites and limitations
You need an Attended RPA license.
Sharing desktop flows with SharePoint cloud actions isn't supported. Co-owners won't be able to run such desktop flows unless they overwrite the connection references with their own. Users with read access are unable to run such flows.
Data loss prevention policies (DLP) that include SharePoint cloud actions aren't enforced within desktop flows. Machine administrators can disable the SharePoint actions by modifying the appropriate registry setting.
Refrain from modifying a response’s properties directly as it may lead to an erroneous state after future updates. Instead, opt for storing the properties you want to utilize (from the response retrieved) directly into separate variables.
Why should I use SharePoint actions inside desktop flows instead of cloud flows?
Users can still combine SharePoint actions with the Run a flow built with Power Automate for desktop action. However, SharePoint actions inside desktop flows improve performance and ease of use for users who need to loop between cloud and desktop actions.
List of SharePoint actions
- Create sharing link for a file or folder
- Copy file
- Move file
- Copy folder
- Move folder
- Create file
- List folder
- Check out file
- Discard check out
- Check in file
- Get list views
- Get all lists and libraries
- Get file metadata
- Update file
- Delete file
- Get file metadata using path
- Get folder metadata
- Get folder metadata using path
- Get file content using path
- Get file content
- List root folder
- Extract folder
- Get lists
Getting started with SharePoint actions in desktop flows
This section presents examples on how to use SharePoint actions in your desktop flows.
How to download the content of a SharePoint folder
Important
Before replicating the following steps, ensure that you are familiar with lists, custom objects, loops, conditionals, and the percentage notation.
Ensure that you've installed the latest version of Power Automate for desktop.
Create a new desktop flow.
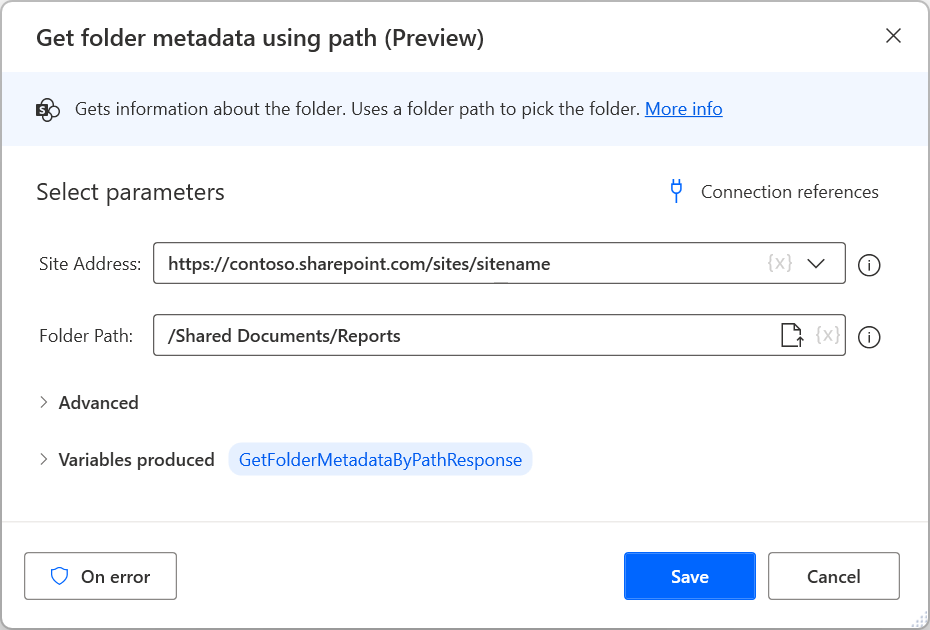
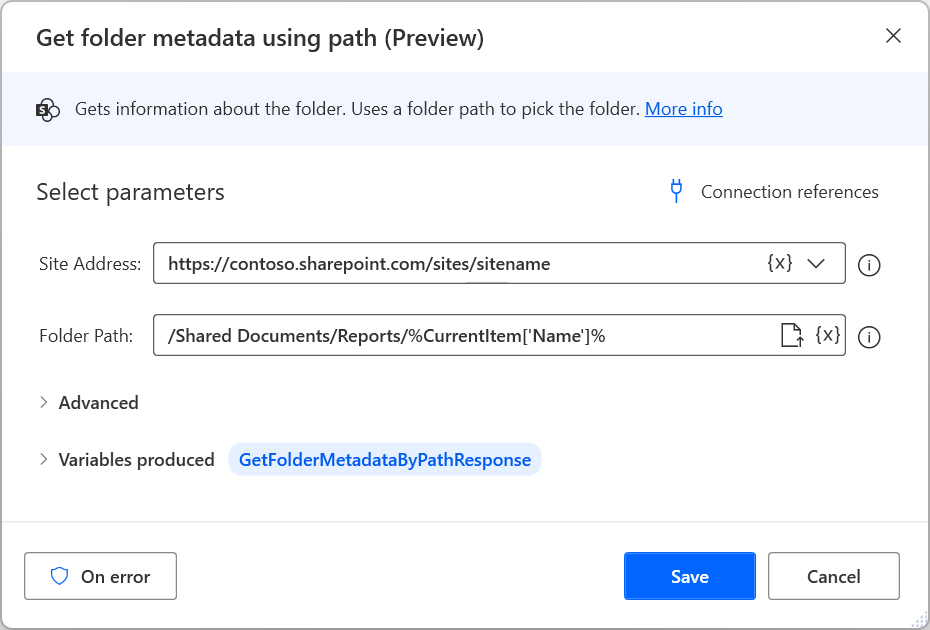
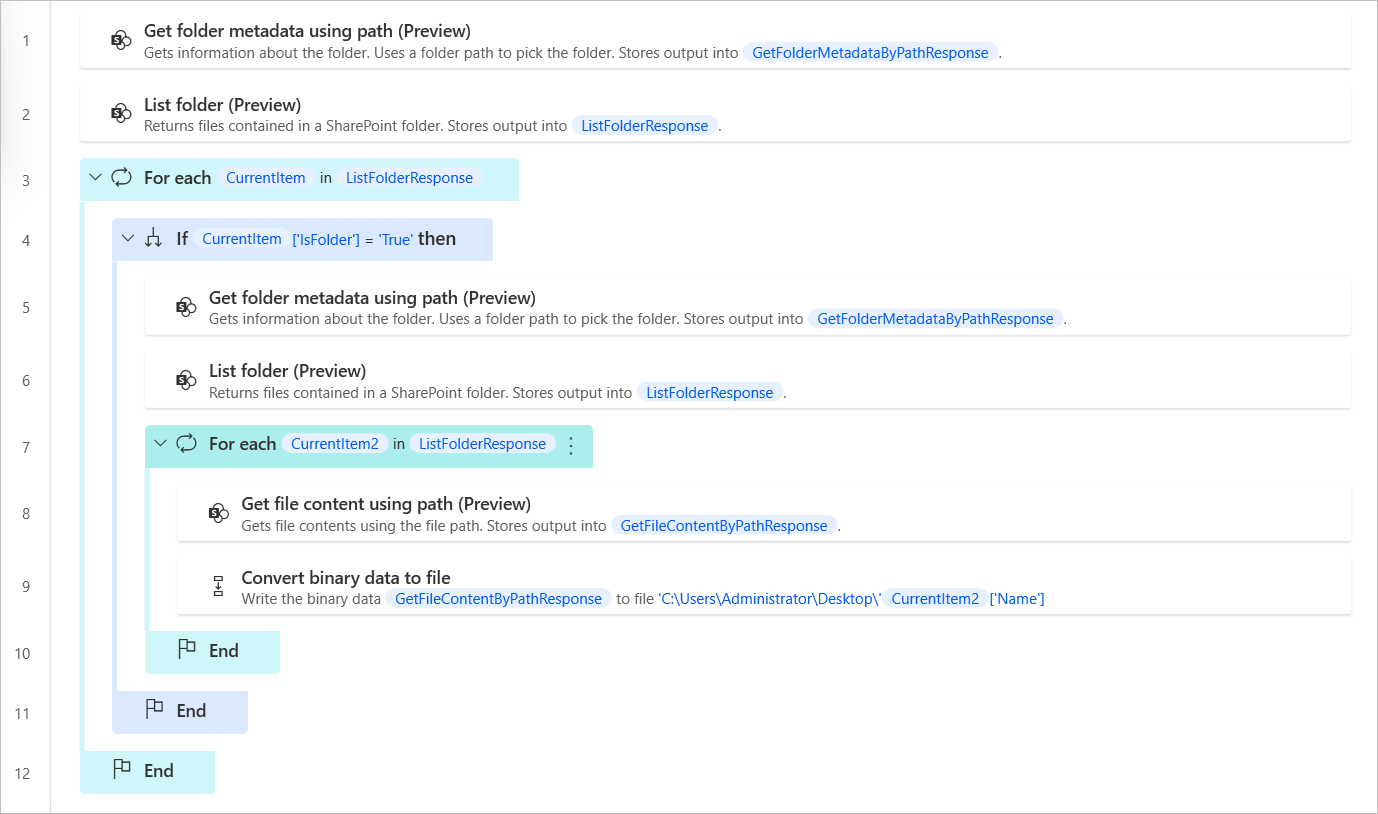
If the identifier of the target folder is unknown, use the Get folder metadata using path SharePoint action to retrieve it. This action requires the folder's path and produces a custom object containing the folder's metadata. You can access the identifier using the Id property.
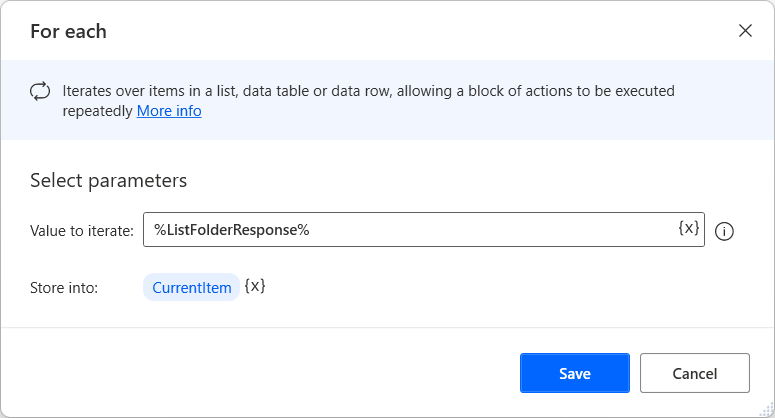
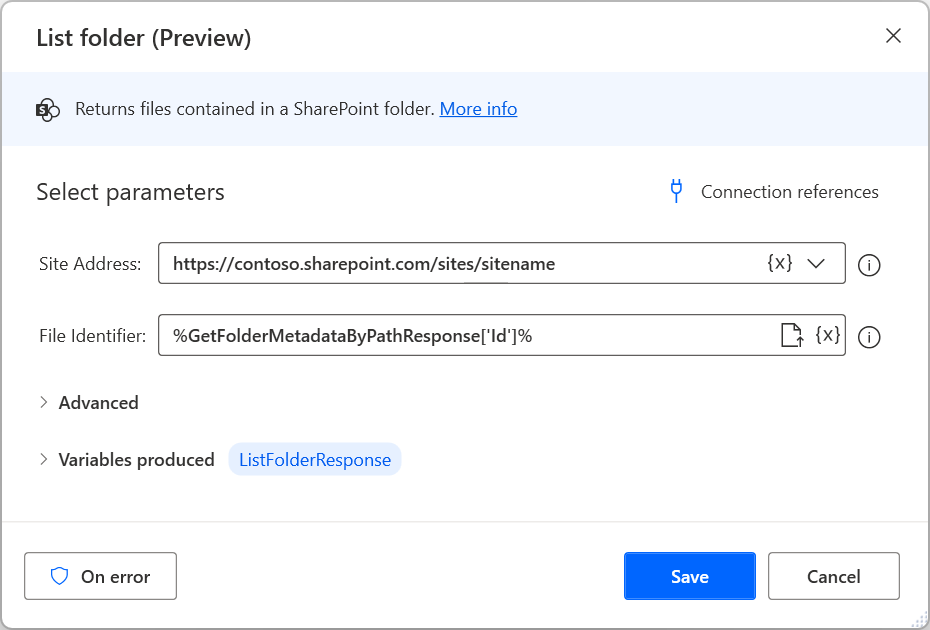
Deploy the List folder SharePoint action and populate the appropriate SharePoint URL and the previously retrieved identifier. The produced list contains custom objects representing items in the target folder.

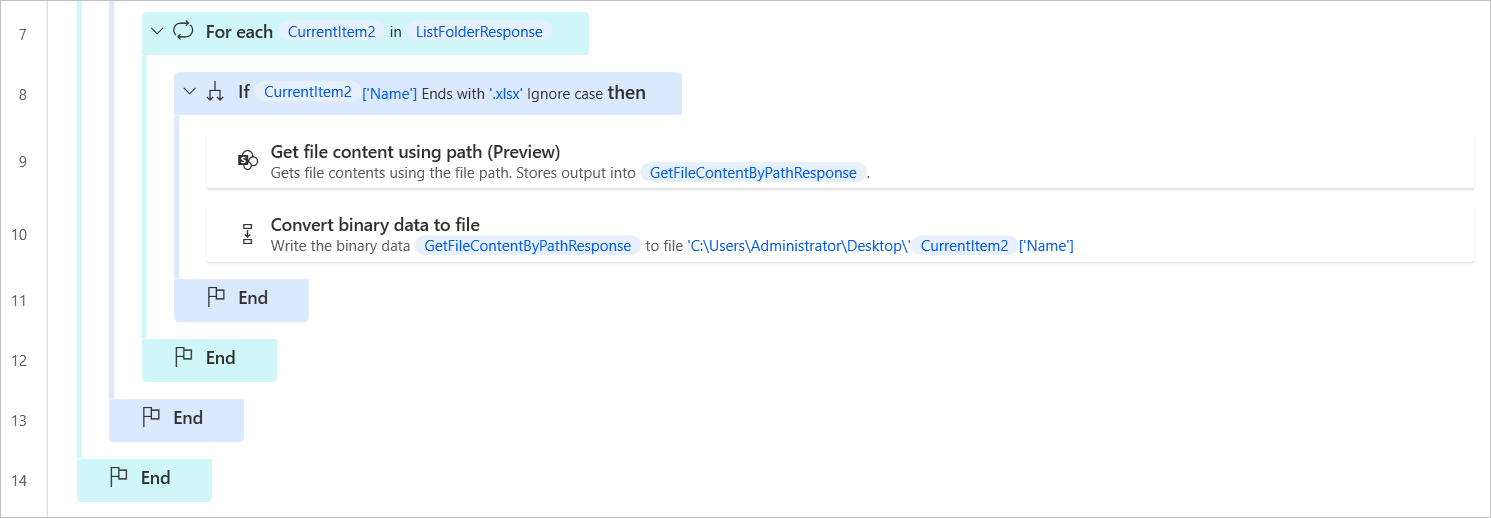
After retrieving the list, use a For each loop to iterate through the objects inside it.
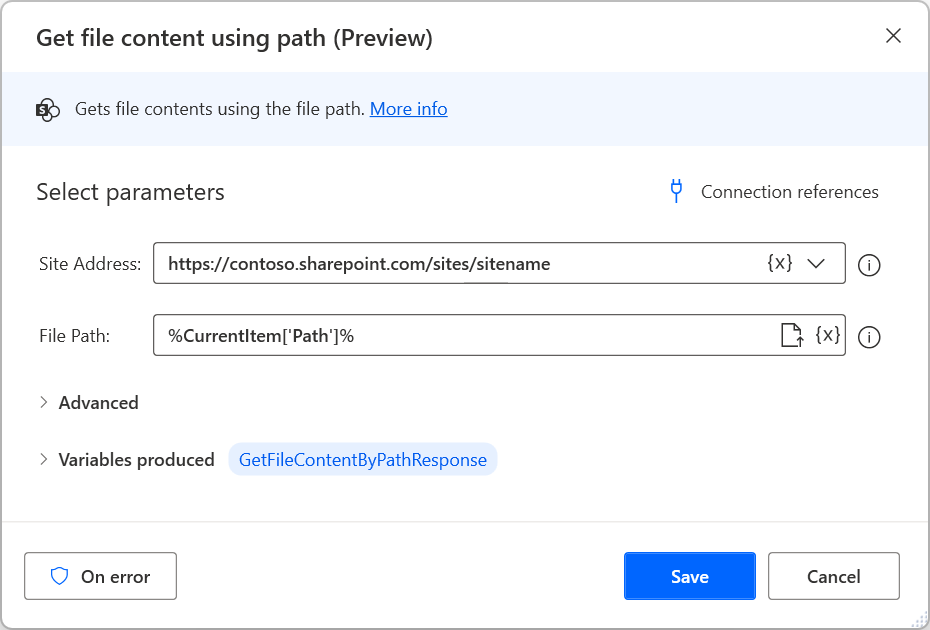
If the items in the target folder are only files, use the Get file content using path action, and the Path property inside the block to retrieve the current file's contents.
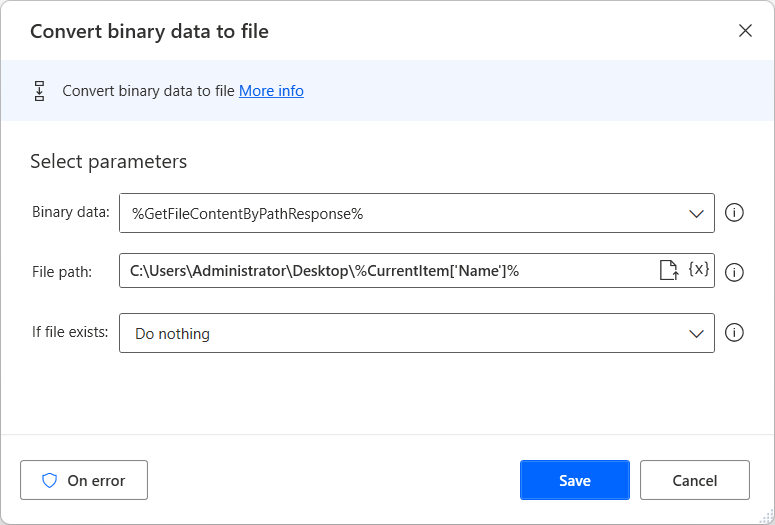
Then, deploy the Convert binary data to file action to store the retrieved data in a local file. You can use the Name property to name the new file with the same name as the original SharePoint file.
The previous steps cover the case where the target folder contains only files. However, if the folder contains subfolders with files inside them, modify your desktop flow accordingly:
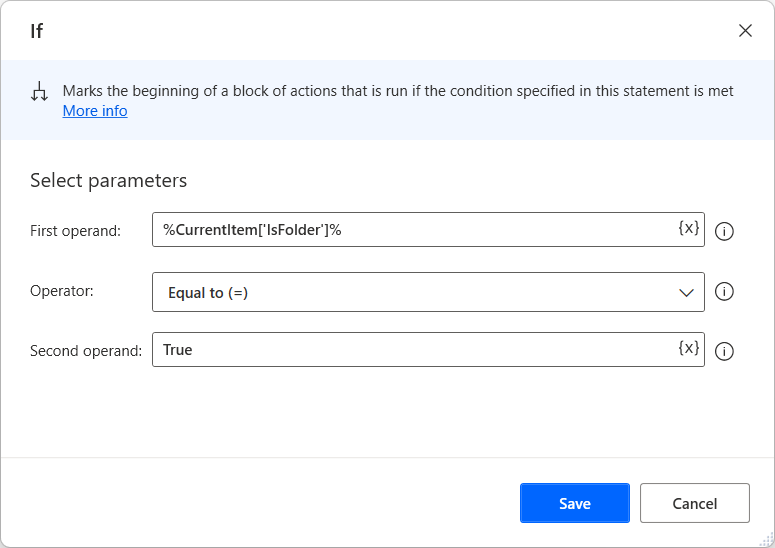
Add an If condition inside the previously deployed loop to check whether the currently selected item is a folder. To perform this check, use the IsFolder property of the current item.
Inside the if-block, use the Get folder metadata using path action to get the identifier of the currently selected folder. The folder path is the same as the one you used at the beginning of the flow, plus the folder's name. You can access the folder using the Name property of the current item.
As you did before, deploy the List folder SharePoint action and populate the appropriate SharePoint URL and the previously retrieved identifier.
Deploy a For each loop to iterate through the files inside the selected subfolder, and move and modify the previously deployed Get file content using path and Convert binary data to file actions to retrieve and save locally the contents of each file.
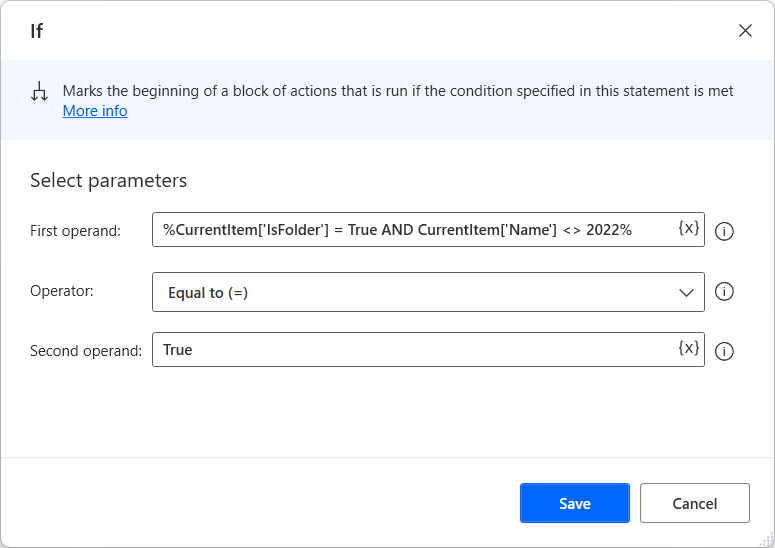
If you want to download files of specific subfolders, modify the previously deployed conditional to check the desired condition. For example, the following condition checks whether the current item's name is any other than 2022.
Note
Although you could use a new nested If action, combining the checks in only one conditional makes the desktop flow less complicated and easier to read.
If you want to download only files of a specific type, add a conditional before retrieving the file contents to check whether the file name ends with a particular extension.
How to upload a local file to SharePoint
Ensure that you've installed the latest version of Power Automate for desktop.
Create a new desktop flow.
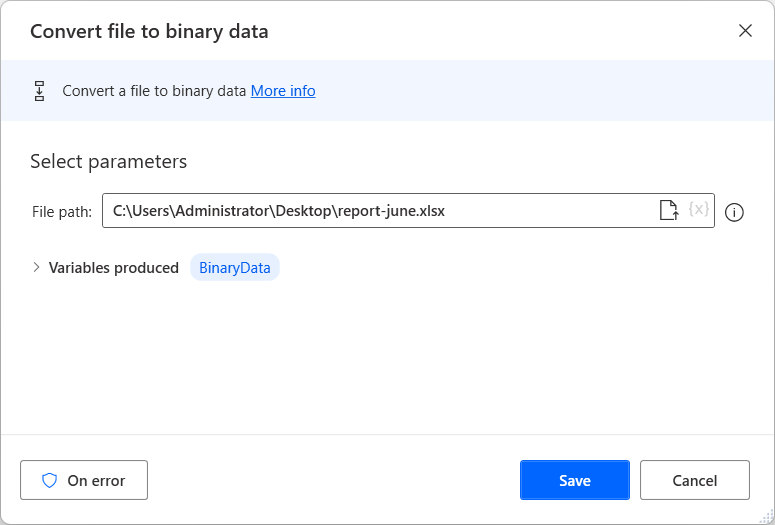
Deploy the Convert file to binary data action and select the desired file on your local drive. The action stores the converted file in the BinaryData variable.
Find the SharePoint group of actions in the flow designer and deploy the Create file action in the workspace.
Select an existing connection reference and fill in the required parameters. Here's an example about how to fill the fields:
Important
Don't forget to add the appropriate file extension after the file name.

Feedback
Coming soon: Throughout 2024 we will be phasing out GitHub Issues as the feedback mechanism for content and replacing it with a new feedback system. For more information see: https://aka.ms/ContentUserFeedback.
Submit and view feedback for