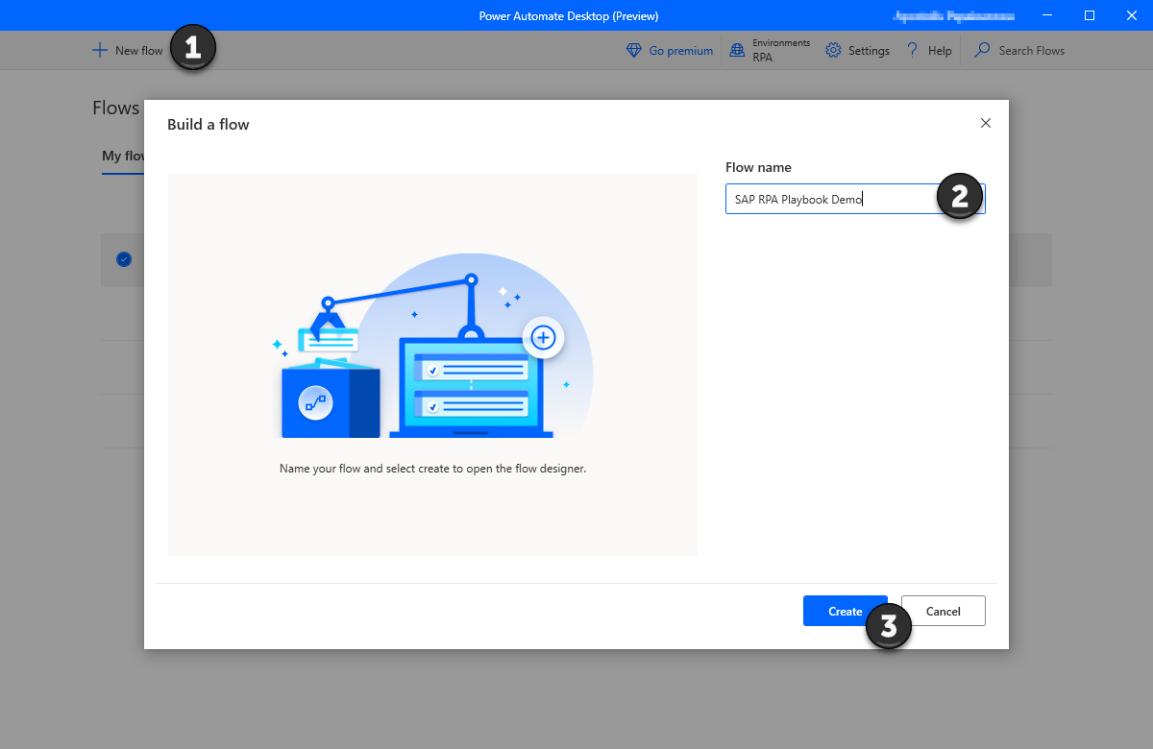
Create an SAP desktop flow with Power Automate Desktop

To create a desktop flow, open Power Automate Desktop, and then select New flow.
Enter a name for the desktop flow, and then select Create.
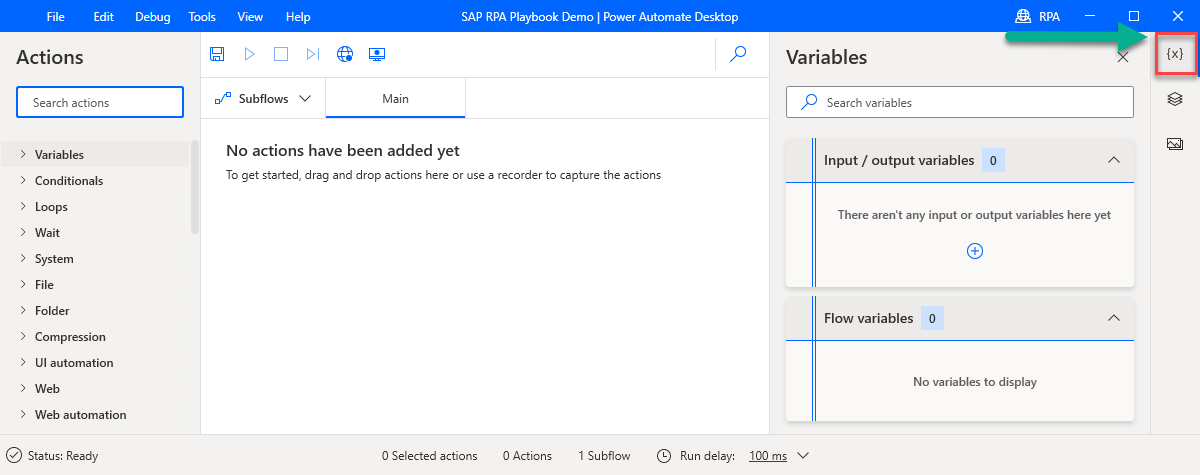
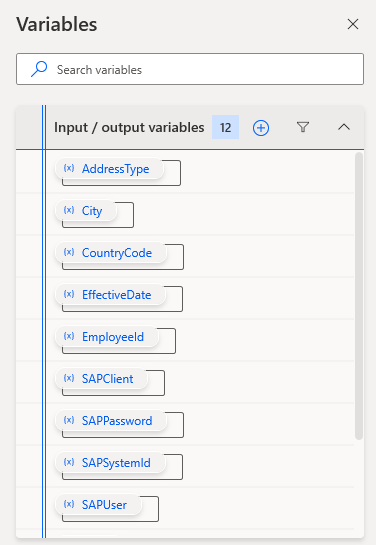
Select Variables in the Power Automate Desktop designer.
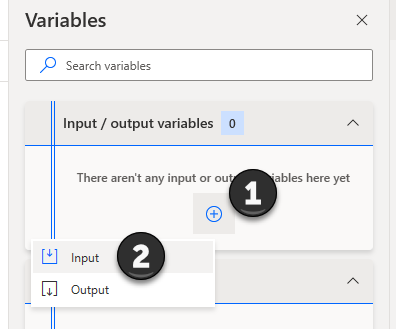
Select the plus sign (+), and then select Input.
You'll create several input variables which will be passed into this desktop flow from a cloud flow.
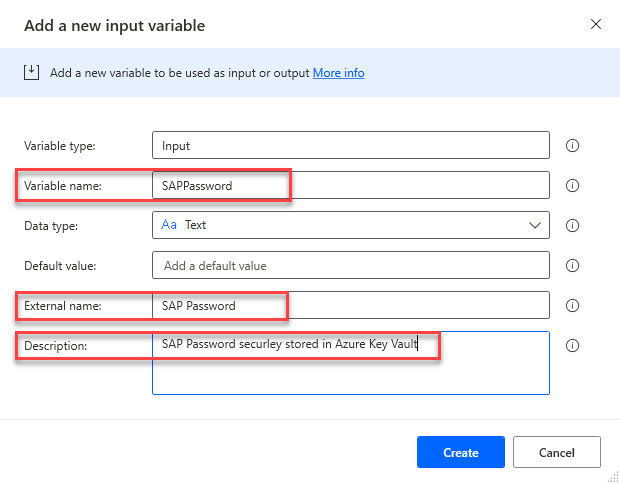
First, we'll create a few technical SAP variables, which will be needed in almost all SAP-based automation flows. For each variable in the following list, enter the Variable name, External name and Description, and then select Update.
SAPPassword
SAPUser
SAPClient
SAPSystemId
Next, create the following use-case-specific variables.
EmployeeId
AddressType
EffectiveDate
Street
City
State
ZipCode
CountryCode
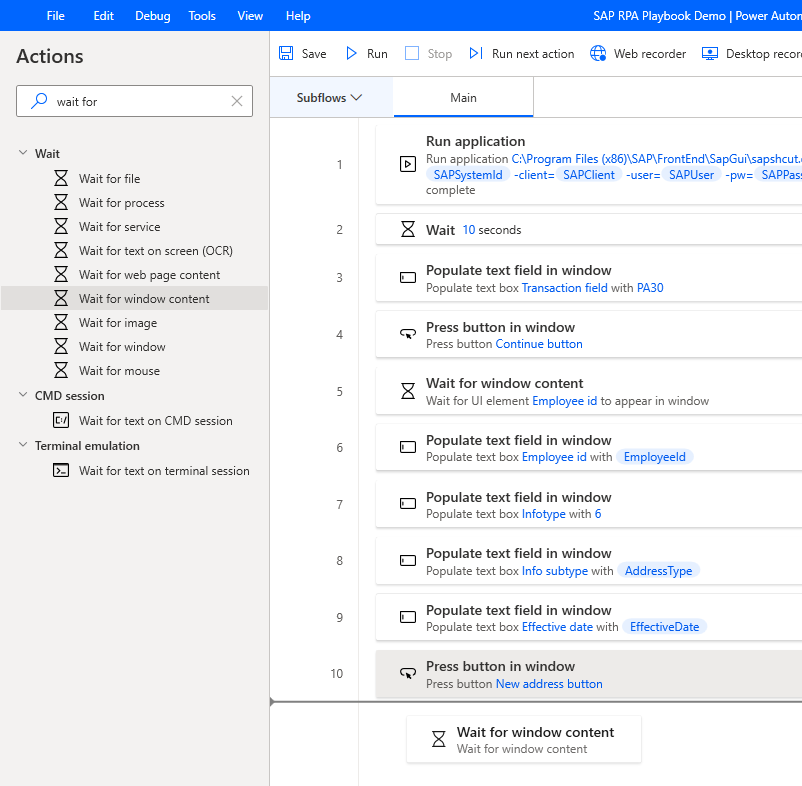
Next, we'll create our first process action. Search for, and then drag the Run application action onto the design surface.
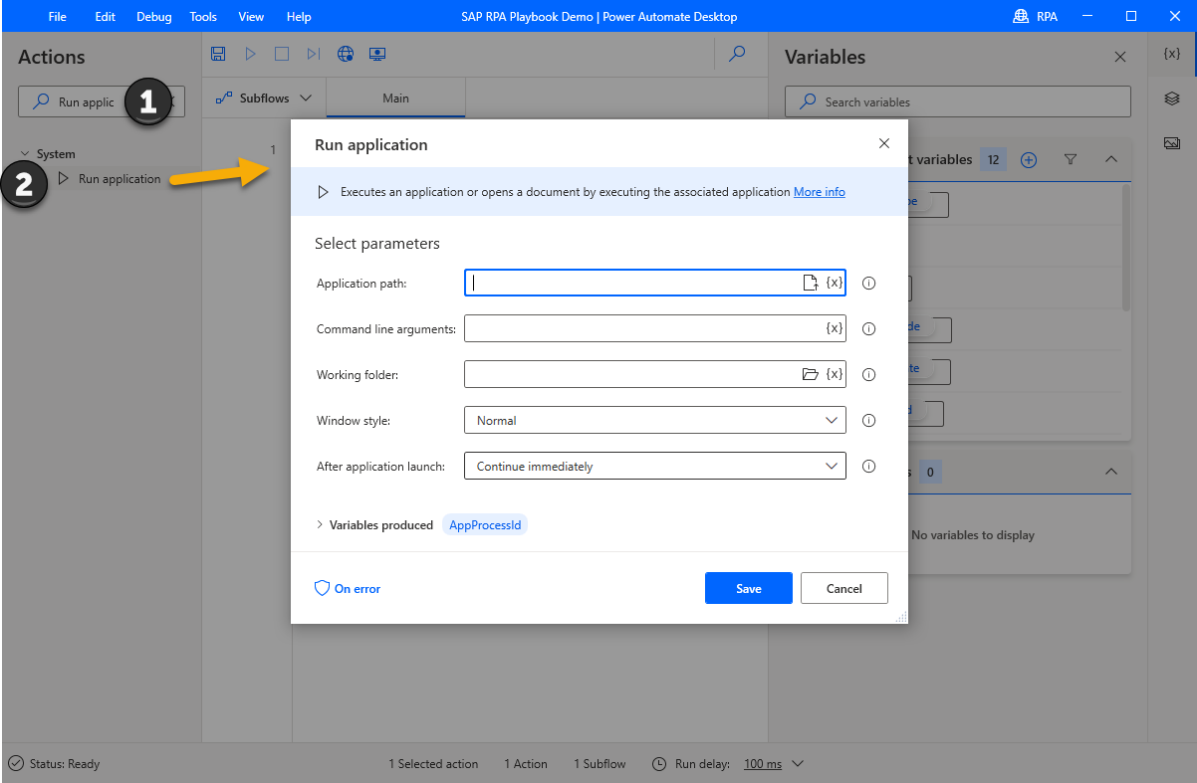
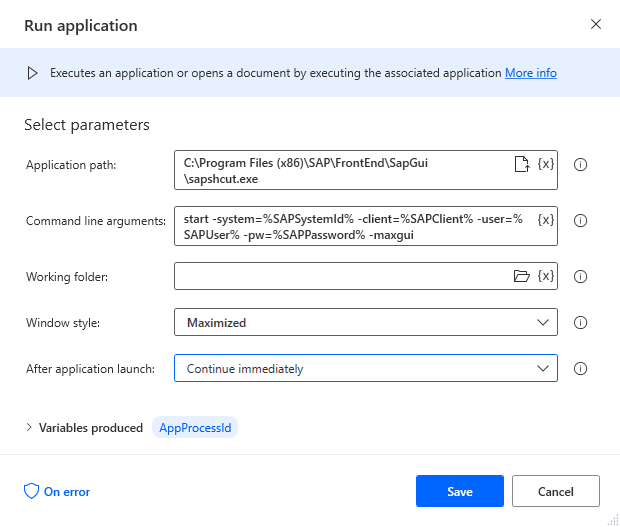
Enter the following information into the parameter list, and then select Save.
Application Path: C:\Program Files (x86)\SAP\FrontEnd\SapGui\sapshcut.exe
Command line arguments: start -system=%SAPSystemId% -client=%SAPClient% -user=%SAPUser% -pw=%SAPPassword% -maxgui
Window style: Maximized
After application launch: Wait for application to complete
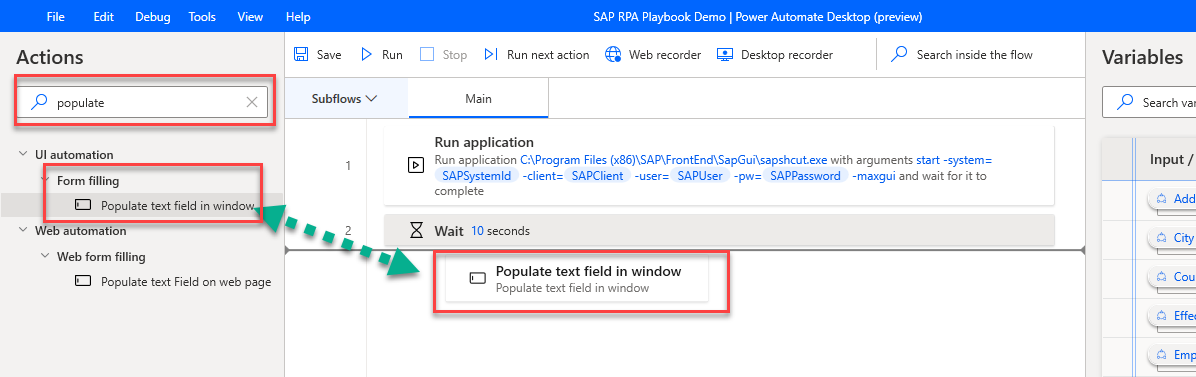
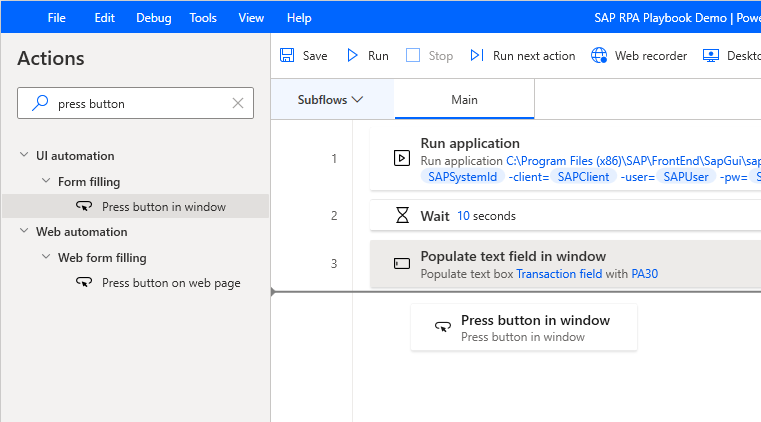
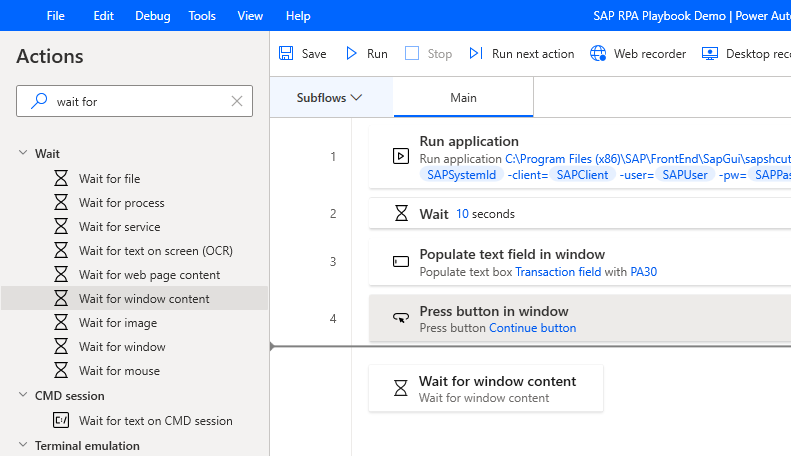
Search for the Wait action, drag it onto the designer, enter 10 (seconds) into the Duration field, and then select Save.

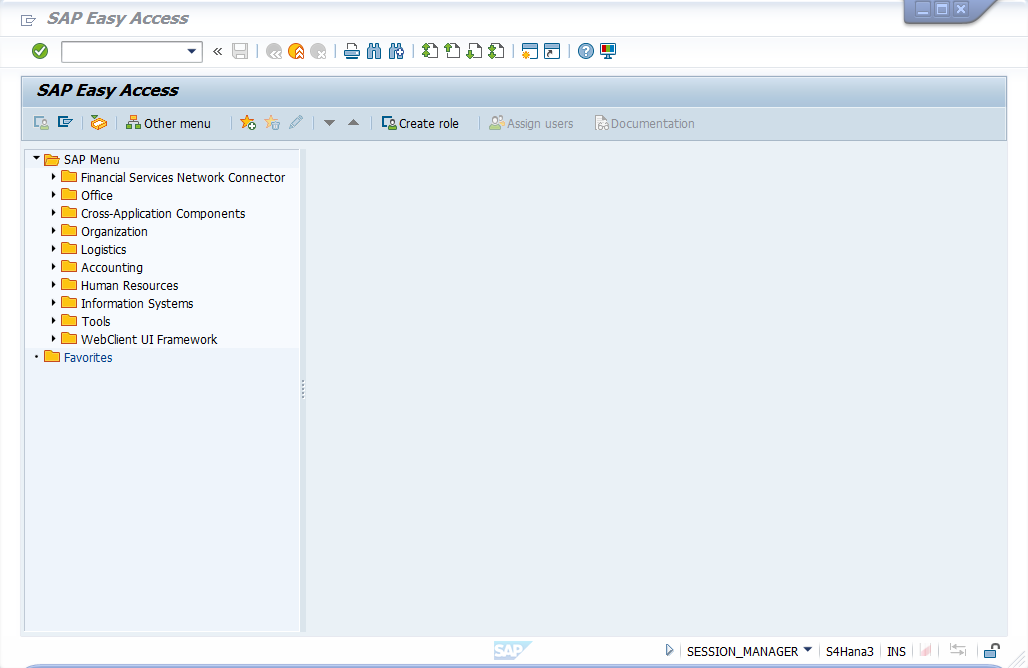
Now, open SAP GUI and sign in to your system of choice.
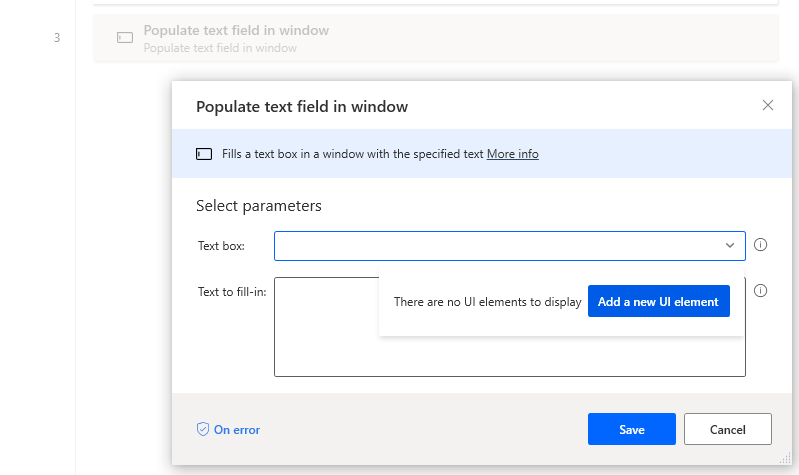
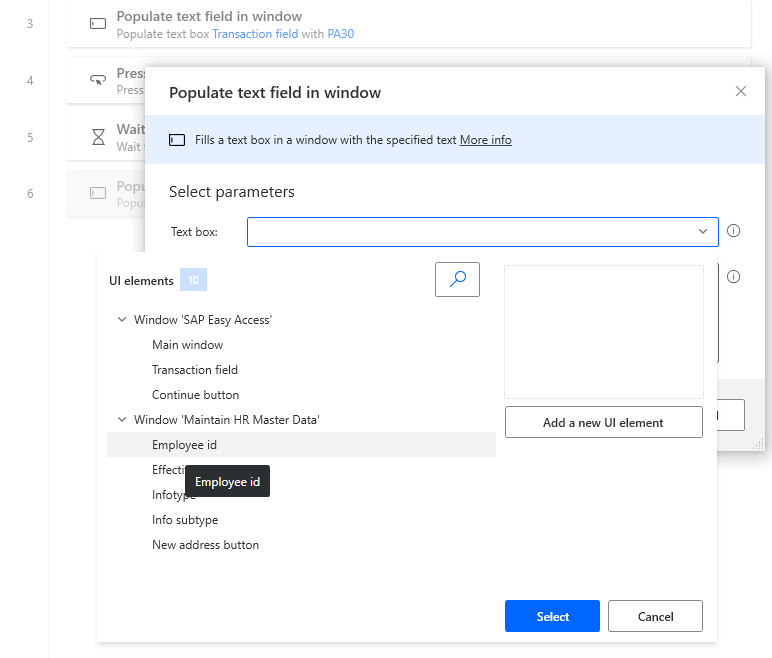
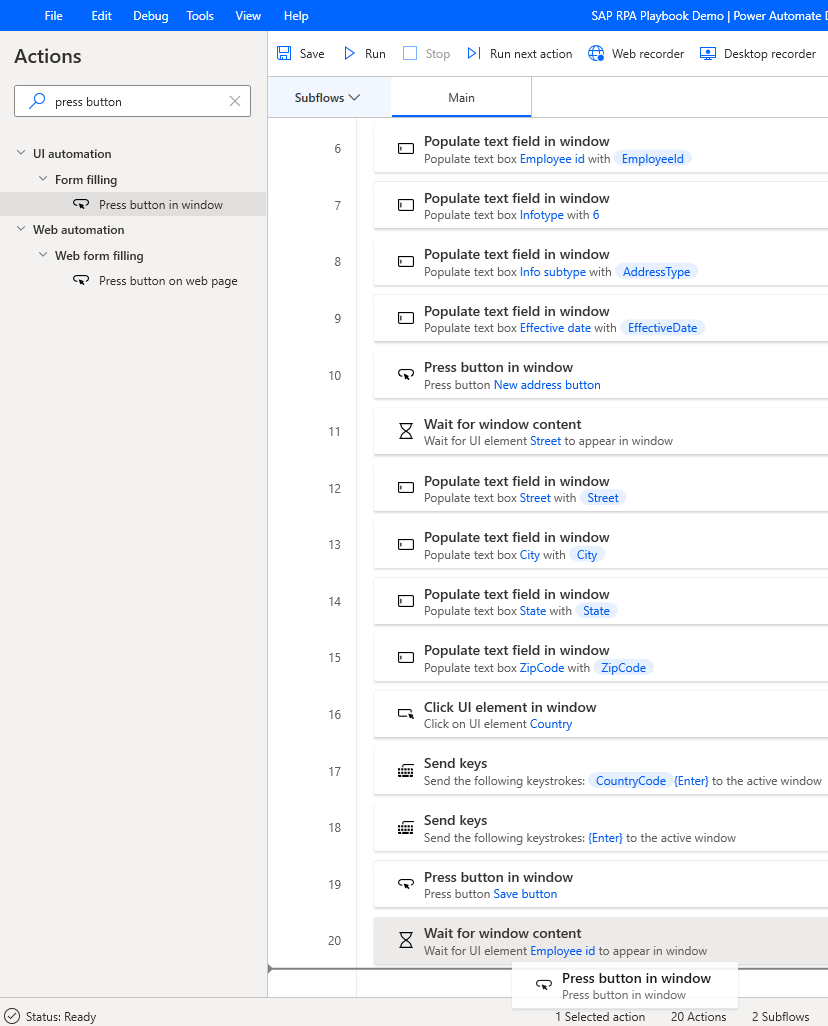
In Power Automate Desktop, search for the populate action in the Actions search box, and then drag the Populate text field in window action onto the canvas.
Select Add new UI element.
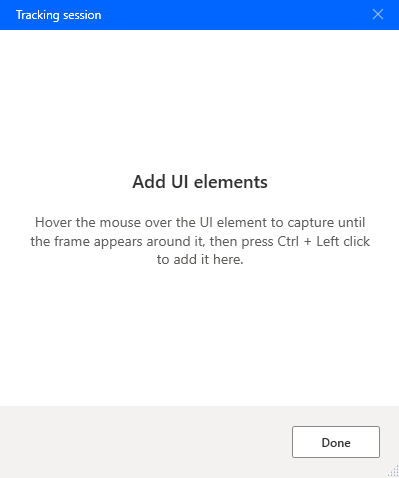
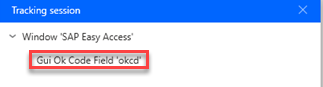
The Tracking session dialog opens, which tracks the individual controls you select on a screen.
Select the SAP main window to give it focus.
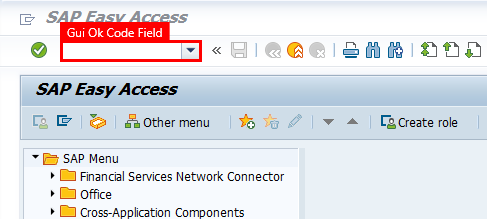
Hover over the transaction code field. When a red frame surrounds Gui Ok Code Field, hold down Ctrl while you click. This adds the control to the UI elements list in the Add UI elements dialog in Power Automate Desktop.
In the SAP window, hover over the green check mark button, and then hold down Ctrl and click.
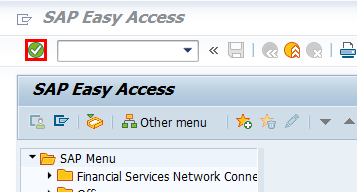
Enter transaction code PA30 into the list box, and then select the green check mark button.

We'll continue our field selection process on the next screen.

Select the following fields and button:


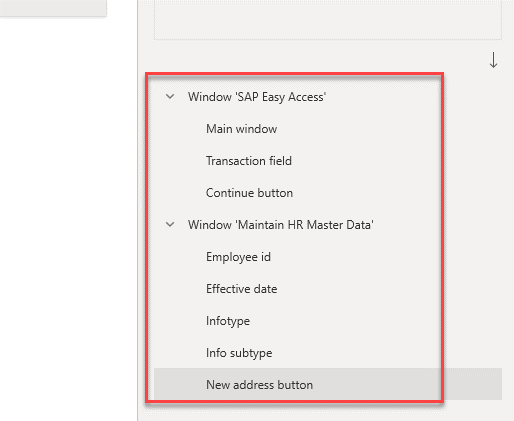
Verify that the dialog includes the following control names now. Select Done to close the dialog and to return to the design canvas.
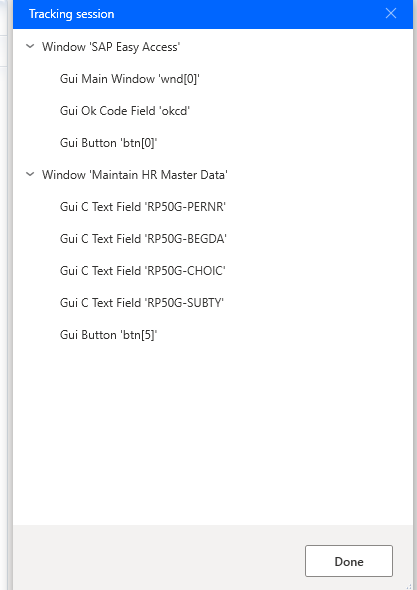
This is the dialog you should see after you've closed the previous dialog.

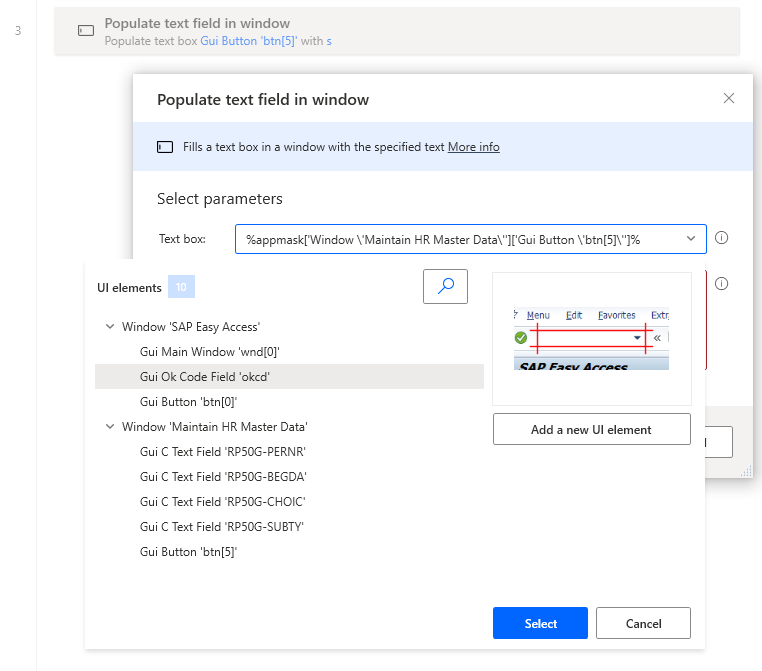
Open the Text box dropdown menu, select Gui Ok Field 'okcd, and then select Select.
Enter the transaction code PA30, and then select Save.

On the right pane, select the UI elements icon. Select each control in the list and rename it.
Tip
This step isn't required, but it's highly recommended because your control library might include dozens of controls, making it difficult to identify them by their system names.

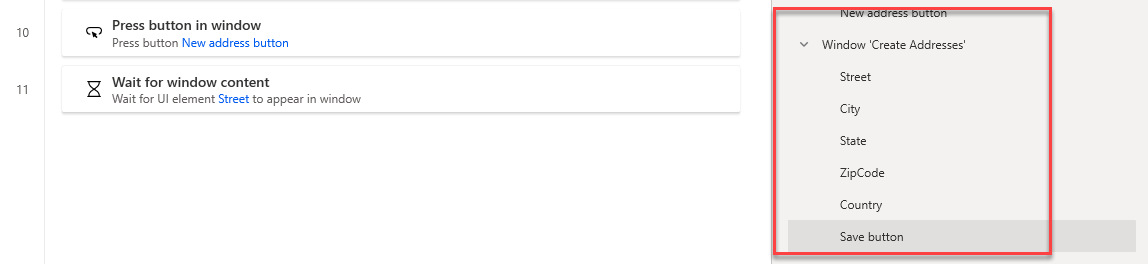
Here's the renamed control list.
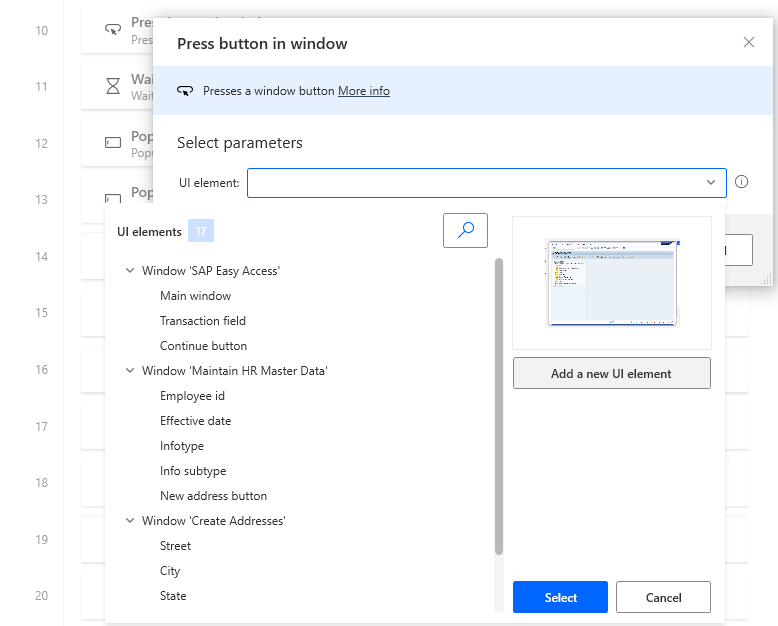
Enter press button into the Action search box, and then drag the Press button in window action onto the canvas.
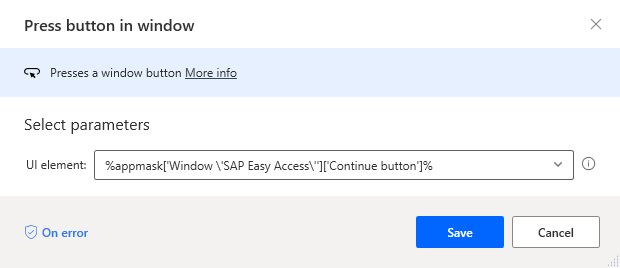
Select Continue.
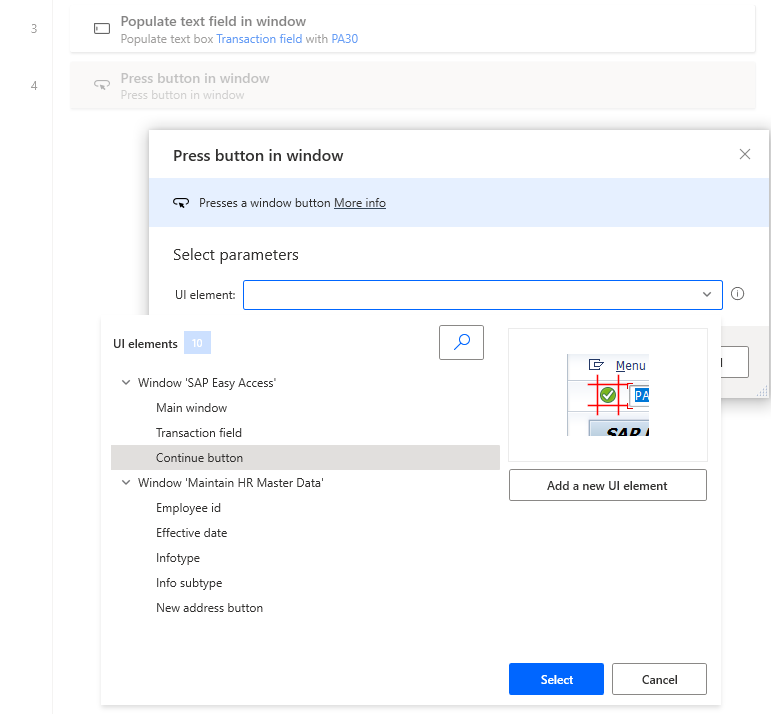
Select Save.
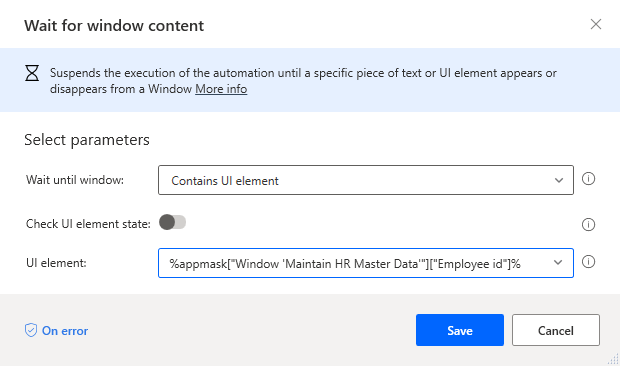
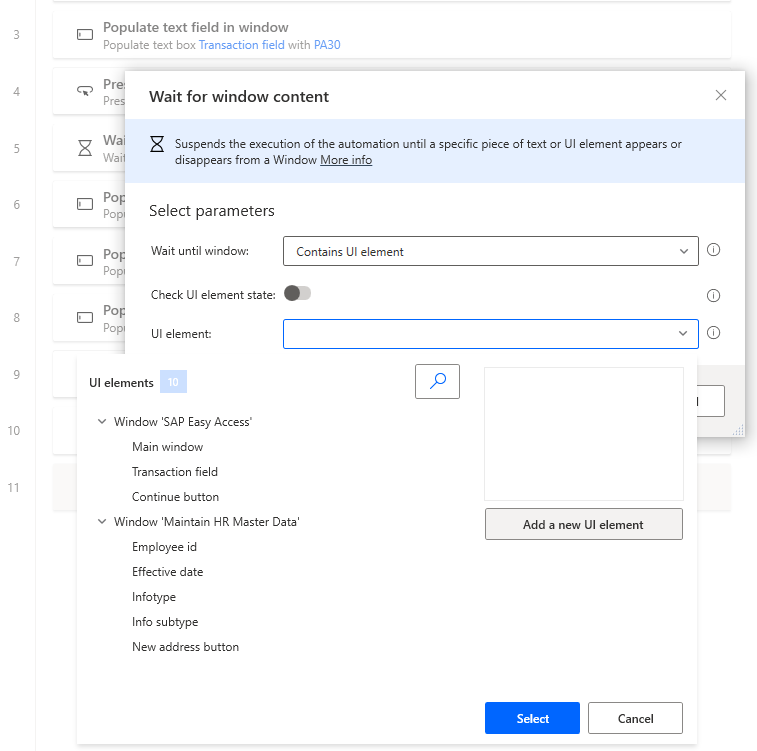
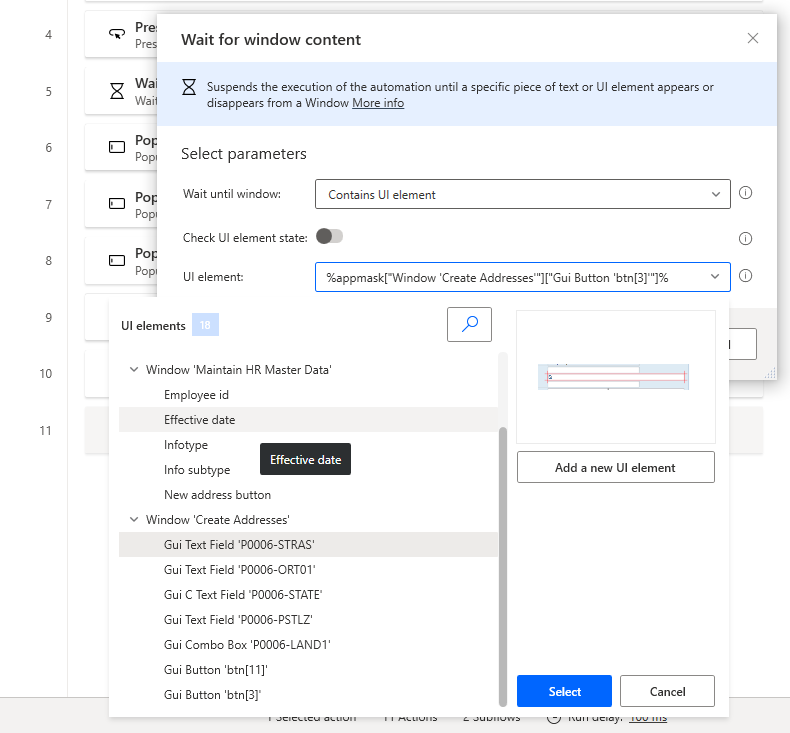
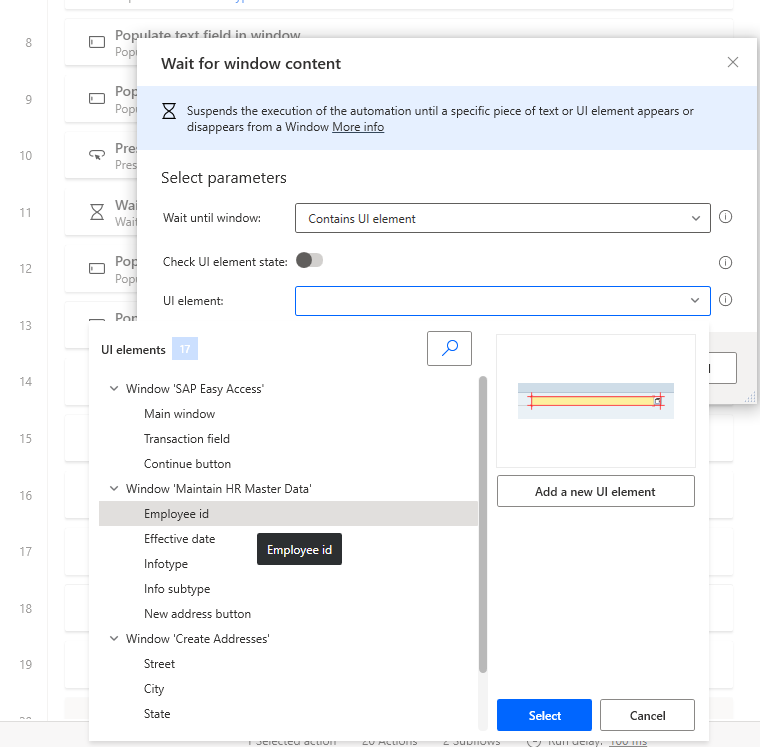
Enter wait for into the Actions search box, and then drag the Wait for window content action onto the canvas.
Under UI element select Employee id, and then select Select.

Select Save.
Enter populate into the Actions search box, and then drag the Populate text field window action onto the canvas.
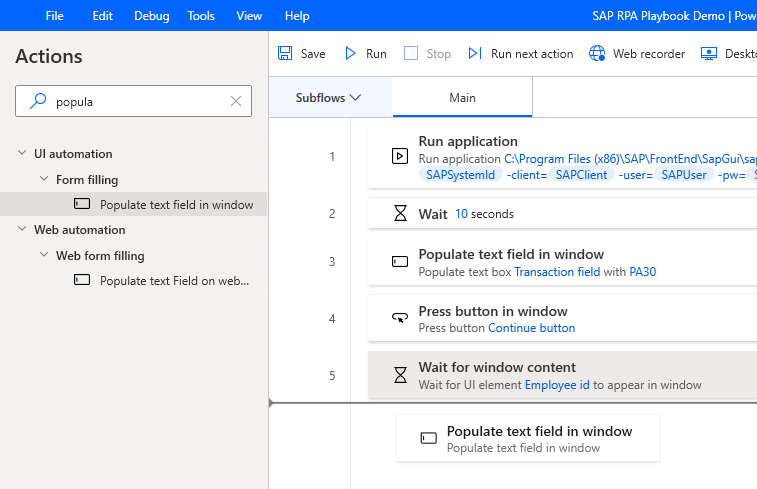
Under UI element select Employee id, and then select Select.
Select the
 icon, which is in the Text to fill-in text box, and then select EmployeeId.
Select Save.

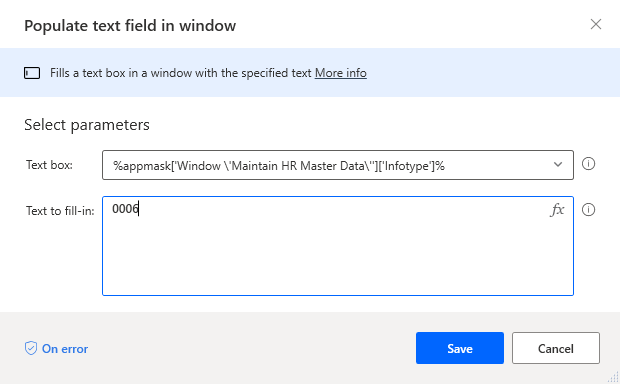
Repeat from step 33 through 35 for controls Infotype, Info subtype, and Effective date, and select the variables or provide a fixed value as shown in the following images.


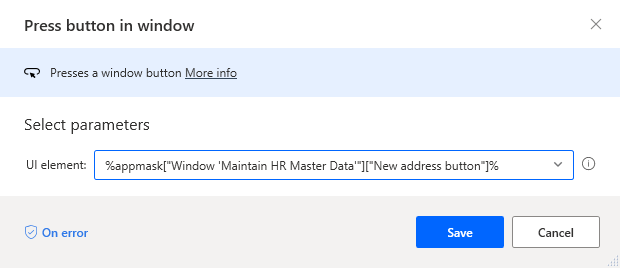
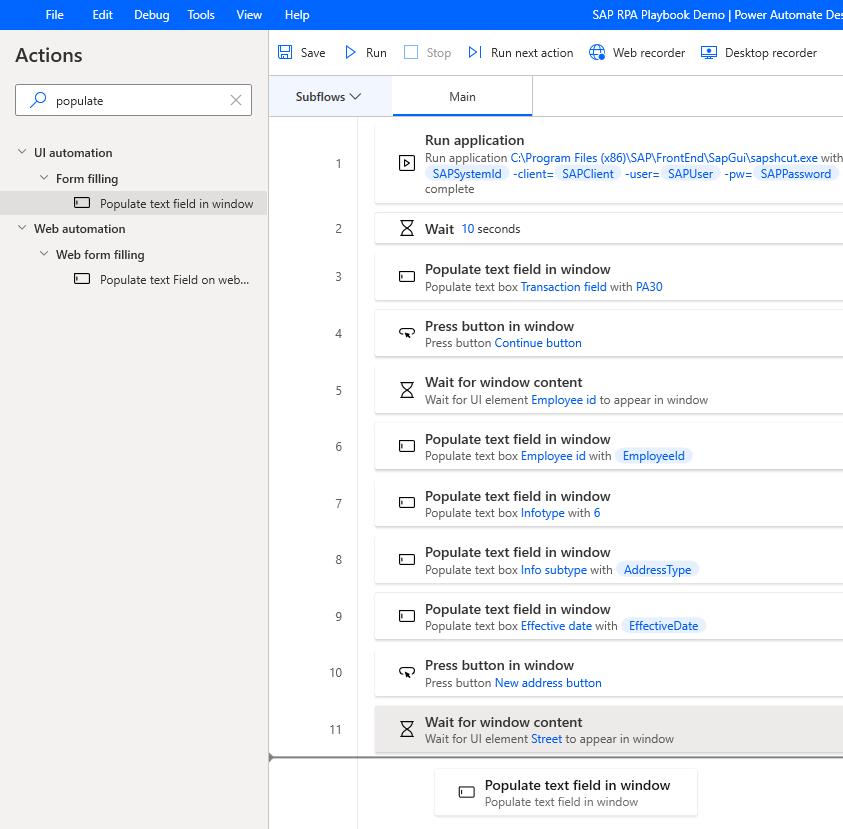
Enter press button into the Actions search box, and then drag the Press button in window action onto the canvas.
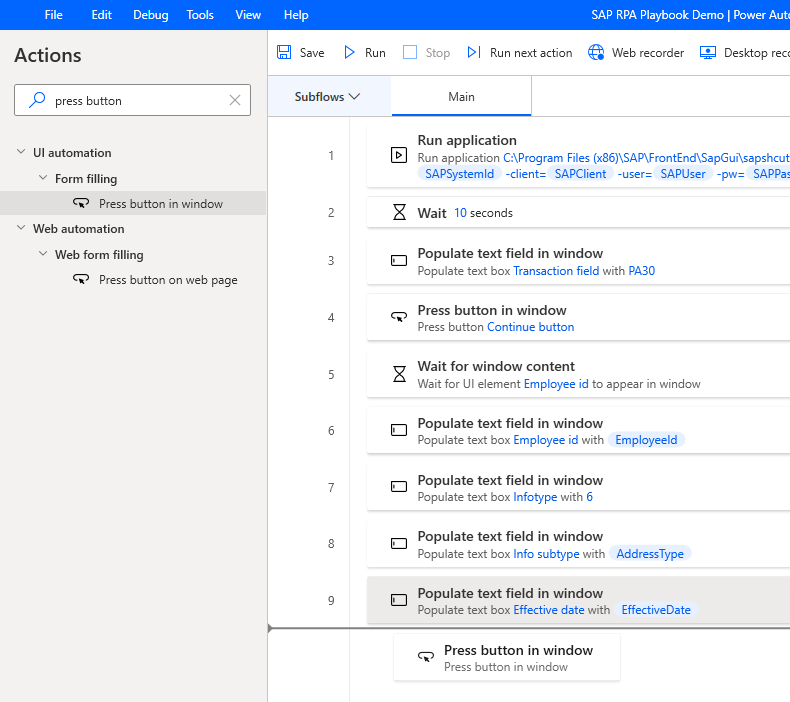
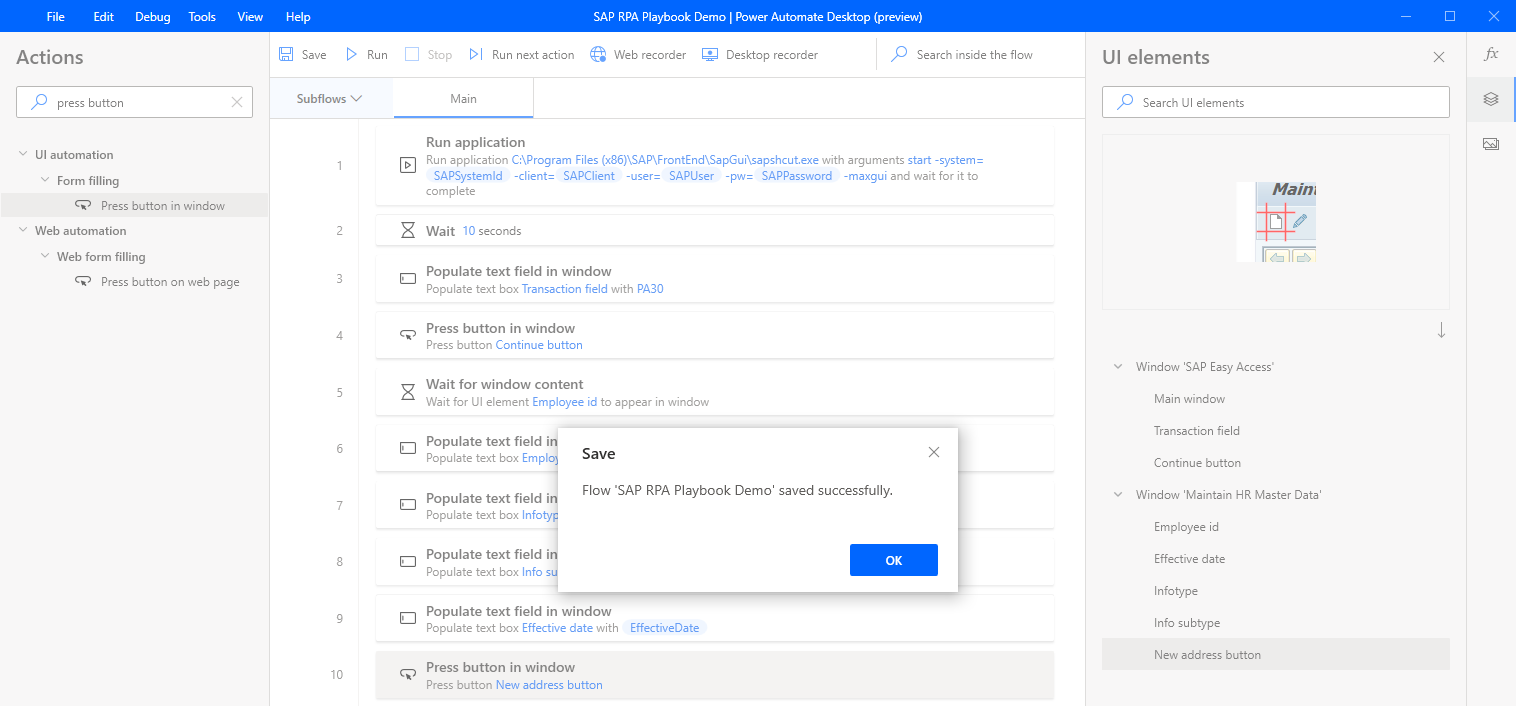
Under UI element, select New address, and then select Save.
Select Save, and then select OK.
Enter wait for into the Actions search box, and then drag the Wait for window content action onto the canvas.
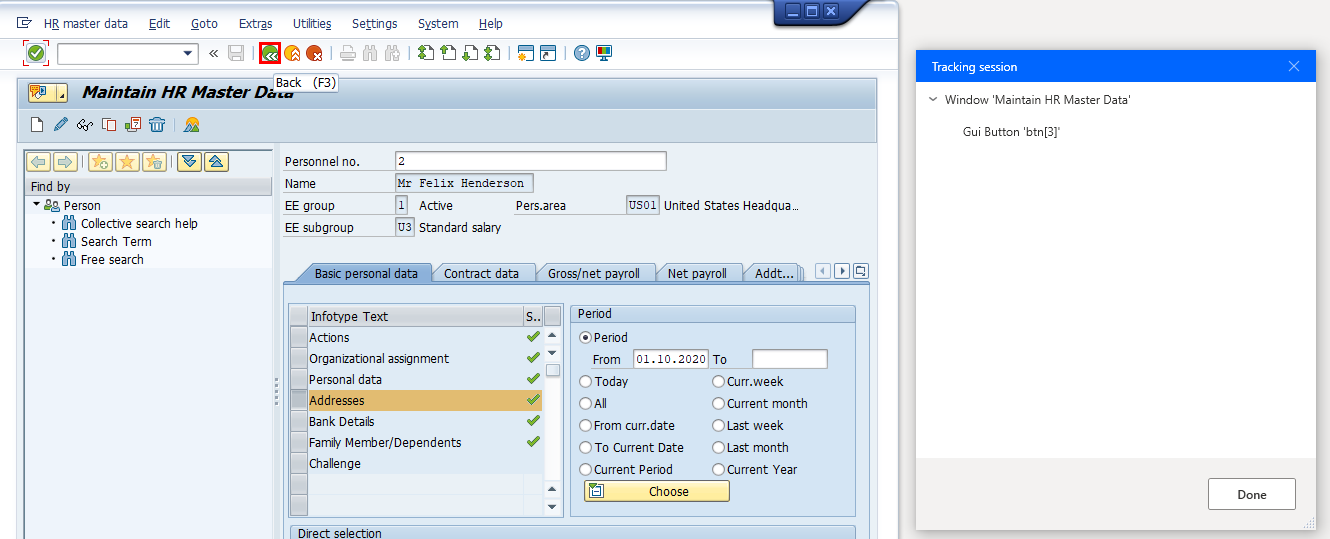
Select UI element, and then select the Add new UI element button to bring up the Tracking session dialog.
The Tracking session dialog appears.
Important
For the following steps, you'll need valid SAP reference test data as outlined in step 5 of the SAP GUI scripting configuration prerequisites.
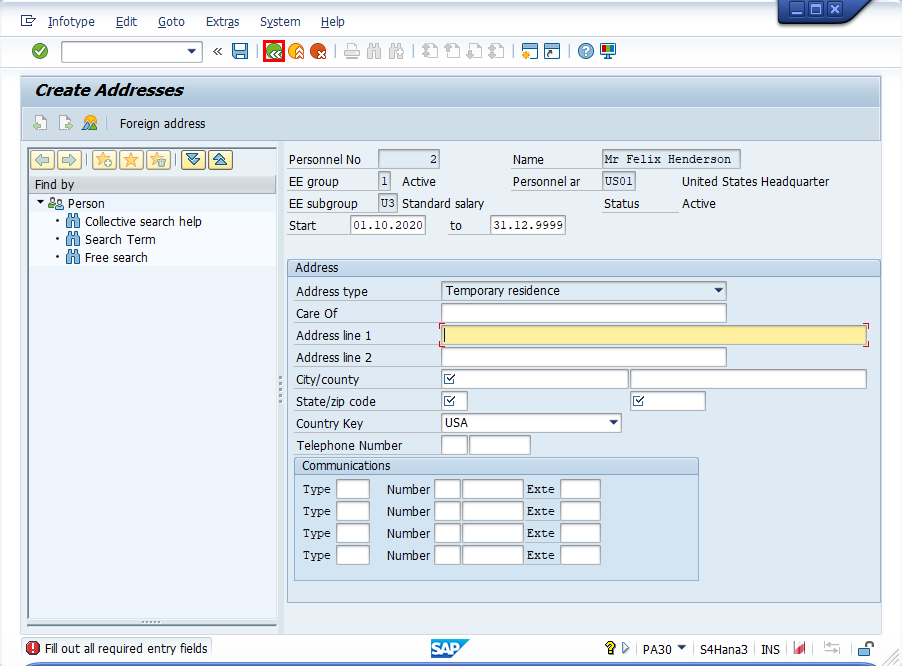
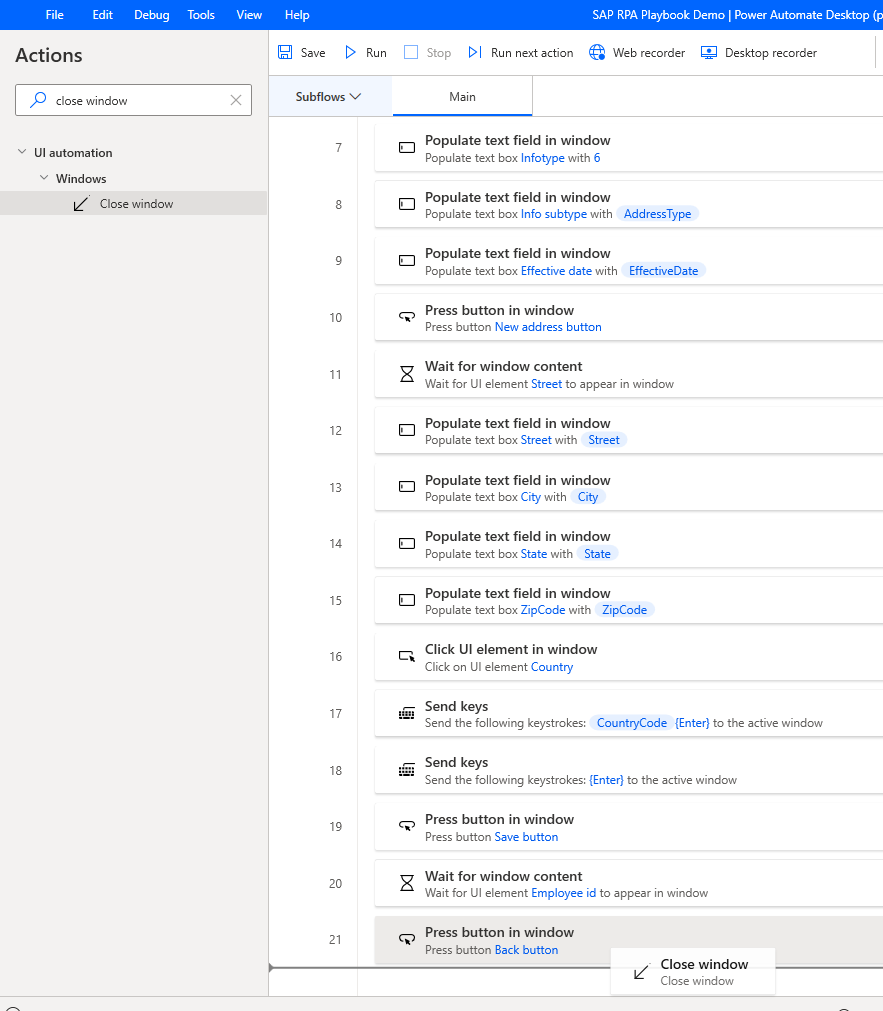
Enter values for Personnel number, Period From, Infotype (always provide 0006, because this is a standard type in SAP systems), STy (this is the Infotype subtype), and then select Create (F5).

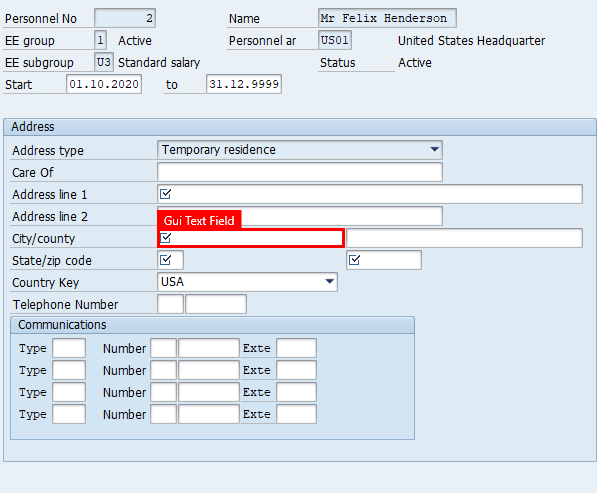
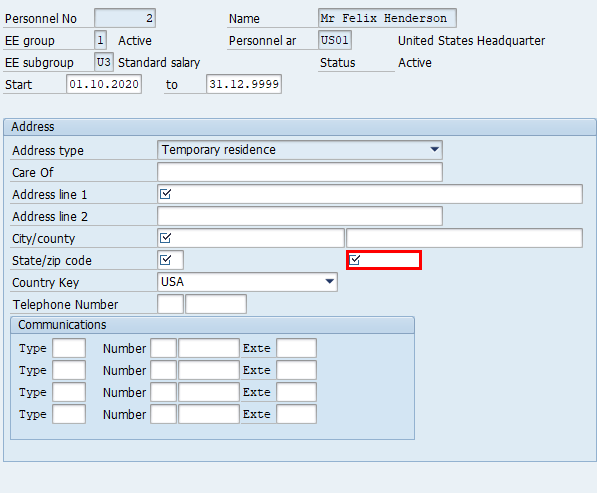
Hover over Address line 1. A red frame surrounds the field Gui Ok Text Field. Hold down Ctrl, and then click to add the control to the UI elements list, which shows up in the Tracking session dialog.
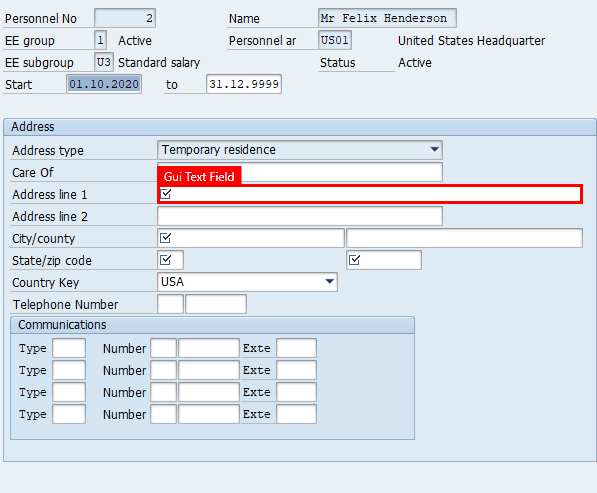
Repeat step 44 for these fields as well: City/county, State, Zip code, Country key, and the Save (Ctrl+S) button.

In the Tracking session dialog, select Done.
Important
Be sure to leave the SAP form open.

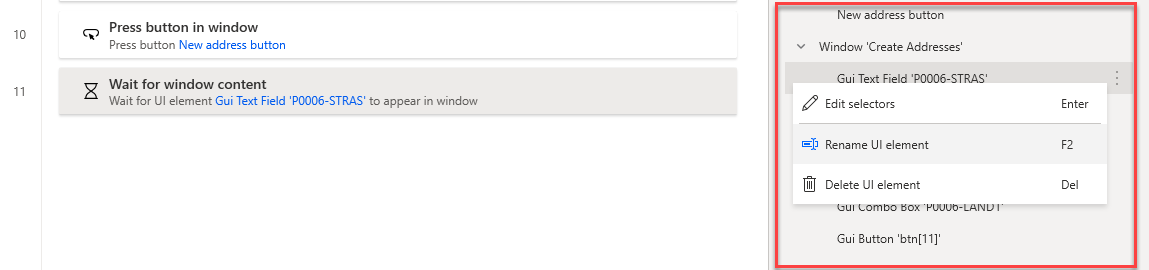
Select UI element and then select Gui Text Field 'P0006-STRAS", and then select Save to close the dialog.
On the right pane, select the UI elements icon. Select each of the newly added controls in the list, and then rename them. This isn't mandatory but highly recommended because your control library might include dozens of controls, making it difficult to identify them by their system names.

Enter populate in the Actions search box, and then drag the Populate text field window action onto the canvas.
Select UI element, and then select Street.

On the Text to fill-in box, select the fx icon, and then double-click to select the Street variable.
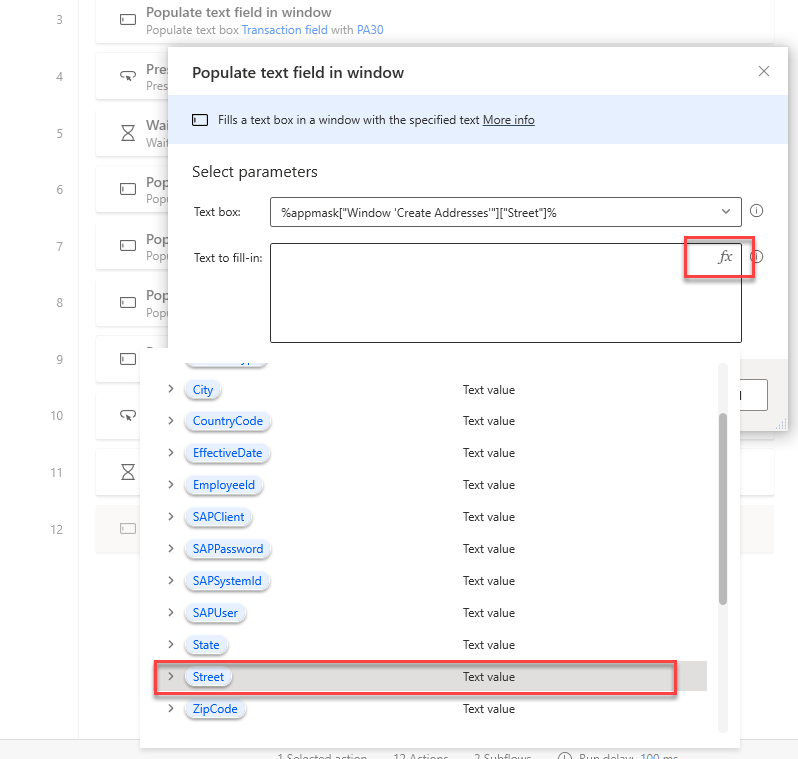
Select Save.

Repeat steps 50 and 52 with these controls: City, State, and ZipCode.


Note
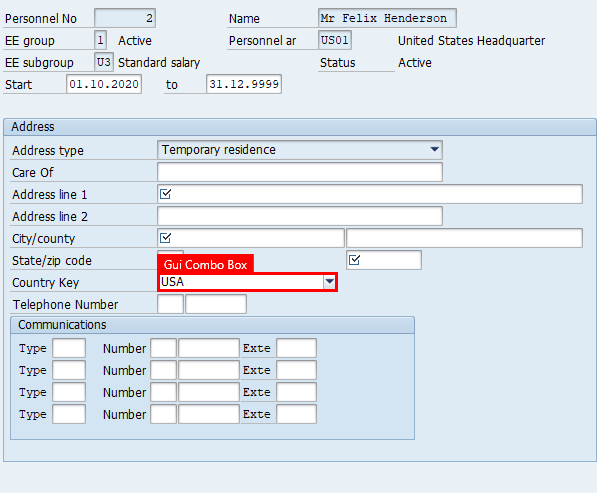
SAP GUI combo boxes need special handling, which requires us to use a combination of actions to select the correct list items within combo boxes.
Enter click UI into the Actions search box, and then drag the Click UI element in window action onto the canvas.
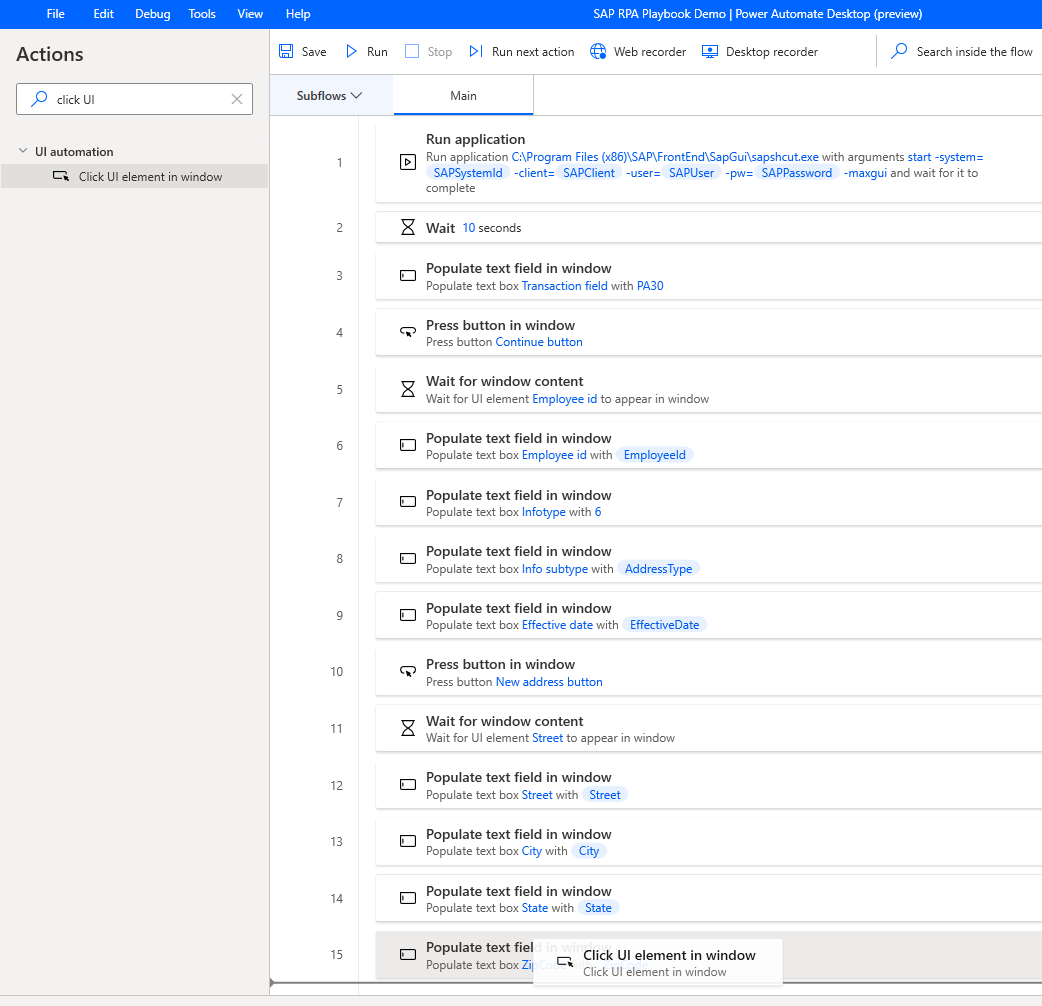
Select UI element, and then Country.
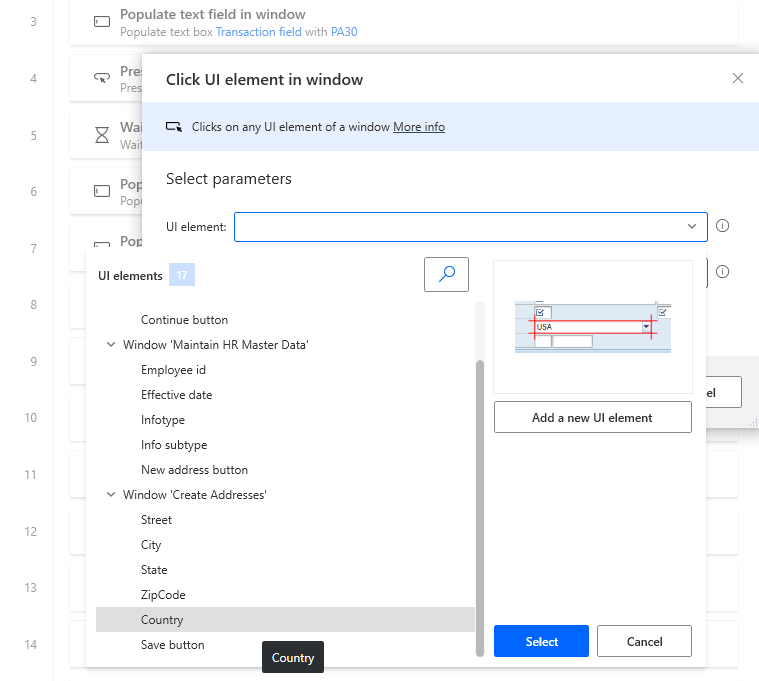
Keep the default value for Click type.

Enter send keys into the Actions search box, and then drag the Click UI element in window action onto the canvas.
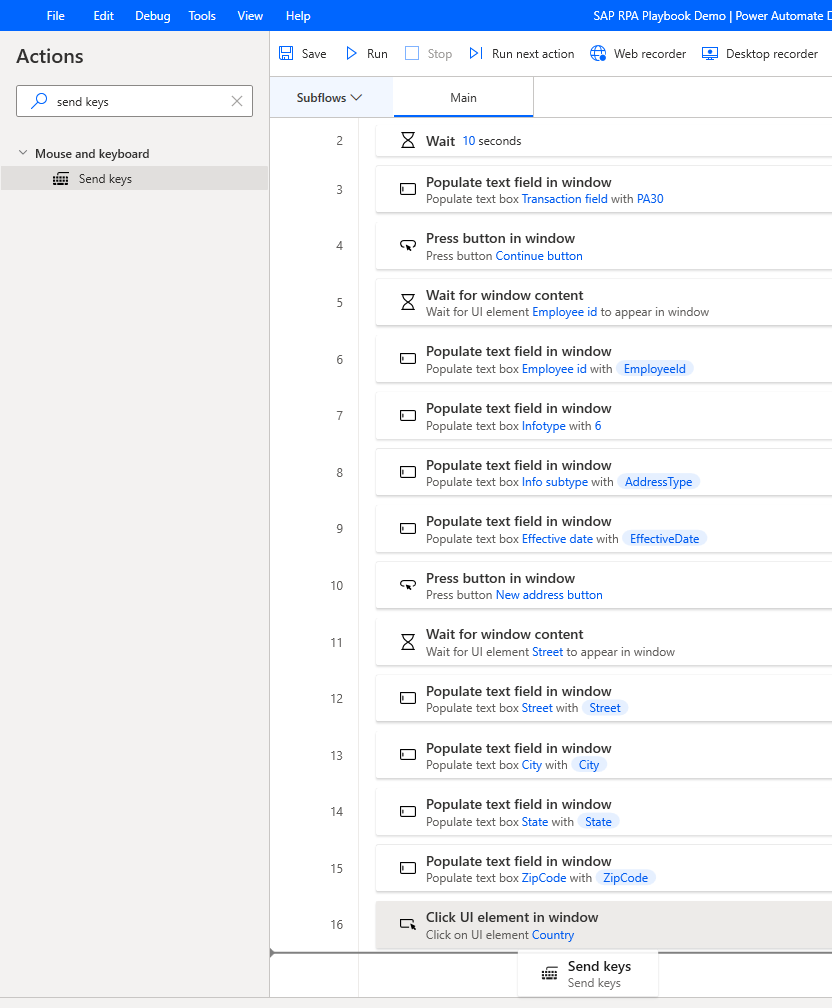
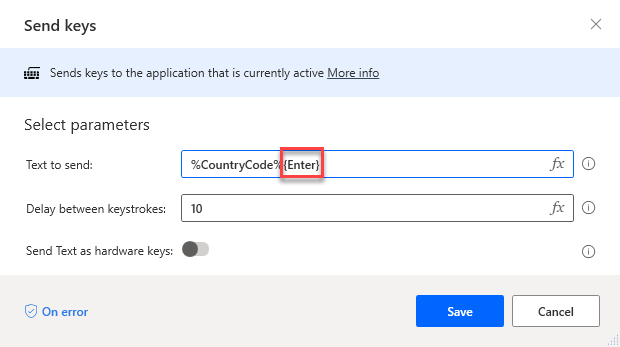
In the Text to send field, select the fx icon, and then double-click to select CountryCode.

Amend the %CountryCode% text by typing {Enter} right after the variable name. The {Enter} reference mimics an Enter keystroke on your keyboard.
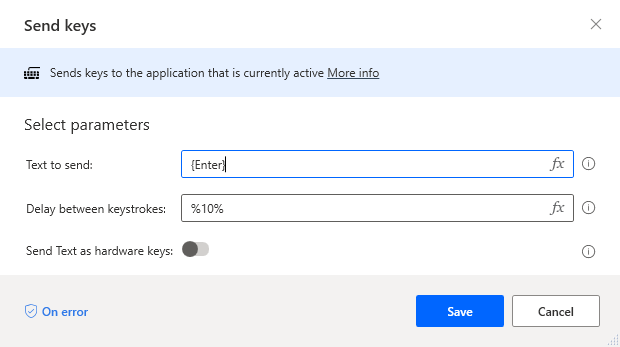
Drag another Send keys action onto the end of the flow.
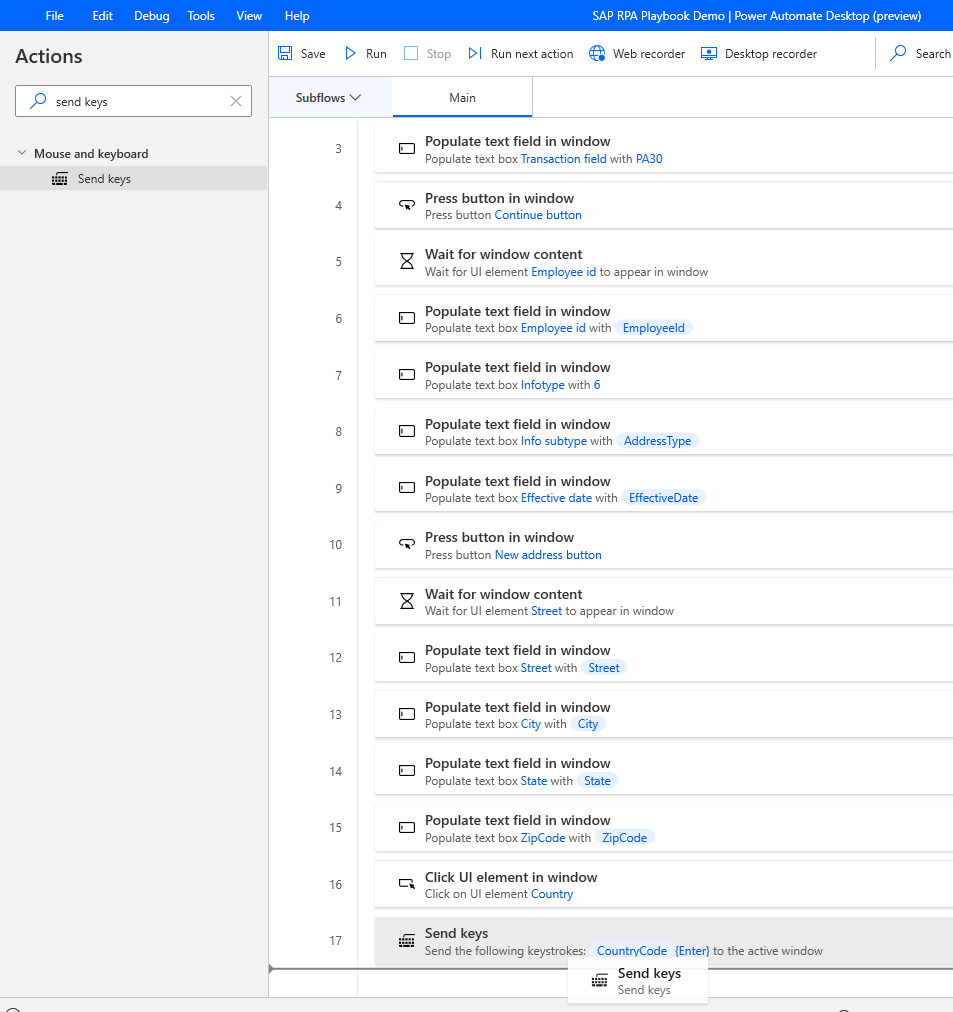
Enter {Enter} into the Text to send field, and then select Save.
Enter press button into the Actions search box, and then drag the Press button in window action onto the canvas.
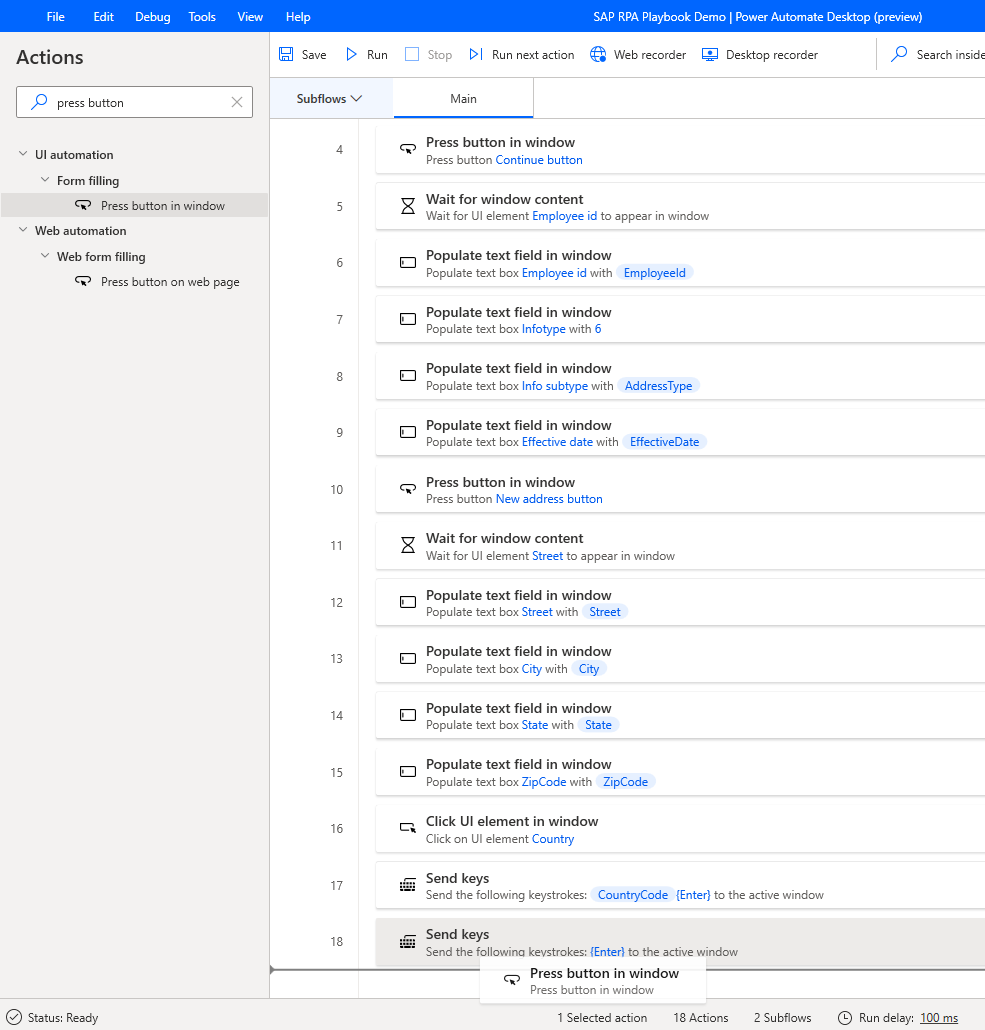
Under UI element, select Save.

Select Save.

Important
Confirm that the save operation is complete for the SAP record before you interact with other controls or windows.To make sure the operation is complete, add a Wait action to wait for a control to become visible.
Enter wait into the Actions search box, and then drag the Wait for window content action onto the canvas.
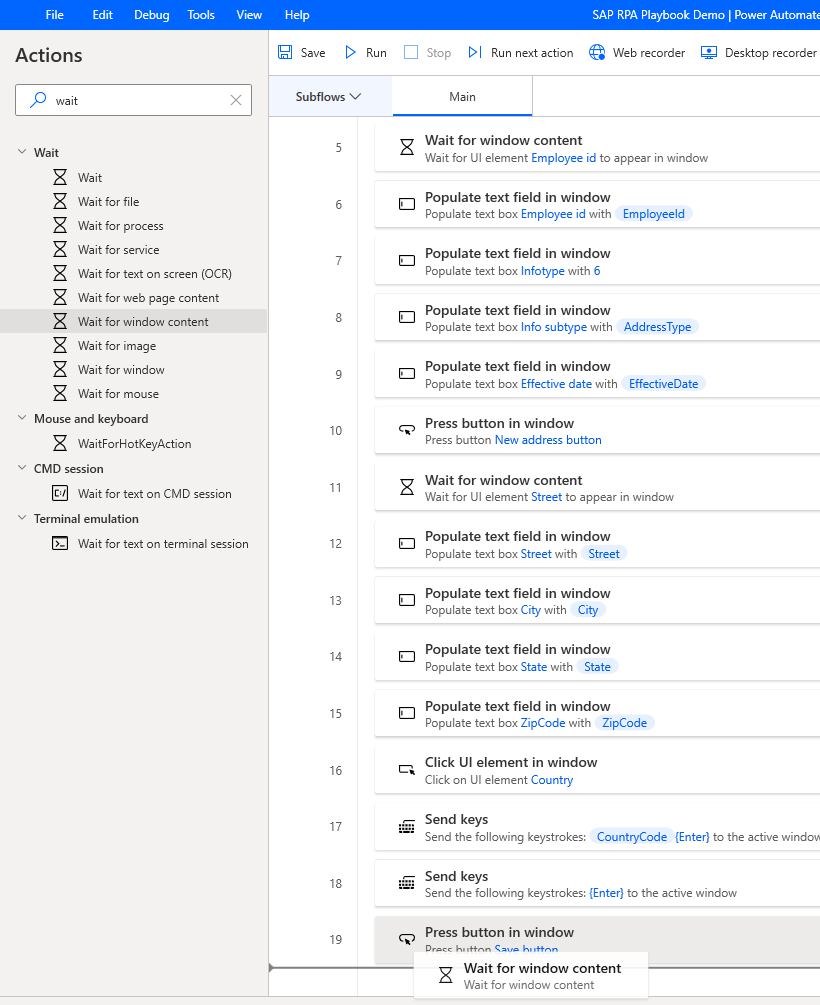
Under UI element, select Employee id, and then select Select.
Select Save.
Enter press button into the Actions search box, and then drag the Press button in window action onto the canvas.
Under UI element, select Add new UI element.
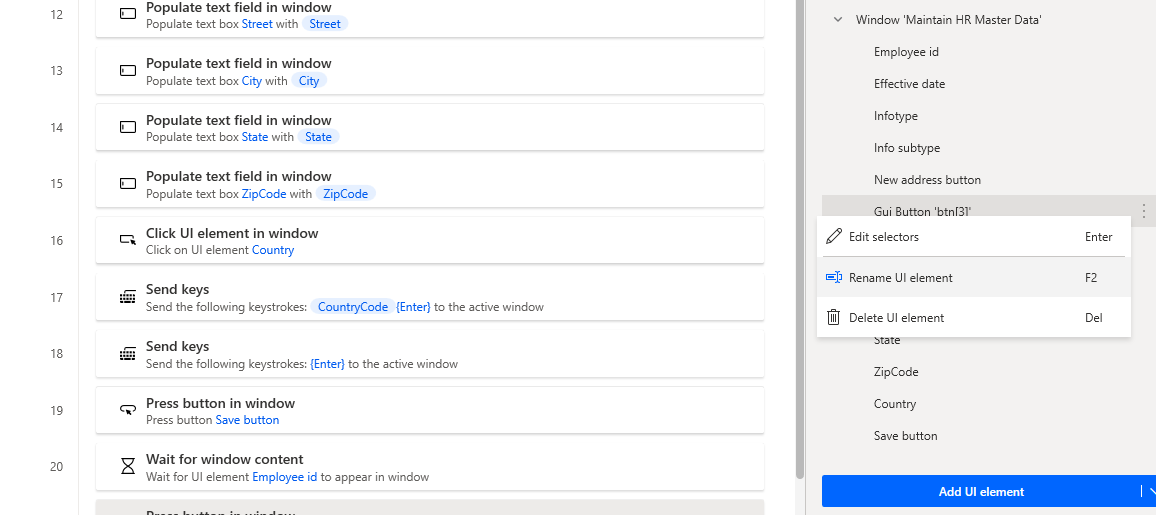
Hover over the Back (F3) button.

Hold down Ctrl while clicking to add the control to the UI elements list in the Tracking session dialog. (Note: we kept this form open in step 46.)
Now, select the Back button (without the Ctrl key) to go back to the previous screen.
If you see a "Data will be lost" message, confirm by selecting Yes.

You should be on the following screen now. In the Tracking session dialog, select Done.
Select Save.

Rename the button we've just added to the control library to Back button.
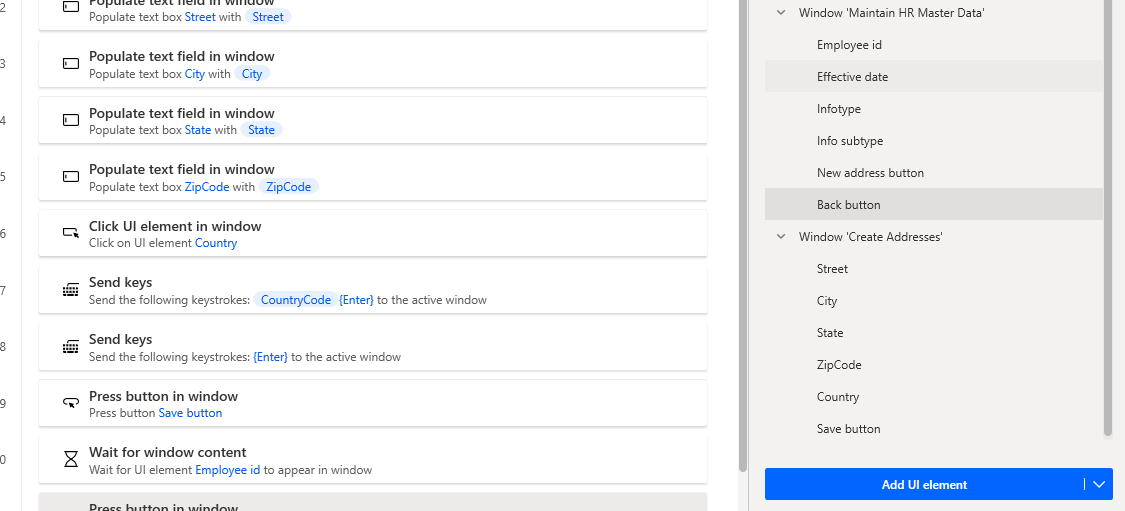
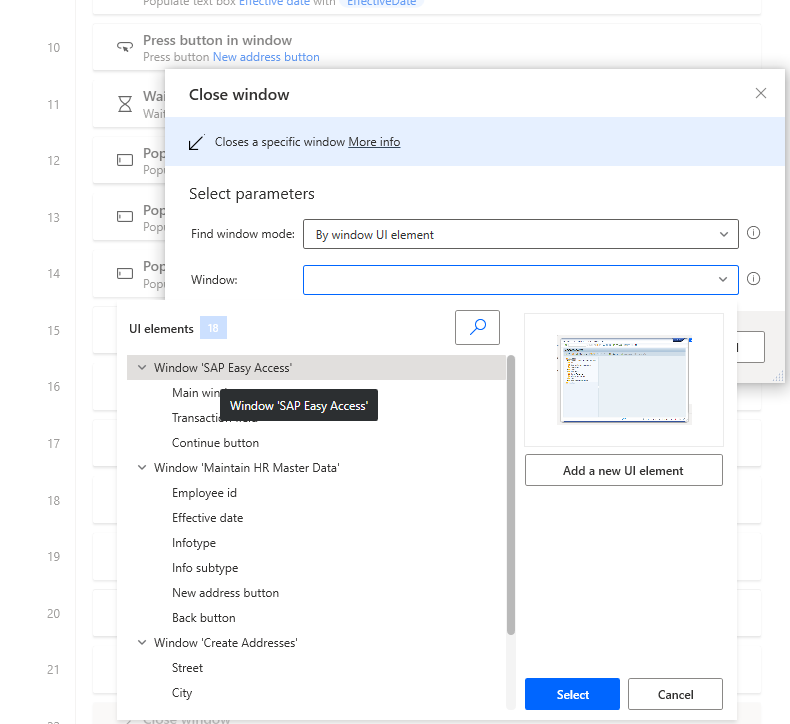
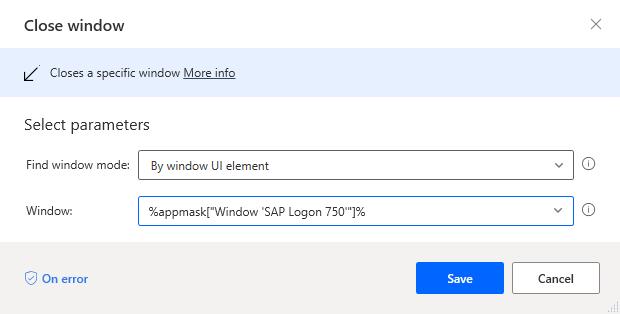
Enter close window into the Actions search box, and then drag the Close window action onto the canvas.
Under UI element, select Window "SAP Easy Access", and then select Save.
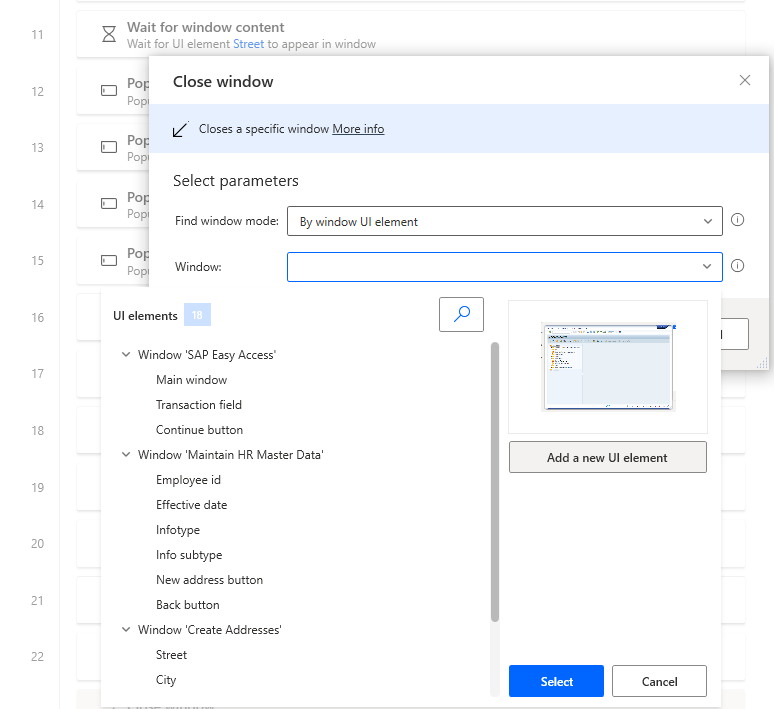
Enter close window into the Actions search box, and then drag the Close window action onto the canvas.
Under Window, select Add a new UI element.
Hover over the outer window frame of the SAP Logon 760 window. Hold down Ctrl and click to add the window element to the UI elements list, which appears in the Tracking session dialog.
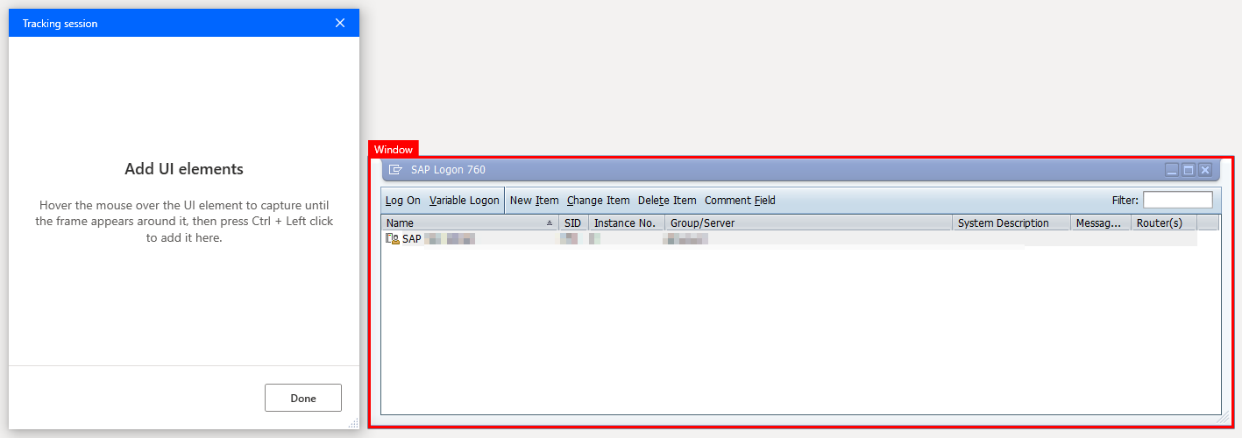
Under UI element, select Window "SAP Logon 760" (the number 760 reflects the SAP GUI version, so this might differ in your environment), and then select Save.
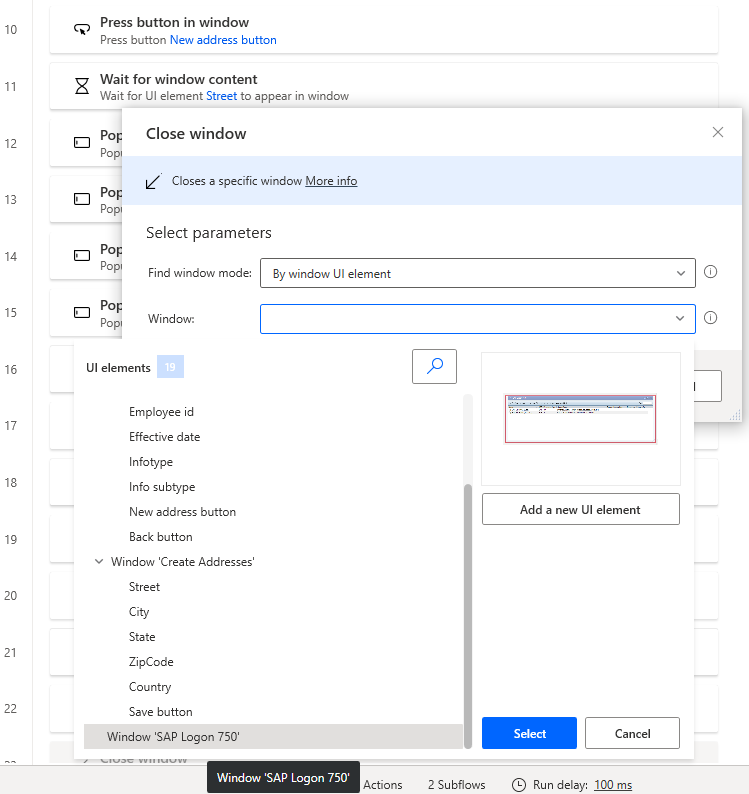
Select Save.
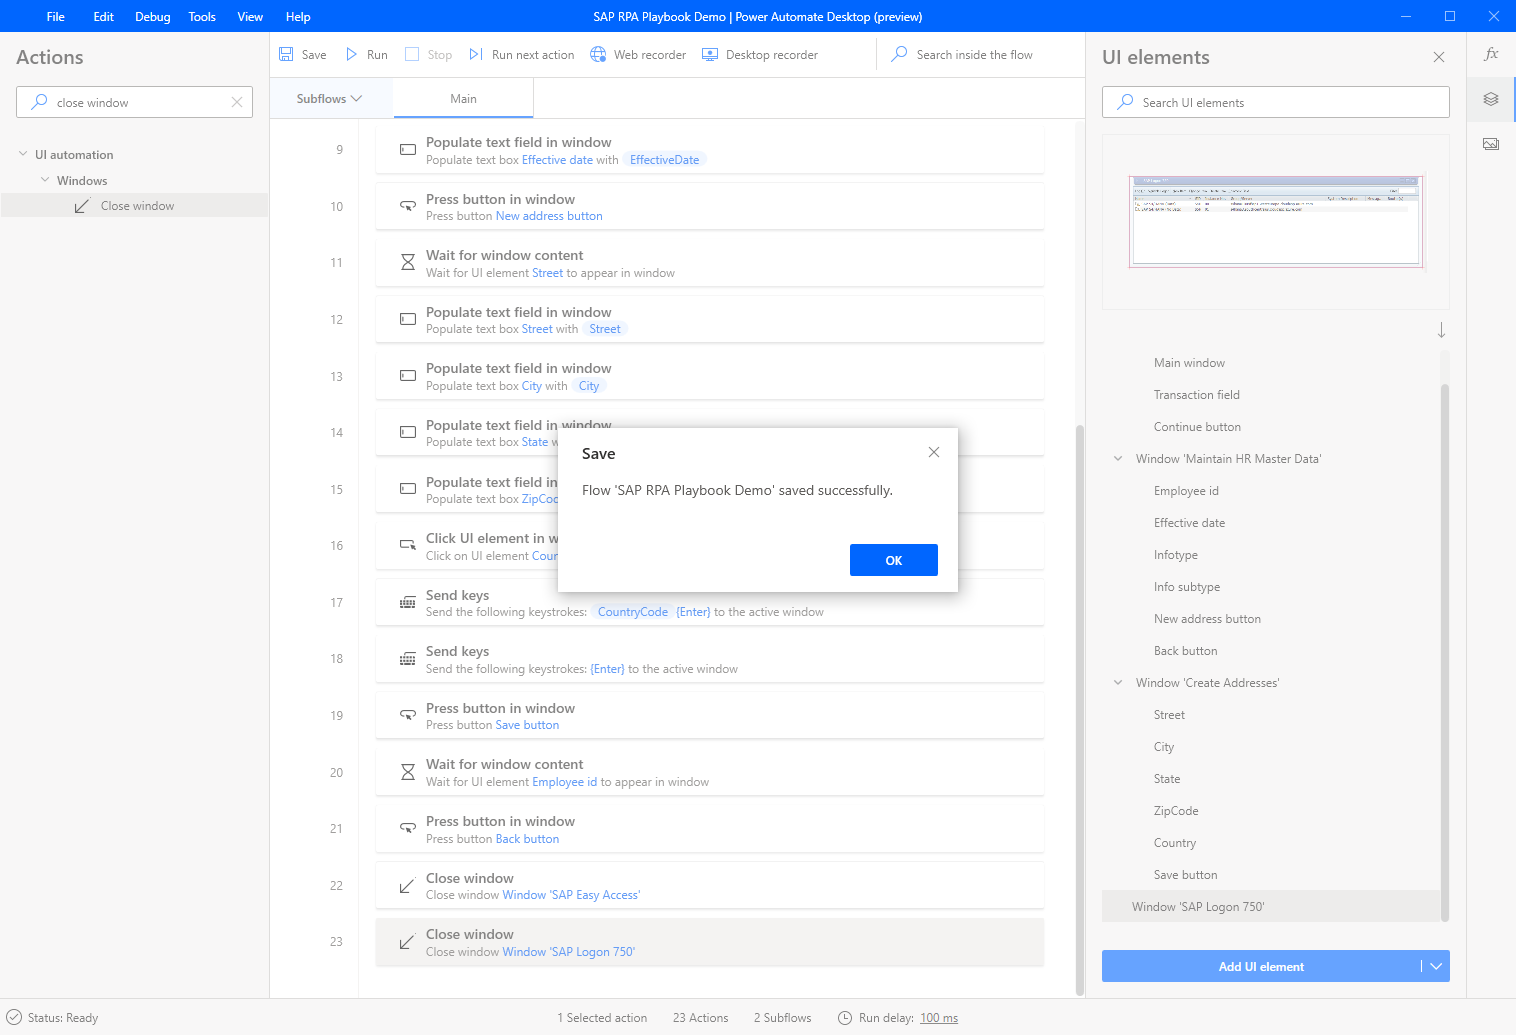
Select Save to save the flow.
Feedback
Coming soon: Throughout 2024 we will be phasing out GitHub Issues as the feedback mechanism for content and replacing it with a new feedback system. For more information see: https://aka.ms/ContentUserFeedback.
Submit and view feedback for