Tutorial: Create a container image for deployment to Azure Container Instances
Azure Container Instances enables deployment of Docker containers onto Azure infrastructure without provisioning any virtual machines or adopting a higher-level service. In this tutorial, you package a small Node.js web application into a container image that can be run using Azure Container Instances.
In this article, part one of the series, you:
- Clone application source code from GitHub
- Create a container image from application source
- Test the image in a local Docker environment
In tutorial parts two and three, you upload your image to Azure Container Registry, and then deploy it to Azure Container Instances.
Before you begin
You must satisfy the following requirements to complete this tutorial:
Azure CLI: You must have Azure CLI version 2.0.29 or later installed on your local computer. Run az --version to find the version. If you need to install or upgrade, see Install the Azure CLI.
Docker: This tutorial assumes a basic understanding of core Docker concepts like containers, container images, and basic docker commands. For a primer on Docker and container basics, see the Docker overview.
Docker: To complete this tutorial, you need Docker installed locally. Docker provides packages that configure the Docker environment on macOS, Windows, and Linux.
Important
Because the Azure Cloud shell does not include the Docker daemon, you must install both the Azure CLI and Docker Engine on your local computer to complete this tutorial. You cannot use the Azure Cloud Shell for this tutorial.
Get application code
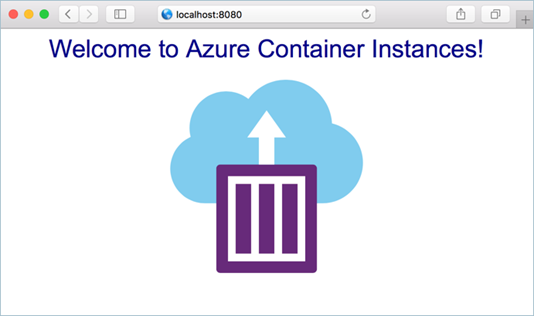
The sample application in this tutorial is a simple web app built in Node.js. The application serves a static HTML page, and looks similar to the following screenshot:

Use Git to clone the sample application's repository:
git clone https://github.com/Azure-Samples/aci-helloworld.git
You can also download the ZIP archive from GitHub directly.
Build the container image
The Dockerfile in the sample application shows how the container is built. It starts from an official Node.js image based on Alpine Linux, a small distribution that is well suited for use with containers. It then copies the application files into the container, installs dependencies using the Node Package Manager, and finally, starts the application.
FROM node:8.9.3-alpine
RUN mkdir -p /usr/src/app
COPY ./app/* /usr/src/app/
WORKDIR /usr/src/app
RUN npm install
CMD node /usr/src/app/index.js
Use the docker build command to create the container image and tag it as aci-tutorial-app:
docker build ./aci-helloworld -t aci-tutorial-app
Output from the docker build command is similar to the following (truncated for readability):
docker build ./aci-helloworld -t aci-tutorial-app
Sending build context to Docker daemon  119.3kB
Step 1/6 : FROM node:8.9.3-alpine
8.9.3-alpine: Pulling from library/node
88286f41530e: Pull complete
84f3a4bf8410: Pull complete
d0d9b2214720: Pull complete
Digest: sha256:c73277ccc763752b42bb2400d1aaecb4e3d32e3a9dbedd0e49885c71bea07354
Status: Downloaded newer image for node:8.9.3-alpine
 ---> 90f5ee24bee2
...
Step 6/6 : CMD node /usr/src/app/index.js
 ---> Running in f4a1ea099eec
 ---> 6edad76d09e9
Removing intermediate container f4a1ea099eec
Successfully built 6edad76d09e9
Successfully tagged aci-tutorial-app:latest
Use the docker images command to see the built image:
docker images
Your newly built image should appear in the list:
docker images
REPOSITORY          TAG       IMAGE ID        CREATED           SIZE
aci-tutorial-app    latest    5c745774dfa9    39 seconds ago    68.1 MB
Run the container locally
Before you deploy the container to Azure Container Instances, use docker run to run it locally and confirm that it works. The -d switch lets the container run in the background, while -p allows you to map an arbitrary port on your computer to port 80 in the container.
docker run -d -p 8080:80 aci-tutorial-app
Output from the docker run command displays the running container's ID if the command was successful:
docker run -d -p 8080:80 aci-tutorial-app
```output
a2e3e4435db58ab0c664ce521854c2e1a1bda88c9cf2fcff46aedf48df86cccf
Now, navigate to http://localhost:8080 in your browser to confirm that the container is running. You should see a web page similar to the following:

Next steps
In this tutorial, you created a container image that can be deployed in Azure Container Instances, and verified that it runs locally. So far, you've done the following:
- Cloned the application source from GitHub
- Created a container image from the application source
- Tested the container locally
Advance to the next tutorial in the series to learn about storing your container image in Azure Container Registry:
Feedback
Coming soon: Throughout 2024 we will be phasing out GitHub Issues as the feedback mechanism for content and replacing it with a new feedback system. For more information see: https://aka.ms/ContentUserFeedback.
Submit and view feedback for