Run a Databricks notebook with the Databricks Notebook Activity in Azure Data Factory
APPLIES TO:  Azure Data Factory
Azure Synapse Analytics
Azure Data Factory
Azure Synapse Analytics
Tip
Try out Data Factory in Microsoft Fabric, an all-in-one analytics solution for enterprises. Microsoft Fabric covers everything from data movement to data science, real-time analytics, business intelligence, and reporting. Learn how to start a new trial for free!
In this tutorial, you use the Azure portal to create an Azure Data Factory pipeline that executes a Databricks notebook against the Databricks jobs cluster. It also passes Azure Data Factory parameters to the Databricks notebook during execution.
You perform the following steps in this tutorial:
Create a data factory.
Create a pipeline that uses Databricks Notebook Activity.
Trigger a pipeline run.
Monitor the pipeline run.
If you don't have an Azure subscription, create a free account before you begin.
For an eleven-minute introduction and demonstration of this feature, watch the following video:
Prerequisites
- Azure Databricks workspace. Create a Databricks workspace or use an existing one. You create a Python notebook in your Azure Databricks workspace. Then you execute the notebook and pass parameters to it using Azure Data Factory.
Create a data factory
Launch Microsoft Edge or Google Chrome web browser. Currently, Data Factory UI is supported only in Microsoft Edge and Google Chrome web browsers.
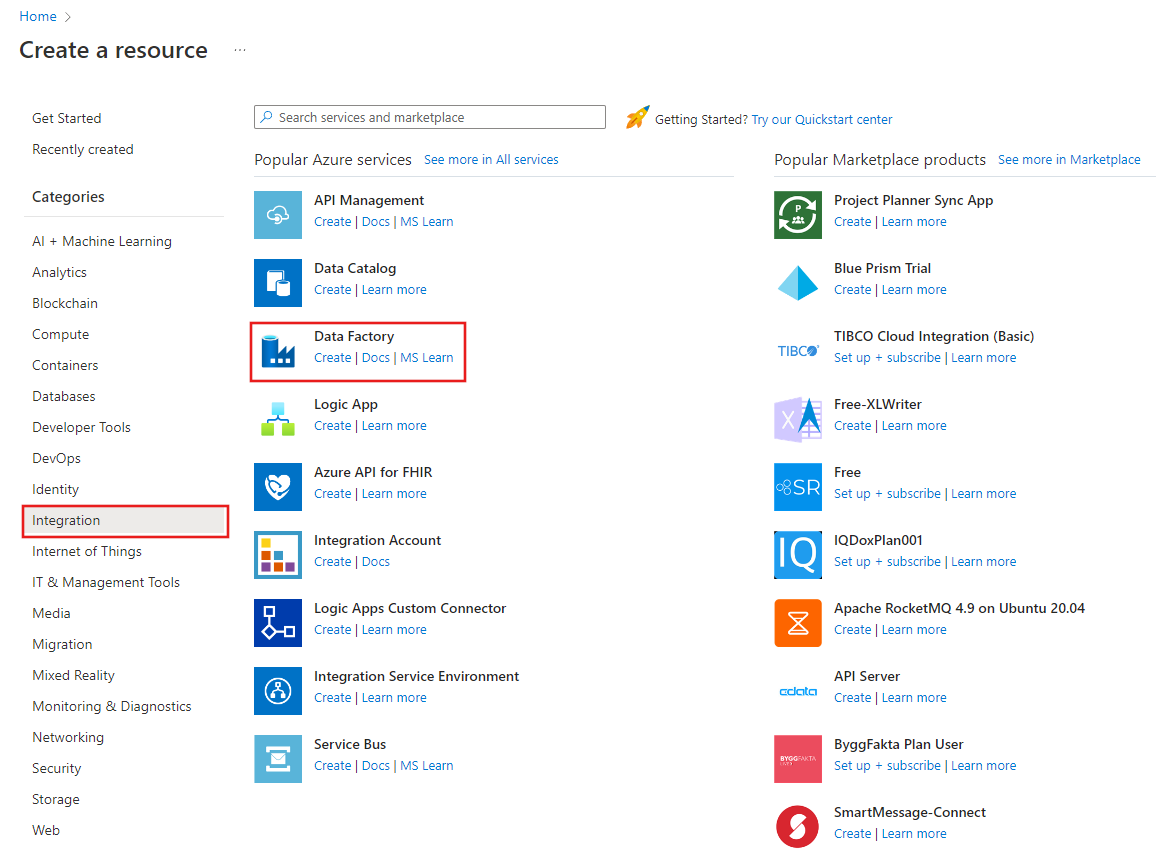
Select Create a resource on the Azure portal menu, select Integration, and then select Data Factory.
On the Create Data Factory page, under Basics tab, select your Azure Subscription in which you want to create the data factory.
For Resource Group, take one of the following steps:
Select an existing resource group from the drop-down list.
Select Create new, and enter the name of a new resource group.
To learn about resource groups, see Using resource groups to manage your Azure resources.
For Region, select the location for the data factory.
The list shows only locations that Data Factory supports, and where your Azure Data Factory meta data will be stored. The associated data stores (like Azure Storage and Azure SQL Database) and computes (like Azure HDInsight) that Data Factory uses can run in other regions.
For Name, enter ADFTutorialDataFactory.
The name of the Azure data factory must be globally unique. If you see the following error, change the name of the data factory (For example, use <yourname>ADFTutorialDataFactory). For naming rules for Data Factory artifacts, see the Data Factory - naming rules article.
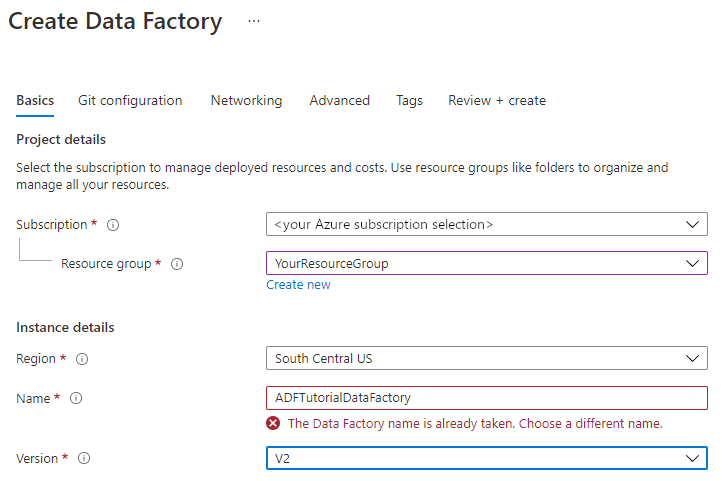
For Version, select V2.
Select Next: Git configuration, and then select Configure Git later check box.
Select Review + create, and select Create after the validation is passed.
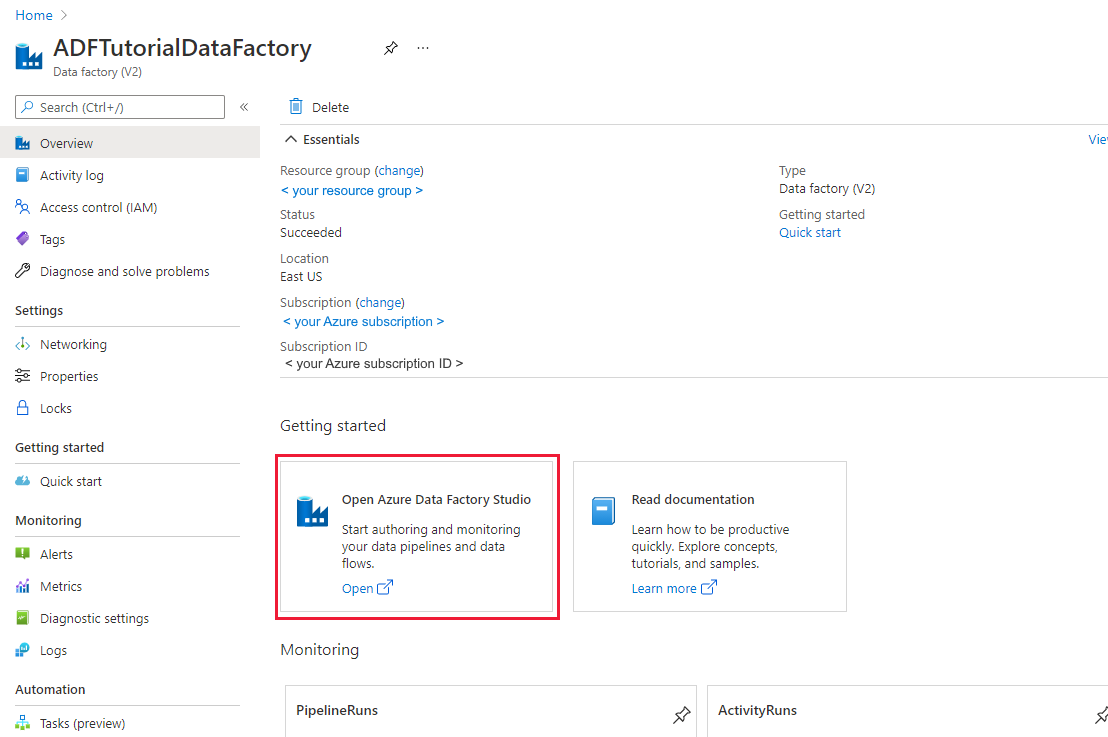
After the creation is complete, select Go to resource to navigate to the Data Factory page. Select the Open Azure Data Factory Studio tile to start the Azure Data Factory user interface (UI) application on a separate browser tab.
Create linked services
In this section, you author a Databricks linked service. This linked service contains the connection information to the Databricks cluster:
Create an Azure Databricks linked service
On the home page, switch to the Manage tab in the left panel.

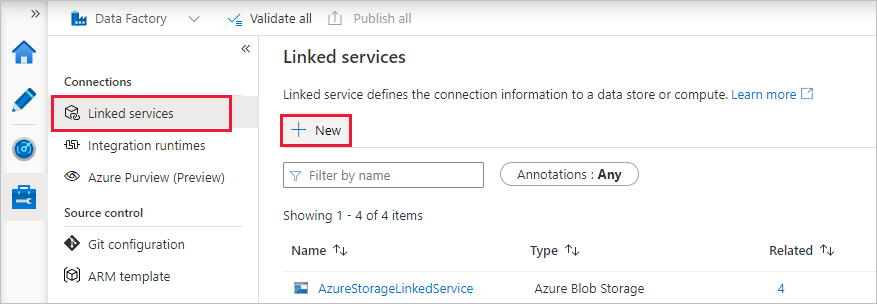
Select Linked services under Connections, and then select + New.
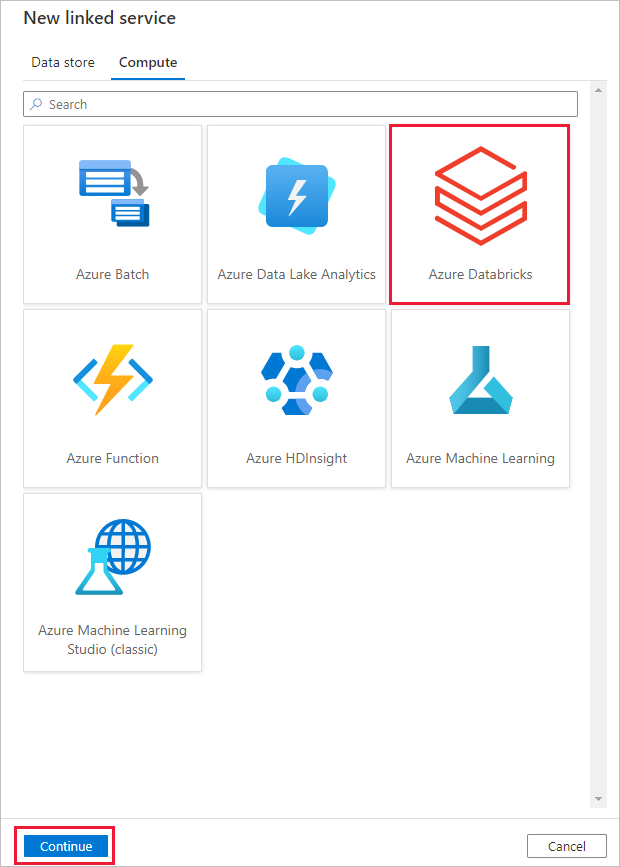
In the New linked service window, select Compute > Azure Databricks, and then select Continue.
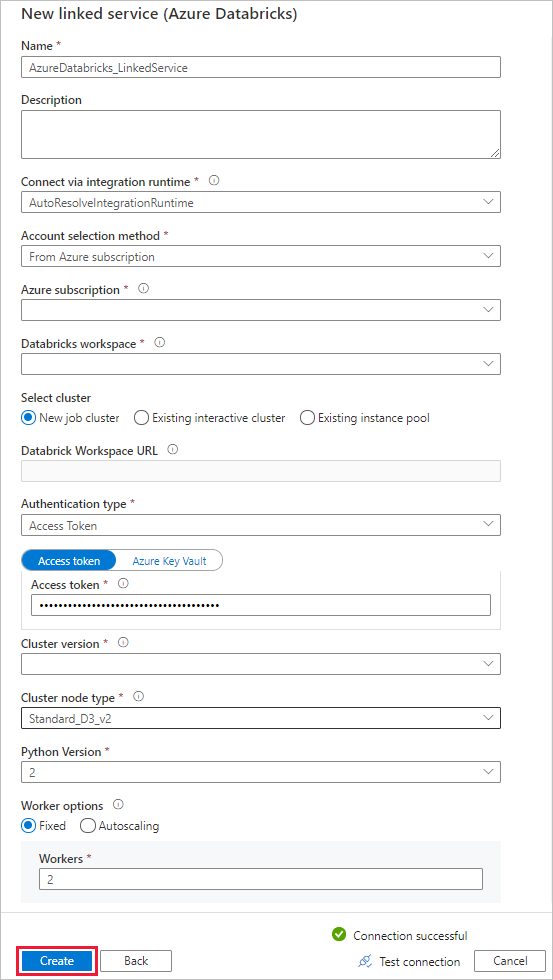
In the New linked service window, complete the following steps:
For Name, enter AzureDatabricks_LinkedService.
Select the appropriate Databricks workspace that you will run your notebook in.
For Select cluster, select New job cluster.
For Databrick Workspace URL, the information should be auto-populated.
For Authentication type, if you select Access Token, generate it from Azure Databricks workplace. You can find the steps here. For Managed service identity and User Assigned Managed Identity, grant Contributor role to both identities in Azure Databricks resource's Access control menu.
For Cluster version, select the version you want to use.
For Cluster node type, select Standard_D3_v2 under General Purpose (HDD) category for this tutorial.
For Workers, enter 2.
Select Create.
Create a pipeline
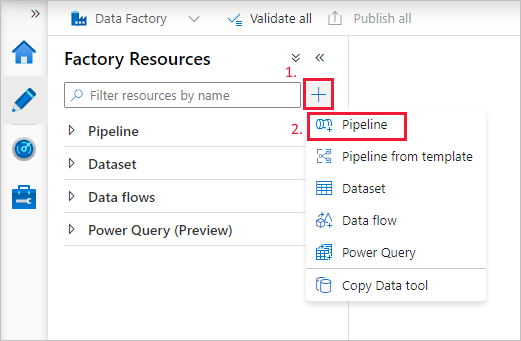
Select the + (plus) button, and then select Pipeline on the menu.
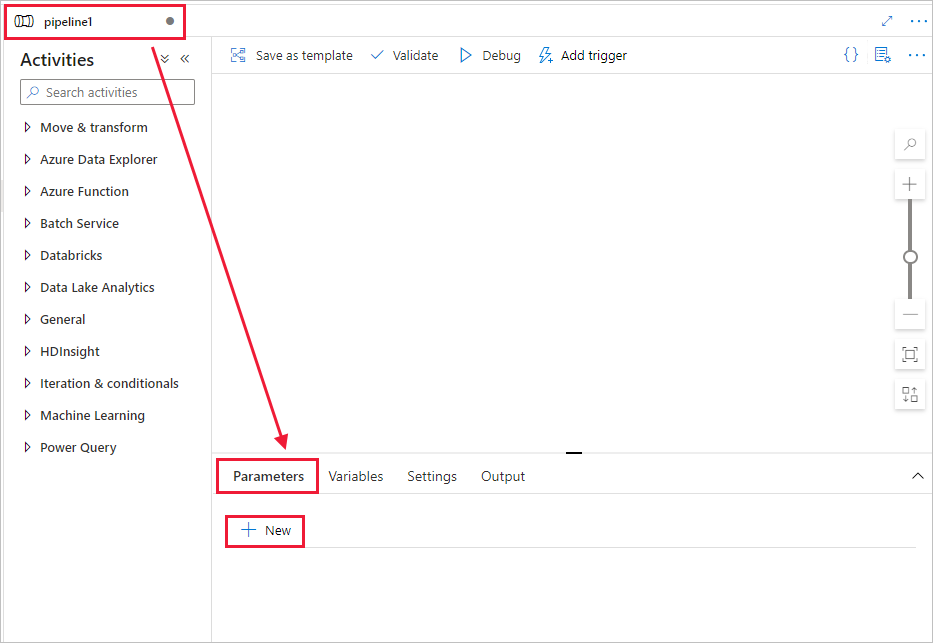
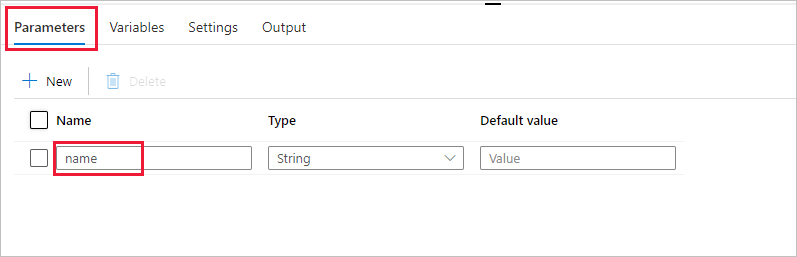
Create a parameter to be used in the Pipeline. Later you pass this parameter to the Databricks Notebook Activity. In the empty pipeline, select the Parameters tab, then select + New and name it as 'name'.
In the Activities toolbox, expand Databricks. Drag the Notebook activity from the Activities toolbox to the pipeline designer surface.
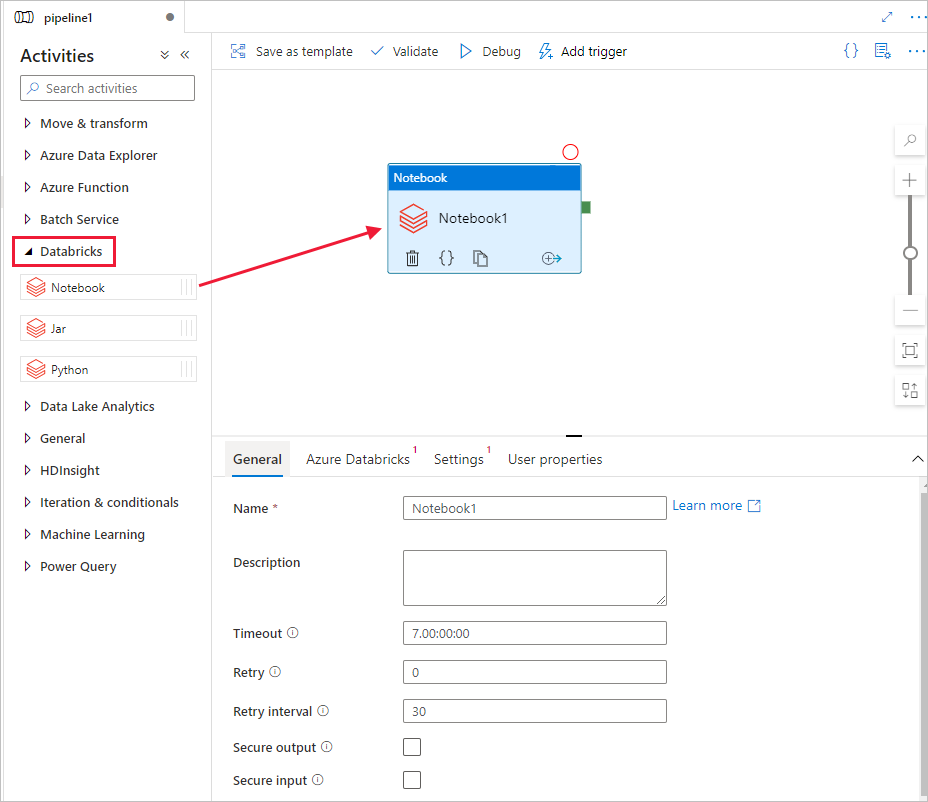
In the properties for the Databricks Notebook activity window at the bottom, complete the following steps:
Switch to the Azure Databricks tab.
Select AzureDatabricks_LinkedService (which you created in the previous procedure).
Switch to the Settings tab.
Browse to select a Databricks Notebook path. Let’s create a notebook and specify the path here. You get the Notebook Path by following the next few steps.
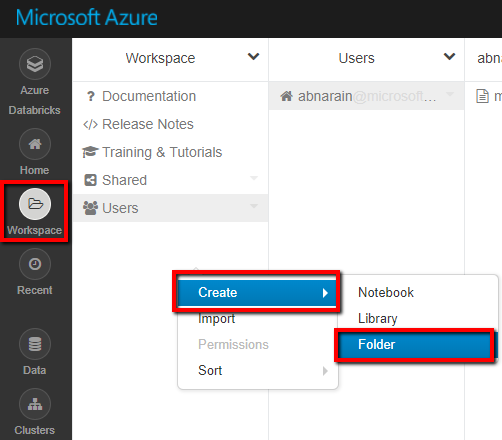
Launch your Azure Databricks Workspace.
Create a New Folder in Workplace and call it as adftutorial.
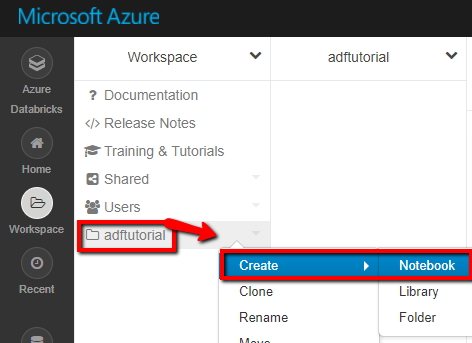
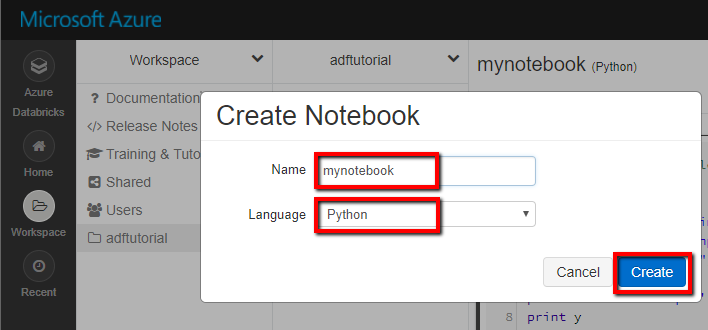
Screenshot showing how to create a new notebook. (Python), let’s call it mynotebook under adftutorial Folder, click Create.
In the newly created notebook "mynotebook'" add the following code:
# Creating widgets for leveraging parameters, and printing the parameters

dbutils.widgets.text("input", "","")
y = dbutils.widgets.get("input")
print ("Param -\'input':")
print (y)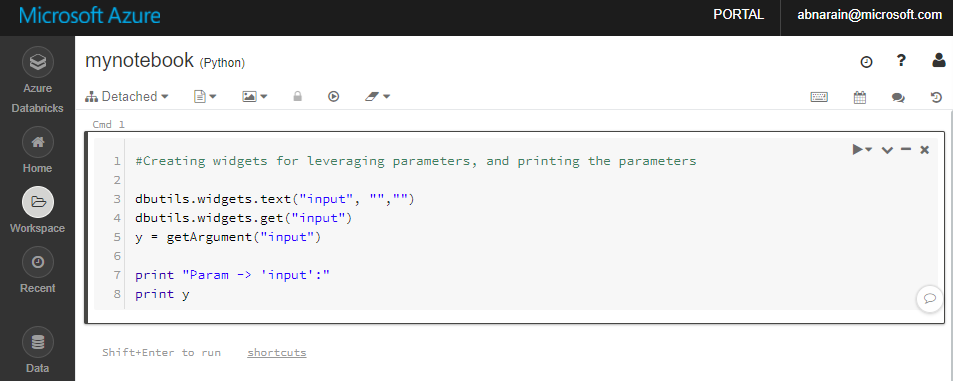
The Notebook Path in this case is /adftutorial/mynotebook.
Switch back to the Data Factory UI authoring tool. Navigate to Settings Tab under the Notebook1 activity.
a. Add a parameter to the Notebook activity. You use the same parameter that you added earlier to the Pipeline.
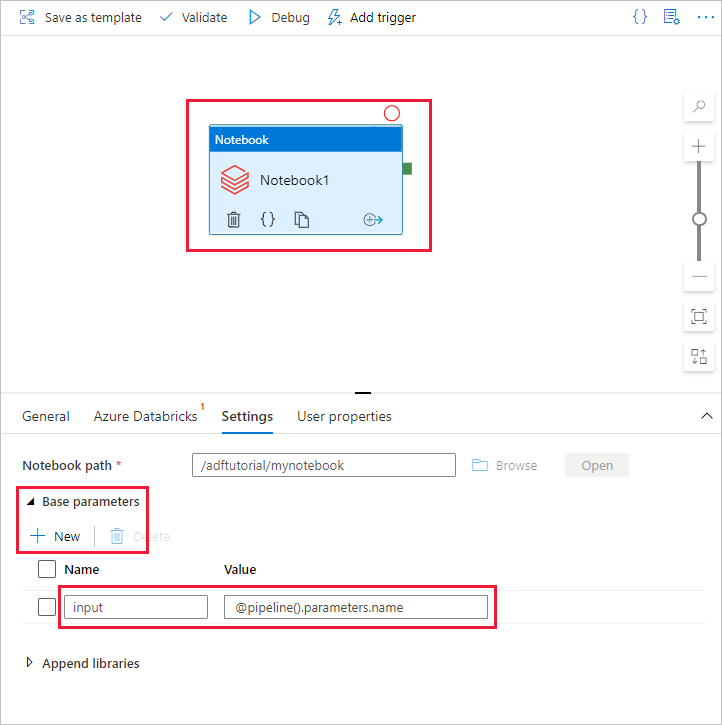
b. Name the parameter as input and provide the value as expression @pipeline().parameters.name.
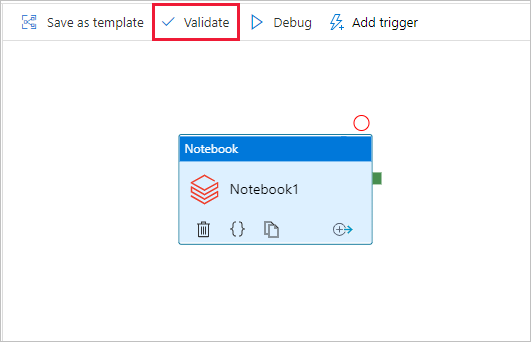
To validate the pipeline, select the Validate button on the toolbar. To close the validation window, select the Close button.
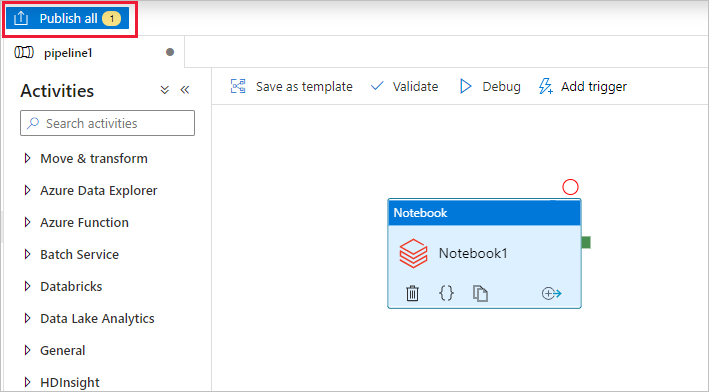
Select Publish all. The Data Factory UI publishes entities (linked services and pipeline) to the Azure Data Factory service.
Trigger a pipeline run
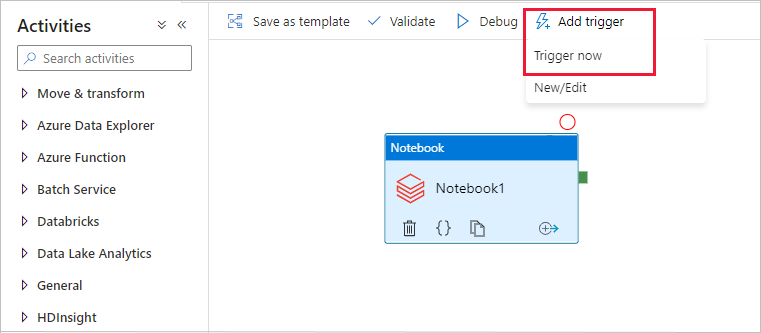
Select Add trigger on the toolbar, and then select Trigger now.
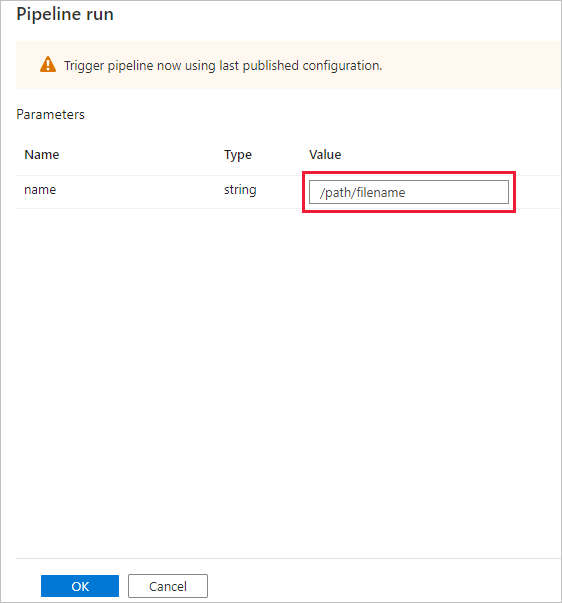
The Pipeline run dialog box asks for the name parameter. Use /path/filename as the parameter here. Select OK.
Monitor the pipeline run
Switch to the Monitor tab. Confirm that you see a pipeline run. It takes approximately 5-8 minutes to create a Databricks job cluster, where the notebook is executed.
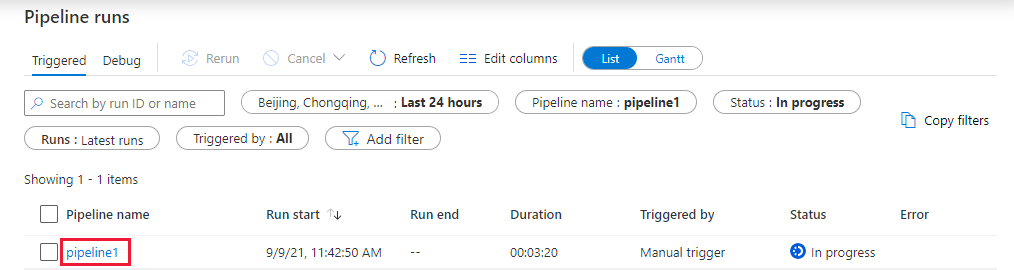
Select Refresh periodically to check the status of the pipeline run.
To see activity runs associated with the pipeline run, select pipeline1 link in the Pipeline name column.
In the Activity runs page, select Output in the Activity name column to view the output of each activity, and you can find the link to Databricks logs in the Output pane for more detailed Spark logs.
You can switch back to the pipeline runs view by selecting the All pipeline runs link in the breadcrumb menu at the top.
Verify the output
You can log on to the Azure Databricks workspace, go to Clusters and you can see the Job status as pending execution, running, or terminated.
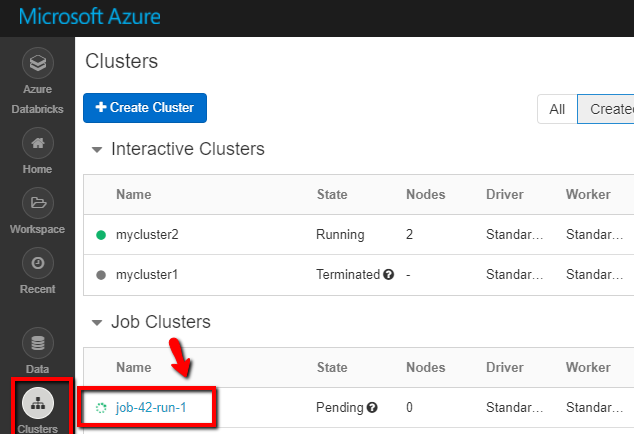
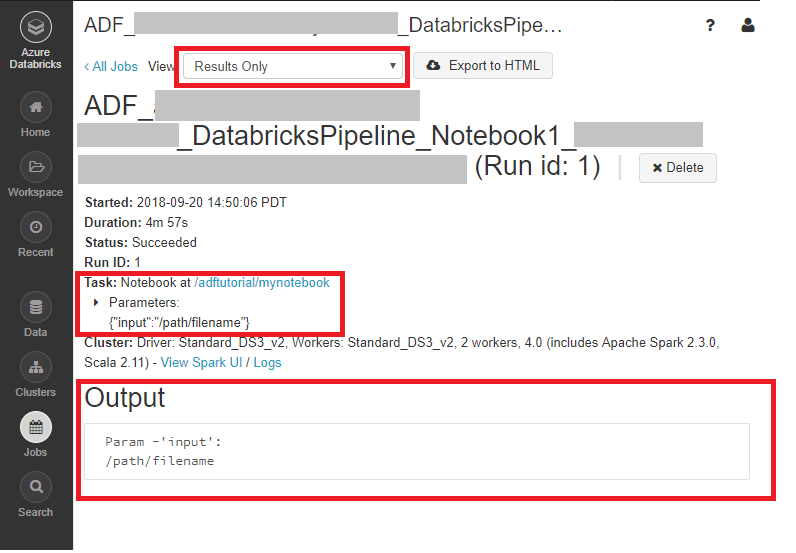
You can click on the Job name and navigate to see further details. On successful run, you can validate the parameters passed and the output of the Python notebook.
Related content
The pipeline in this sample triggers a Databricks Notebook activity and passes a parameter to it. You learned how to:
Create a data factory.
Create a pipeline that uses a Databricks Notebook activity.
Trigger a pipeline run.
Monitor the pipeline run.
Feedback
Coming soon: Throughout 2024 we will be phasing out GitHub Issues as the feedback mechanism for content and replacing it with a new feedback system. For more information see: https://aka.ms/ContentUserFeedback.
Submit and view feedback for