Tutorial: Receive notifications from your Azure Digital Twins spaces by using Logic Apps
Important
A new version of the Azure Digital Twins service has been released. In light of the new service's expanded capabilities, the original Azure Digital Twins service (described in this documentation set) has been retired.
To view the documentation for the new service, visit the active Azure Digital Twins Documentation.
After you deploy your Azure Digital Twins instance, provision your spaces, and implement custom functions to monitor specific conditions, you can notify your office admin via email when the monitored conditions occur.
In the first tutorial, you configured the spatial graph of an imaginary building. A room in the building contains sensors for motion, carbon dioxide, and temperature. In the second tutorial, you provisioned your graph and a user-defined function to monitor these sensor values and trigger notifications when the room is empty, and the temperature and carbon dioxide are in a comfortable range.
This tutorial shows how you can integrate these notifications with Azure Logic Apps to send emails when such a room is available. An office administrator can use this information to help the employees book the most productive meeting room.
In this tutorial, you learn how to:
- Integrate events with Azure Event Grid.
- Notify events with Logic Apps.
Prerequisites
This tutorial assumes that you have configured and provisioned your Azure Digital Twins setup. Before proceeding, make sure that you have:
- An Azure account.
- An instance of Digital Twins running.
- The Digital Twins C# samples downloaded and extracted on your work machine.
- .NET Core SDK version 2.1.403 or later on your development machine to run the sample. Run
dotnet --versionto verify that the right version is installed. - An Office 365 account to send notification e-mails.
Tip
Use a unique Digital Twins instance name if you're provisioning a new instance.
Integrate events with Event Grid
In this section, you set up Event Grid to collect events from your Azure Digital Twins instance, and redirect them to an event handler such as Logic Apps.
Create an event grid topic
An event grid topic provides an interface to route the events generated by the user-defined function.
Sign in to the Azure portal.
In the left pane, select Create a resource.
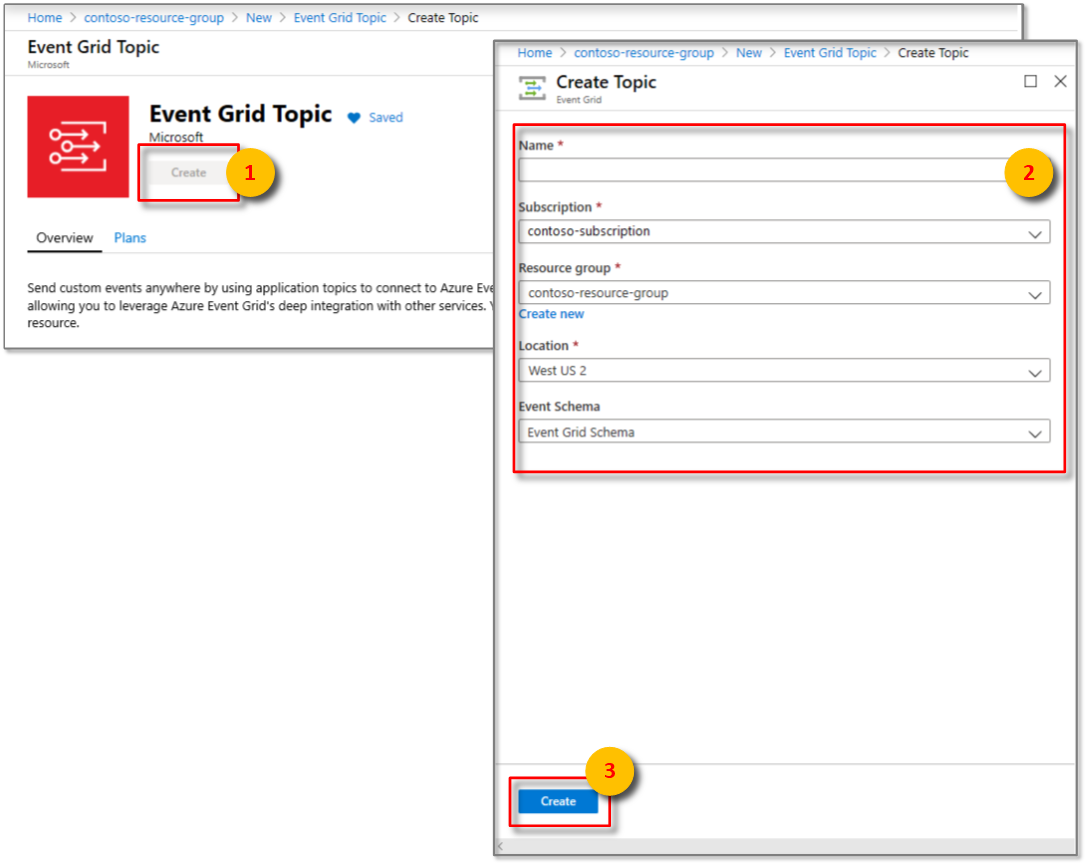
Search for and select Event Grid Topic. Select Create.
Enter a Name for your event grid topic, and choose the Subscription. Select the Resource group that you used or created for your Digital Twins instance, and the Location. Select Create.
Browse to the event grid topic from your resource group, select Overview, and copy the value for Topic Endpoint to a temporary file. You'll need this URL in the next section.
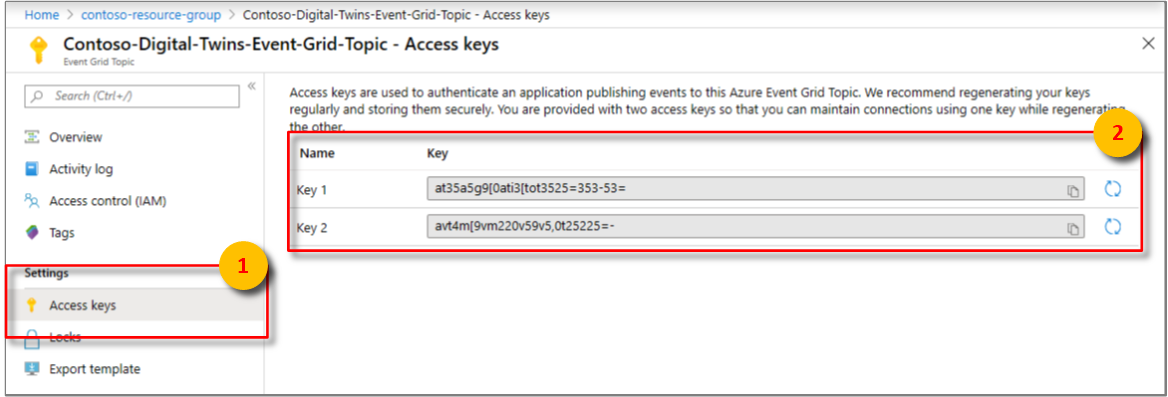
Select Access keys, and copy Key 1 and Key 2 to a temporary file. You'll need these values to create the endpoint in the next section.


Create an endpoint for the event grid topic
In the command window, make sure you're in the occupancy-quickstart\src folder of the Digital Twins sample.
Open the file actions\createEndpoints.yaml in your Visual Studio Code editor. Make sure it has the following contents:
- type: EventGrid
  eventTypes:
  - SensorChange
  - SpaceChange
  - TopologyOperation
  - UdfCustom
  connectionString: <Primary connection string for your Event Grid>
  secondaryConnectionString: <Secondary connection string for your Event Grid>
  path: <Event Grid Topic Name without https:// and /api/events, e.g. eventgridname.region.eventgrid.azure.net>
Replace the placeholder
<Primary connection string for your Event Grid>with the value of Key 1.Replace the placeholder
<Secondary connection string for your Event Grid>with the value of Key 2.Replace the placeholder for path with the path of the event grid topic. Get this path by removing https:// and the trailing resource paths from the Topic Endpoint URL. It should look similar to this format: yourEventGridName.yourLocation.eventgrid.azure.net.
Important
Enter all values without any quotes. Make sure there's at least one space character after the colons in the YAML file. You can also validate your YAML file contents by using any online YAML validator such as this tool.
Save and close the file. In the command window, run the following command, and sign in when prompted.
dotnet run CreateEndpointsThis command creates the endpoint for Event Grid.


Notify events with Logic Apps
You can use the Azure Logic Apps service to create automated tasks for events received from other services. In this section, you set up Logic Apps to create email notifications for events routed from your spatial sensors, with the help of an event grid topic.
In the left pane of the Azure portal, select Create a resource.
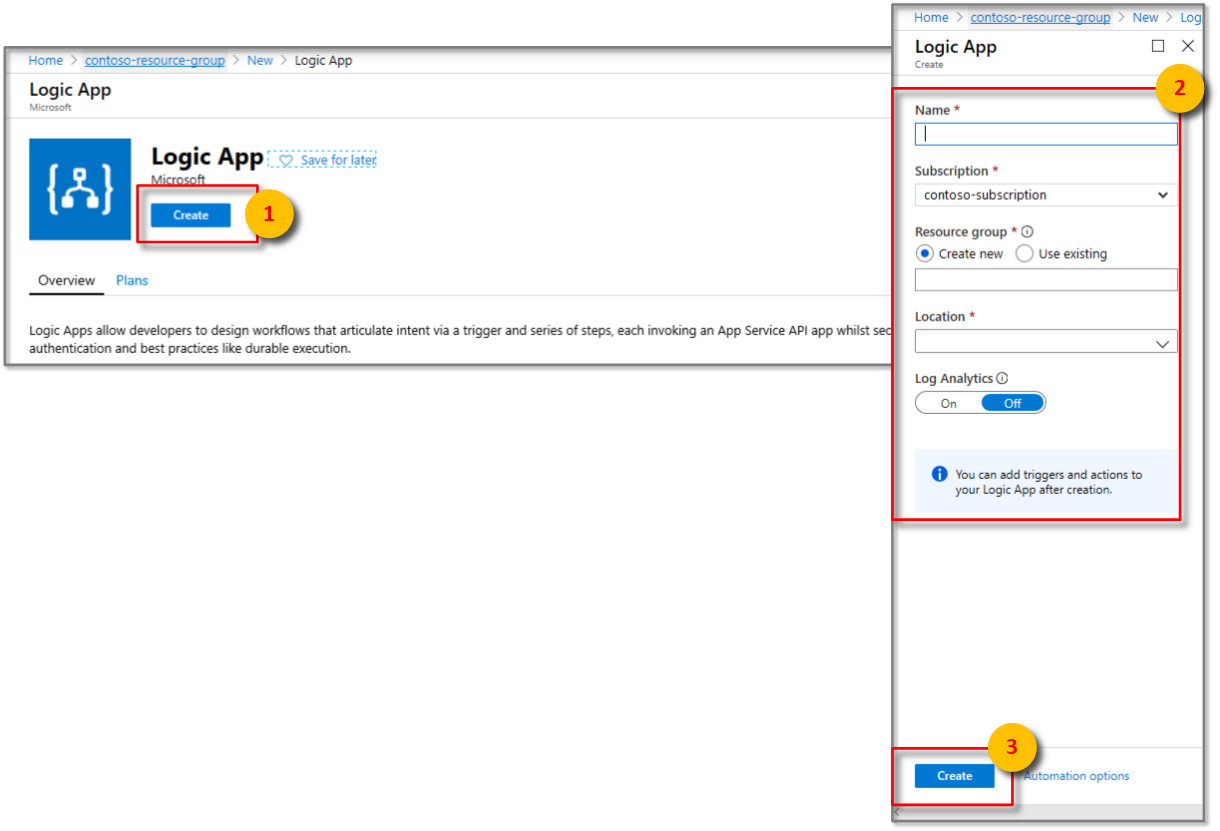
Search and select a new Logic App resource. Select Create.
Enter a Name for your Logic App resource, and then select your Subscription, Resource group, and Location. Select Create.
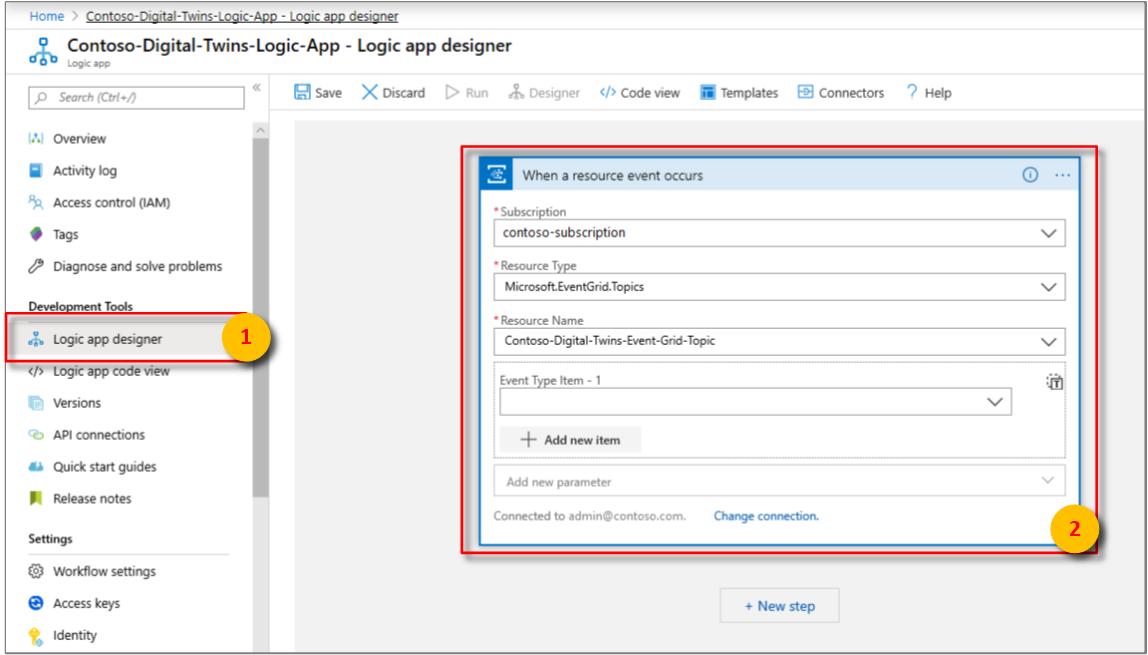
Open your Logic Apps resource when it's deployed, and then open the Logic app designer pane.
Select the When an Event Grid resource event occurs trigger. Expand the Azure Event Grid option, and sign in to your tenant with your Azure account when prompted. Select Allow access for your Event Grid resource if prompted. Select Continue.
In the When a resource event occurs window:
a. Select the Subscription that you used to create the event grid topic.
b. Select Microsoft.EventGrid.Topics for Resource Type.
c. Select your Event Grid resource from the drop-down box for Resource Name.
Select the New step button.
In the Choose an action window:
a. Search the phrase parse json, and select the Parse JSON action.
b. In the Content field, select Body from the Dynamic content list.
c. Select Use sample payload to generate schema. Paste the following JSON payload, and then select Done.
{
"id": "32162f00-a8f1-4d37-aee2-9312aabba0fd",
"subject": "UdfCustom",
"data": {
  "TopologyObjectId": "20efd3a8-34cb-4d96-a502-e02bffdabb14",
  "ResourceType": "Space",
  "Payload": "\"Air quality is poor.\"",
  "CorrelationId": "32162f00-a8f1-4d37-aee2-9312aabba0fd"
},
"eventType": "UdfCustom",
"eventTime": "0001-01-01T00:00:00Z",
"dataVersion": "1.0",
"metadataVersion": "1",
"topic": "/subscriptions/a382ee71-b48e-4382-b6be-eec7540cf271/resourceGroups/HOL/providers/Microsoft.EventGrid/topics/DigitalTwinEventGrid"
}
This payload has fictitious values. Logic Apps uses this sample payload to generate a schema.

Select the New step button.
In the Choose an action window:
a. Select Control > Condition or search Condition from the Actions list.
b. In the first Choose a value text box, select eventType from the Dynamic content list for the Parse JSON window.
c. In the second Choose a value text box, enter
UdfCustom.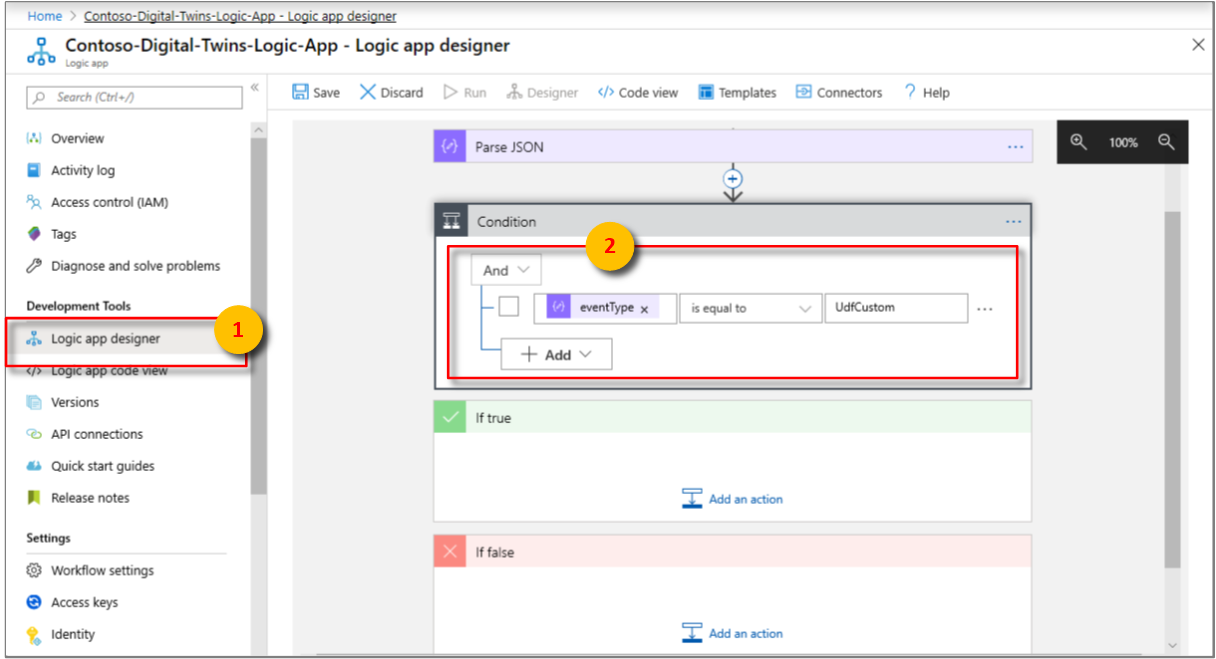
In the If true window:
a. Select Add an action, and select Office 365 Outlook.
b. From the Actions list, select Send an email (V2). Select Sign in and use your email account credentials. Select Allow access if prompted.
c. In the To box, enter your email ID to receive notifications. In Subject, enter the text Digital Twins notification for poor air quality in space. Then select TopologyObjectId from the Dynamic content list for Parse JSON.
d. Under Body in the same window, enter text similar to the following: Poor air quality detected in a room, and temperature needs to be adjusted. Feel free to elaborate by using elements from the Dynamic content list.

Select the Save button at the top of the Logic app designer pane.
Make sure to simulate sensor data by browsing to the device-connectivity folder of the Digital Twins sample in a command window, and running
dotnet run.


In a few minutes, you should start getting email notifications from this Logic Apps resource.

To stop receiving these emails, go to your Logic Apps resource in the portal, and select the Overview pane. Select Disable.
Clean up resources
If you want to stop exploring Azure Digital Twins at this point, feel free to delete resources created in this tutorial:
From the left menu in the Azure portal, select All resources, select your Digital Twins resource group, and select Delete.
Tip
If you experienced trouble deleting your Digital Twins instance, a service update has been rolled out with the fix. Please retry deleting your instance.
If necessary, delete the sample applications on your work machine.
Next steps
To learn how to visualize your sensor data, analyze trends, and spot anomalies, go to the next tutorial:
You can also learn more about the spatial intelligence graphs and object models in Azure Digital Twins: