CI/CD for MicroProfile apps using Azure Pipelines
This tutorial shows you how to easily set up an Azure Pipelines continuous integration and continuous deployment (CI/CD) release cycle to deploy your MicroProfile Java EE application to an Azure Web App for Containers. The MicroProfile app in this tutorial uses a Payara Micro base image to create a WAR file.
FROM payara/micro:5.182
COPY target/*.war $DEPLOY_DIR/ROOT.war
EXPOSE 8080
You start the Azure Pipelines containerization process by building a Docker image and pushing the container image to an Azure Container Registry (ACR). You complete the process by creating an Azure Pipelines release pipeline and deploying the container image to a web app.
Prerequisites
In the Azure portal, create an Azure Container Registry.
In the Azure portal, create an Azure Web App for Containers. Select Linux for the OS, and for Configure container, select Quickstart as the Image source.
Copy and save the clone URL from the sample GitHub repository at https://github.com/Azure-Samples/microprofile-hello-azure.
Register or log into your Azure DevOps organization, and create a new project.
Import the sample GitHub repository into Azure Repos:
- From your Azure DevOps project page, select Repos in the left navigation.
- Under or import a repository, select Import.
- Under Clone URL, enter the Git clone URL you saved, and select Import.
Create a build pipeline
The continuous integration Build pipeline in Azure Pipelines automatically executes all build tasks each time there's a commit in the Java EE source app. In this example, Azure Pipelines uses Maven to build the Java MicroProfile project.
From your Azure DevOps project page, select Pipelines > Builds in the left navigation.
Select New Pipeline.
Select Use the classic editor to create a pipeline without YAML.
Make sure your project name and imported GitHub repository appear in the fields, and select Continue.
Select Maven from the list of templates, and then select Apply.
In the right pane, make sure Hosted Ubuntu 1604 appears in the Agent pool dropdown.
Note
This setting lets Azure Pipelines know which build server to use. You can also use your private, customized build server.
To configure the pipeline for continuous integration, select the Triggers tab on the left pane, and then select the checkbox next to Enable continuous integration.
At the top of the page, select the dropdown next to Save & queue, and select Save.

Create a Docker build image
Azure Pipelines uses a Dockerfile with a base image from Payara Micro to create a Docker image.
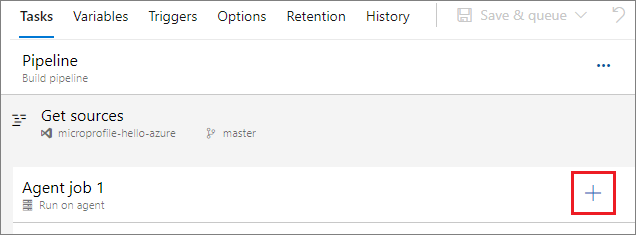
Select the Tasks tab, and then select the plus sign + next to Agent job 1 to add a task.
In the right pane, select Docker from the list of templates, and then select Add.
Select buildAndPush in the left pane, and in the right pane, enter a description in the Display name field.
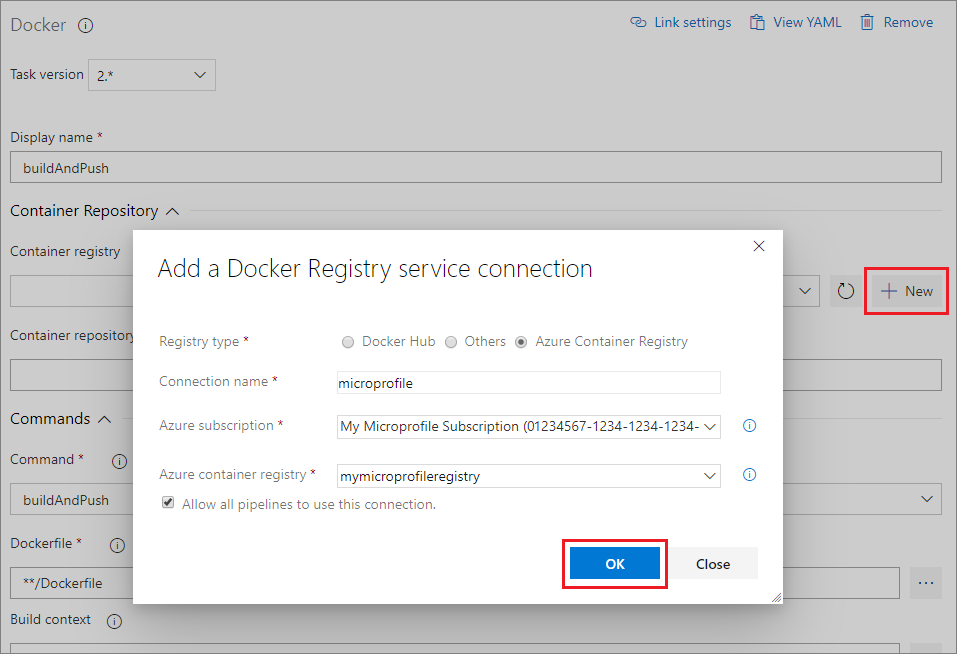
Under Container Repository, select New next to the Container Registry field.
Fill out the Add a Docker Registry service connection dialog as follows:
Field Value Registry type Select Azure Container Registry. Connection Name Enter a name for the connection. Azure subscription Select your Azure subscription from the dropdown, and if necessary, select Authorize. Azure container registry Select your Azure Container Registry name from the dropdown. Select OK.
Note
If you're using Docker Hub or another registry, select Docker Hub or Others instead of Azure Container Registry next to Registry type. Then provide the credentials and connection information for your container registry.
Under Commands, select build from the Command dropdown.
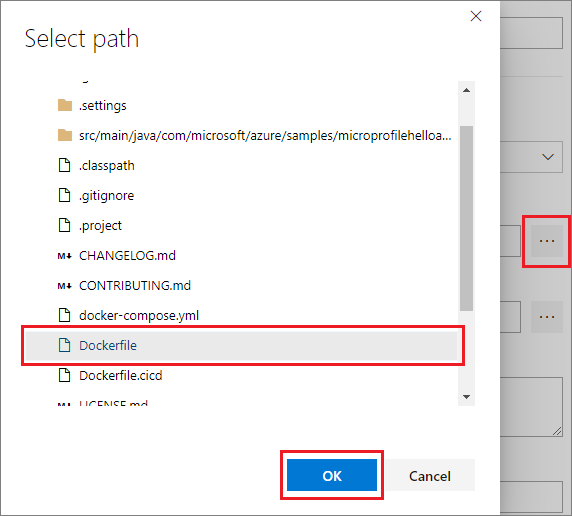
Select the ellipsis ... next to the Dockerfile field, browse to and select the Dockerfile from your GitHub repository, and then select OK.
Under Tags, enter latest on a new line.
At the top of the page, select the dropdown next to Save & queue, and select Save.
Push the Docker image to ACR
Azure Pipelines pushes the Docker image to your Azure Container Registry, and uses it to run the MicroProfile API app as a containerized Java web app.
Since you're using Docker in Azure Pipelines, create another Docker template by repeating the steps under Create a Docker build image. This time, select push in the Command dropdown.
Select the dropdown next to Save & queue, and select Save & queue.
In the Run pipeline popup, make sure Hosted Ubuntu 1604 is selected under Agent pool, and select Save and run.
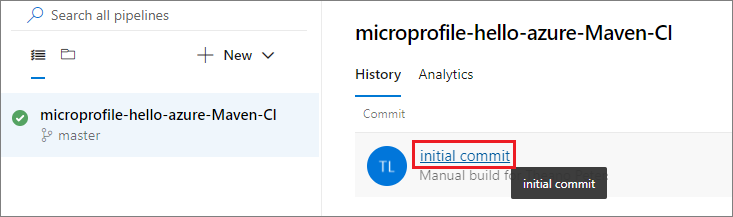
After the build finishes, you can select the hyperlink on the Build page to verify build success and see other details.
Create a release pipeline
An Azure Pipelines continuous Release pipeline automatically triggers deployment to a target environment like Azure as soon as a build succeeds. You can create release pipelines for environments like dev, test, staging, or production.
On your Azure DevOps project page, select Pipelines > Releases in the left navigation.
Select New Pipeline.
Select Deploy a Java app to Azure App Service in the list of templates, and then select Apply.
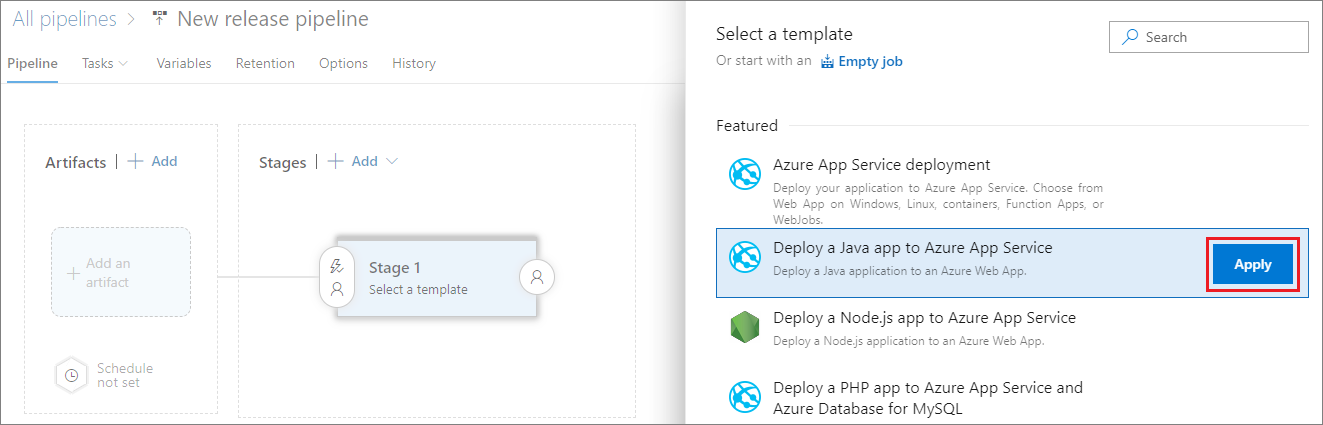
In the popup window, change Stage 1 to a stage name like Dev, Test, Staging, or Production, and then close the window.
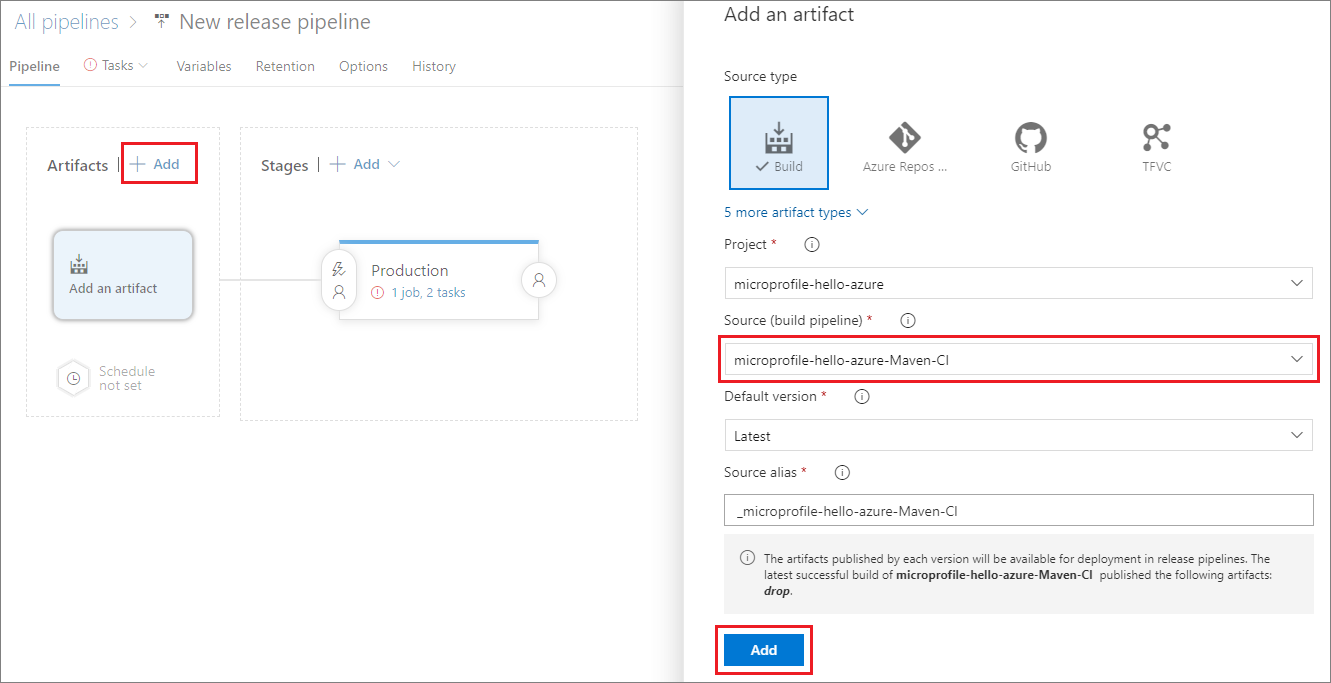
Under Artifacts in the left pane, select Add to link artifacts from the build pipeline to the release pipeline.
In the right pane, select your build pipeline in the dropdown under Source (build pipeline), and then select Add.
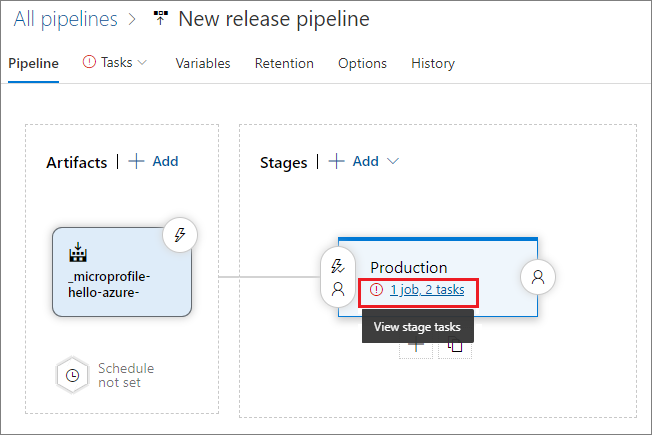
Select the hyperlink in the Production stage to View stage tasks.
In the right pane, fill out the form as follows:
Field Value Azure subscription Select your Azure subscription from the dropdown. App type Select Web App for Containers (Linux) from the dropdown. App service name Select your ACR instance from the dropdown. Registry or Namespaces Enter your ACR name in the field. For example, enter mymicroprofileregistry.azure.io. Repository Enter the repository that contains your Docker image. 
In the left pane, select Deploy War to Azure App Service, and in the right pane, enter latest tag in the Tag field.
In the left pane, select Run on agent, and in the right pane, select Hosted Ubuntu 1604 from the Agent pool dropdown.
Set up environment variables
Add and define environment variables to connect to the container registry during deployment.
Select the Variables tab, and then select Add to add the following variables for your container registry URL, username, and password.
Name Value registry.url Enter your container registry URL. For example: https://mymicroprofileregistry.azure.io registry.username Enter the username for the registry. registry.password Enter the password for the registry. For security, select the lock icon to keep the password value hidden. 
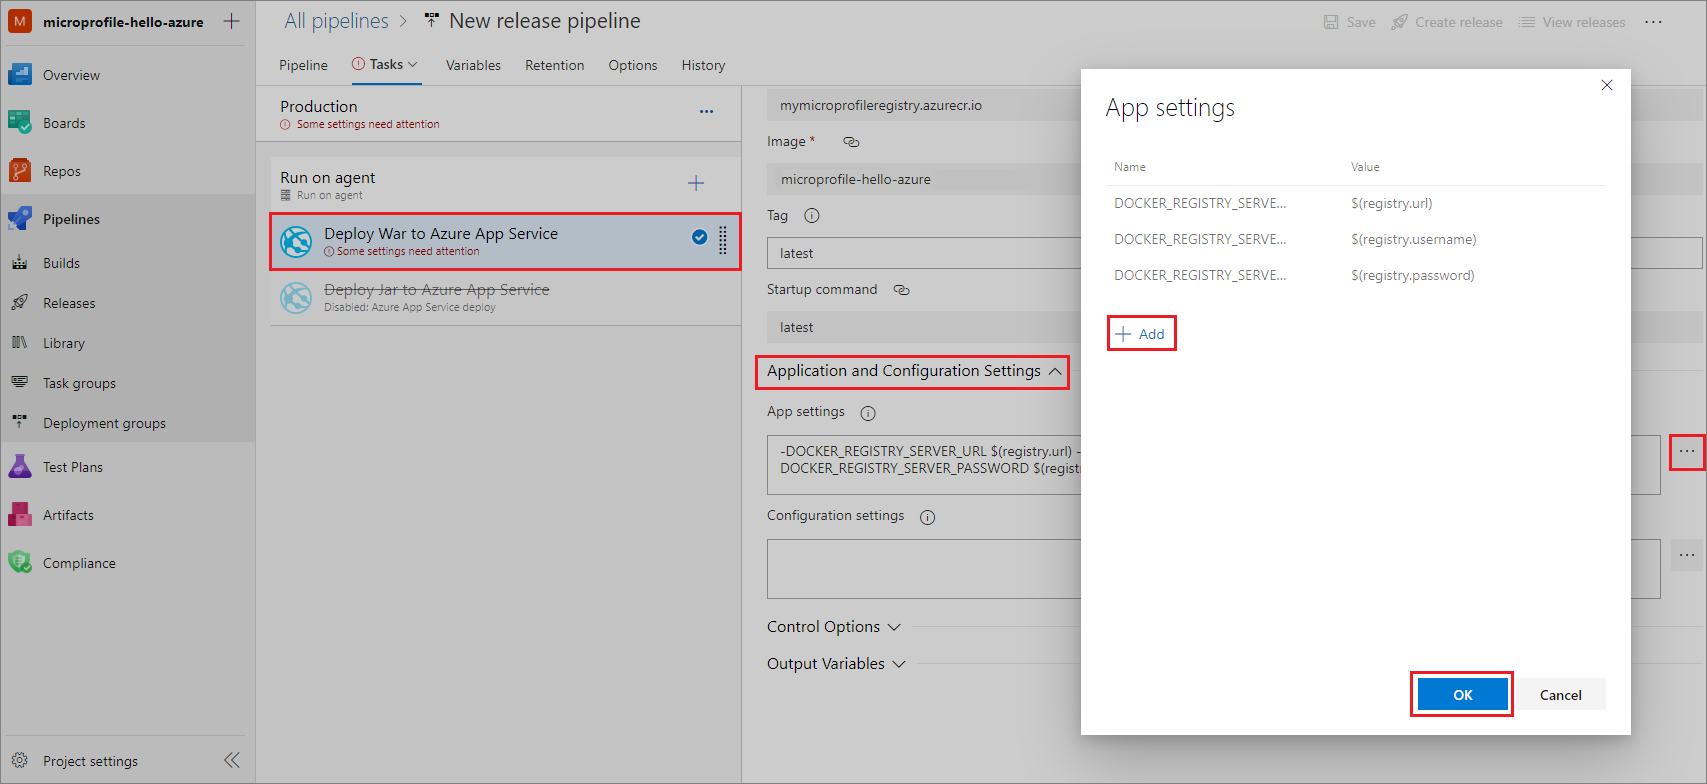
On the Tasks tab, select Deploy War to Azure App Service in the left pane.
In the right pane, expand Application and Configuration Settings, and then select the ellipsis ... next to the App Settings field.
In the App settings popup, select Add to define and assign the app setting variables:
Name Value DOCKER_REGISTRY_SERVER_URL $(registry.url) DOCKER_REGISTRY_SERVER_USERNAME $(registry.username) DOCKER_REGISTRY_SERVER_PASSWORD $(registry.password) Select OK.
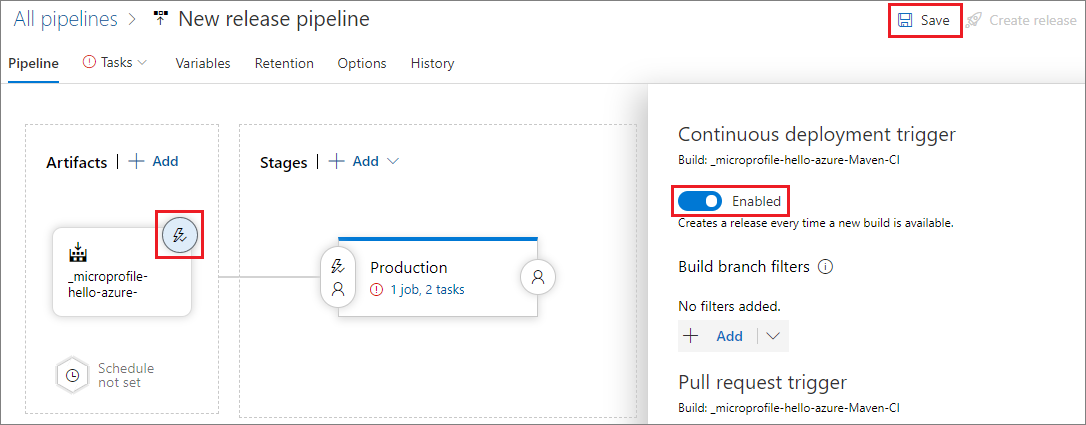
Set up continuous deployment
To enable continuous deployment:
On the Pipeline tab, under Artifacts, select the lightning icon in the build artifact.
In the right pane, set the Continuous deployment trigger to Enabled.
Select Save at upper right, and then select Save again.
Deploy the Java app
Now that you enabled CI/CD, modifying the source code creates and runs builds and releases automatically. You can also create and run releases manually, as follows:
At the upper right on the release pipeline page, select Create release .
On the Create a new release page, select the stage name under Stages for a trigger change from automated to manual.
Select Create.
Select the release name, hover over or select the stage, and then select Deploy.
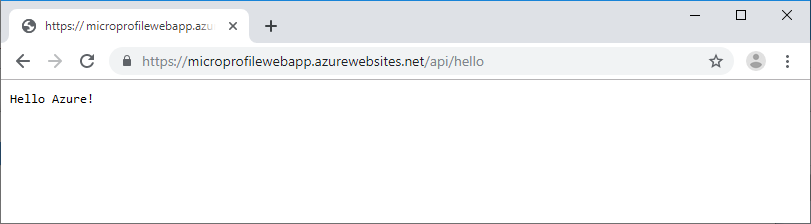
Test the Java web app
After deployment completes successfully, test your web app.
Copy the web app URL from the Azure portal.

Enter the URL in your web browser to run your app. The web page should say Hello Azure!
Feedback
Coming soon: Throughout 2024 we will be phasing out GitHub Issues as the feedback mechanism for content and replacing it with a new feedback system. For more information see: https://aka.ms/ContentUserFeedback.
Submit and view feedback for