Quickstart: Analyze with Data Explorer (Preview)
In this article, you'll learn the basic steps to load and analyze data with Data Explorer for Azure Synapse.
Create a Data Explorer pool
In Synapse Studio, on the left-side pane, select Manage > Data Explorer pools.
Select New, and then enter the following details on the Basics tab:
Setting Suggested value Description Data Explorer pool name contosodataexplorer This is the name that the Data Explorer pool will have. Workload Compute optimized This workload provides a higher CPU to SSD storage ratio. Node size Small (4 cores) Set this to the smallest size to reduce costs for this quickstart Important
Note that there are specific limitations for the names that Data Explorer pools can use. Names must contain lowercase letters and numbers only, must be between 4 and 15 characters, and must start with a letter.
Select Review + create > Create. Your Data Explorer pool will start the provisioning process.
Create a Data Explorer database
In Synapse Studio, on the left-side pane, select Data.
Select + (Add new resource) > Data Explorer database, and paste the following information:
Setting Suggested value Description Pool name contosodataexplorer The name of the Data Explorer pool to use Name TestDatabase The database name must be unique within the cluster. Default retention period 365 The time span (in days) for which it's guaranteed that the data is kept available to query. The time span is measured from the time that data is ingested. Default cache period 31 The time span (in days) for which to keep frequently queried data available in SSD storage or RAM, rather than in longer-term storage. Select Create to create the database. Creation typically takes less than a minute.
Ingest sample data and analyze with a simple query
In Synapse Studio, on the left-side pane, select Develop.
Under KQL scripts, Select + (Add new resource) > KQL script. On the right-side pane, you can name your script.
In the Connect to menu, select contosodataexplorer.
In the Use database menu, select TestDatabase.
Paste in the following command, and select Run to create a StormEvents table.
.create table StormEvents (StartTime: datetime, EndTime: datetime, EpisodeId: int, EventId: int, State: string, EventType: string, InjuriesDirect: int, InjuriesIndirect: int, DeathsDirect: int, DeathsIndirect: int, DamageProperty: int, DamageCrops: int, Source: string, BeginLocation: string, EndLocation: string, BeginLat: real, BeginLon: real, EndLat: real, EndLon: real, EpisodeNarrative: string, EventNarrative: string, StormSummary: dynamic)Tip
Verify that the table was successfully created. On the left-side pane, select Data, select the contosodataexplorer more menu, and then select Refresh. Under contosodataexplorer, expand Tables and make sure that the StormEvents table appears in the list.
Paste in the following command, and select Run to ingest data into StormEvents table.
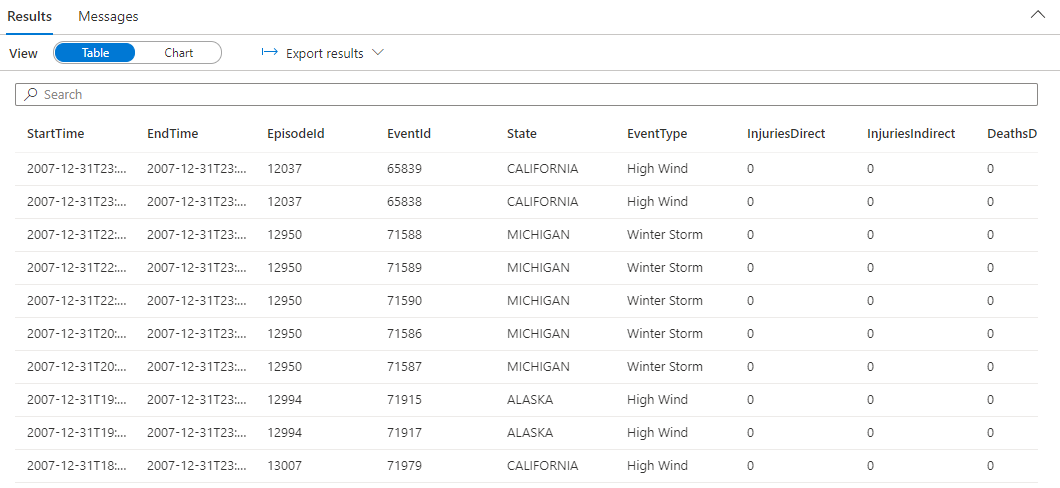
.ingest into table StormEvents 'https://kustosamples.blob.core.windows.net/samplefiles/StormEvents.csv' with (ignoreFirstRecord=true)After ingestion completes, paste in the following query, select the query in the window, and select Run.
StormEvents
| sort by StartTime desc
| take 10
The query returns the following results from the ingested sample data.
Next steps
Feedback
Coming soon: Throughout 2024 we will be phasing out GitHub Issues as the feedback mechanism for content and replacing it with a new feedback system. For more information see: https://aka.ms/ContentUserFeedback.
Submit and view feedback for