Exercise - Set up your environment
The team has been slowly integrating a DevOps strategy into their processes. In this section, you make sure that your environment reflects the team's efforts so far.
To do this, you:
- Add a user to ensure Azure DevOps can connect to your Azure subscription.
- Set up an Azure DevOps project for this module.
- Add the build pipeline.
Add a user to Azure DevOps
To complete this module, you need your own Azure subscription. You can get started with Azure for free.
Although you don't need a subscription to use Azure DevOps to work in it, here you'll use Azure DevOps to deploy to Azure resources that exist in your Azure subscription. To simplify the process, sign in to both your Azure subscription and your Azure DevOps organization under the same Microsoft account.
If you use different Microsoft accounts to sign in to Azure and Azure DevOps, add a user to your DevOps organization under the Microsoft account you use to sign in to Azure. For more information, see Add organization users and manage access. When you add the user, choose the Basic access level.
Then, sign out of Azure DevOps and sign in again under the Microsoft account you use to sign in to your Azure subscription.
Get the Azure DevOps project
Make sure your Azure DevOps organization is set up to complete the rest of this module. You'll do this by running a template that creates a project for you in Azure DevOps.
The modules in this learning path form a progression as you follow the Tailspin web team through their DevOps journey. For learning purposes, each module has an associated Azure DevOps project.
Run the template
Run a template that sets up everything for you in your Azure DevOps organization.
From the Azure DevOps Demo Generator site, follow these steps to run the template:
Select Sign In and accept the usage terms.
From the Create New Project page, select your Azure DevOps organization and enter a project name, such as Space Game - web - Release.
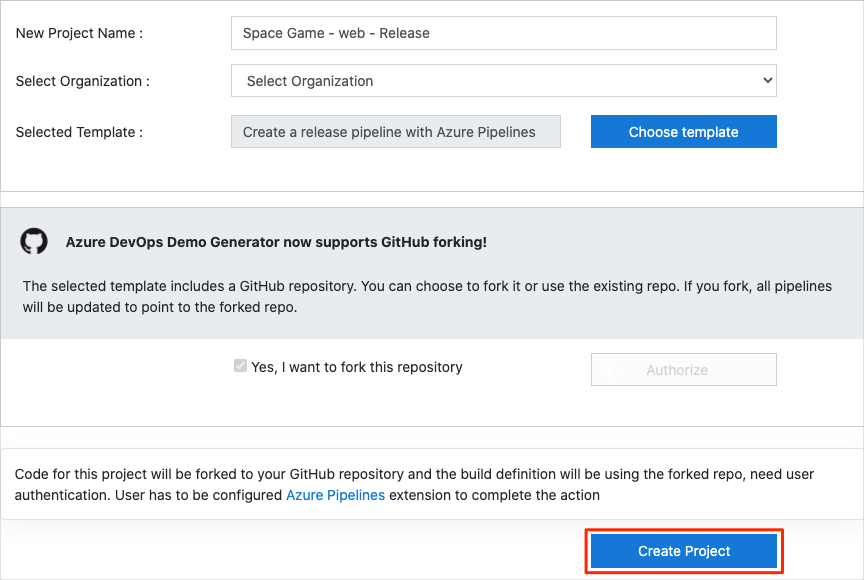
Select Yes, I want to fork this repository > Authorize. If a window appears, authorize access to your GitHub account.
Important
You need to select this option so the template will connect to your GitHub repository. Select it even if you've already forked the Space Game website project. The template uses your existing fork.
Select Create Project. The template takes a few moments to run.
Select Navigate to project to go to your project in Azure DevOps.
Important
The Clean up your Azure DevOps environment page in this module contains important cleanup steps. Cleaning up helps ensure that you don't run out of free build minutes. Be sure to perform the cleanup steps even if you don't complete this module.
Set your project's visibility
Initially, your fork of the Space Game repository on GitHub is set to public while the project created by the Azure DevOps template is set to private. A public repository on GitHub can be accessed by anyone, while a private repository is only accessible to you and the people you choose to share it with. Similarly, on Azure DevOps, public projects provide read-only access to non-authenticated users, while private projects require users to be granted access and authenticated to access the services.
At the moment, it is not necessary to modify any of these settings for the purposes of this module. However, for your personal projects, you must determine the visibility and access you wish to grant to others. For instance, if your project is open source, you may choose to make both your GitHub repository and your Azure DevOps project public. If your project is proprietary, you would typically make both your GitHub repository and your Azure DevOps project private.
Later on, you may find the following resources helpful in determining which option is best for your project:
- Use private and public projects
- Quickstart: Make your private project public
- Setting repository visibility
Prepare Visual Studio Code
Set up Visual Studio Code so you can build the website locally and use the source files.
Visual Studio Code comes with an integrated terminal so you can edit files and work from the command line, all from one place.
Start Visual Studio Code.
Select Terminal, and then select New Terminal.
In the dropdown list, select Git bash. If you're familiar with another Unix shell that you prefer to use, such as Zsh, select that shell instead. Git for Windows provides Git Bash, which makes it easy to run Git commands.
Note
On Windows, if you don't see Git Bash listed as an option, make sure you've installed Git, and then restart Visual Studio Code.
Run the following command to navigate to your home directory.
cd ~
Configure Git
If you're new to Git and GitHub, you'll first need to run a few commands to associate your identity with Git and authenticate with GitHub. For more information, see Set up Git.
At a minimum, you'll need to complete the following steps:
Note
If you're already using two-factor authentication with GitHub, create a personal access token. Use your token in place of your password when you're prompted later.
Treat your access token like you would treat a password. Keep it in a safe place.
Set up your project in Visual Studio Code
When you ran the template to set up your Azure DevOps project, the process forked the mslearn-tailspin-spacegame-web-deploy repository automatically for you. Now you'll download, or clone, a copy to your computer so you can work with it.
Clone your fork locally
On GitHub, go to your fork of the Space Game web project (mslearn-tailspin-spacegame-web-deploy).
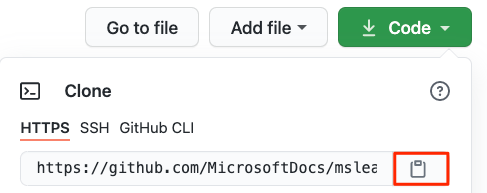
Select Code, and then, from the HTTPS tab, select the copy button to copy the URL to your clipboard.
In Visual Studio Code, go to the terminal window you opened earlier.
Run the
git clonecommand. Replace the URL that's shown here with the contents of your clipboard:git clone https://github.com/your-name/mslearn-tailspin-spacegame-web-deploy.gitMove to the mslearn-tailspin-spacegame-web-deploy directory. This directory is the root of your repository.
cd mslearn-tailspin-spacegame-web-deploy
Set the upstream remote
A remote is a Git repository where team members collaborate (like a repository on GitHub). Here you list your remotes and add a remote that points to Microsoft's copy of the repository so that you can get the latest sample code.
Run the following command to list your remotes:
git remote -vYou see that you have both fetch (download) and push (upload) access to your repository:
origin  https://github.com/username/mslearn-tailspin-spacegame-web-deploy.git (fetch)
origin  https://github.com/username/mslearn-tailspin-spacegame-web-deploy.git (push)
Origin specifies your repository on GitHub. When you fork code from another repository, the original remote (the one you forked from) is commonly named upstream.
Run the following command to create a remote named upstream that points to the Microsoft repository:
git remote add upstream https://github.com/MicrosoftDocs/mslearn-tailspin-spacegame-web-deploy.gitRun
git remotea second time to see the changes:git remote -vYou see that you still have both fetch (download) and push (upload) access to your repository. You also now have fetch access from the Microsoft repository:
origin  https://github.com/username/mslearn-tailspin-spacegame-web-deploy.git (fetch)
origin  https://github.com/username/mslearn-tailspin-spacegame-web-deploy.git (push)
upstream        https://github.com/MicrosoftDocs/mslearn-tailspin-spacegame-web-deploy.git (fetch)
upstream        https://github.com/MicrosoftDocs/mslearn-tailspin-spacegame-web-deploy.git (push)
Open the project in Visual Studio Code
Run the following command from the root directory of your project.
code .Reopen the integrated terminal. The terminal places you at the root of your web project.
If the code command fails, you need to add Visual Studio Code to your system PATH. To do so:
- In Visual Studio Code, select F1 or select View > Command Palette to access the command palette.
- Type shell command and find the Shell Command: Install 'code' command in PATH command.
- Restart the terminal for the new PATH to take effect.
You're now set up to work with the Space Game source code and your Azure Pipelines configuration from your local development environment.
Fetch the branch from GitHub
In Visual Studio Code, open the integrated terminal.
Run the following commands to fetch the release-pipeline branch from the MicrosoftDocs repository, and check out a new branch upstream/release-pipeline.
git fetch upstream release-pipeline
git checkout -B release-pipeline upstream/release-pipeline
As an optional step, in Visual Studio Code, open the azure-pipelines.yml file and familiarize yourself with the initial YAML pipeline configuration.
Run the pipeline
At this point, you have:
- A fork of the mslearn-tailspin-spacegame-web-deploy repository in your GitHub account.
- The mslearn-tailspin-spacegame-web-deploy repository cloned locally.
- A branch named release-pipeline that contains the web site source code and an initial Azure Pipelines configuration.
Next, you'll manually trigger the pipeline to run. This step ensures that your project is set up to build from your GitHub repository. The initial pipeline configuration builds the application and produces a builds artifact.
Navigate to your project in Azure Devops, and then select Pipelines.
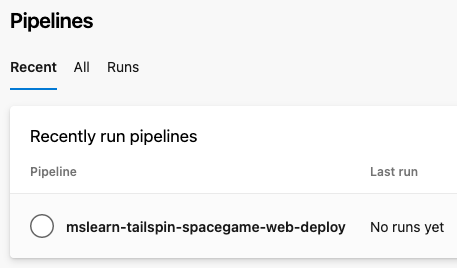
Select the mslearn-tailspin-spacegame-web-deploy pipeline. If prompted, make sure you select Authorize resources to authorize the service connection.
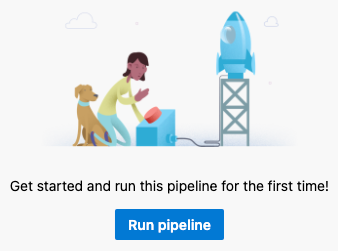
Select Run pipeline, and then select the release-pipeline branch from the Branch/tag dropdown menu. Select Run.
In the Summary page, select your pipeline job to view the logs.
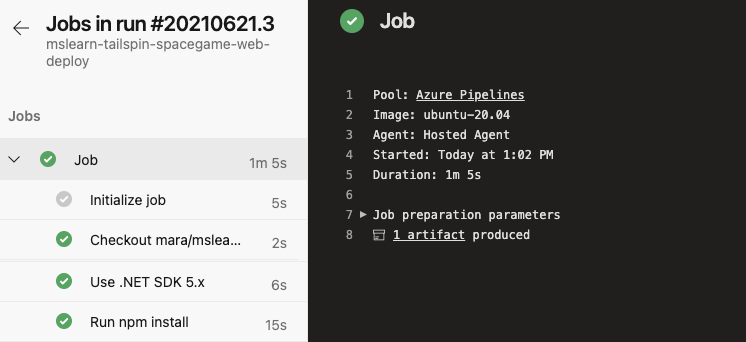
After the build finishes, select the back button to return to the summary page.
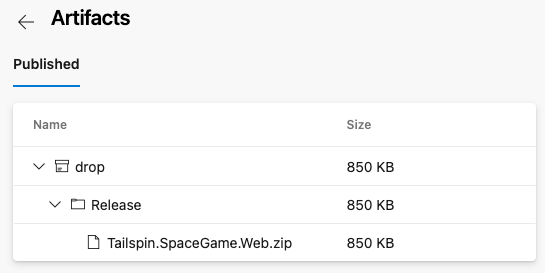
Select your published artifact.

The Tailspin.Space.Game.Web.zip is your build artifact. This file contains your built application and its dependencies.
You now have a build pipeline for the Space Game web project. Next, you'll add a deployment stage to deploy your build artifact to Azure App Service.