Common ways to use a form in a flow
If you're not sure where to start, these are some of the most common ways people use Microsoft Forms with Power Automate:
- Send an email when there's a new form response
- Send an email to the form responder
- Send an approval request with the form details
- Add form responses to an Excel worksheet
- Get an attachment from a form and send it in an email
Send an email when there's a new form response
You can turn on email notifications for the form's owners in your form settings. If you want someone else to be notified when a response is submitted, create a custom email notification with Power Automate.
Note
Power Automate uses either the classic cloud flows designer or the cloud flows designer with Copilot. To identify which designer you’re using, go to the Note section in Understand the cloud flows designer with copilot capabilities.
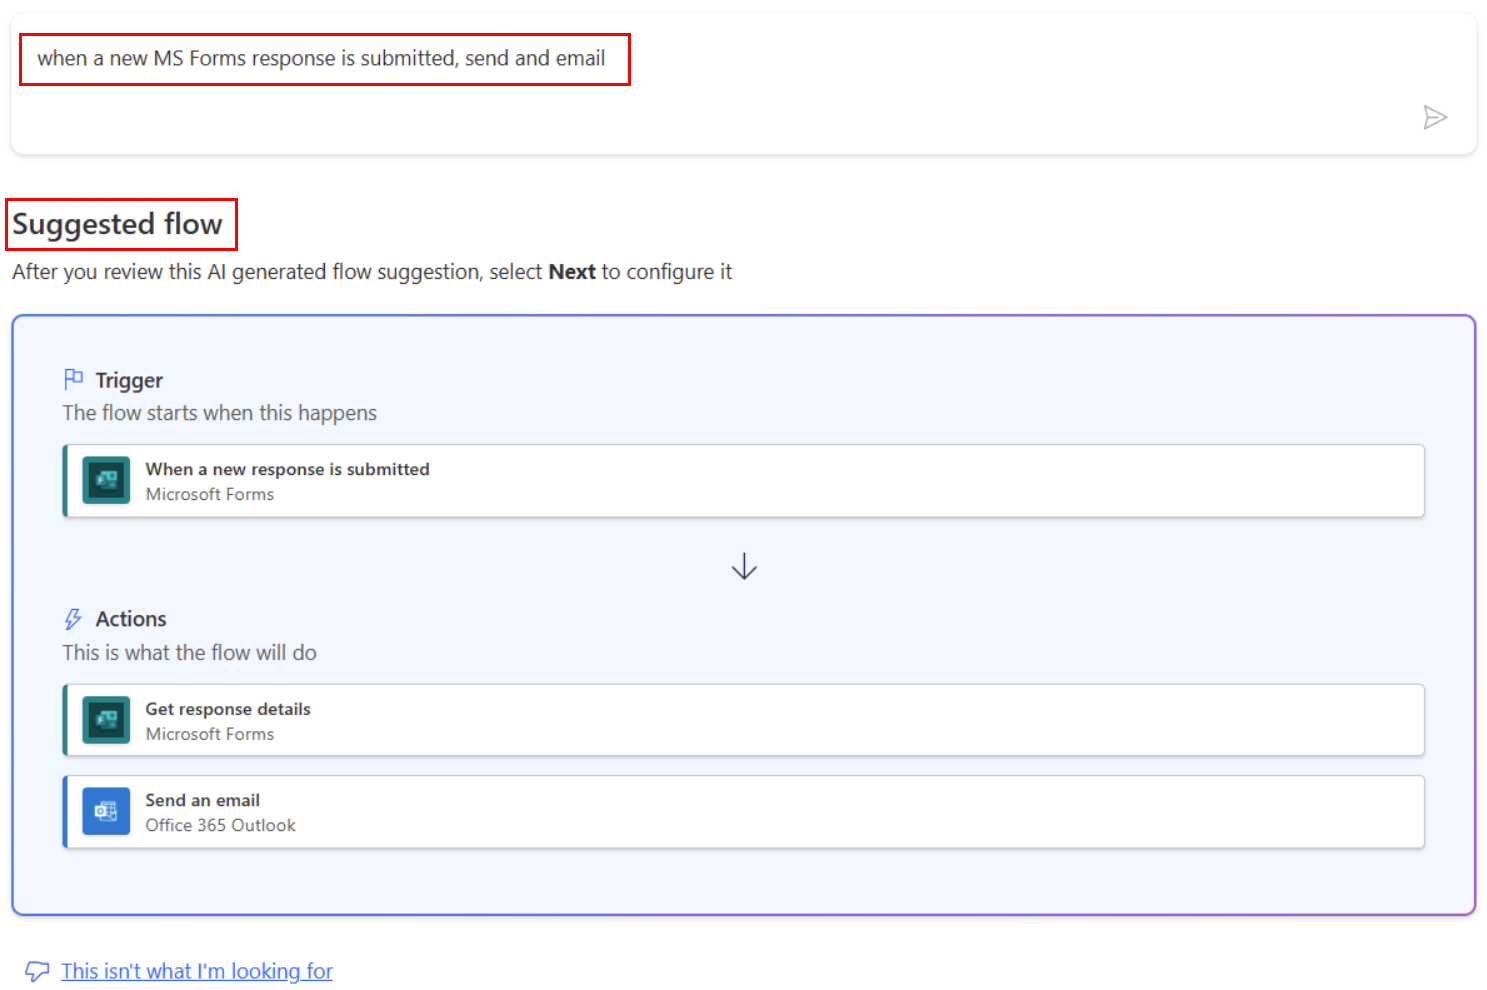
We start with a prebuilt template and customize it to help our managers plan for employees' summer vacations.
Search for Microsoft Forms in the Power Automate template gallery, and then select the template named Notify me in Outlook when a student completes a quiz.
If needed, sign in to the connectors, and then select Continue.
In the first step in the flow, When a new response is submitted, select your form in the Form Id box.
In the next step in the flow, Apply to each, select your form again in the Form Id field. Leave everything else as it is.
Skip the Office 365 Get my profile (V2) step.
If you don't need to send the email to yourself, you can delete this step.
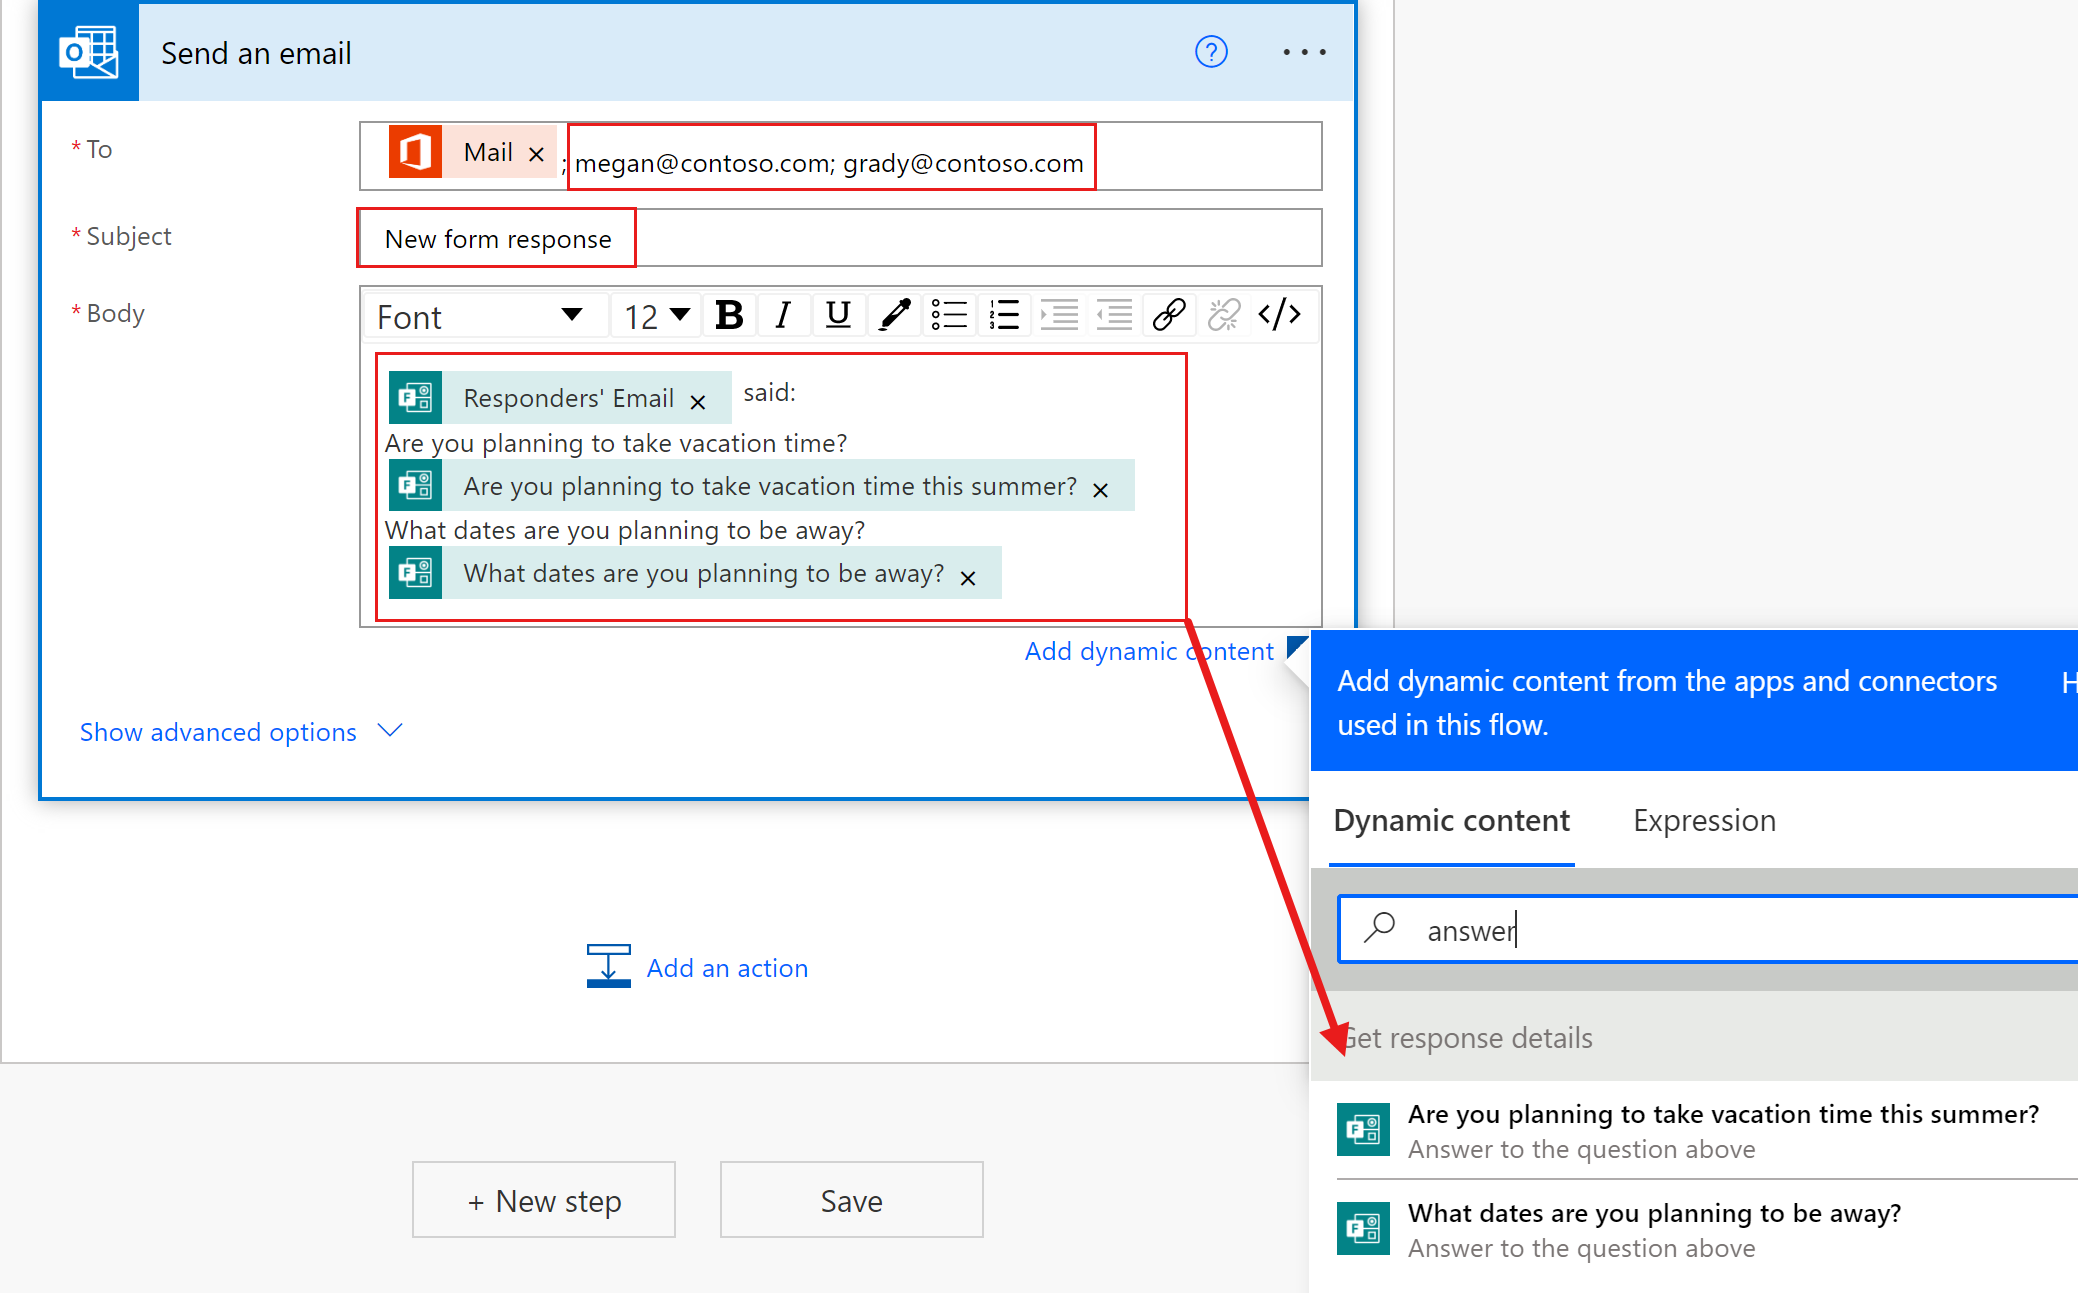
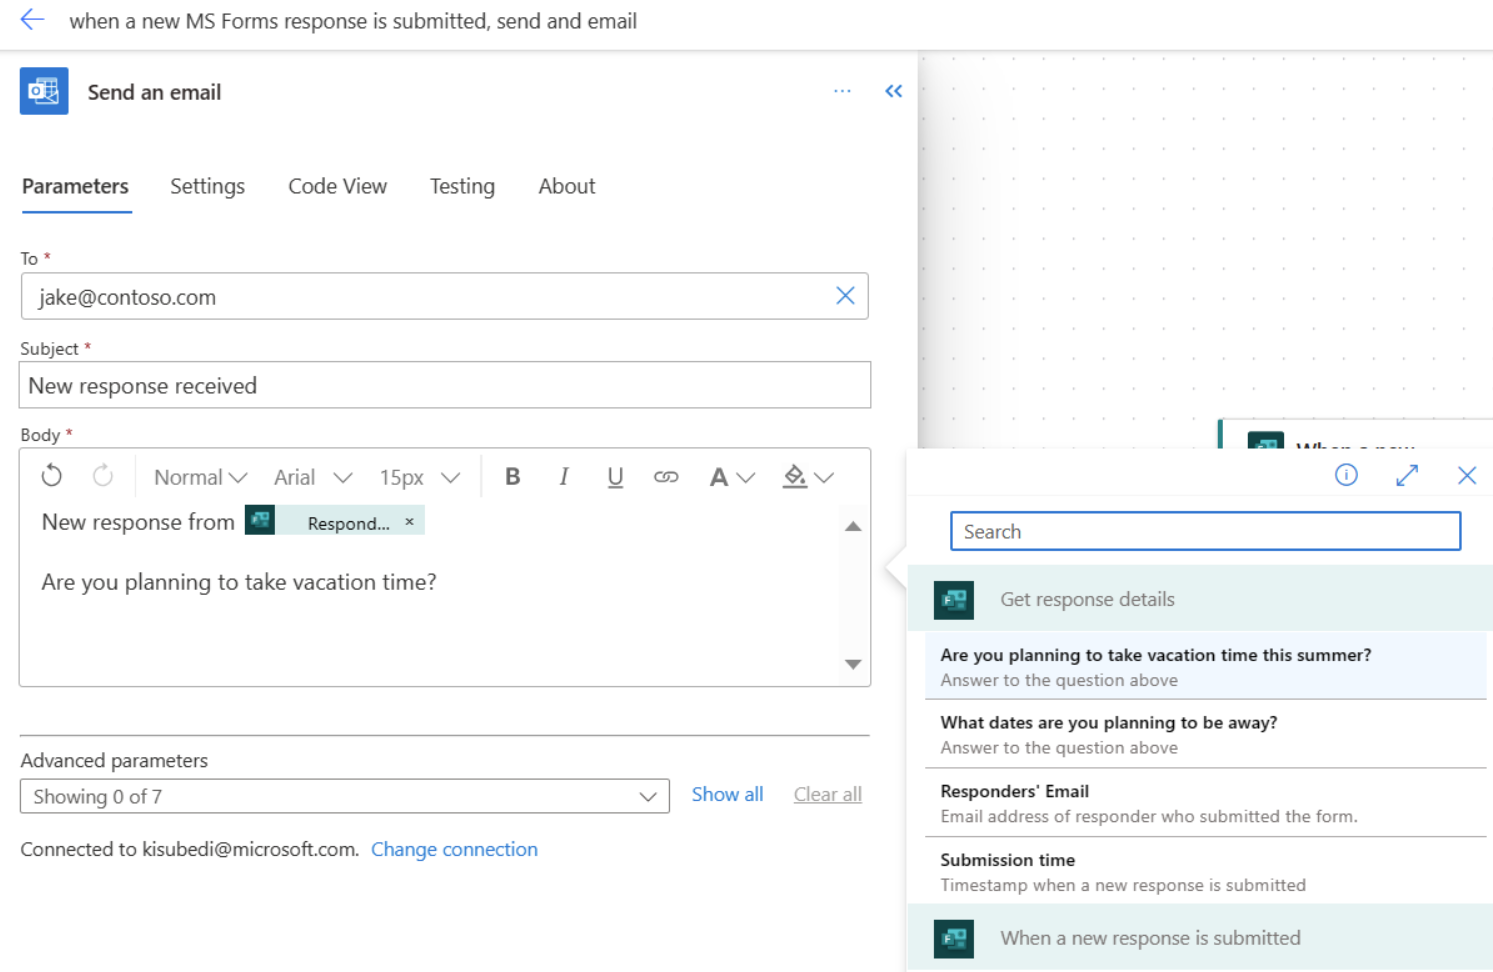
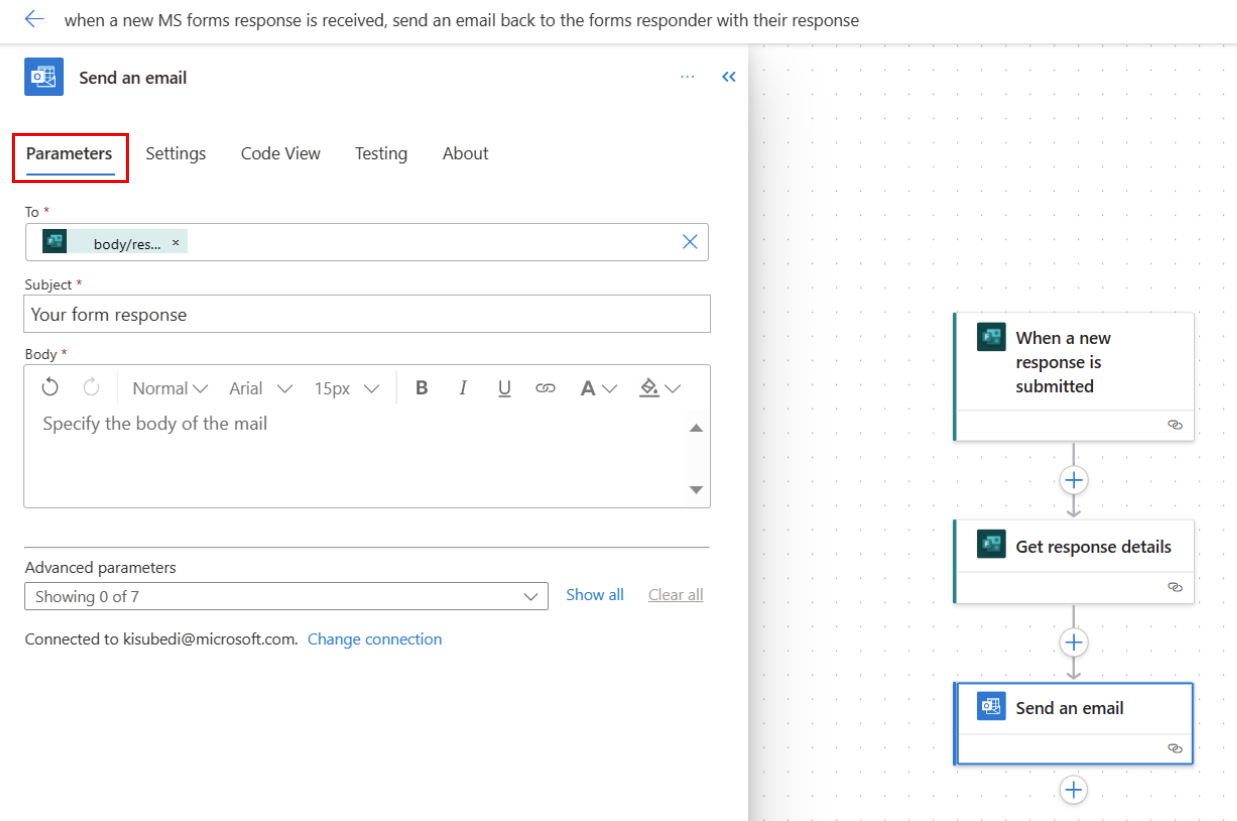
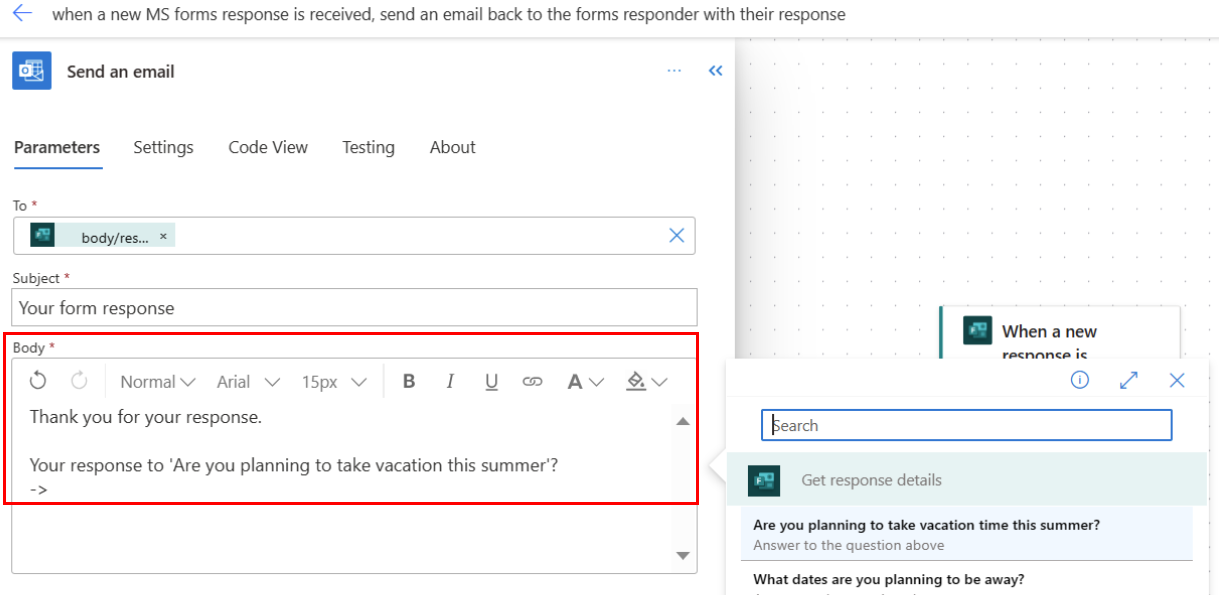
In the final step in the flow, Send an email, enter the recipients, subject, and body of the email. Select dynamic content to include details from the form response in your email.
Select the flow name at the top of the Power Automate canvas and change it as you like.
Save and test your flow.
Send an email to the form responder
You can turn on email receipts for respondents in your form settings. If you want to customize the email they receive, use Power Automate.
Follow the steps to send an email when there's a new form response, but send the email to the responder.
Send an approval request with the form details
In this example, we'll start with another prebuilt template and customize it to create a vacation approval request.
Search for Microsoft Forms in the Power Automate template gallery and select the template named Send form responses for approval.
Sign in to or create the connectors, as needed, and select Continue.
In the first step in the flow, "When a new response is submitted," select your form in the Form Id box.
In the next step in the flow, Apply to each, select your form again in the Form Id box. Leave everything else as it is.
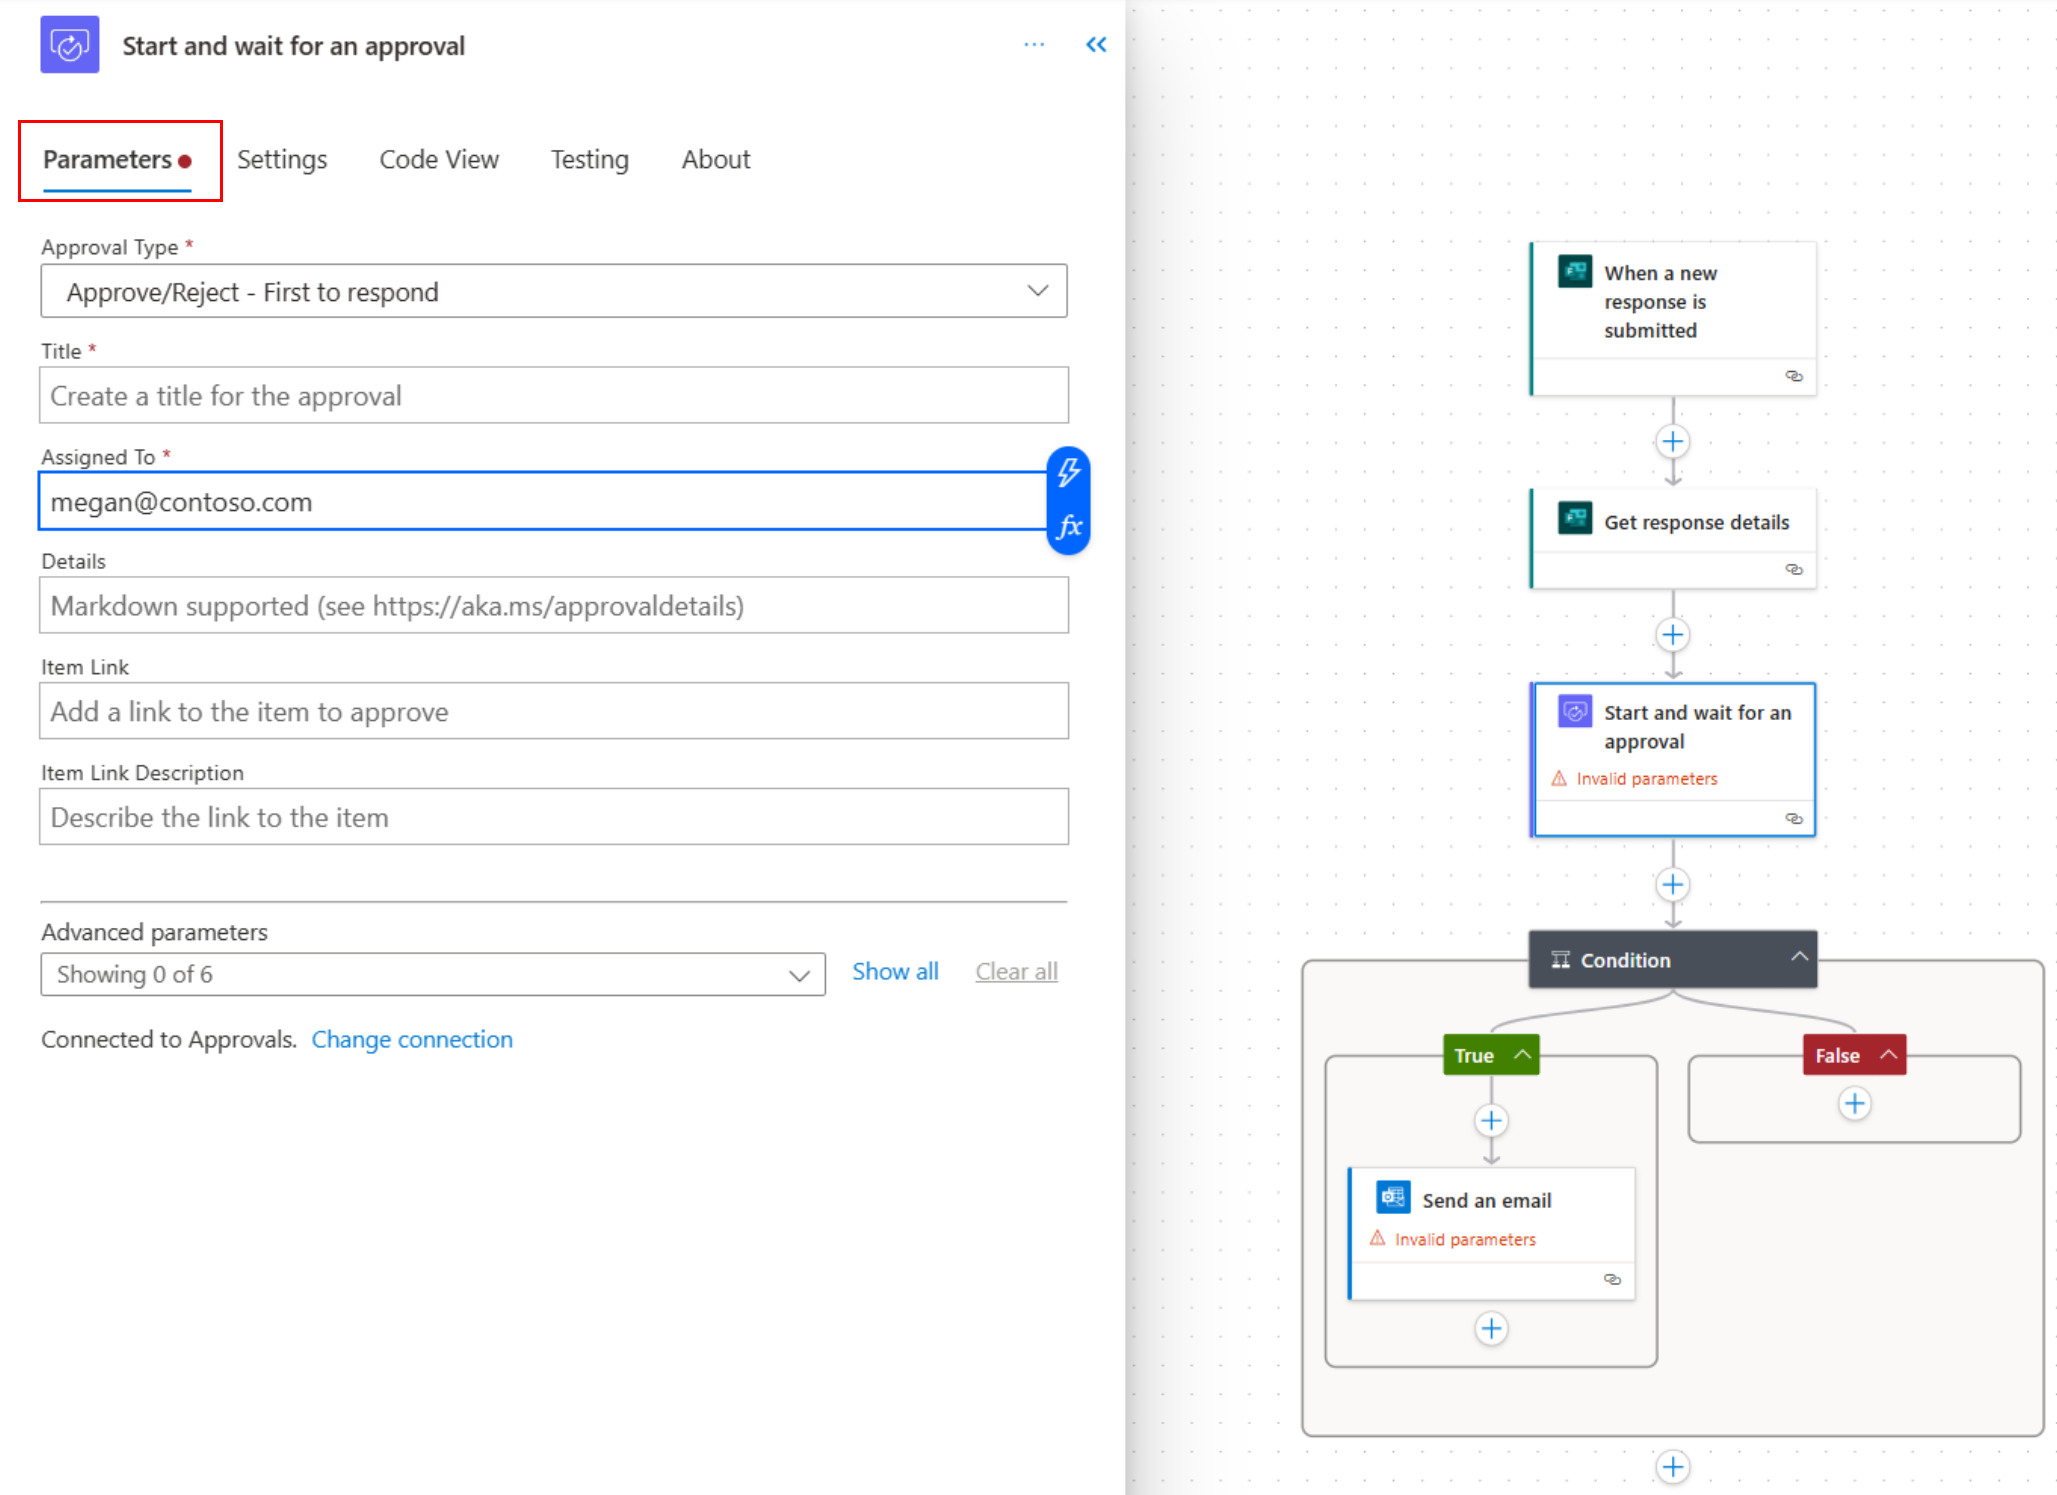
In the next step in the flow, "Start and wait for an approval," select the Approval type, enter a Title, and enter the approvers' email addresses in Assigned to. Select dynamic content to include details from the form response in the approval request.

Skip the Condition action.
In the If yes step:
- Delete the SharePoint action that comes with the template.
- Add an Office 365 Outlook Send an email (V2) action.
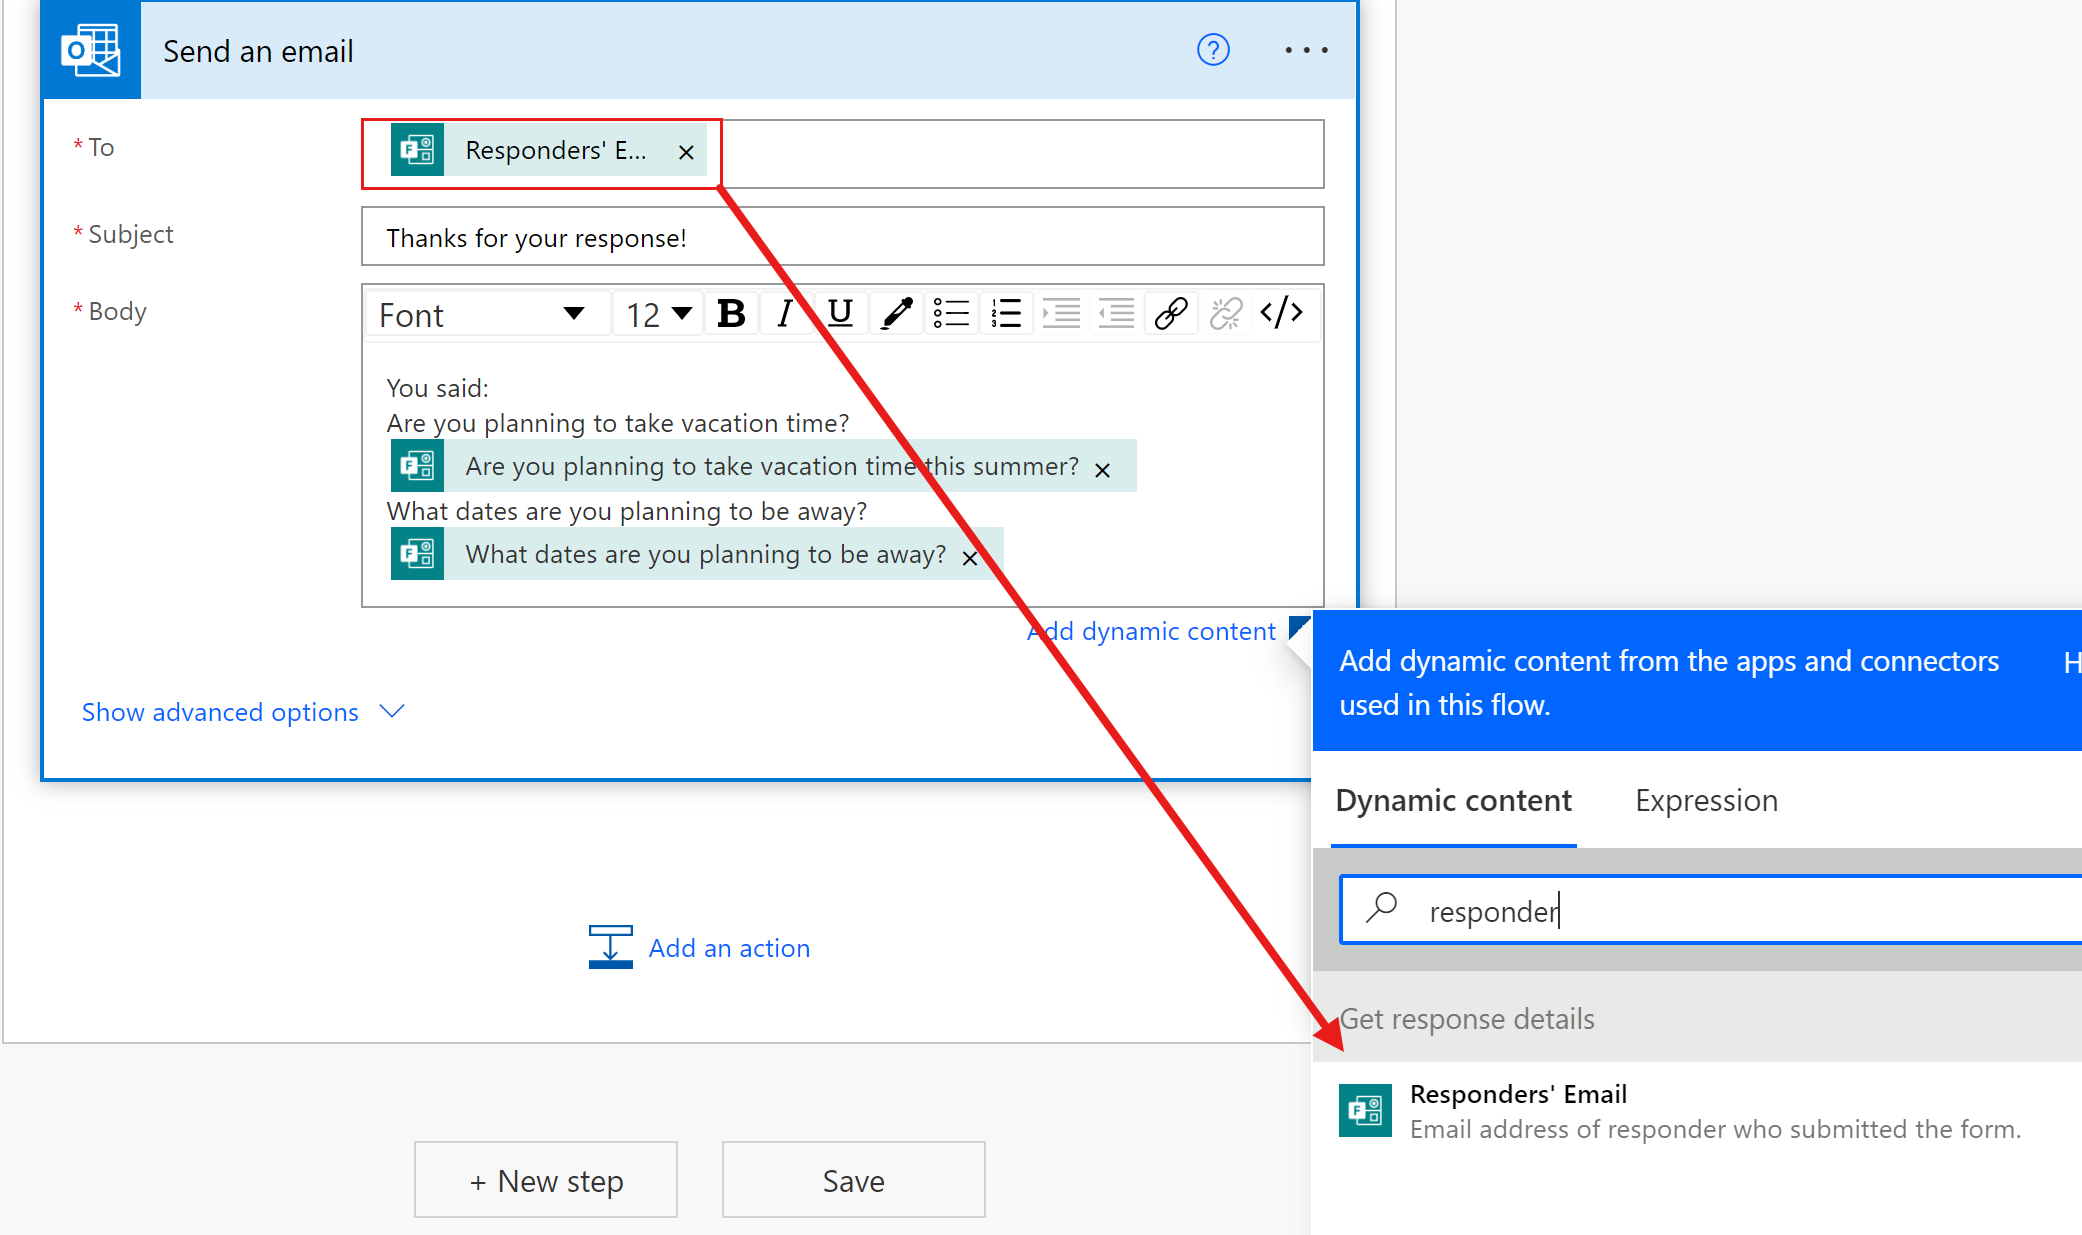
- In the To box, select the dynamic content Responders' Email.
- Enter the subject and body of the email.
In the If no step:
- Delete the Office 365 "Get my profile (V2)" step that comes with the template.
- In the "Send an email (V2)" action, in the To box, select the dynamic content Responders' Email.
- Enter the subject and body of the email.
At the top of the Power Automate canvas, select the flow name and change it as you like.
Save and test your flow.
For more examples of approval flows, go to Manage sequential approvals.

Add form responses to an Excel worksheet
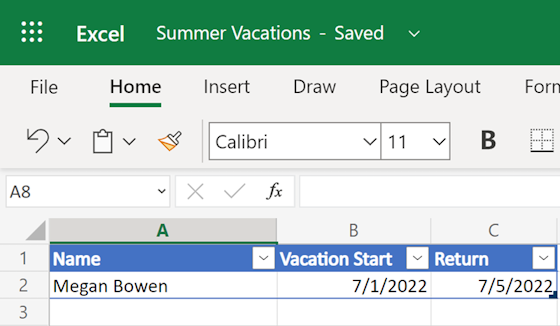
In this example, you create a flow from blank. Continuing with the scenario from our earlier examples, we'll use the flow to record employees' names and vacation dates in an Excel table when they submit their summer vacation form.
Create a workbook in Excel Online. Add a table with one column for each question on your form. Save and close the workbook.
In Power Automate, create an automated cloud flow from blank. Select the Microsoft Forms When a new response is submitted trigger.
In the first step in the flow, When a new response is submitted, select your form in the Form Id box.
Add this step to your flow:
- Search for forms and select Microsoft Forms.
- Select Get response details.
- Select your form in the Form Id box.
Add this step to your flow:
- Search for profile and select Office 365 Users.
- Select Get user profile (V2).
- In the User (UPN) box, select the dynamic content Responders' Email. This will look up the responder's name by the email address on the form.
Add this step to your flow:
- Search for excel and select Excel Online (Business).
- Select Add a row into a table.
- Select the Location and Document Library.
- Select the folder icon and browse to the Excel workbook you created earlier.
- Select the Table.
- In each column in the table, select the corresponding dynamic content.
Select the flow name at the top of the Power Automate canvas and change it as you like.
Save and test your flow.
You can use a template to add an approval step before a form response is added to the Excel table.

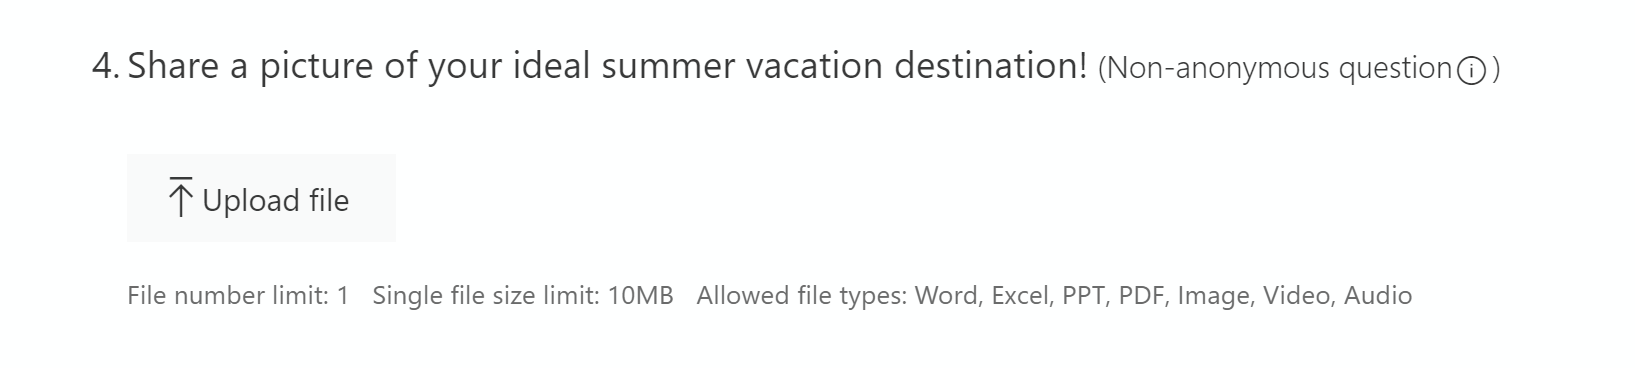
Get an attachment from a form and send it in an email
In this example, we'll create another flow from blank. We'll use the flow to create a share link for a file that's uploaded on our summer vacation form, and then email the link.
Select your form
In Power Automate, create an automated cloud flow from blank.
Select the Microsoft Forms When a new response is submitted trigger.
In the first step in the flow, When a new response is submitted, select your form in the Form Id box.
Add a step to your flow:
- Search for forms, and then select Microsoft Forms.
- Select Get response details.
- Select your form in the Form Id box.
Use a JSON schema to find the uploaded file
Save and test your flow. Be sure to upload a file to your form.
This step allows Power Automate to use the test run to generate a sample JSON schema for the uploaded file.
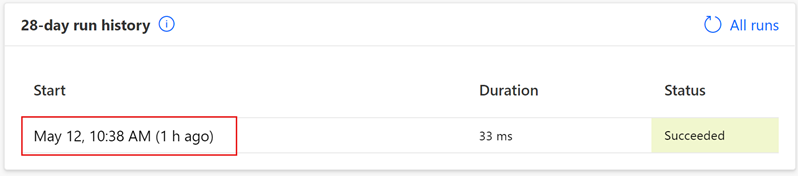
On your flow's information page, under 28-day run history, select the test run.
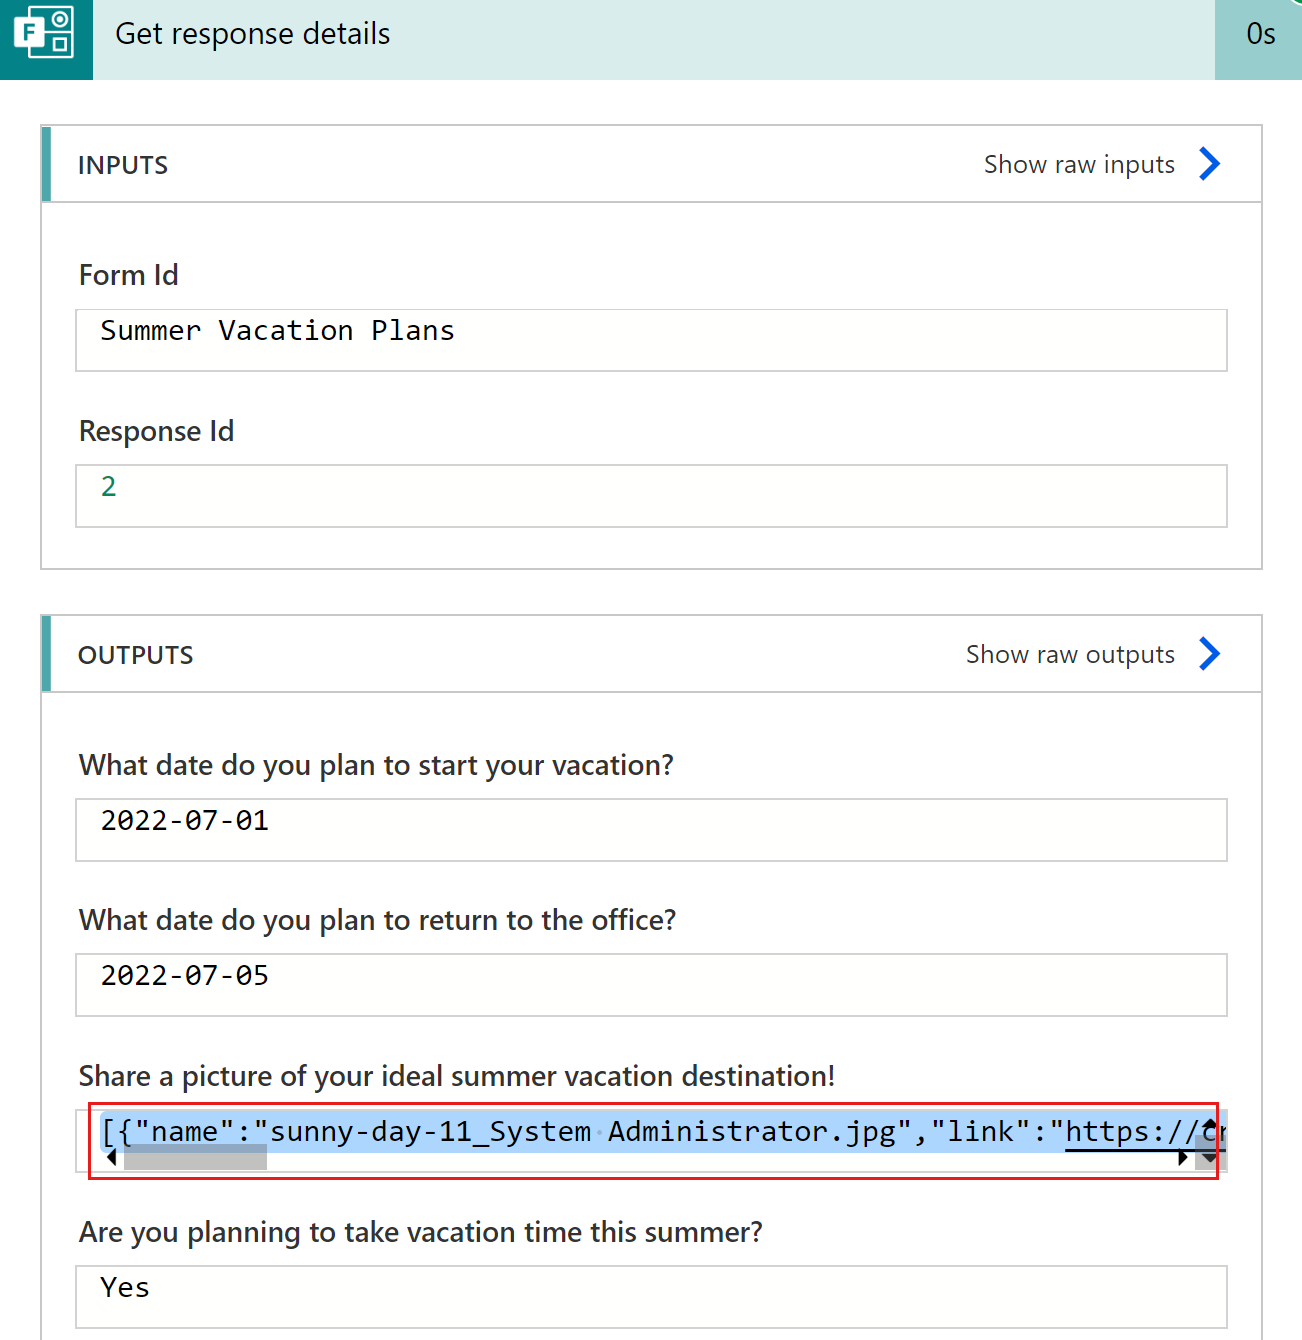
Expand the Get response details step and copy the contents of the file upload output.
In the upper-right corner of the window, select the Edit pencil icon to open the flow canvas.
Add a step to your flow:
Search for "parse" and select Parse JSON.
In the Content box, select the dynamic content that corresponds to the file upload option on the form.
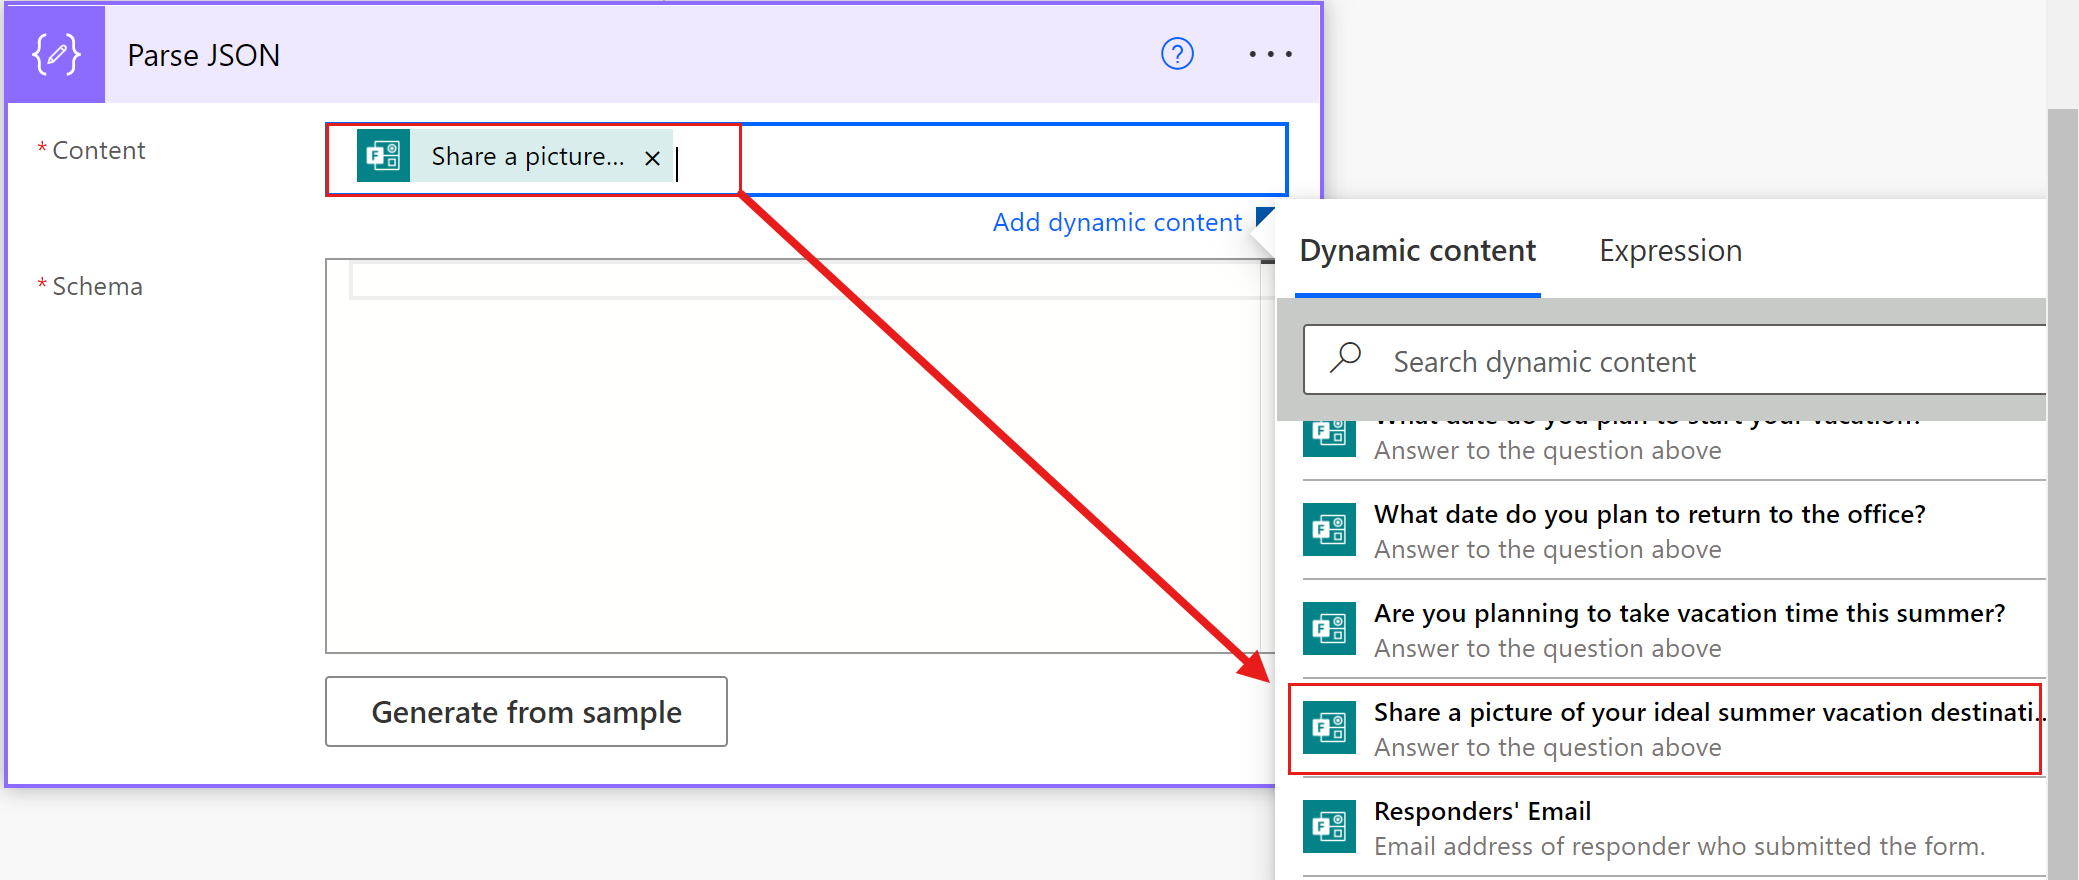
Select Generate from sample.
Under Insert a sample JSON payload, select the box and paste the file upload output you copied earlier, and then select Done.
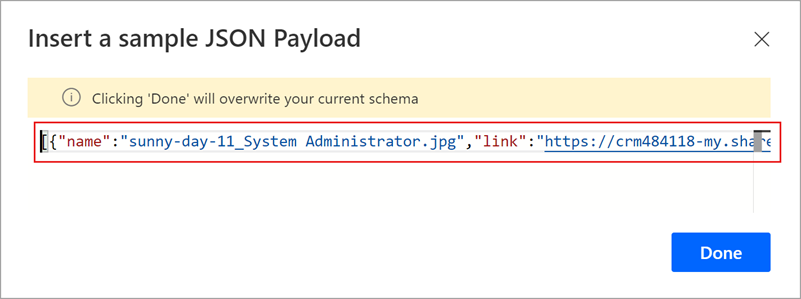
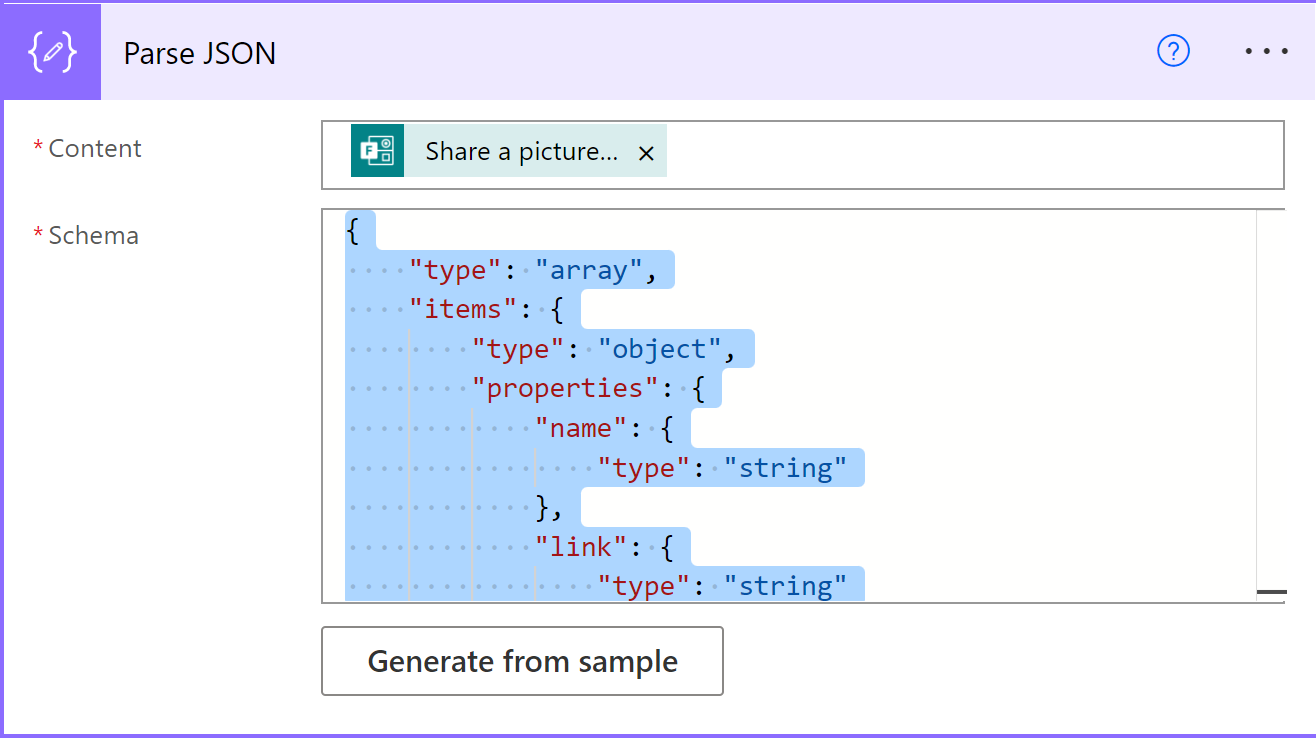
The Parse JSON action should look something like this after you select Done:
Create a share link and email the URL
Add a step to your flow:
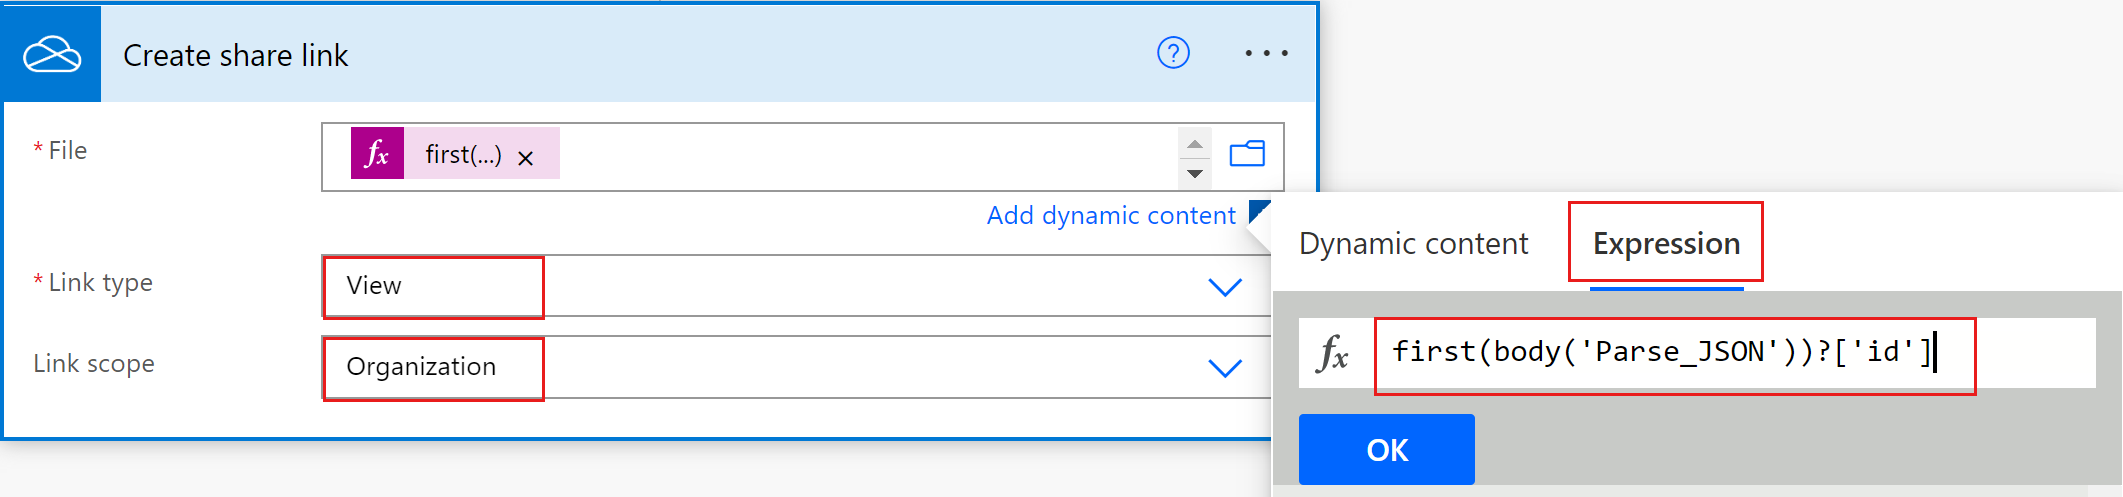
Search for "create share link" and select the OneDrive for Business action Create share link.
Select the File box. The dynamic content panel opens. Select the Expression tab.
Type the following expression: first(body('Parse_JSON'))?['id']
Select the Link type and Link scope.
Select OK.
Add a step to your flow:
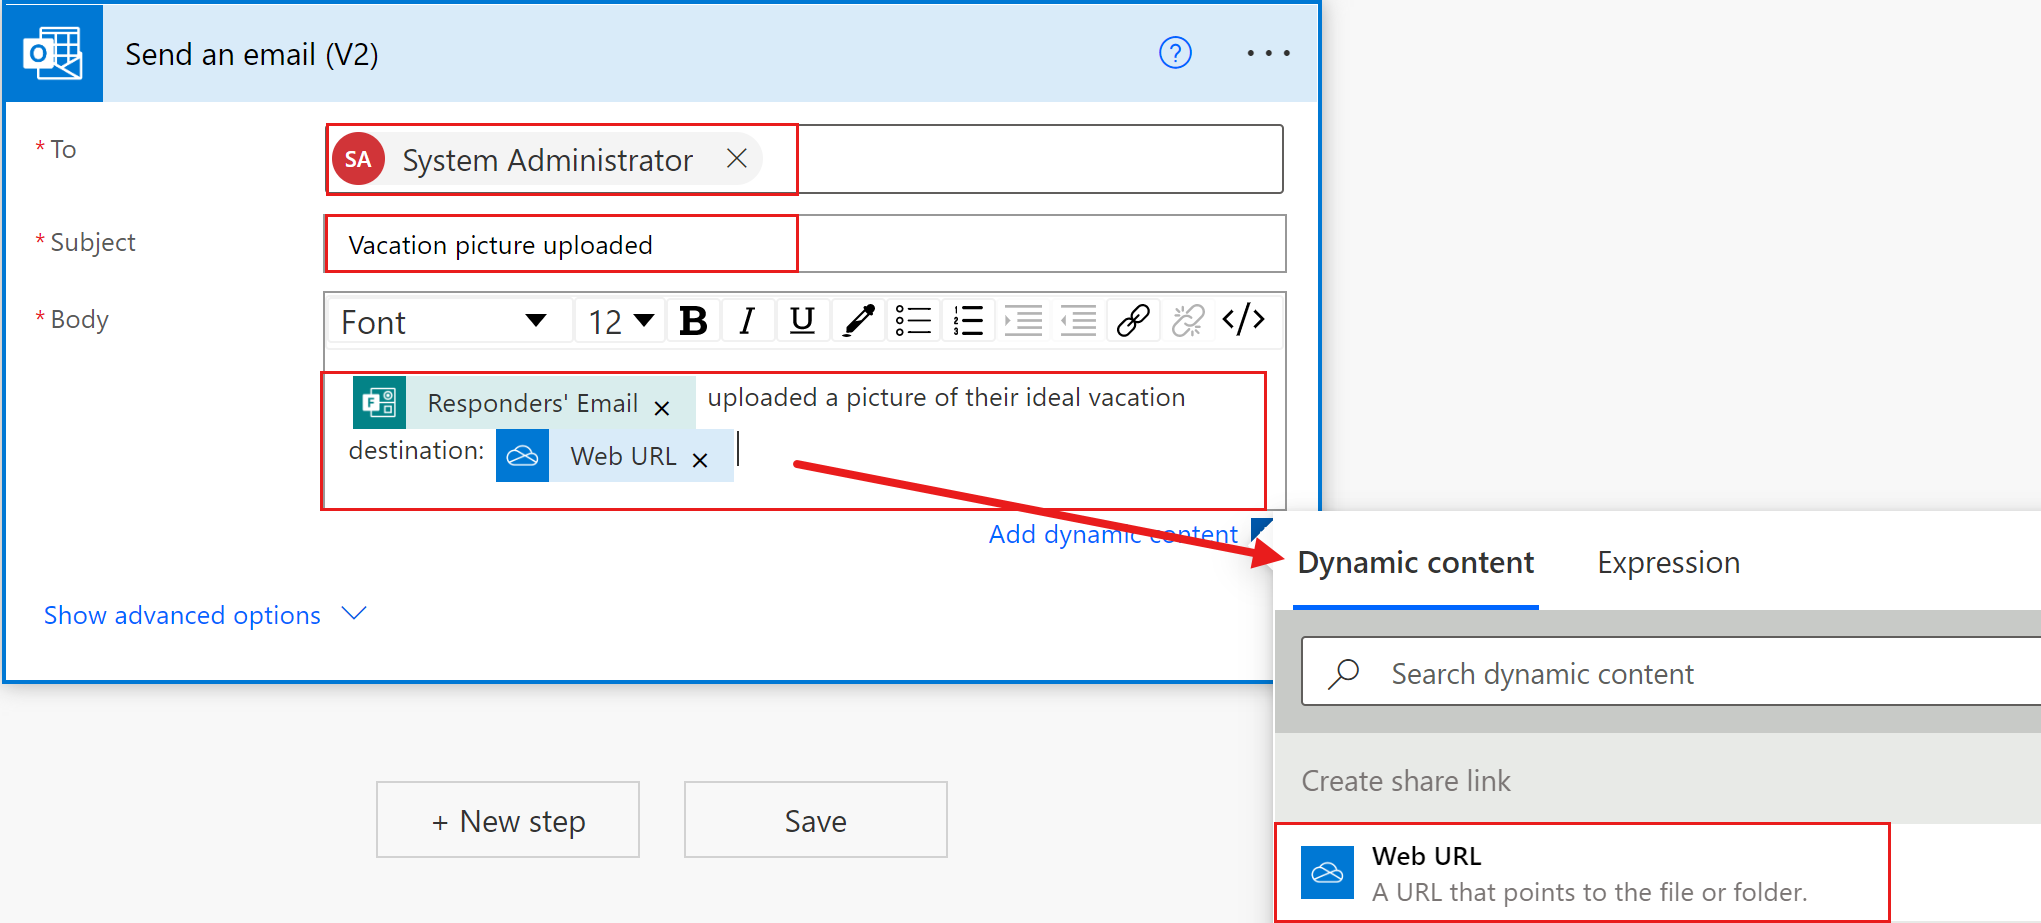
Search for "send email" and select the Office 365 Outlook action Send an email (V2).
Enter the recipients, subject, and body of the email. Select dynamic content to include details from the form response in your email.
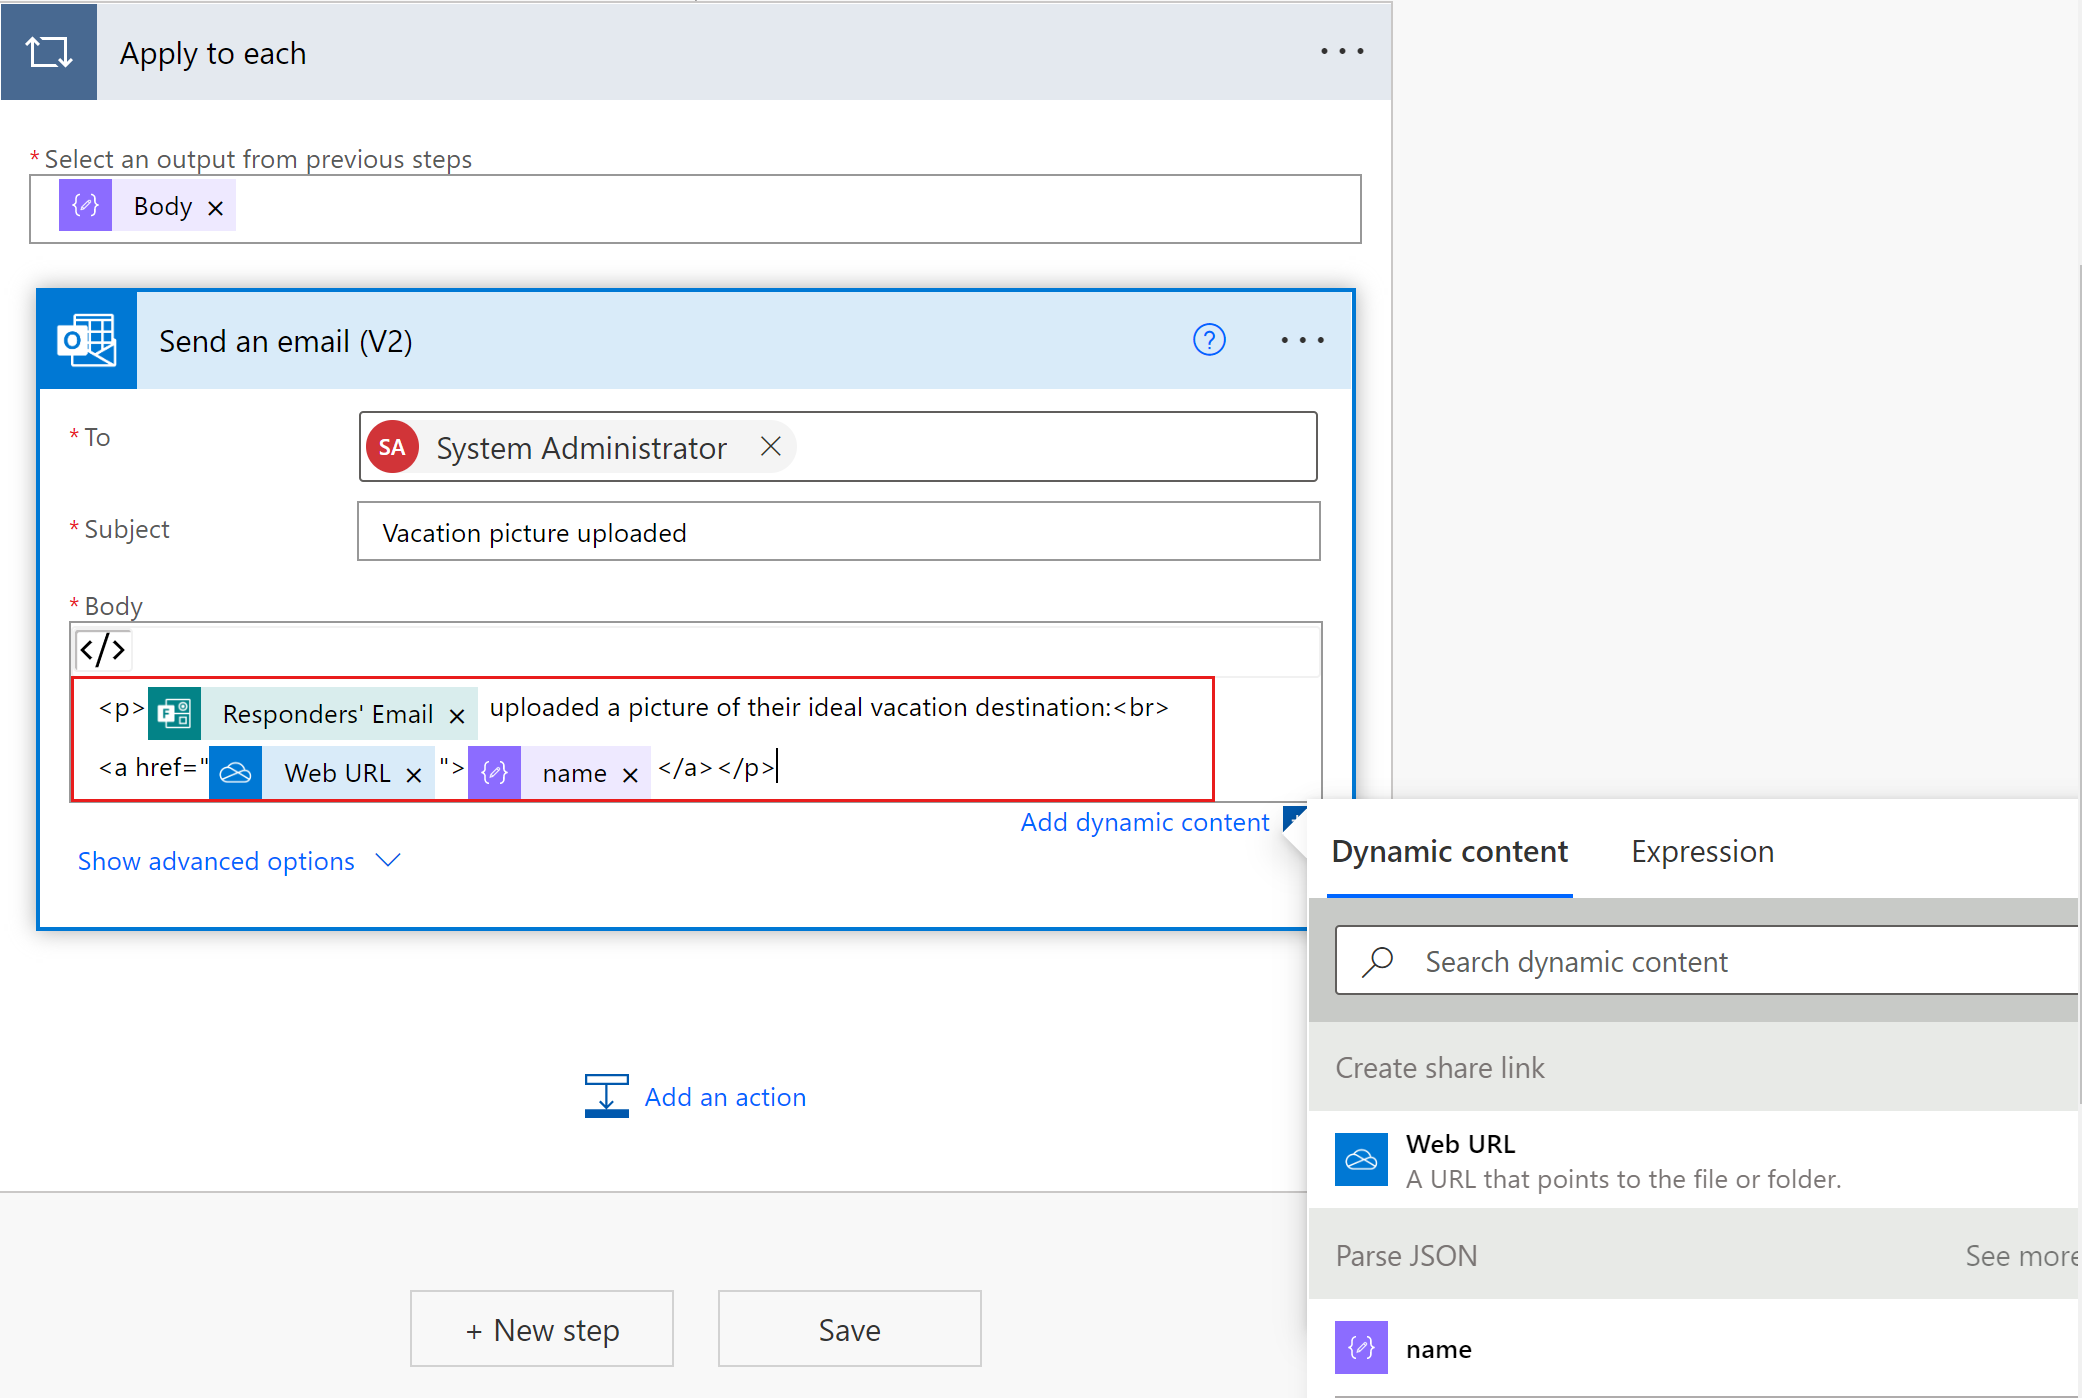
Convert the URL to a clickable link
To make the URL of the shared file a clickable link in the email, you'll need to use the HTML editor and an anchor tag:
- In the email body toolbar, select the HTML view icon (</>).
- Enclose the dynamic content Web URL and name in an anchor tag to turn them into a link and the link title, respectively.
In this example, you entered the following HTML in the email body, where text in curly brackets indicates the dynamic content:
<a href="{WebURL}">{name}</a>
Here's an example:
You can combine getting an attachment from a form and creating an approval flow.
Feedback
Coming soon: Throughout 2024 we will be phasing out GitHub Issues as the feedback mechanism for content and replacing it with a new feedback system. For more information see: https://aka.ms/ContentUserFeedback.
Submit and view feedback for