Tutorial: Add a form to your page
Power Pages allows you to add form components to a page to allow your users to be able to create, edit, or view Microsoft Dataverse records.
Forms on pages are created from Microsoft Dataverse table forms.
This tutorial shows you how to create and add a form to your page, capture rich information through code components, and configure form actions when the information in the form is submitted.
In this tutorial, you learn how to:
- Create a form
- Add code components
- Add a form to a page
- Configure code options
Prerequisites
- A Power Pages subscription or trial. Get a Power Pages trial here.
- A Power Pages site created. Create a Power Pages site.
- Complete the Add and design a page tutorial.
- Complete the Display data securely on pages tutorial.
Create a form
This video provides an overview of the steps to create a form.
Go to Power Pages.
In the data workspace, select the Feedback table and choose the Forms tab.
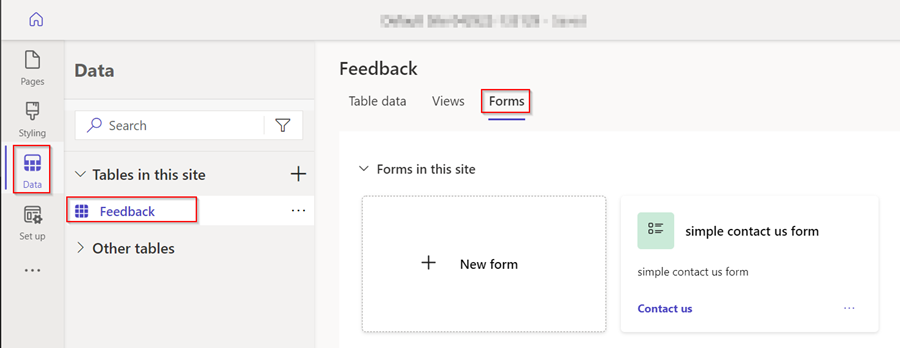
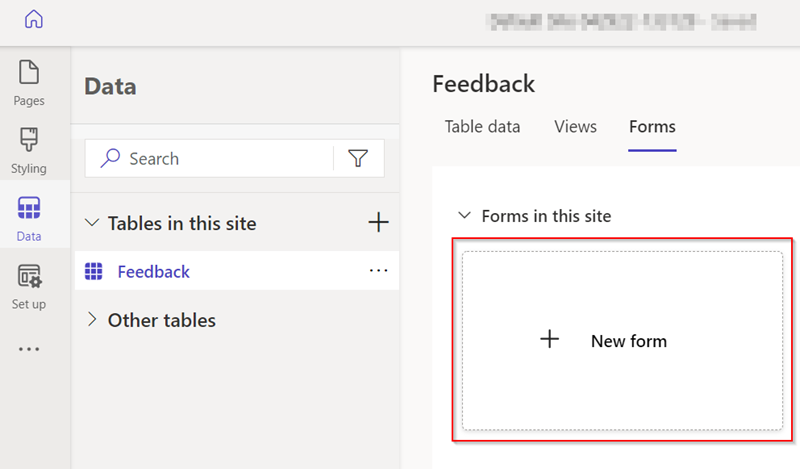
Select + New form to open the form editor.
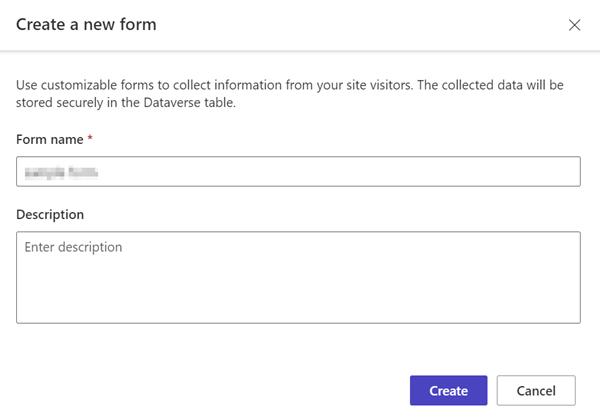
Fill in the details.
Give the form a name. You can also add a description if you'd like one.
Select Create.
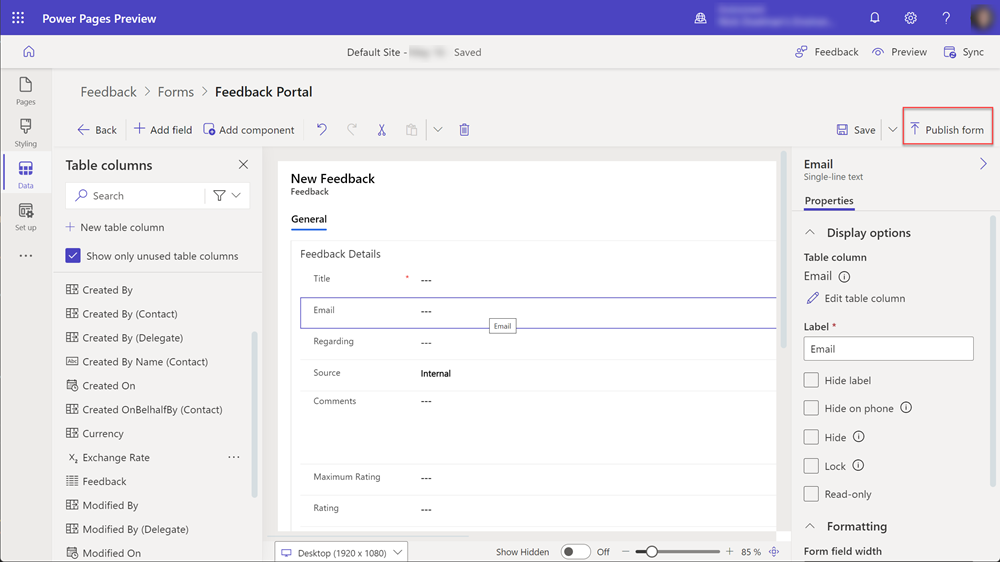
Modify the form using the Add field menu option, or by dragging and dropping existing fields to reorder them.
Select Publish form.
Select Back.

The form will appear in the list of forms for that table.
See also
Add code components
Code components can be added to Dataverse forms to allow advanced interaction with specific data fields. For example, we can enable rich text editing capabilities to a multi-line text field on a form.
In the Data workspace, select the Feedback table and choose the Forms tab.
Select the form you created earlier.
Select the Comments field on the form.
In the right-hand section, choose Components and select the Rich Text Editor control.
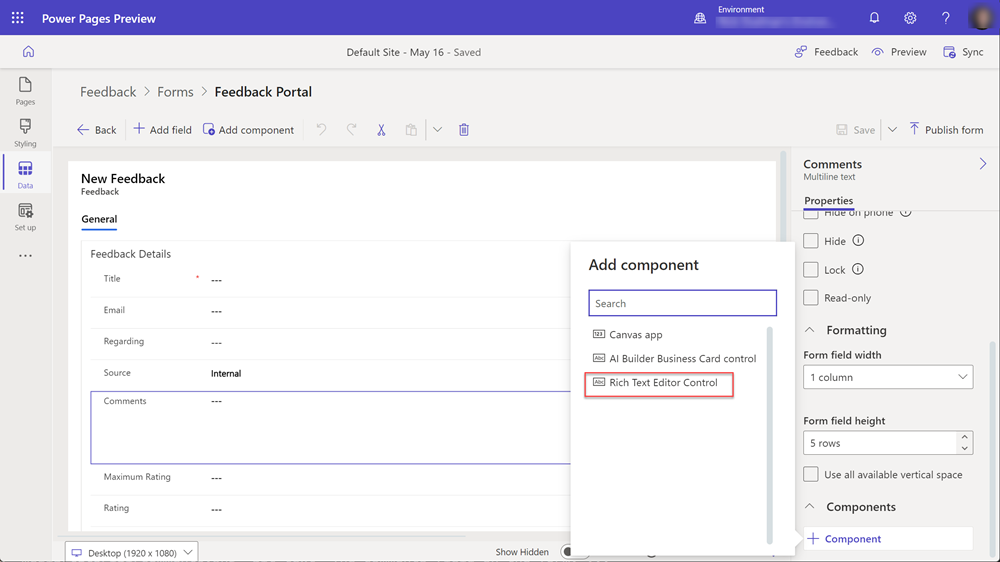
Select Done.
The form now has a code component linked to the field.
Add a form to a page
The following steps provide details on how to add your form to a page.
This video provides an overview of the steps to add a form to a page.
Open a Power Pages site in the design studio.
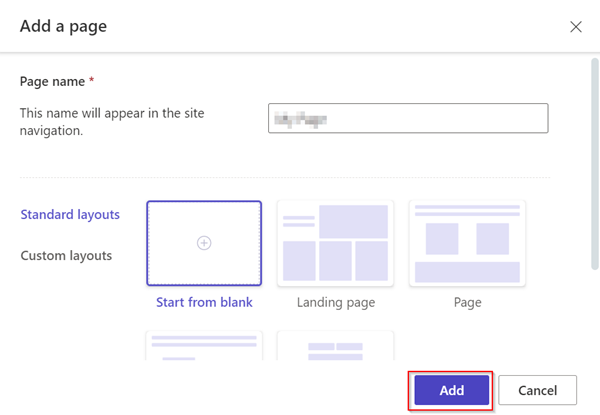
Choose the + icon next to Main Navigation to add a new page.
Fill in the details.
- Give the page a name.
- Choose the Start from Blank template.
- Select Add.
Select Form from the component bar.
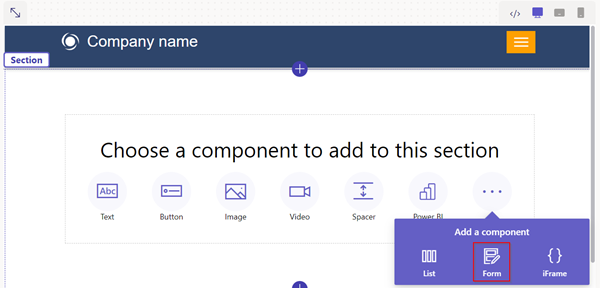
Select + New form.
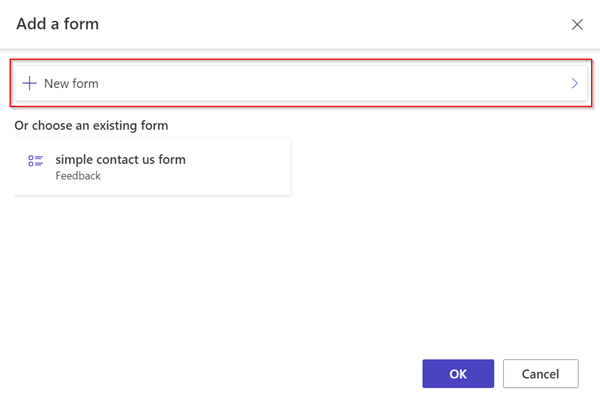
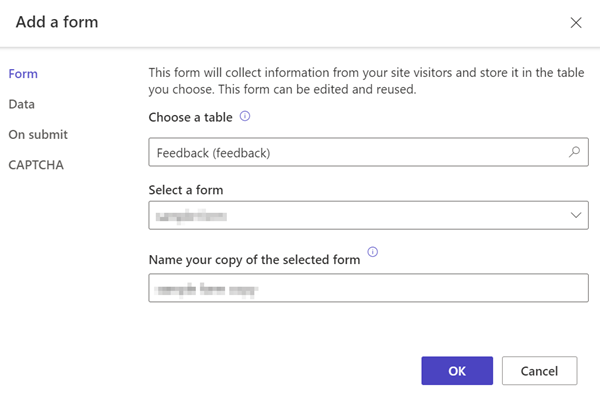
Fill in the details.
- Select the Feedback table.
- Select the form you created previously.
- Select Ok.
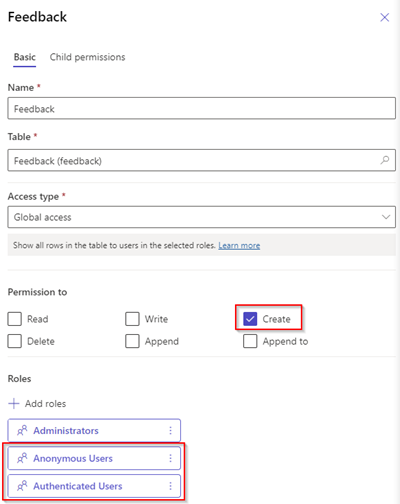
Select the Permissions button.

Select Feedback permissions.
- Ensure the Create privilege is checked and that Anonymous and Authenticated web roles are linked.
Select Preview page.

Enable code components on form fields
This video provides an overview of the steps to configure the rich text editor control on a form.
If a Dataverse form field has been configured to use a code component using the Data workspace or a model-driven app, you can enable the code component to be used when a form is used on a webpage.
To enable a code component:
Select the Edit code component button from the menu.
Switch the Enable custom component field toggle switch to the on position.
Custom components are now enabled for that field.
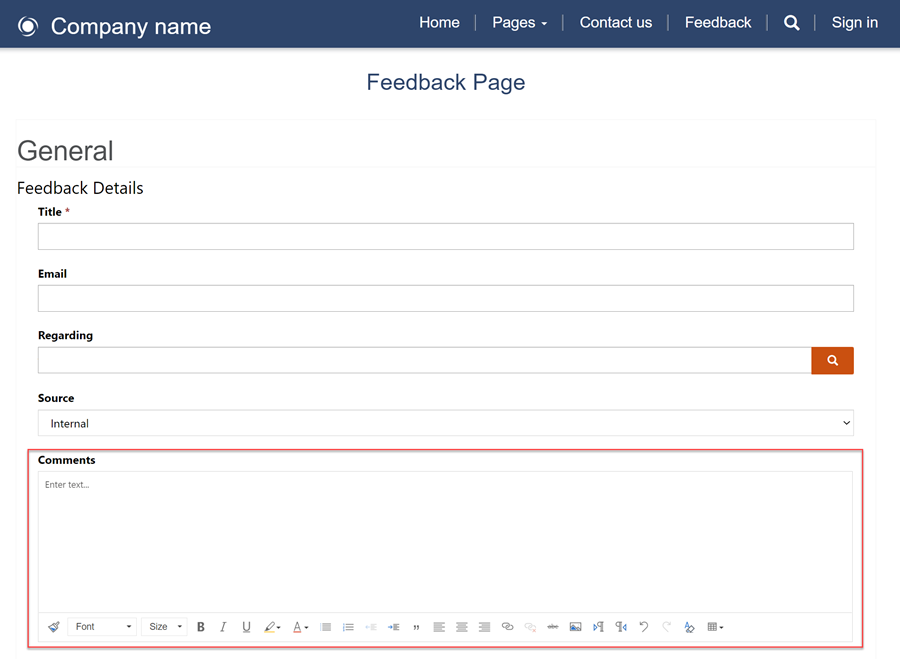
From the design studio, select Preview and navigate to your page.
The form should show the rich text editor controls on the field.
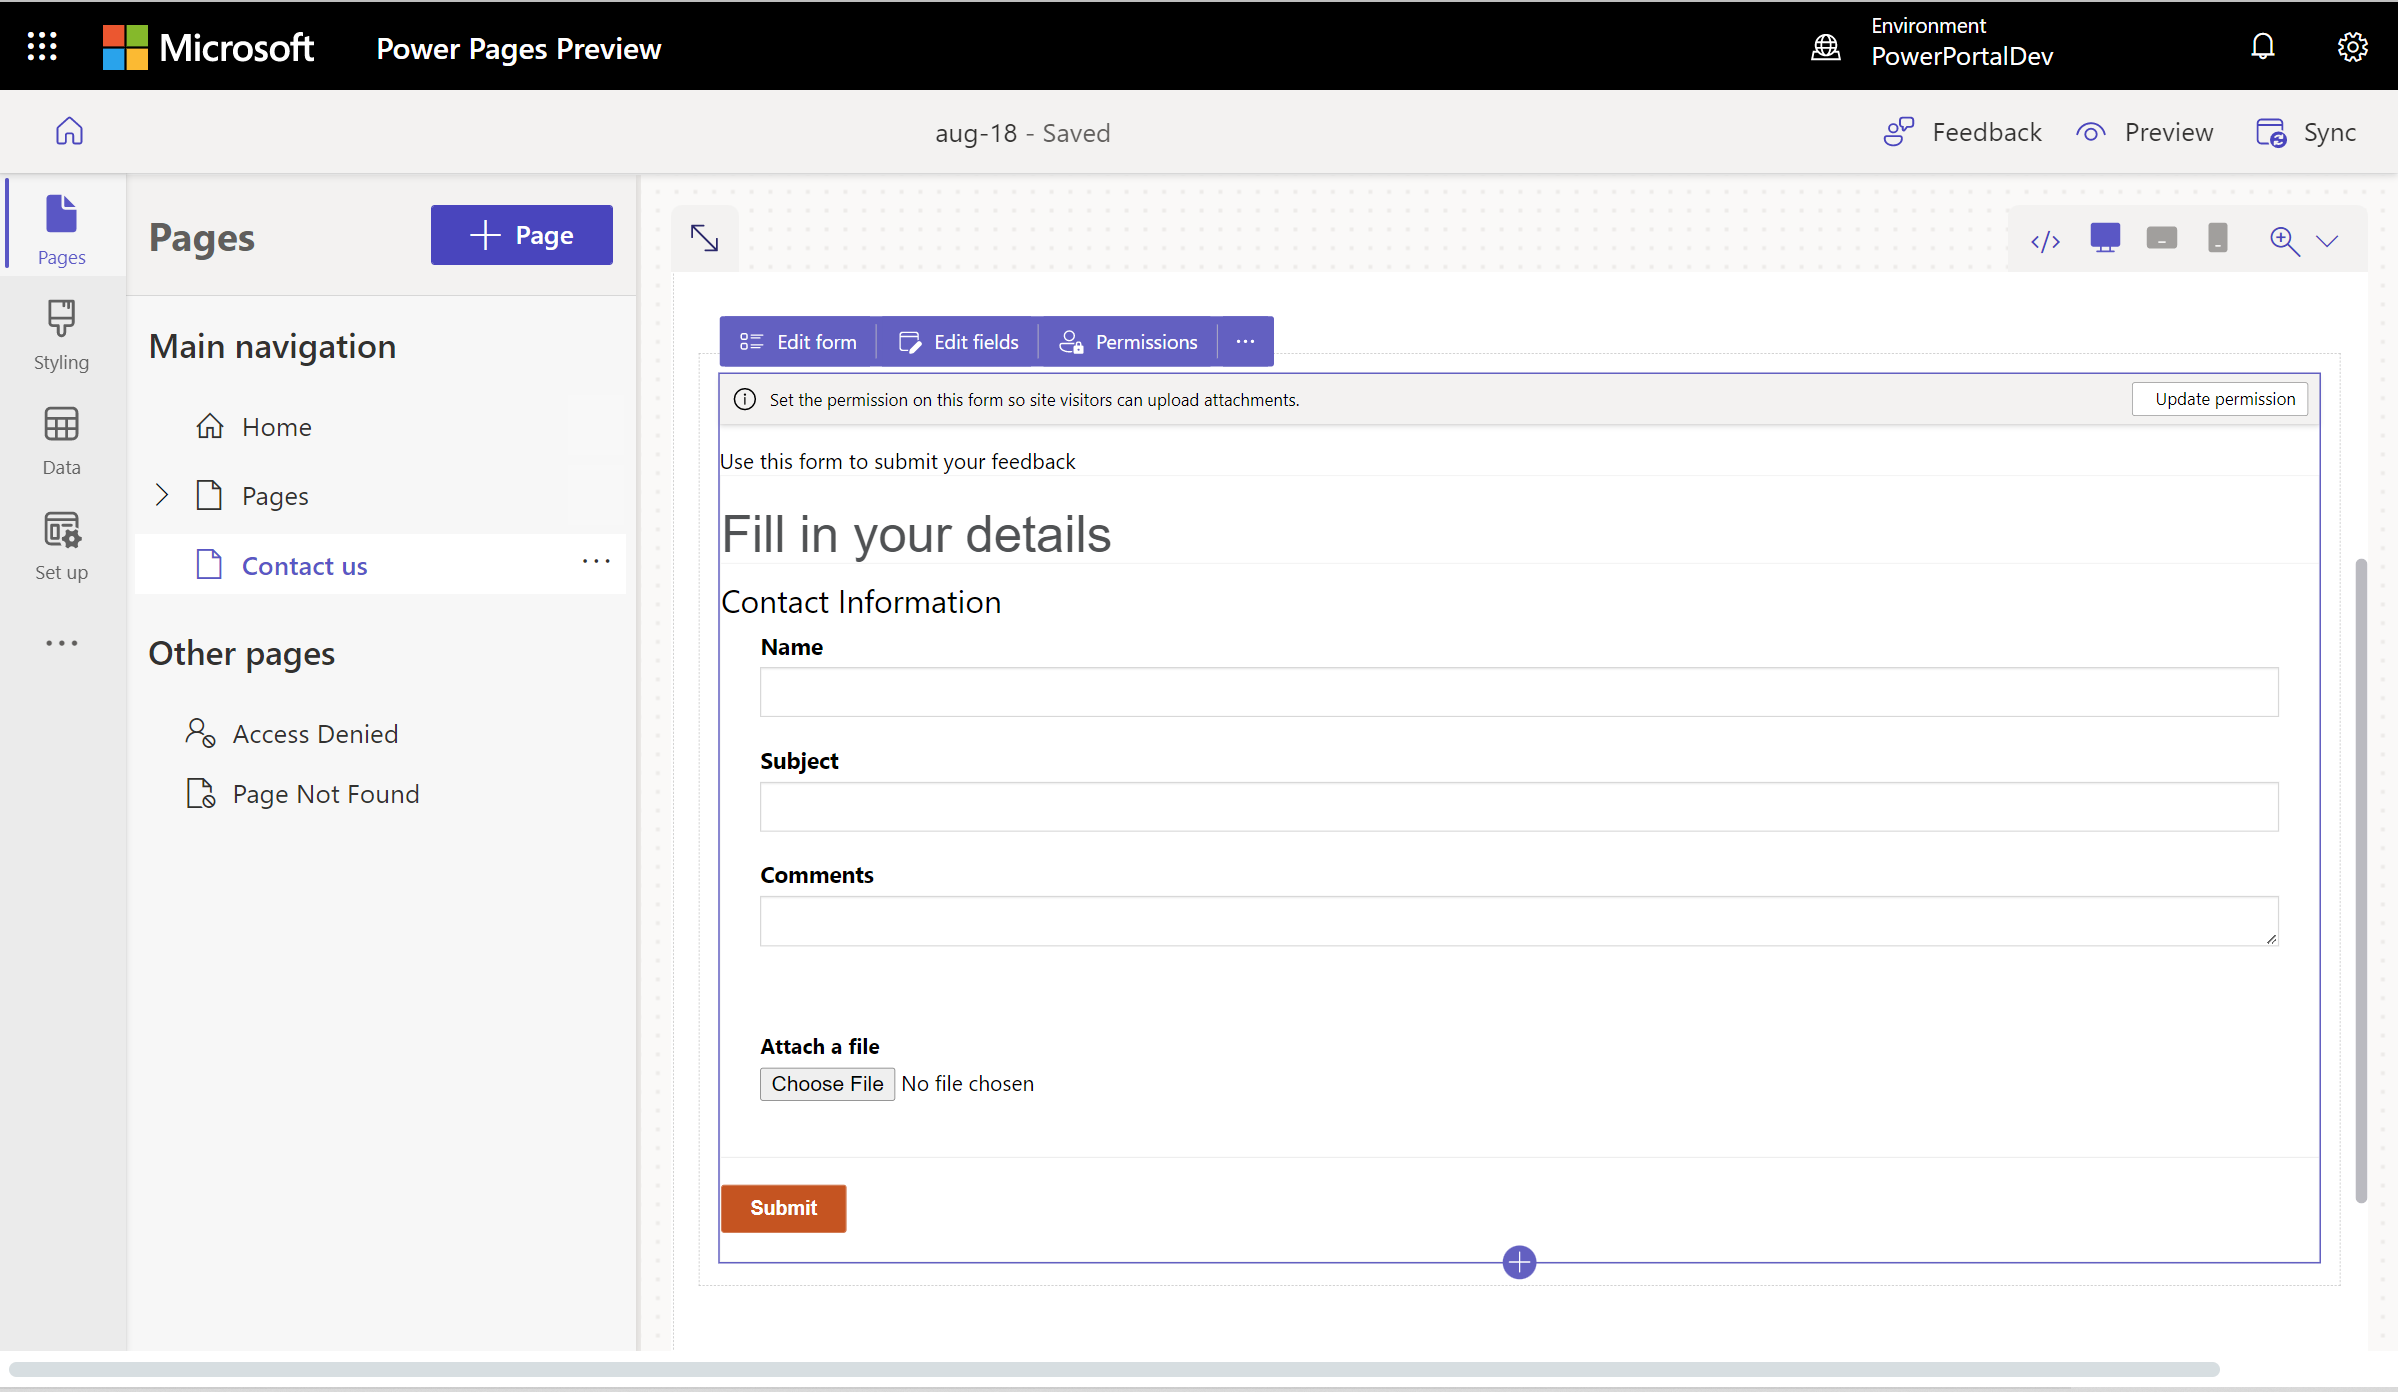
Enable attachments on forms
This video shows how you can enable attachments on forms.
Users can upload an attachment with form submission.
To enable attachments on a form:
Add a form or edit an existing form.
In the Add a form modal, choose Attachments from the left panel.
- Configure the following options:
- Turn on/off the Enable attachments toggle.
- Turn on/off the Attachment is required toggle.
- Turn on/off the Allow multiple files toggle.
- Max file size allowed
- Configure the following options:
Note
The following file types are allowed:
- All
- Audio
- Document
- Image
- Video
- Specific (comma separated values)
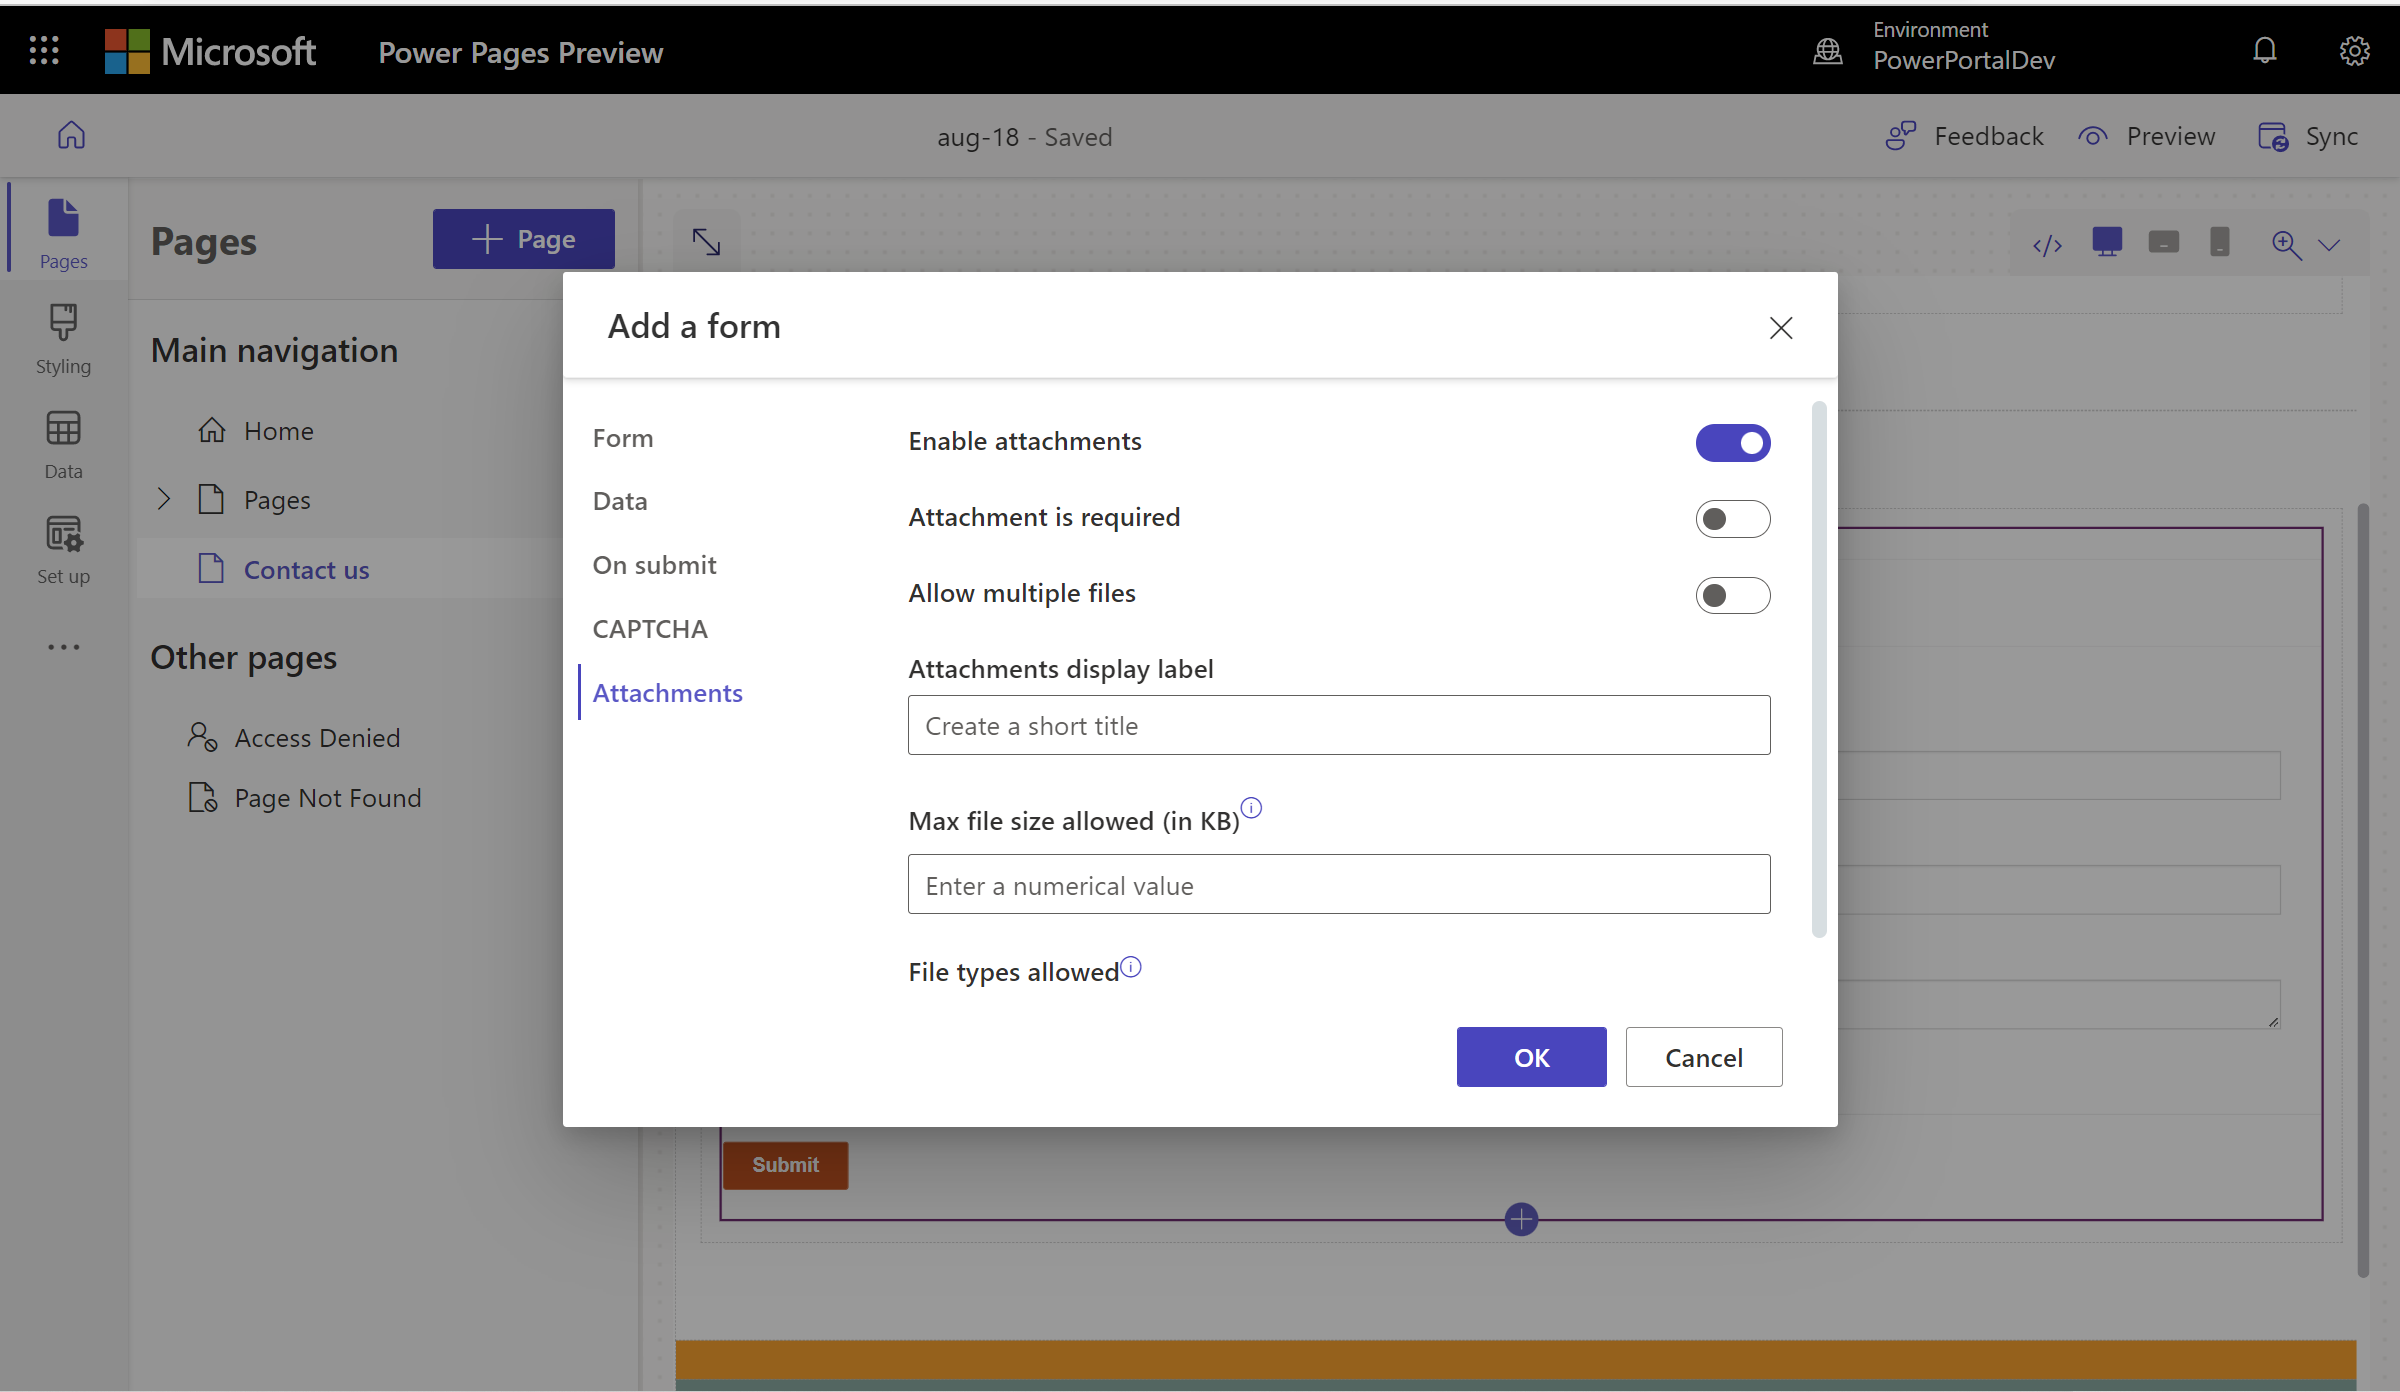
Once configured, the file upload placeholder will show in the canvas.
Next steps
Next, learn how to create a multi-step (advanced) form to your page.
Feedback
Coming soon: Throughout 2024 we will be phasing out GitHub Issues as the feedback mechanism for content and replacing it with a new feedback system. For more information see: https://aka.ms/ContentUserFeedback.
Submit and view feedback for