Configuring table permissions
Access to Dataverse records is automatically restricted in Power Pages when using forms, lists, Liquid, the Portals Web API, and other components accessing Dataverse tables.
To allow access to Dataverse records in Power Pages sites, you'll need to configure table permissions and associate the table permissions to web roles.
How to configure table permissions
You can create table permissions by using the following methods:
- When configuring a list or a form on a page
- From the Set up workspace
- With the Portal Management app
Adding table permissions from a list or form
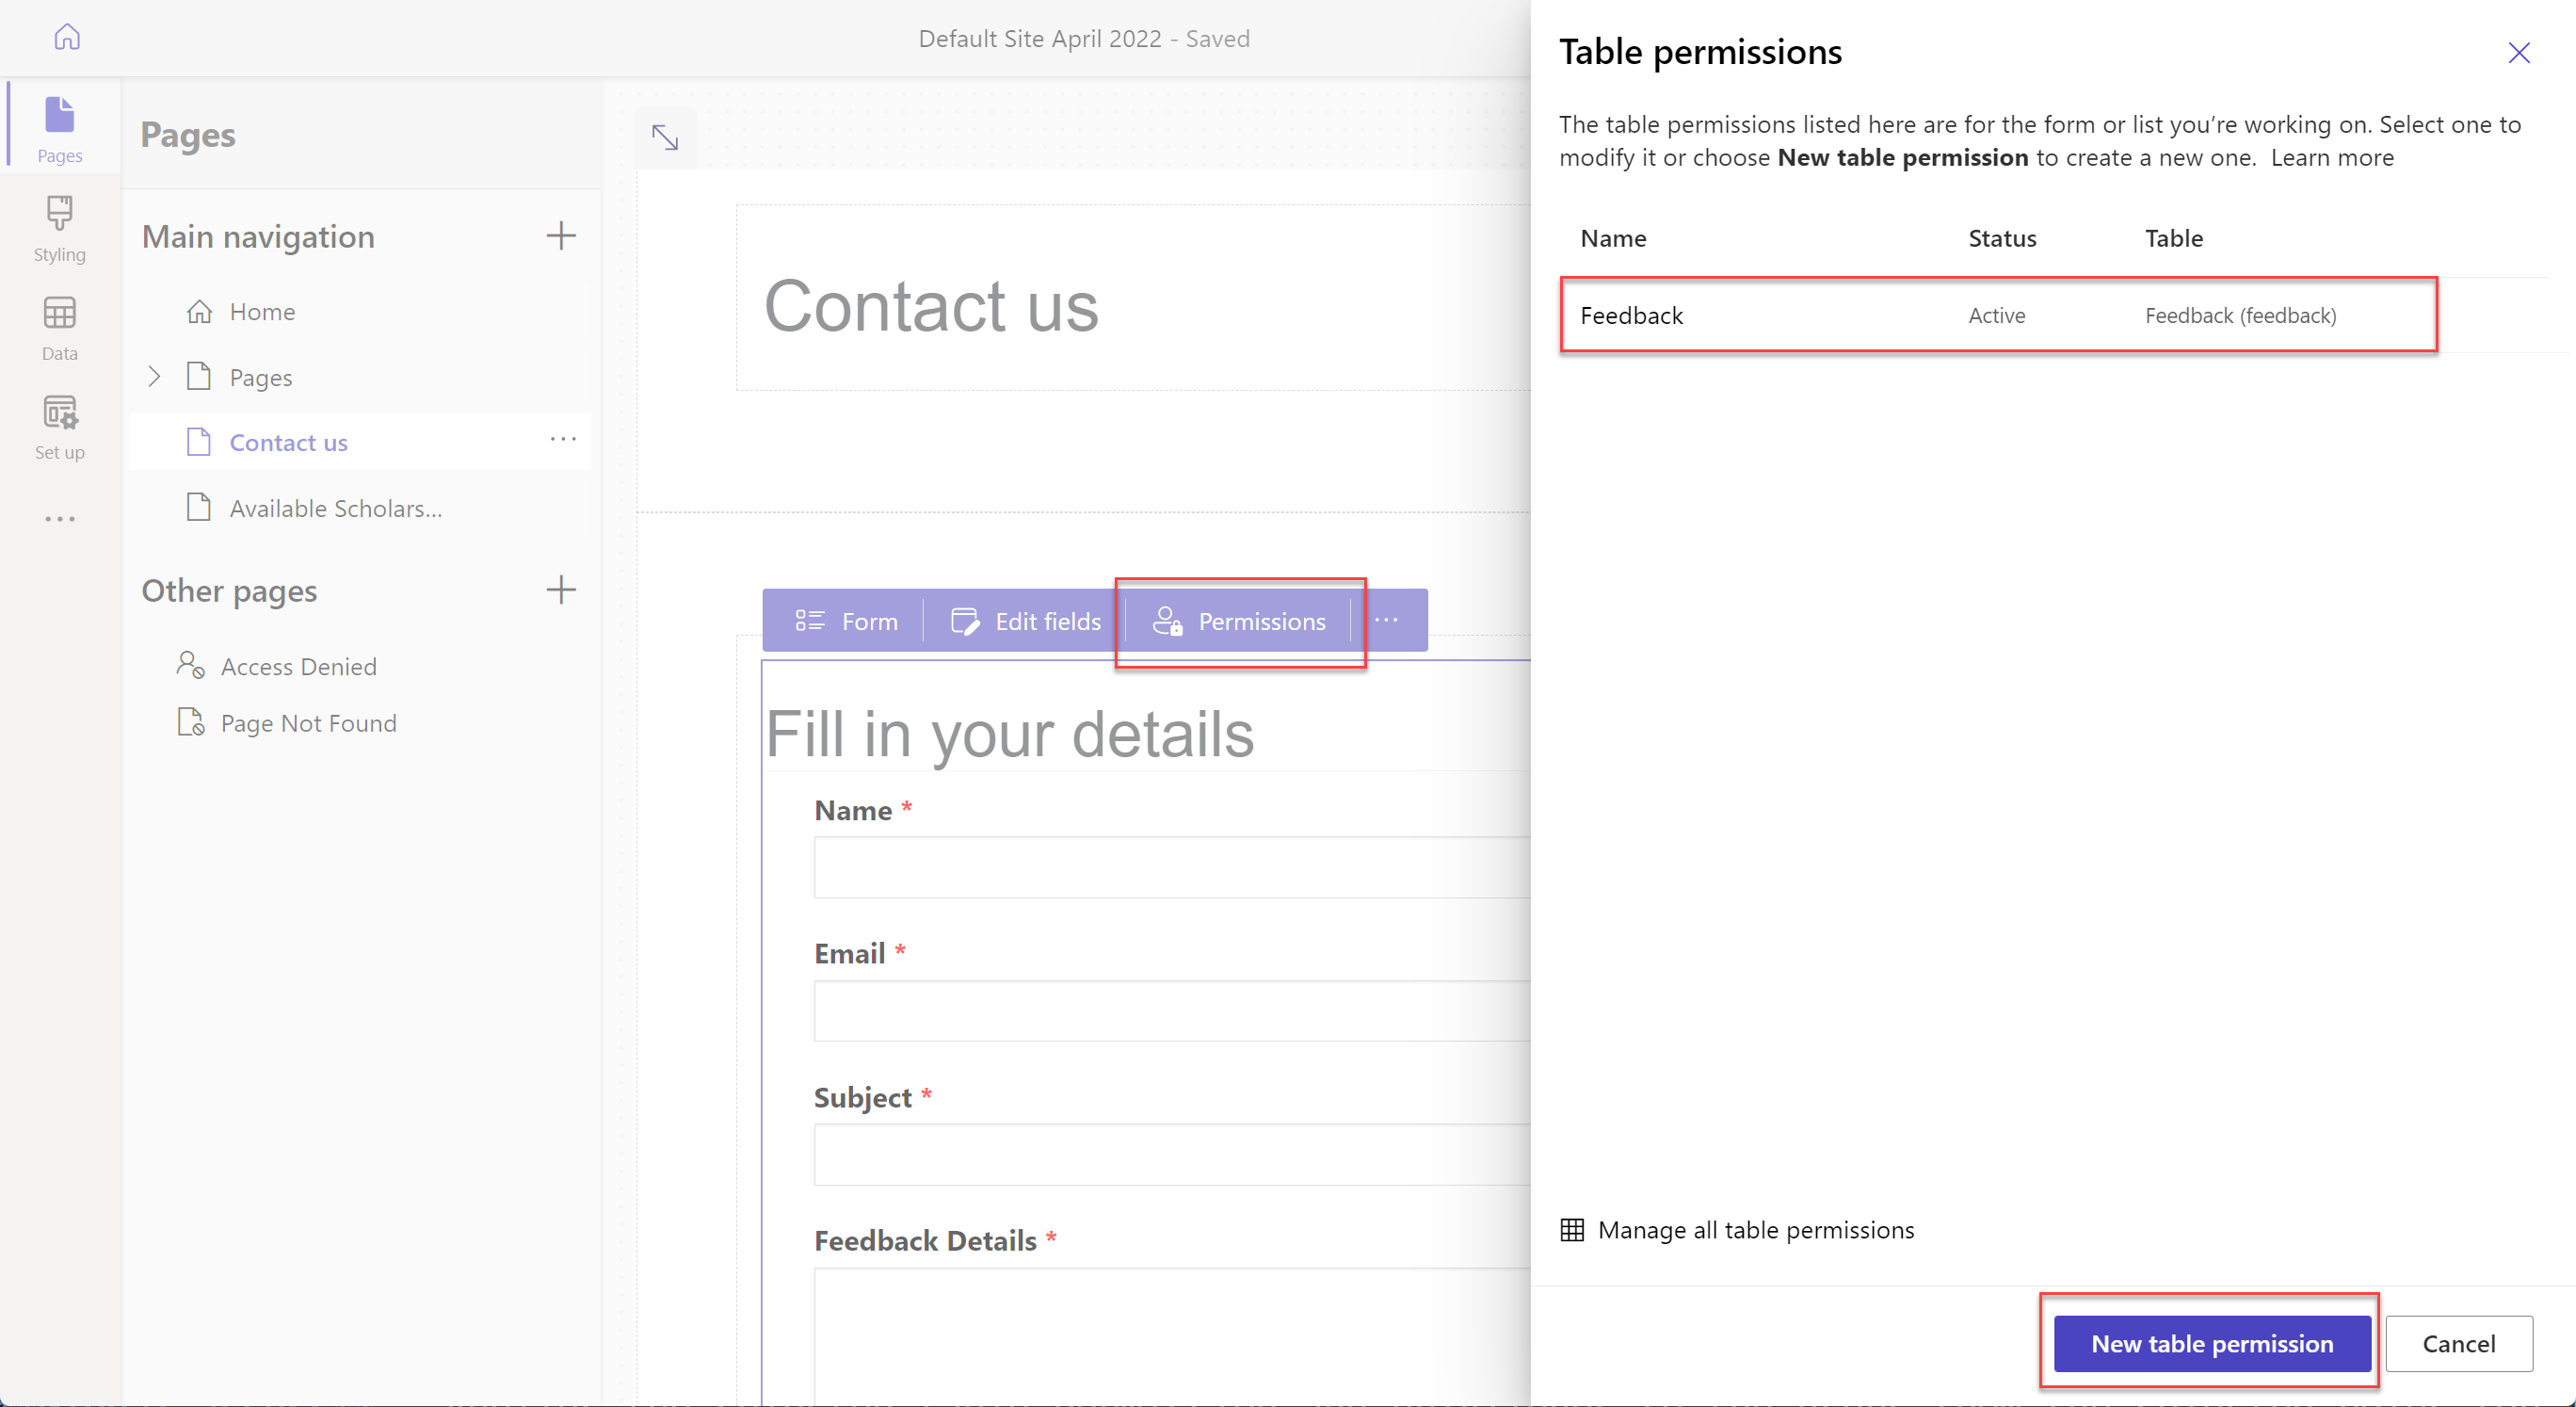
In design studio, go to the page containing the list or form component.
Select the form or list component, and then select Permissions.
In the Table permissions panel that appears, you can manage existing permissions or create a new table permission.
Adding table permissions from the Set up workspace
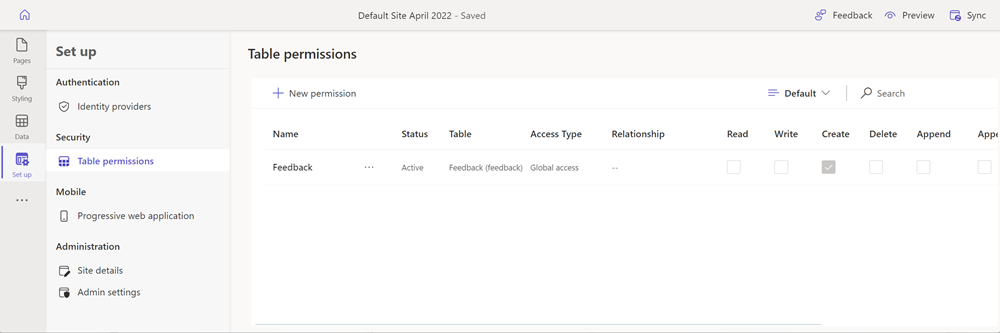
In the design studio on the side menu, select Set up.
On the left pane in the Security section, select Table permissions to add and modify table permissions.
Adding table permissions from the Portal Management app
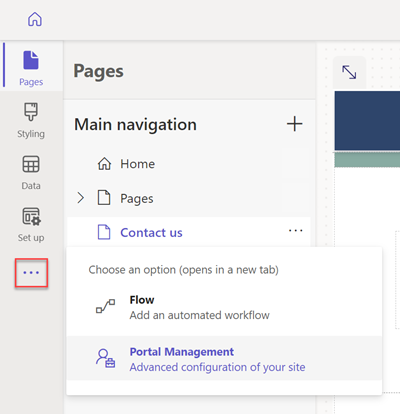
In the design studio, select the ellipsis (...) from the side menu, and then select Portal Management.
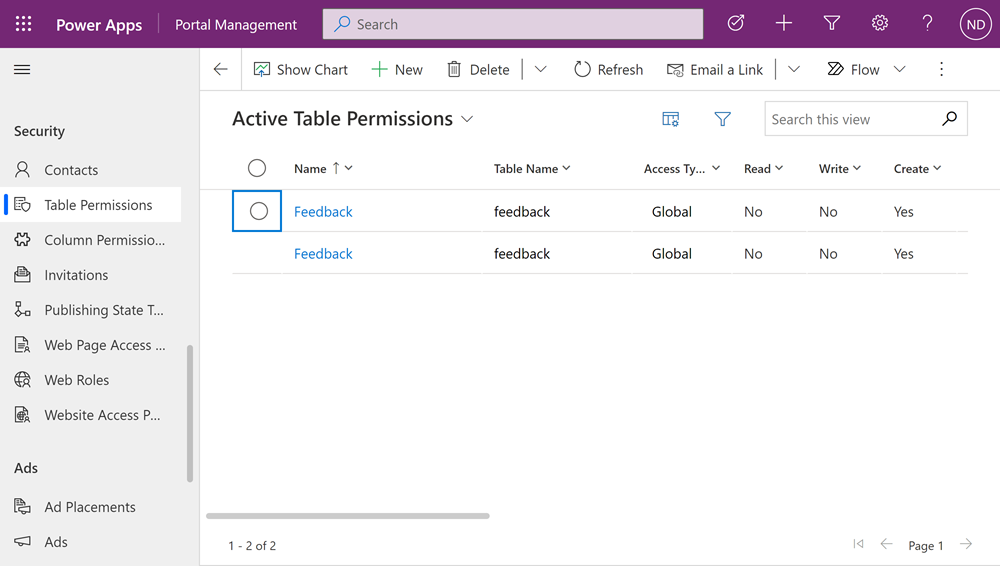
In the Portal Management app on the left pane in the Security section, select Table Permissions .
Available access types
The design studio shows four different Access types. Depending on the access type you choose, the selected table permission and privileges apply to the users from the selected roles for the following records.
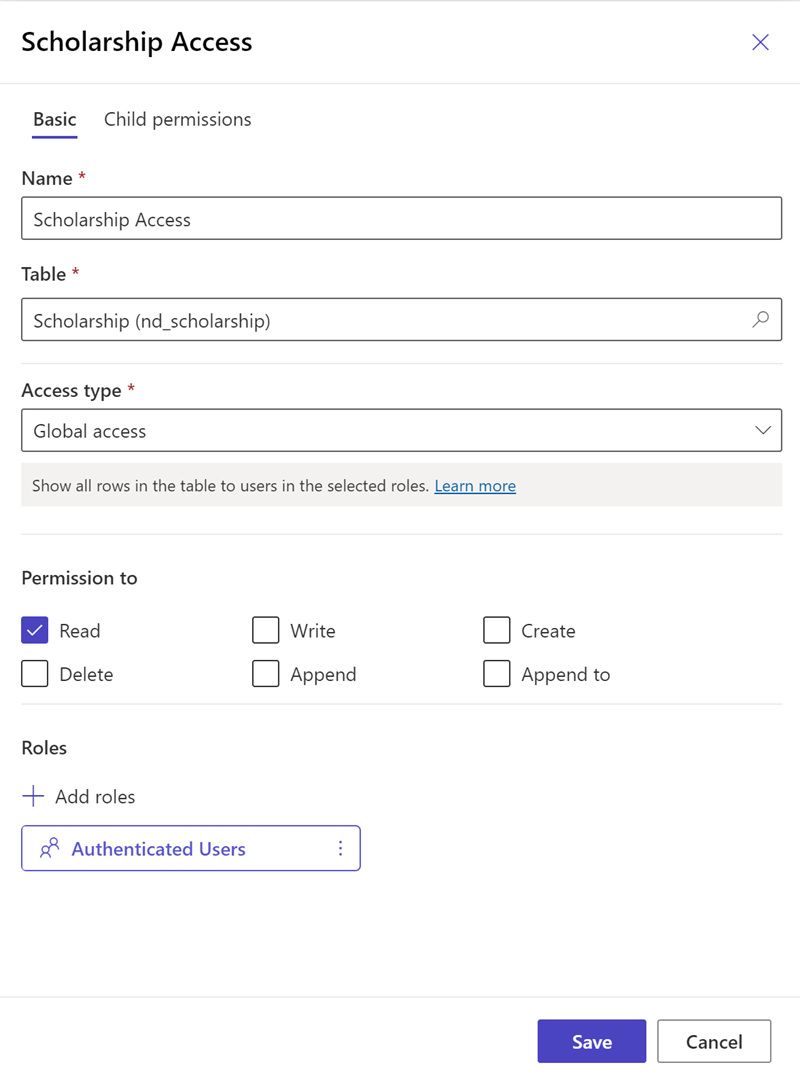
- Global access - Applies the selected table permission and privileges to the users from the selected roles for all records.
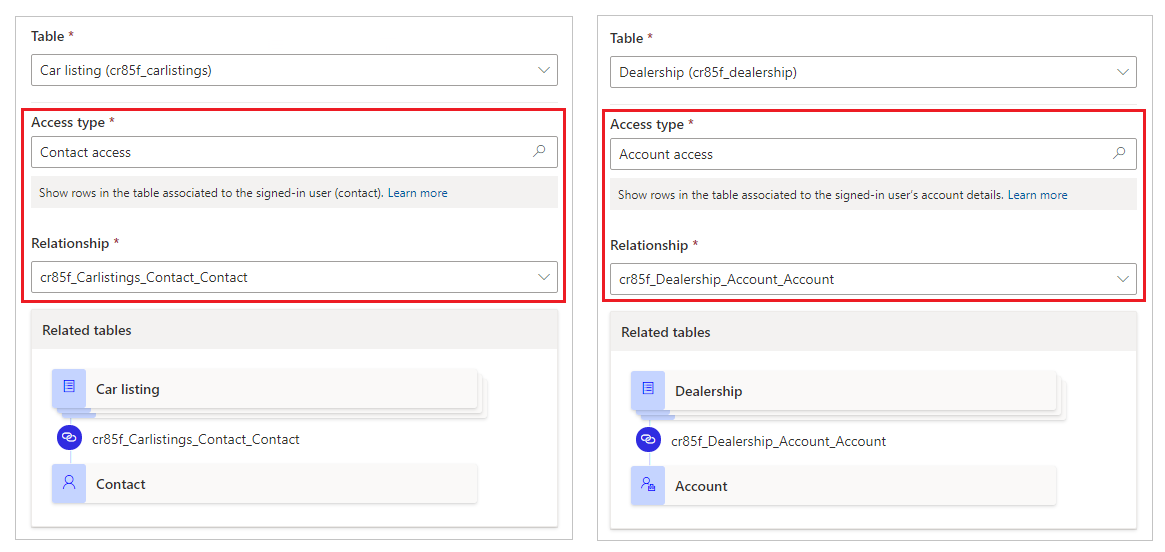
- Contact access - Applies the selected table permission and privileges to the users from the selected role associated to the signed-in user.
- Account access - Applies the selected table permission and privileges to the users from the selected role associated to the signed-in user's account.
- Self access - Applies the selected table permission and privileges to the users from the selected role for only their own Contact record.
Note
The Parent access type is only available in the Portal Management app. Instead of creating a table permission with the access type of Parent when using the design studio, directly add child permission to existing table permissions.
Configure table permissions
In this section, you'll learn how to create, view, edit, and deactivate/activate, or delete table permissions.
Create table permissions
Select New permission.
Enter the table permission name.
Select a table.
Select an access type. More information: Available access types
If you select the Contact or Account access type, select the relationship between the Contact/Account and the table you selected for the permission.
Note
- If you don't have any relationships available for the selected table, you can select New relationship to create a new relationship.
- Once you create a table relationship in Power Apps, you need to make sure the configuration is published and also select the Sync button in the design studio.
- In some cases, you may also need to reload the design studio to see the new table relationship in the table permissions panel.
Select the privileges that you want to grant.
Select Add roles to add the roles that this table permission will apply to.
Tip
If you haven't created a web role yet, select Manage roles from the roles flyout menu to open the Portal Management app and create roles.
Select Save.
View table permissions
In the design studio from the side menu, select Set up.
On the left pane in the Security section, select Table permissions to view table permissions.
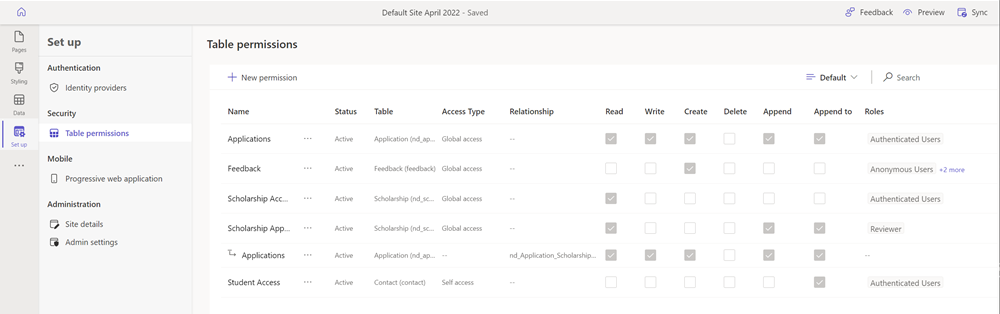
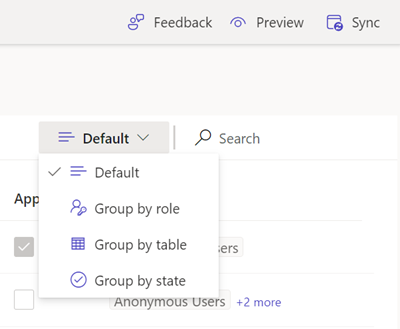
To group or filter table permissions, select a view (Default, Group by roles, Group by table, or Group by state), or enter a table permission name in the filter text box.
Note
- When you group table permissions by role, table, or state, the permissions are listed as a flat structure without the parent-child relationships for configured permissions.
- You can only filter for parent table permissions, not child permissions.
To sort the table permissions, select a column at the top in the list of table permissions.
Edit table permissions
In the design studio from the side menu, select Set up.
On the left pane in the Security section, select Table permissions to view table permissions.
Select the table permission that you want to edit; alternatively, you can select More commands (...), and then select Edit.
Change table permission details, such as the name, table, access type, privileges, and applicable roles. More information: Create table permissions.
Select Save.
Deactivate/activate or delete table permissions
A deactivated table permission becomes ineffective. You can activate a deactivated table permission later. When a table permission is deactivated, its child table permissions remain active, but don't remain in effect due to the ineffective parent table permission. You can deactivate child permissions separately.
When a table permission is deleted, all associated child permissions are also deleted.
To deactivate/activate or delete table permissions:
In the design studio from the side menu, select Set up.
On the left pane in the Security section, select Table permissions to view table permissions.
Select the table permission that you want to deactivate/activate or delete.
Select More commands (...), and then select Deactivate or Delete.
Confirm when prompted.
Configure child permissions
Note
Polymorphic lookups are not supported when configuring parent-child table permissions.
To add a child permission to an existing table permission:
In the design studio from the side menu, select Set up.
On the left pane in the Security section, select Table permissions to view table permissions.
Select the table permission that you want to add the child permission to. In the table permissions property panel, select the Child permissions tab, and then select New. Alternatively, you can also select More commands (...), and then select Add child permission.
Create the child permission with the following details:
Name for the child permission
Table that the child permission is for
Relationship between the table for primary table permission, and the selected table for the child permission
Privileges for the child permissions
Roles (These roles are inherited from the parent table permission. To add or remove roles, edit the parent table permission instead.)
Select Save.
To view, edit, deactivate/activate, or delete child permissions using the design studio, follow the steps explained in the earlier section to configure table permissions.
Additional considerations
The configuration of table permissions is subject to the following extra considerations and rules.
Parent table permission missing a web role associated to its child
When you have a child permission associated with one or more web roles missing from the parent permissions, you'll see the following error while editing the child permissions:
One or more roles applied to this permission aren't available to its parent table permission. Modify roles in either permissions.
For example, a child table permission displays the following message when the parent table permission doesn't have the Marketing web role associated, even though the child permission is still associated.

To fix this problem, add the Marketing web role to the parent table permission, or remove the Marketing web role from the child table permission.
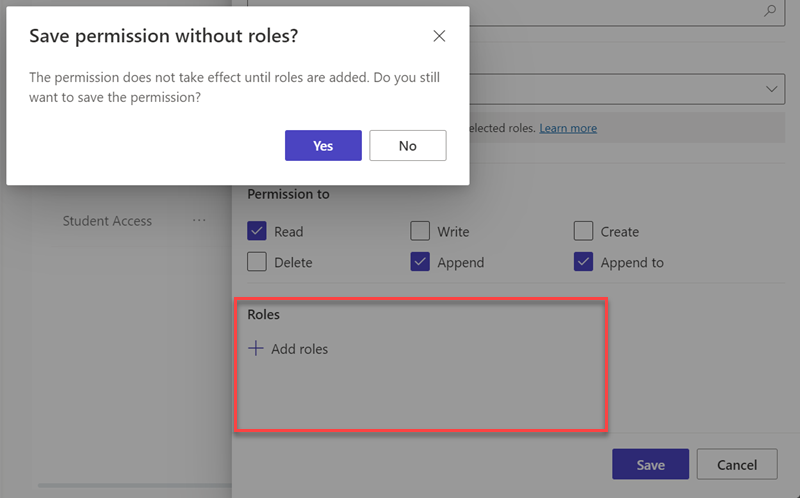
Table permissions without any web roles associated
For a table permission to take effect, it has to be associated to one or more web roles. Users who belong to web roles are granted the privileges you select for the associated table permission.
The following message is displayed when you try to save a table permission without any web role associated.
Next Steps
Web Application Firewall DRS rule groups and rules for Power Pages (preview)
See also
Feedback
Coming soon: Throughout 2024 we will be phasing out GitHub Issues as the feedback mechanism for content and replacing it with a new feedback system. For more information see: https://aka.ms/ContentUserFeedback.
Submit and view feedback for