Create a canvas app with data from Microsoft Lists
In this topic, you'll use Power Apps to create a canvas app based on items in a list created using Microsoft Lists. You can create the app from within Power Apps or SharePoint Online. From within Power Apps, you can create the app based on a list in an on-premises SharePoint site if you connect to it through a data gateway.
The app that you create will contain three screens:
- In the browse screen, you can scroll through all items in the list.
- In the details screen, you can show all information about a single item in the list.
- In the edit screen, you can create an item or update information about an existing item.
You can apply the concepts and techniques in this topic to any list in SharePoint. To follow the steps exactly:
- In a SharePoint Online site, create a list named SimpleApp.
- In a column named Title, create entries for Vanilla, Chocolate, and Strawberry.
The principles of generating an app won't change even if you create a list that's far more complex, with many columns of various types such as text, dates, numbers, and currency.
Important
Power Apps doesn't support all types of SharePoint data. For more information, see Known issues.
Watch this video to learn how to create a canvas app from a list:
Create an app from within Power Apps
- Sign in to Power Apps.
- Depending on how you want to create your app, from the home screen, select one of the following options:
- To create a single-page gallery app with a responsive layout, choose either:
- Start with data > Create with SharePoint List.
- Start with a page design > Gallery connected to external data > From SharePoint.
- To create a three screen mobile app, select Start with an app template > From SharePoint.
- To create a single-page gallery app with a responsive layout, choose either:
- If you don't have a SharePoint connection already created, you'll be prompted to. To select a different connection, select on the ... button to switch account or create a new connection.
- Enter the SharePoint URL and then select Connect. Or, select a recent site.
- Select a list and then select, Create app.
Your app opens in Power Apps Studio where you can design, build, and manage your app. More information: Understand Power Apps Studio
You'll probably want to make more changes before you use this app or share it with others. As a best practice, save your work so far by selecting the save icon on the upper-right corner before you proceed. Give your app a name, and then select Save.
Create an app from within SharePoint Online
If you create an app of a list from the SharePoint Online command bar, the app appears as a view of that list. You can also run the app on an iOS or Android device, in addition to a web browser.
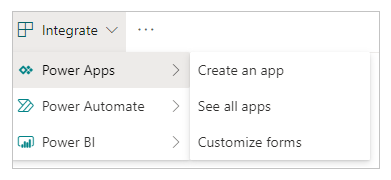
In SharePoint Online, open a list, and then select Integrate > Power Apps > Create an app.
In the panel that appears, type a name for your app, and then select Create.
A new tab appears in your web browser that shows the app that you created based on your list. The app appears in Power Apps Studio, where you can customize it.
(optional) Refresh the browser tab for your list (by selecting it and then, for example, pressing F5), and then follow these steps to run or manage your app:
To run the app (in a separate browser tab), select Open.
To let others in your organization run the app, select Make this view public.
To let others edit your app, share it with Can edit permissions.
To remove the view from SharePoint, select Remove this view.
To remove the app from Power Apps, delete the app.
Note
Apps created from the list currently do not show in the Power Apps Mobile.
Use Sharepoint or SQL on-premises
Follow these steps if you're using an external on-premises data source such as SharePoint or SQL on-premises to create an app.
- Sign in to Power Apps.
- On the left navigation, select Create.
- Depending on the type of data source that you're connecting to, select SharePoint or SQL.
- Select New connection and then select SharePoint or SQL.
- Select Connect using on-premises data gateway and enter the required information and then select Create.
When your connection is ready, select it and then you'll see a list of tables available for the database connection. - Select a table and then select Connect.
Next steps
In this topic, you created an app to manage data in a list. As a next step, create an app from a more complex list, and then customize the app (starting with the browse screen) to better suit your needs.
See also
Feedback
Coming soon: Throughout 2024 we will be phasing out GitHub Issues as the feedback mechanism for content and replacing it with a new feedback system. For more information see: https://aka.ms/ContentUserFeedback.
Submit and view feedback for