Add a context menu to your Power BI Visual
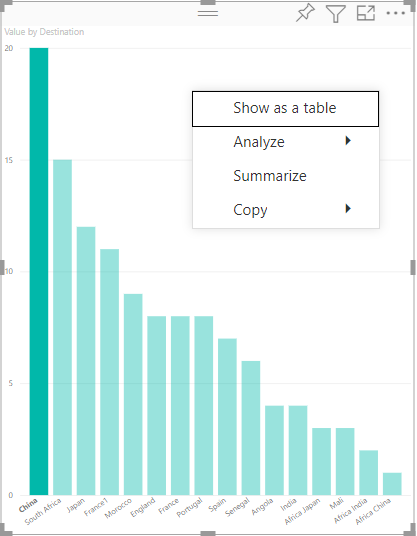
Every Power BI visual can display a context menu. The context menu allows you to perform various operations on the visual, such as analyzing, summarizing, or copying it. When you right-click anywhere inside a visual's viewport (or long-press for touch devices), the context menu displays. There are two modes of context menus for each visual. The mode that displays depends on where you click inside the visual:
- Call the context menu on empty space to see the basic context menu for the visual.
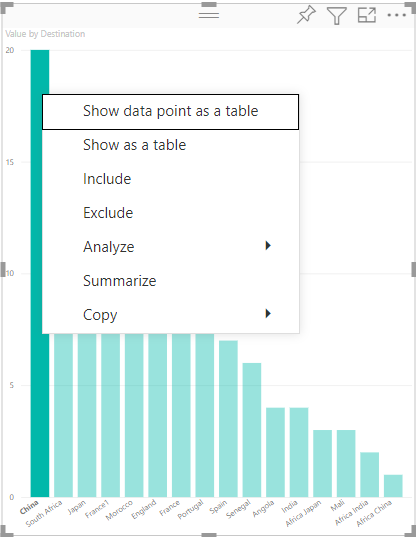
- Call the context menu on a specific data point for added options that can be applied to that data point. In this case, the context menu also contains the options Show data point as a table, Include, and Exclude, which will apply the corresponding filter to that data point.
How to add a context menu
Use selectionManager.showContextMenu() with parameters selectionId and a position (as an {x:, y:} object) to have Power BI display a context menu for your visual.
Note
- The
selectionManager.showContextMenu()is available from Visuals API version 2.2.0. To find out which version you’re using, check theapiVersionin the pbiviz.json file. - All visuals published to AppSource must support both
ContextMenumodes (empty space and data point).
The following example shows how to add a context menu to a visual. The code is taken from the barChart.ts file, which is part of the sample BarChart visual:
constructor(options: VisualConstructorOptions) {
        ...
        this.handleContextMenu();
    }

private handleContextMenu() {
        this.rootSelection.on('contextmenu', (event: PointerEvent, dataPoint) => {
            this.selectionManager.showContextMenu(dataPoint ? dataPoint: {}, {
                x: mouseEvent.clientX,
                y: mouseEvent.clientY
            });
            mouseEvent.preventDefault();
        });
    }
Related content
More questions? Ask the Power BI Community
Feedback
Coming soon: Throughout 2024 we will be phasing out GitHub Issues as the feedback mechanism for content and replacing it with a new feedback system. For more information see: https://aka.ms/ContentUserFeedback.
Submit and view feedback for