Windows Recovery Environment (Windows RE)
Windows Recovery Environment (WinRE) is a recovery environment that can repair common causes of unbootable operating systems. WinRE is based on Windows Preinstallation Environment (Windows PE), and can be customized with additional drivers, languages, Windows PE Optional Components, and other troubleshooting and diagnostic tools. By default, WinRE is preloaded into the Windows 10 and Windows 11 for desktop editions (Home, Pro, Enterprise, and Education) and Windows Server 2016, and later, installations.
What's new with WinRE for Windows 11
- You can now run most tools within WinRE without selecting an administrator account and entering the password. When booted into the Recovery environment, encrypted files won't be accessible unless the user has the key to decrypt the volume.
- We've updated the behavior of Advanced startup (Settings > Update & Security > Recovery > Advanced startup "Restart now") so Ease of Access features will work in the recovery environment. For example, previously, if the narrator feature was enabled prior to launching Advanced startup, it would not be enabled on restart (and could not be enabled). Now Advanced startup boots directly into the Windows Recovery Environment where a user can turn on Ease of Access features by using a keyboard shortcut.
What's new with WinRE for Windows 10
- By default, if you install Windows using media created from Windows Imaging and Configuration Designer (ICD), you'll get a dedicated WinRE tools partition on both UEFI and BIOS-based devices, located immediately after the Windows partition. This allows Windows to replace and resize the partition as needed. (If you install Windows by using Windows Setup, you'll get the same partition layout that you did in Windows 8.1.)
- If you add a custom tool to the WinRE Advanced startup menu, it can only use optional components that are already in the default WinRE tools. For example, if you have a app from Windows 8 that depended on the .NET optional components, you'll need to rewrite the app for Windows 10.
- If you add a custom tool to the WinRE Advanced startup menu, it must be placed in the \Sources\Recovery\Tools folder so that it can continue to work after future WinRE upgrades.
- When adding languages to the push-button reset tools, you'll now need to add the WinPE-HTA optional component.
Tools
WinRE includes these tools:
- Automatic repair and other troubleshooting tools. For more info, see Windows RE Troubleshooting Features.
- Push-button reset (Windows dekstop editions only). This tool enables your users to repair their own PCs quickly while preserving their data and important customizations, without having to back up data in advance. For more info, see Push-Button Reset Overview.
- System image recovery (Windows Server editions only). This tool restores the entire hard drive. For more info, see Recover the Operating System or Full Server.
In addition, you can create your own custom recovery solution by using the Windows Imaging API, or by using the Deployment Image Servicing and Management (DISM) API.
Entry points into WinRE
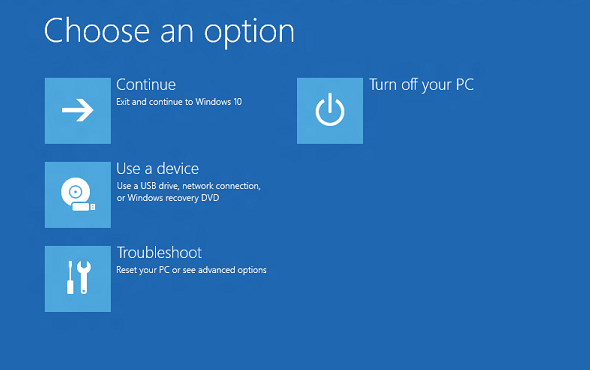
Your users can access WinRE features through the Advanced startup menu, which can be launched from Windows in a few different ways:
- From the login screen, click Shutdown, then hold down the Shift key while selecting Restart.
- Click Start > Settings > Update & security > Recovery > under Advanced Startup, click Restart now.
- Boot to recovery media.
- Use a hardware recovery button (or button combination) configured by the OEM.
After any of these actions is performed, all user sessions are signed off and the Advanced startup menu is displayed. If your users select a WinRE feature from this menu, the PC restarts into WinRE and the selected feature is launched.
WinRE starts automatically after detecting the following issues:
- Two consecutive failed attempts to start Windows.
- Two consecutive unexpected shutdowns that occur within two minutes of boot completion.
- Two consecutive system reboots within two minutes of boot completion.
- A Secure Boot error (except for issues related to Bootmgr.efi).
- A BitLocker error on touch-only devices.
Advanced startup menu
This menu enables your users to perform these actions:
- Start recovery, troubleshooting, and diagnostic tools.
- Boot from a device (UEFI only).
- Access the Firmware menu (UEFI only).
- Choose which operating system to boot, if multiple operating systems are installed on the PC.
Note
You can add one custom tool to the Advanced startup menu. Otherwise, these menus can't be further customized. For more info, see Add a Custom Tool to the Windows RE Advanced startup Menu.
Security considerations
When working with WinRE, be aware of these security considerations:
- If users open the Advanced startup menu from Windows and select a WinRE tool, they must provide the user name and password of a local user account with administrator rights.
- You can run most tools within WinRE without selecting an administrator account and entering the password. When booted into the Recovery environment, encrypted files won't be accessible unless the user has the key to decrypt the volume.
- By default, networking is disabled in WinRE. You can turn on networking when you need it. For better security, disable networking when you don't need connectivity.
Customizing WinRE
You can customize WinRE by adding packages (Windows PE Optional Components), languages, drivers, and custom diagnostic or troubleshooting tools. The base WinRE image includes these Windows PE Optional Components:
- Microsoft-Windows-Foundation-Package
- WinPE-EnhancedStorage
- WinPE-Rejuv
- WinPE-Scripting
- WinPE-SecureStartup
- WinPE-Setup
- WinPE-SRT
- WinPE-WDS-Tools
- WinPE-WMI
- WinPE-StorageWMI-Package (added to the base image in Windows 8.1 and Windows Server 2012 R2)
- WinPE-HTA (added to the base image in Windows 10)
Note
The number of packages, languages, and drivers is limited by the amount of memory available on the PC. For performance reasons, minimize the number of languages, drivers, and tools that you add to the image.
Hard drive partitions
When you install Windows by using Windows Setup, WinRE is configured like this:
During Windows Setup, Windows prepares the hard drive partitions to support WinRE.
Windows initially places the WinRE image file (winre.wim) in the Windows partition, in the \Windows\System32\Recovery folder.
Before delivering the PC to your customer, you can modify or replace the WinRE image file to include additional languages, drivers, or packages.
During the specialize configuration pass, the WinRE image file is copied into the recovery tools partition, so that the device can boot to the recovery tools even if there's a problem with the Windows partition.
When you deploy Windows by applying images, you must manually configure the hard drive partitions. When WinRE is installed on a hard drive, the partition must be formatted as NTFS.
Add the baseline WinRE tools image (winre.wim) to a separate partition from the Windows and data partitions. This enables your users to use WinRE even if the Windows partition is encrypted with Windows BitLocker Drive Encryption. It also prevents your users from accidentally modifying or removing the WinRE tools.
Store the recovery tools in a dedicated partition, directly after the Windows partition. This way, if future updates require a larger recovery partition, Windows will be able to handle it more efficiently by adjusting the Windows and recovery partition sizes, rather than having to create a new recovery partition size while the old one remains in place.
To learn more, see Configure UEFI/GPT-Based Hard Drive Partitions or Configure BIOS/MBR-Based Hard Drive Partitions.
Memory requirements
In order to boot Windows RE directly from memory (also known as RAM disk boot), a contiguous portion of physical memory (RAM) which can hold the entire Windows RE image (winre.wim) must be available. To optimize memory use, manufacturers should ensure that their firmware reserves memory locations either at the beginning or at the end of the physical memory address space.
Updating the on-disk Windows Recovery Environment
The on-disk copy of Windows RE can be serviced as part of rollup updates for the OS. Not all rollup updates will service Windows RE.
Unlike the normal OS update process, updates for Windows RE don't directly service the on-disk Windows RE image (winre.wim). Instead, a newer version of the Windows RE image replaces the existing one, with the following contents being injected or migrated into the new image:
- Boot critical and input device drivers from the full OS environment are added to the new Windows RE image.
- Windows RE customizations under
\Sources\Recoveryof the mounted winre.wim are migrated to the new image.
The following contents from the existing Windows RE image are not migrated to the new image:
- Drivers which are in the existing Windows RE image but not in the full OS environment
- Windows PE optional components which are not part of the default Windows RE image
- Language packs for Windows PE and optional components
The Windows RE update process makes every effort to reuse the existing Windows RE partition without any modification. However, in some rare situations where the new Windows RE image (along with the migrated/injected contents) does not fit in the existing Windows RE partition, the update process will behave as follows:
- If the existing Windows RE partition is located immediately after the Windows partition, the Windows partition will be shrunk and space will be added to the Windows RE partition. The new Windows RE image will be installed onto the expanded Windows RE partition.
- If the existing Windows RE partition is not located immediately after the Windows partition, the Windows partition will be shrunk and a new Windows RE partition will be created. The new Windows RE image will be installed onto this new Windows RE partition. The existing Windows RE partition will be orphaned.
- If the existing Windows RE partition cannot be reused and the Windows partition cannot successfully be shrunk, the new Windows RE image will be installed onto the Windows partition. The existing Windows RE partition will be orphaned.
Important
To ensure that your customizations continue to work after Windows RE has been updated, they must not depend on functionalities provided by Windows PE optional components which are not in the default Windows RE image (e.g. WinPE-NetFX). To facilitate development of Windows RE customizations, the WinPE-HTA optional component has been added to the default Windows RE image in Windows 10.
Note
The new Windows RE image deployed as part of the rollup update contains language resources only for the system default language, even if the existing Windows RE image contains resources for multiple languages. On most PCs, the system default language is the language selected at the time of OOBE.
Known Issue
If the GPO "Windows Settings/Security Settings/Local Policies/Security Options/Accounts: Block Microsoft accounts" is set to enable the policy "User can’t add or log with Microsoft account", attempting to restore the System in WinRE will fail with the error message "You need to sign in as an administrator to continue, but there aren't any administrator accounts on this PC."
This is a known issue and the workaround is to either avoid setting the "Accounts: Block Microsoft accounts" to "User can't add or log with Microsoft Account" or set the MDM policy Security/RecoveryEnvironmentAuthentication to 2.
See also
| Content type | References |
|---|---|
Deployment |
|
Operations |
|
Troubleshooting |
|
Add-on tools |
Add a Custom Tool to the Windows RE Advanced startup Menu | Add a Hardware Recovery Button to Start Windows RE | Push-Button Reset Overview |