Using web.config transforms and Release Manager - TFS 2017/Team Services edition
This is a follow-up to an old post on Using Web.Config transforms and Release Manager that I did some time ago. That post was done on TFS 2015 and using the now "old" architecture of Release Management.
This post will follow the same idea of deploying an application to Azure (App Service), but this time using Visual Studio Team Services and its Build/Release system. This can be easily translated to TFS 2017 RTM, the latest TFS version at the time of this writing.
I'll be using an old MVC app (TailspinToys) as an example and will be focusing on the web.config changes only. I'll check if I can post the source code for this later, but this is an old app that I used to expedite the work on writing this, so you might want to use a newer framework.
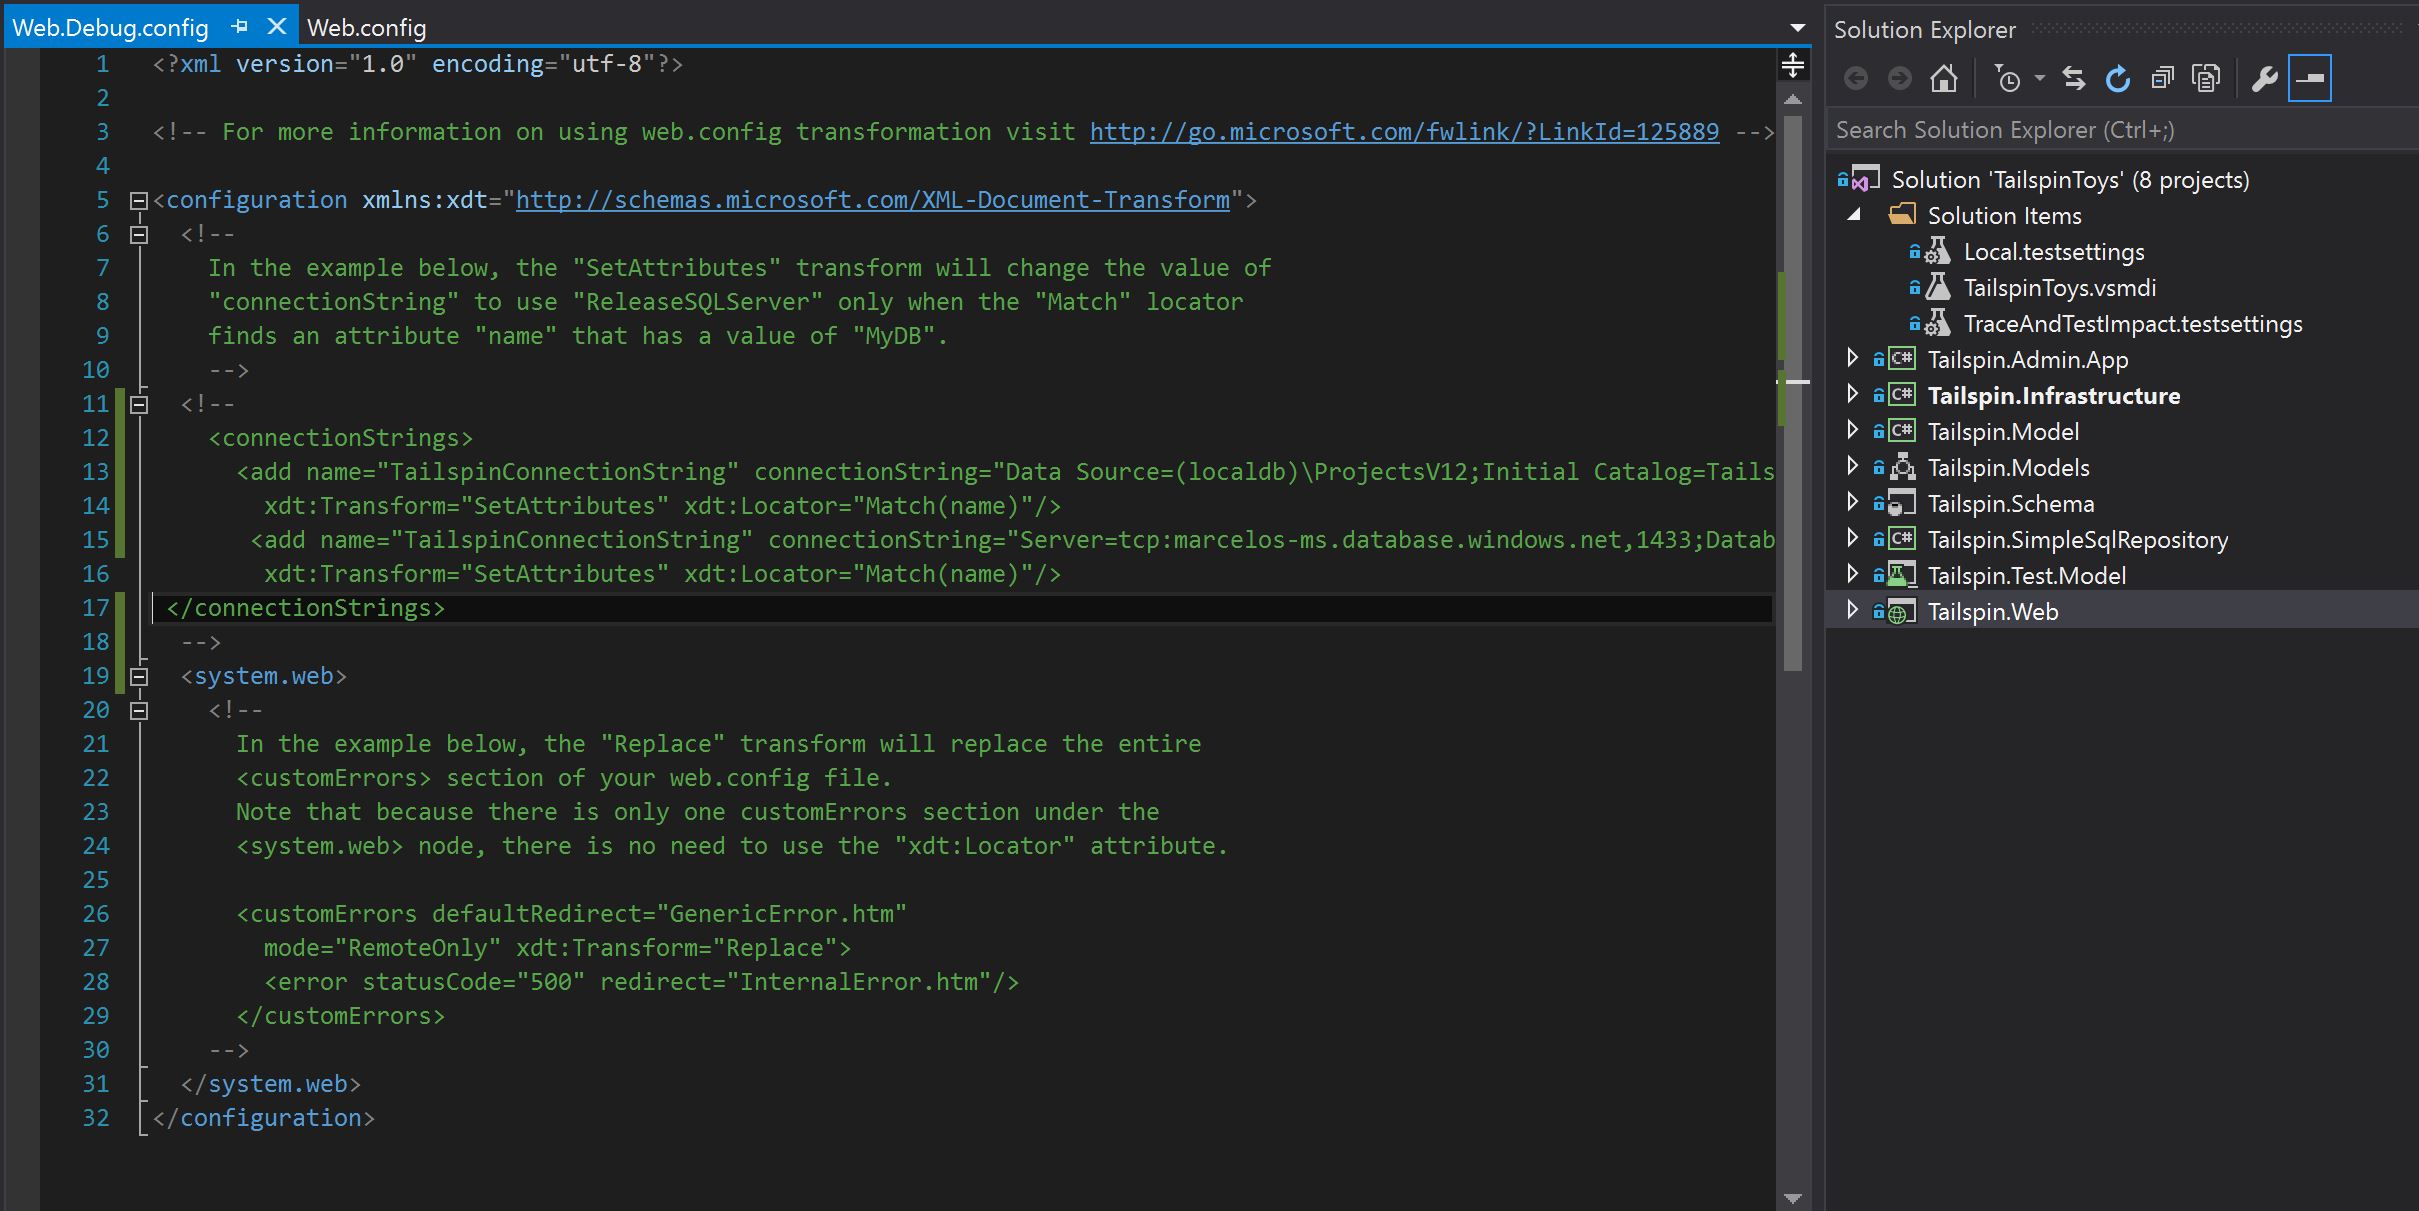
First, from a developers perspective, I want to make sure my app runs on my laptop and uses my LocalDB as database server. This way, I can have a full test bed for my work before I deploy it to Azure. My web.config, by default, points to my LocalDB:

The debug transform doesn't need any changes:
Running the application locally, you should get:
[caption id="attachment_115" align="alignnone" width="1024"]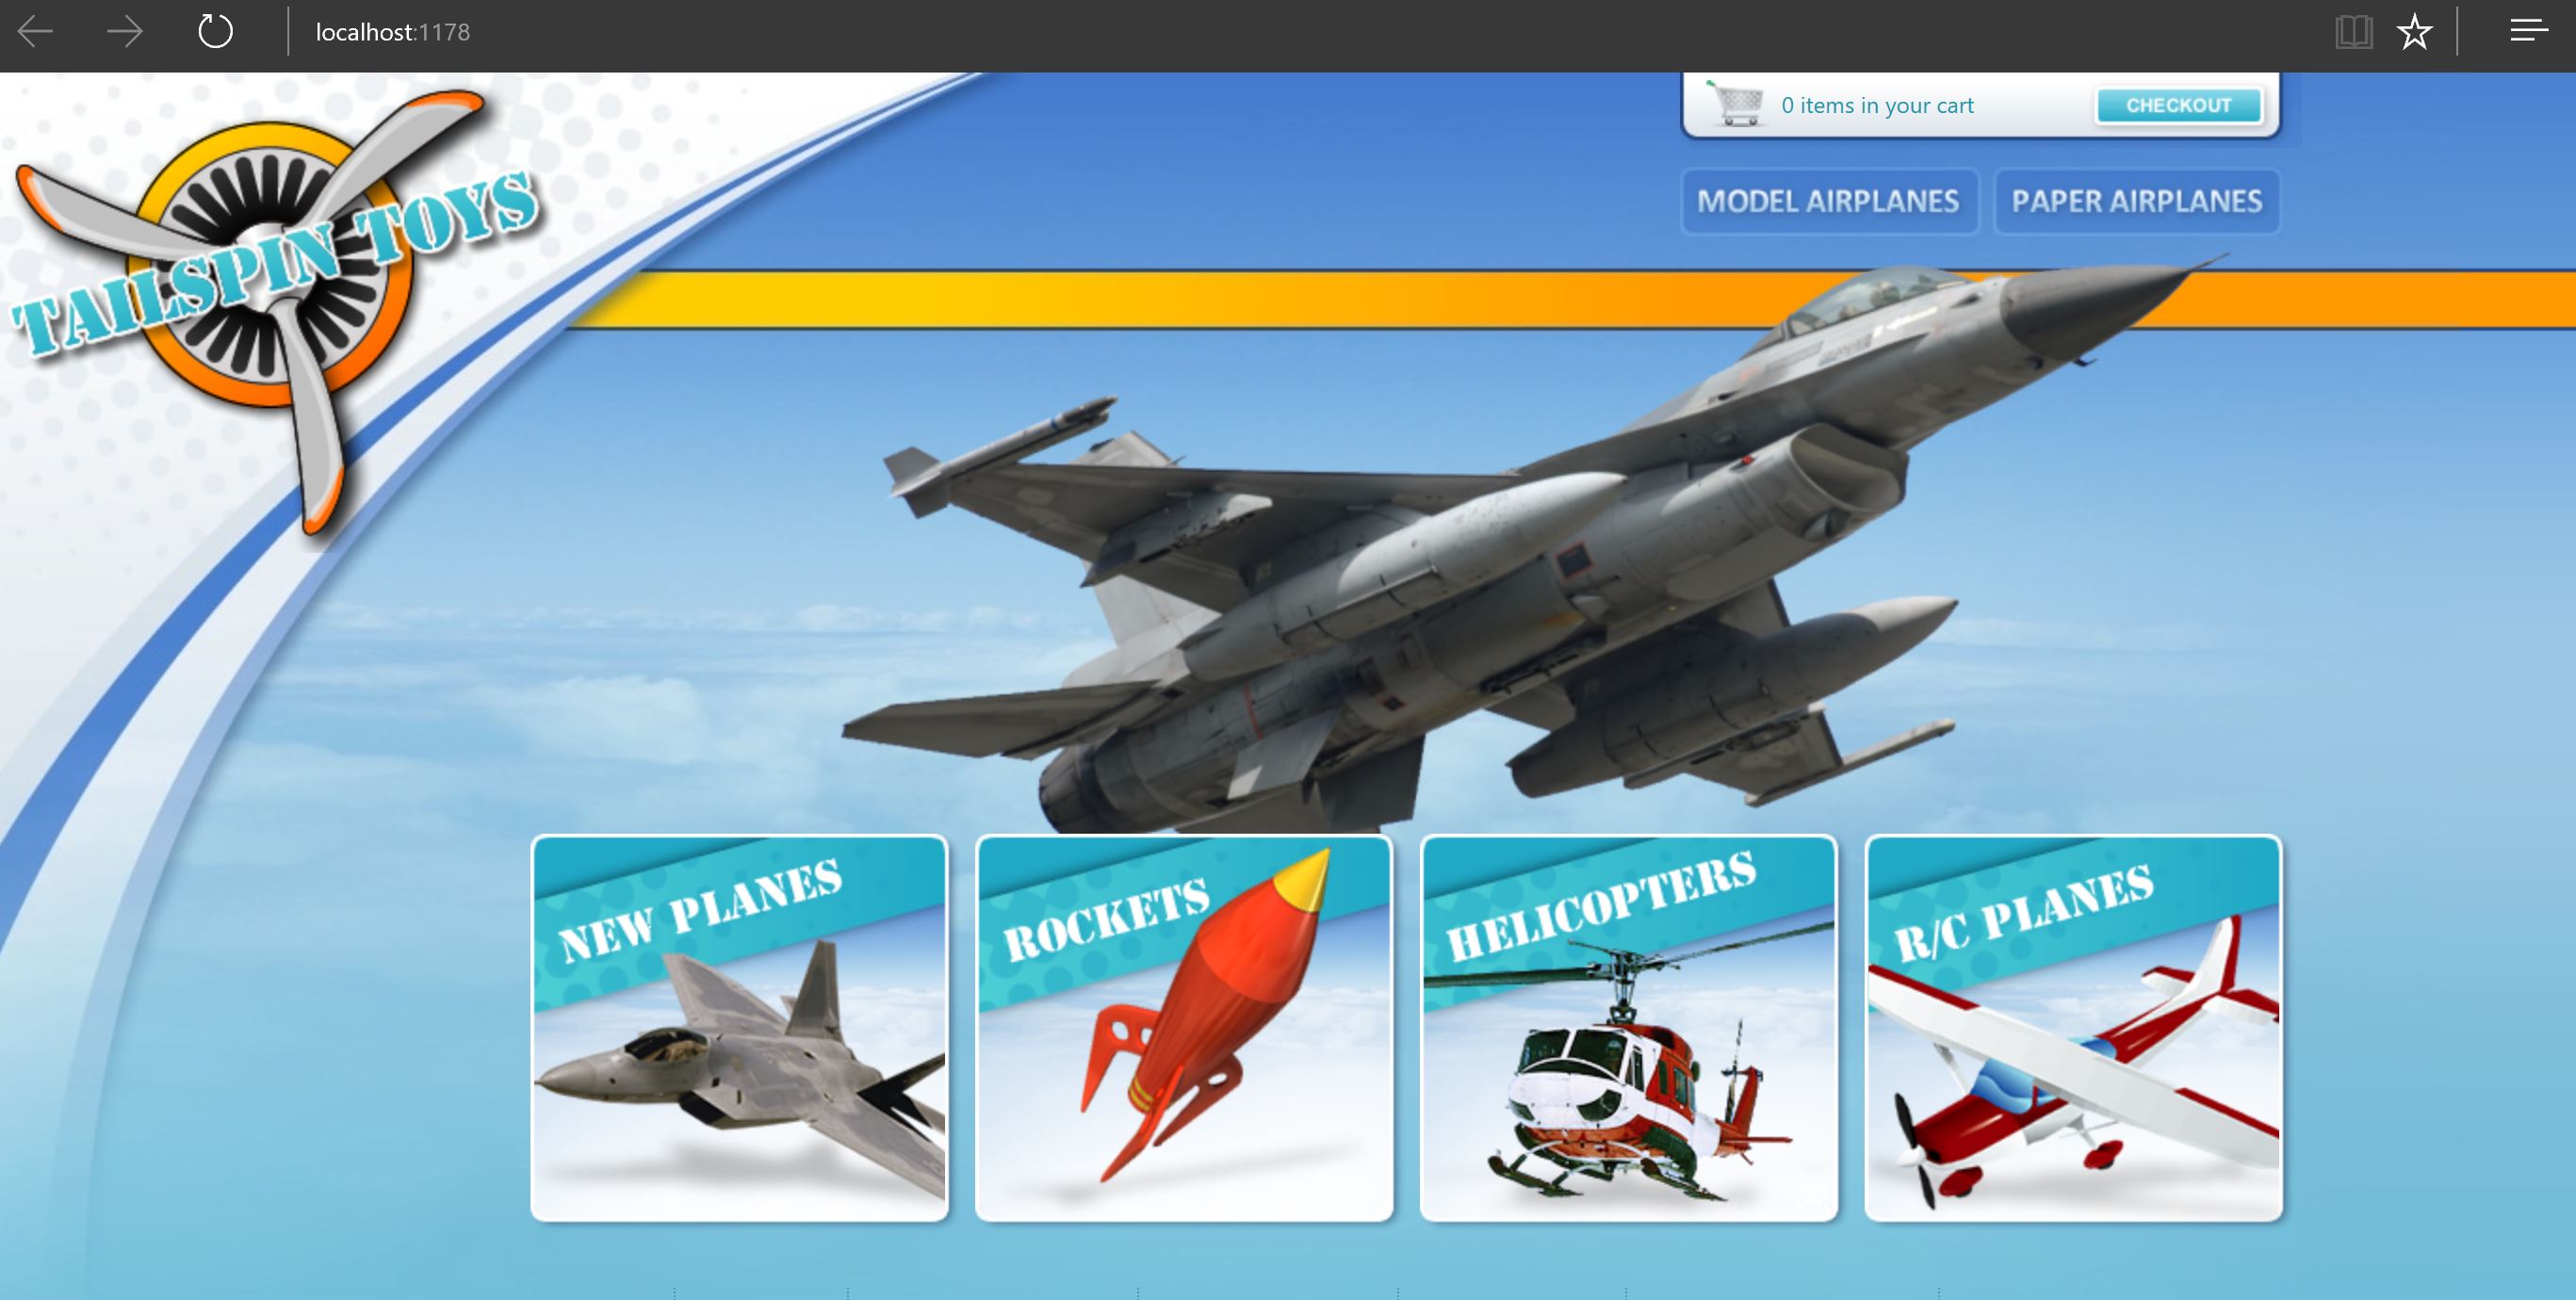 TailspinToys running locally on developer's machine[/caption]
If you don't have the infrastructure setup on Azure yet, this is a good time to do it. I won't go into too much detail on how to create a web app and Azure SQL database, but there is good documentation on the web on how to do it.
In this example, I'll create two web app/sql pairs: one for QA, another for Prod. In prod, we'll have two slots, just for fun.
[caption id="attachment_125" align="alignnone" width="1024"]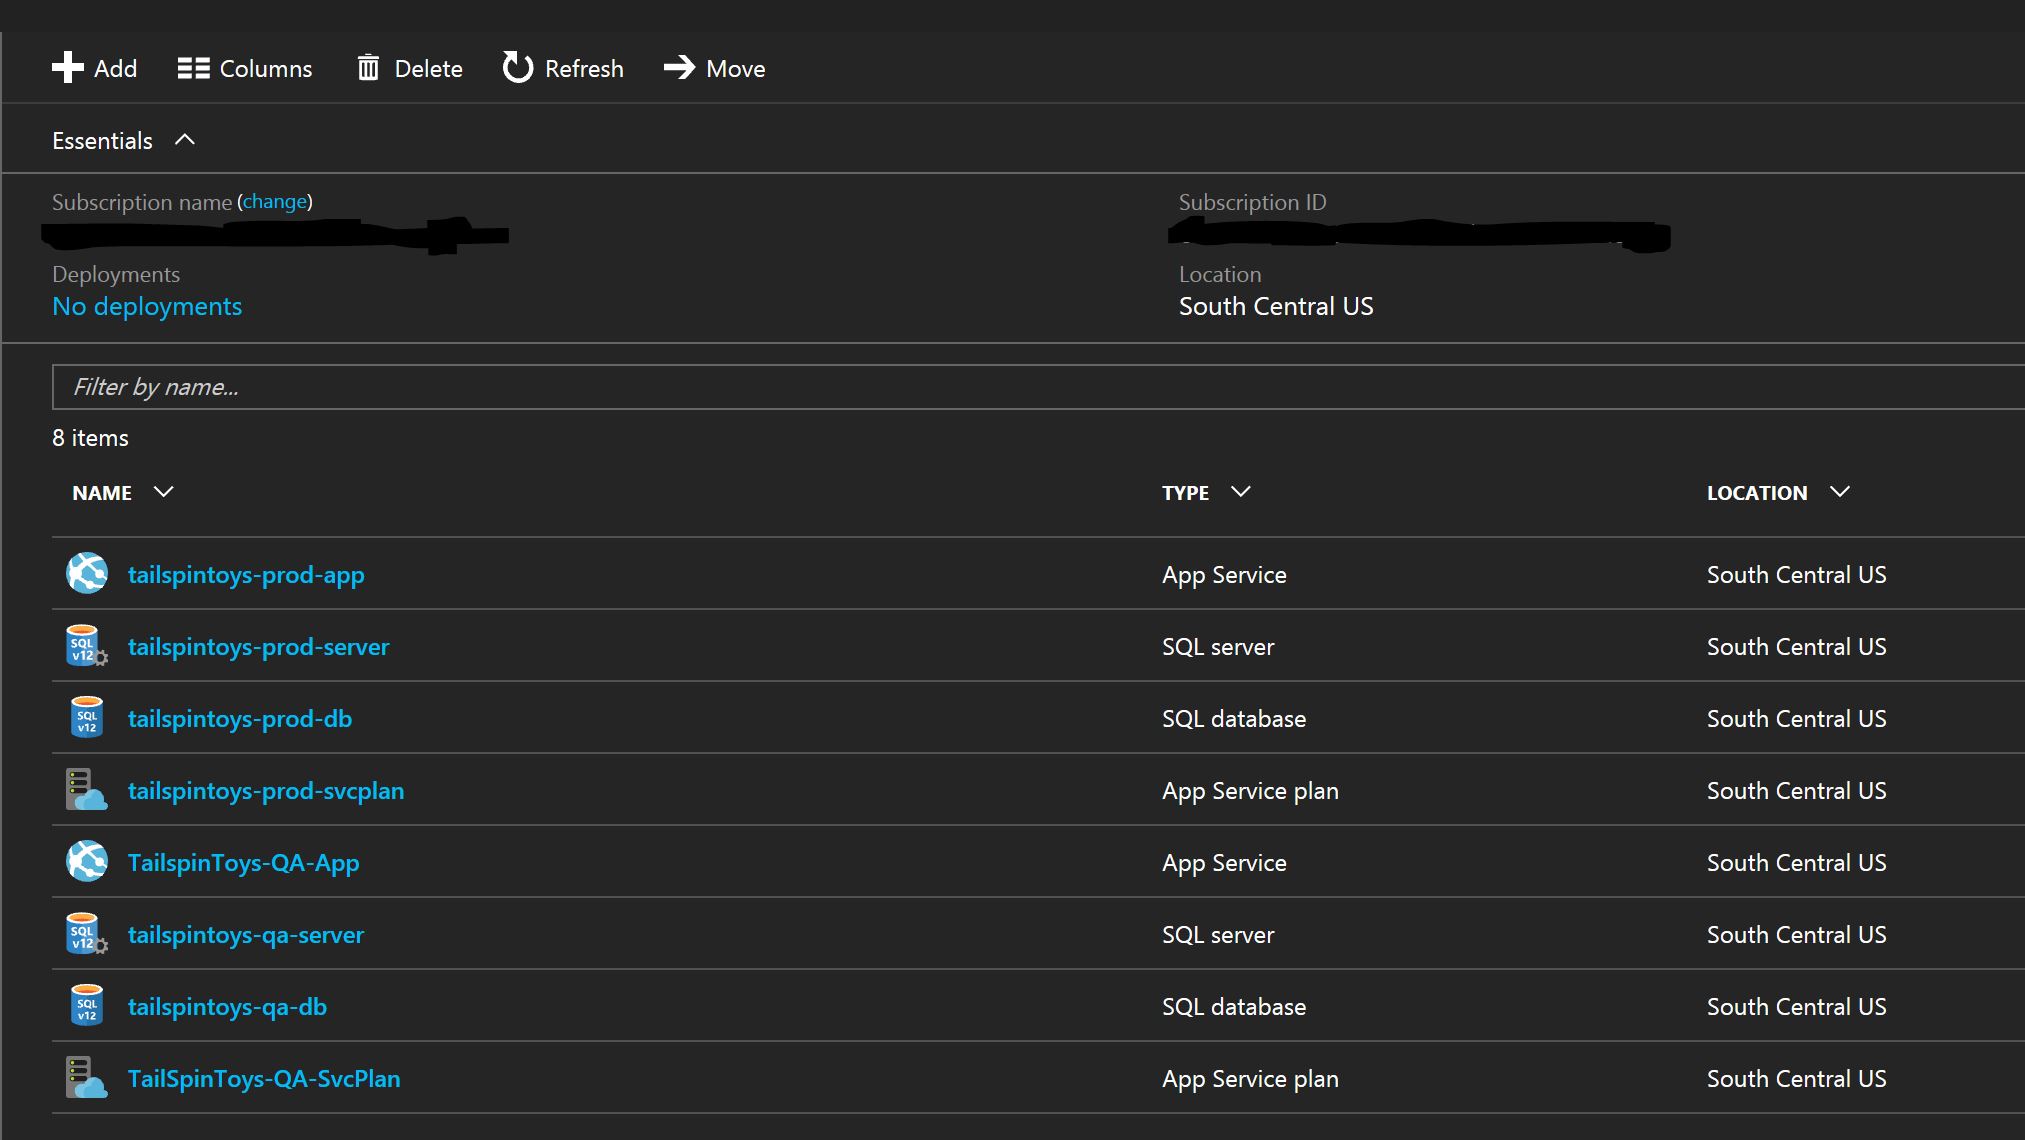 Azure environments[/caption]
We can now create a web.config transform to "tokenize" the connection string. This token will then be replaced at deployment time.
In the example below, we created in Visual Studio a configuration called "Azure" and created the corresponding transform (by right-clicking on the web.config and selecting "add web config transform"):
[caption id="attachment_155" align="alignnone" width="1024"]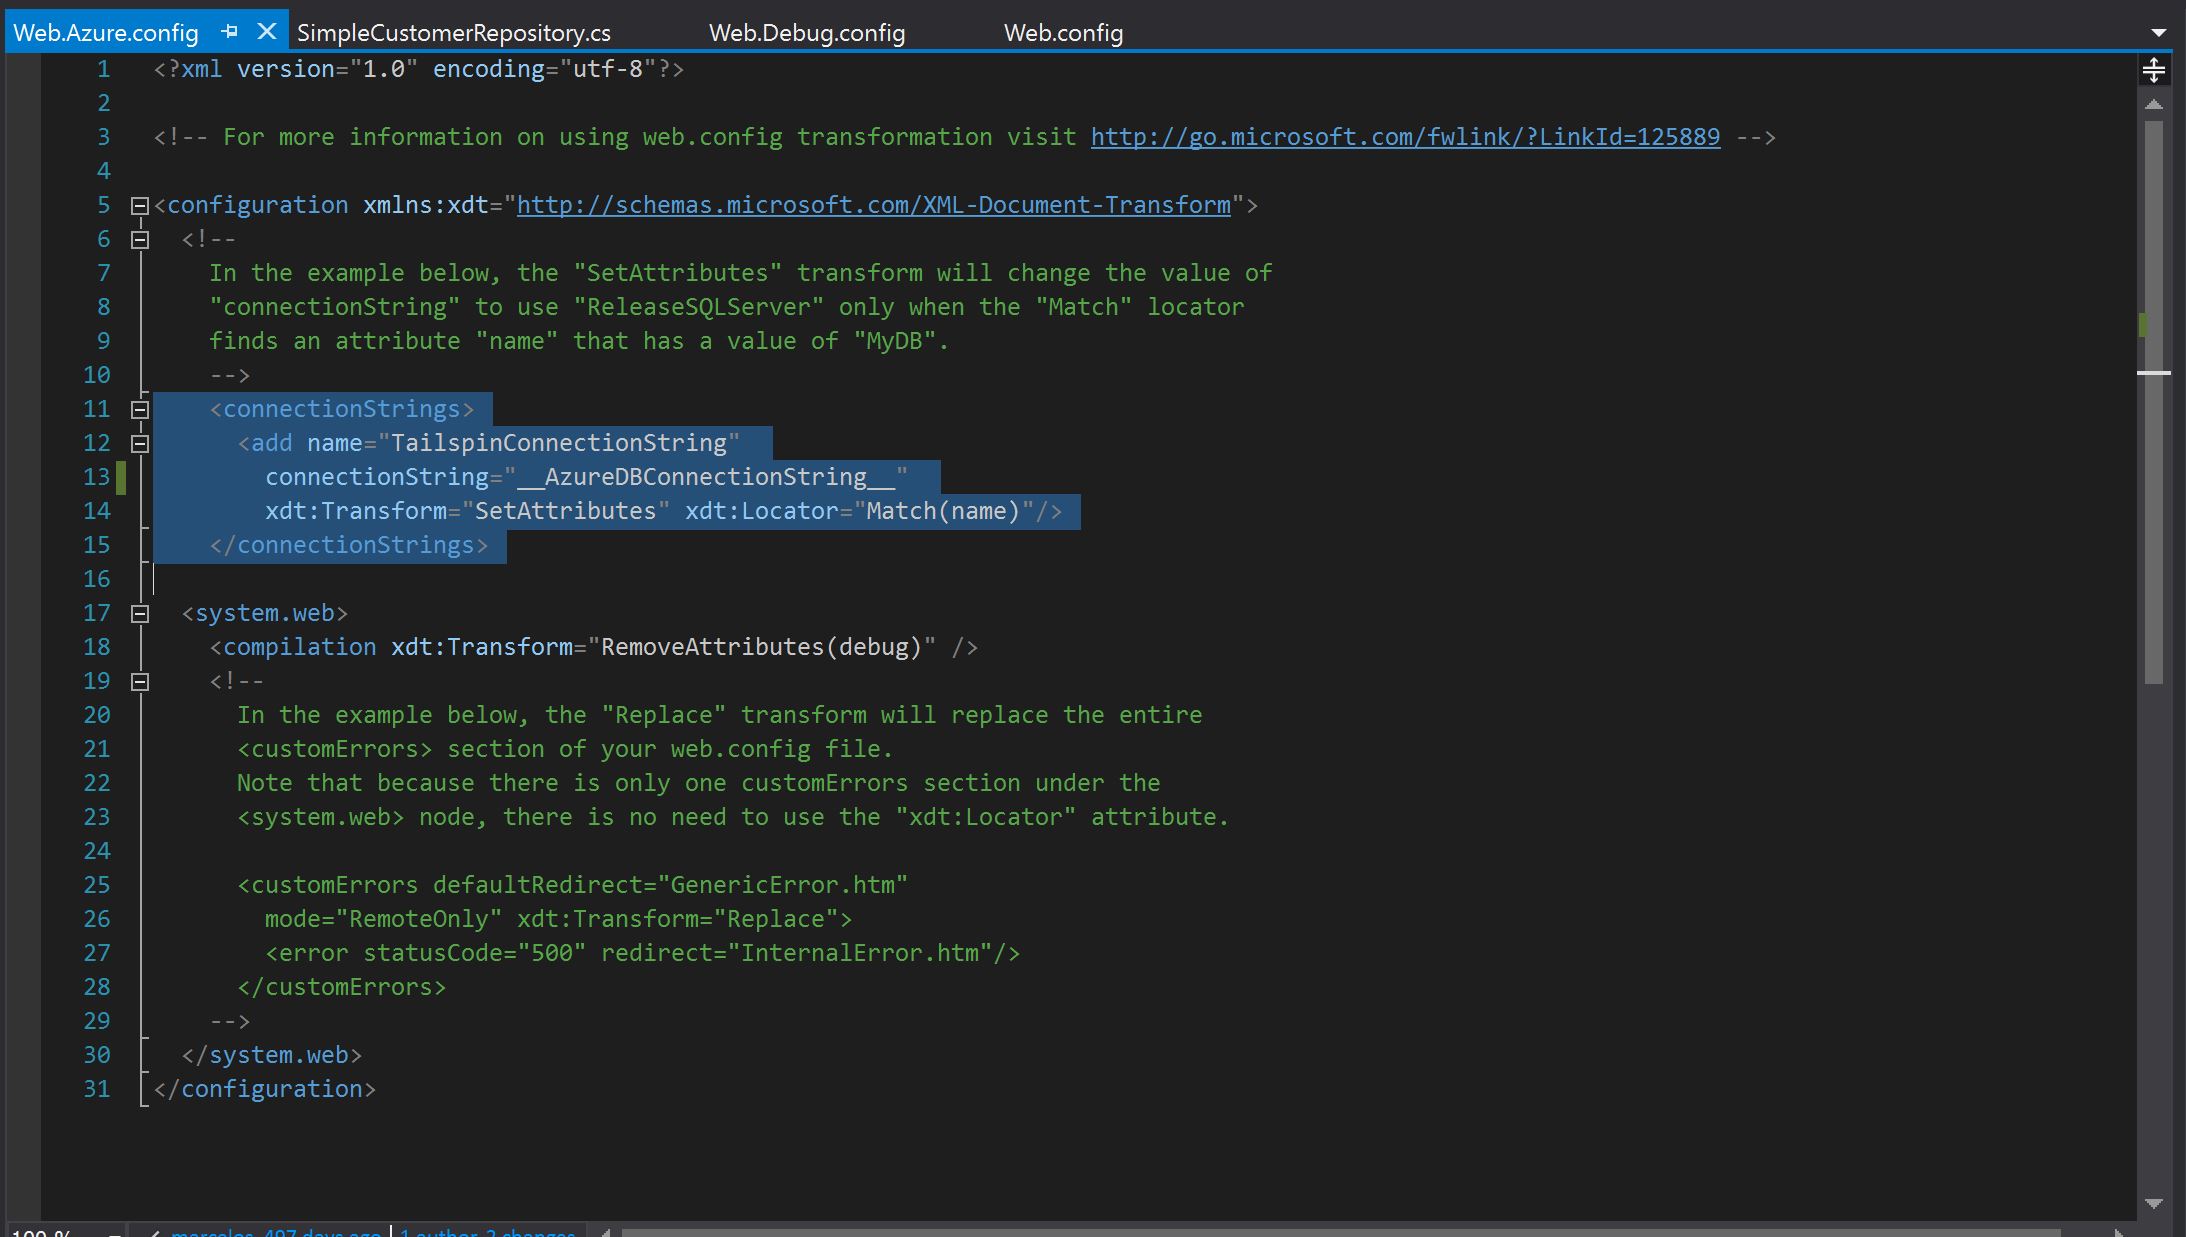 Web config for Azure with tokenized connection string[/caption]
Notice that I used "__" as token delimiter. It's not a requirement anymore, but I kept the same syntax used in the previous Release Management versions.
Code is committed and pushed to VSTS. Now we have to setup a build for the QA environment:
[caption id="attachment_165" align="alignnone" width="1024"]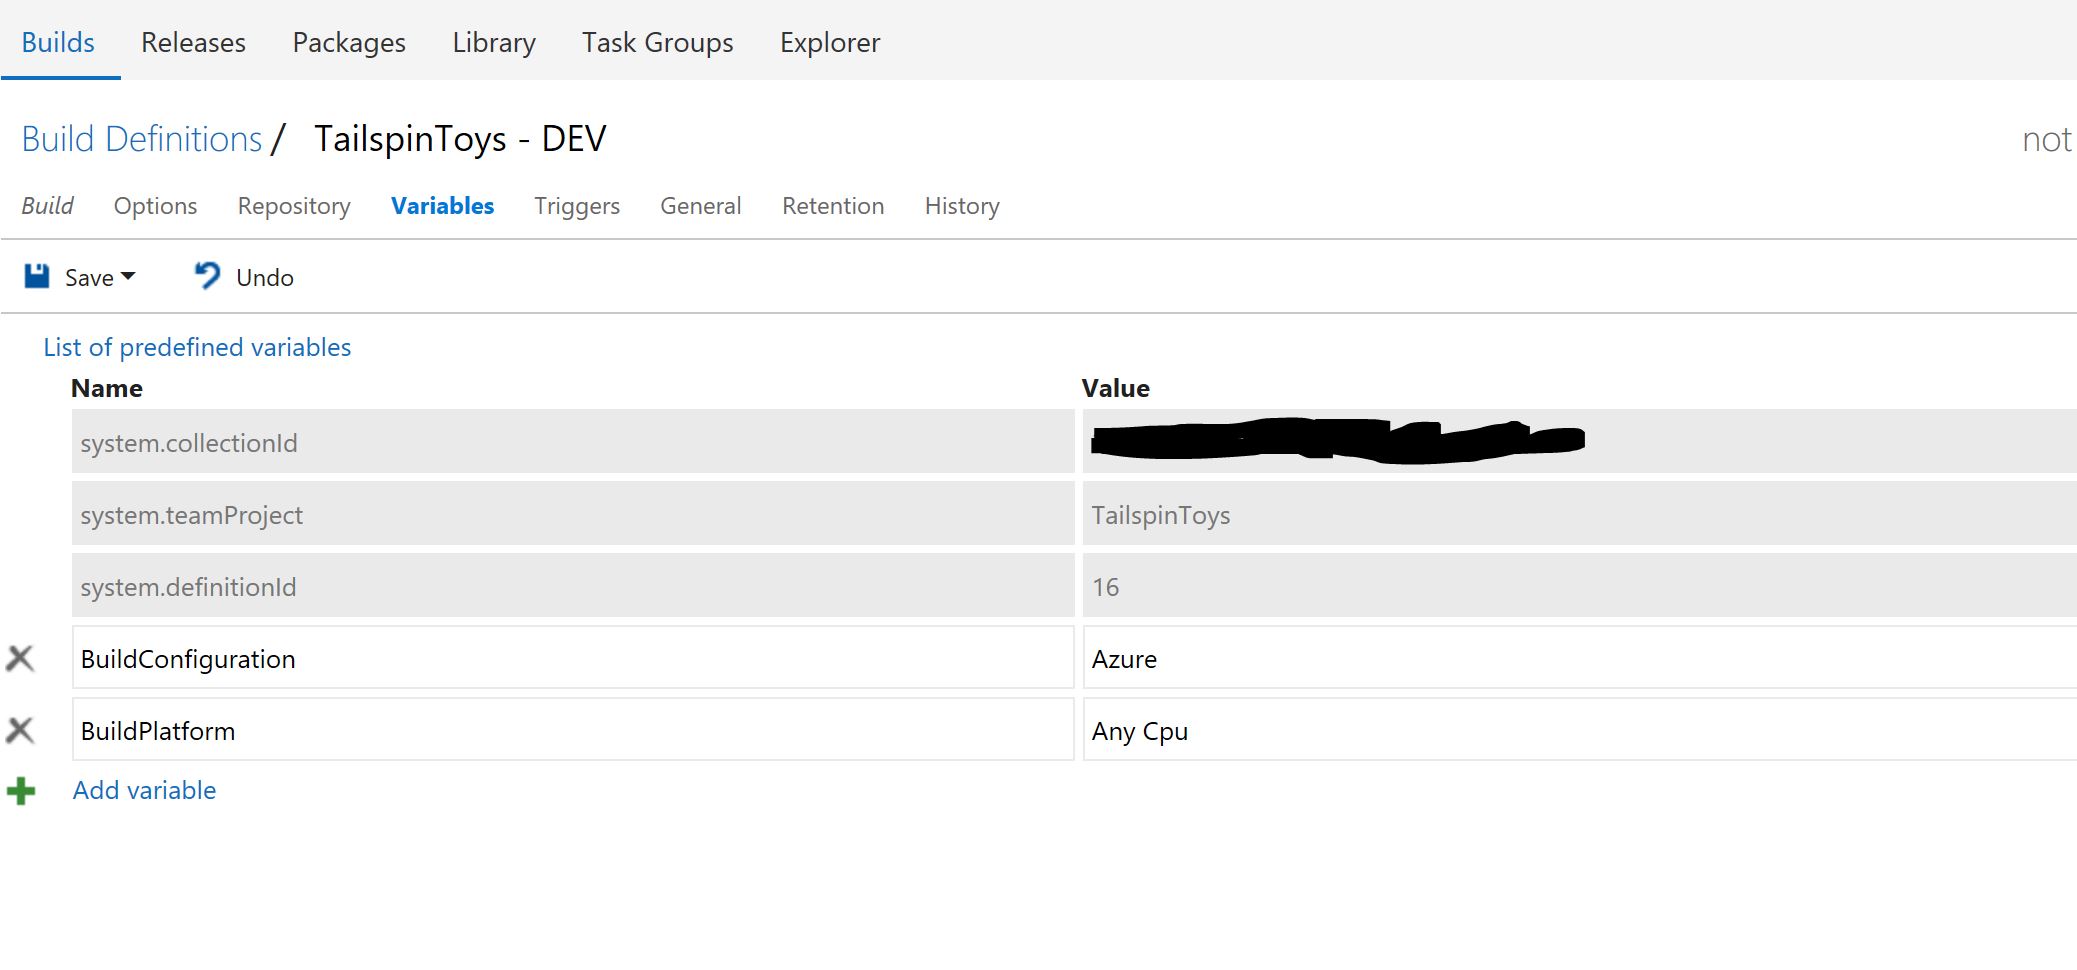 Build variables specifying "Azure" configuration to build[/caption]
[caption id="attachment_185" align="alignnone" width="1024"]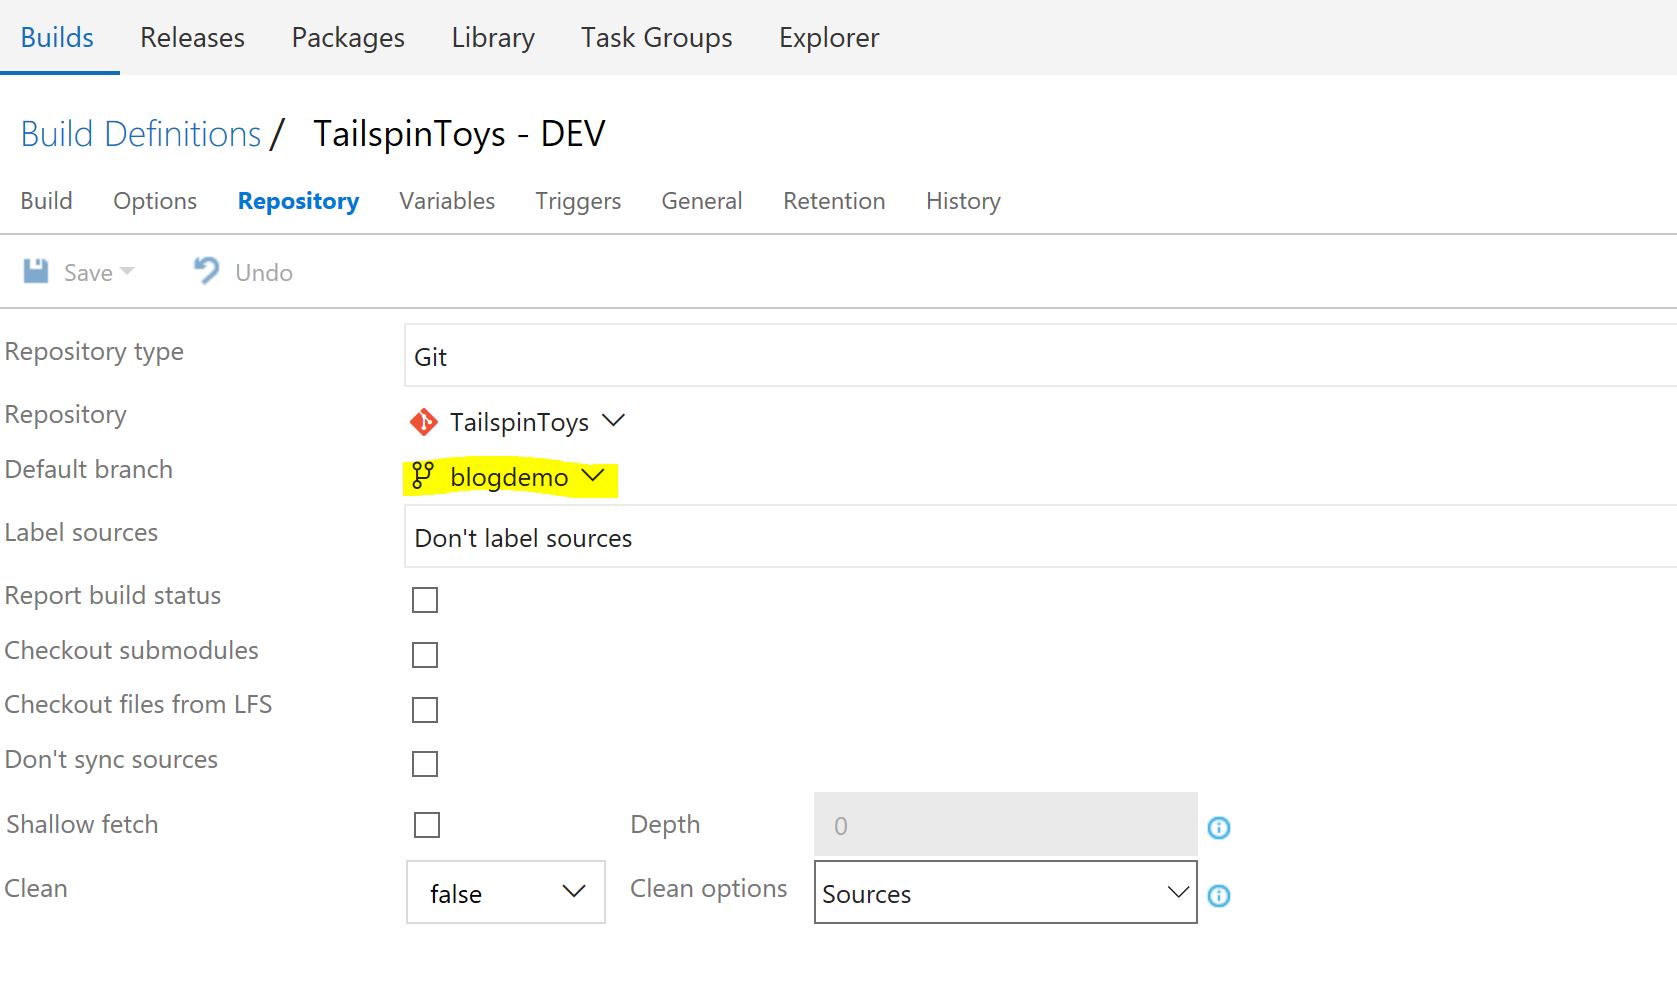 Repository setting to pull code from a specific branch[/caption]
Notice that I also used some MSBuild arguments to make sure we get the properly packaged output. In this case I used /p:DeployOnBuild=True
In the copy artifacts steps, I specify all the files I need for deployment:
**\Package\*.zip **\Package\*.cmd **\Package\*.xml **\output\*.dacpac
[caption id="attachment_325" align="alignnone" width="1024"]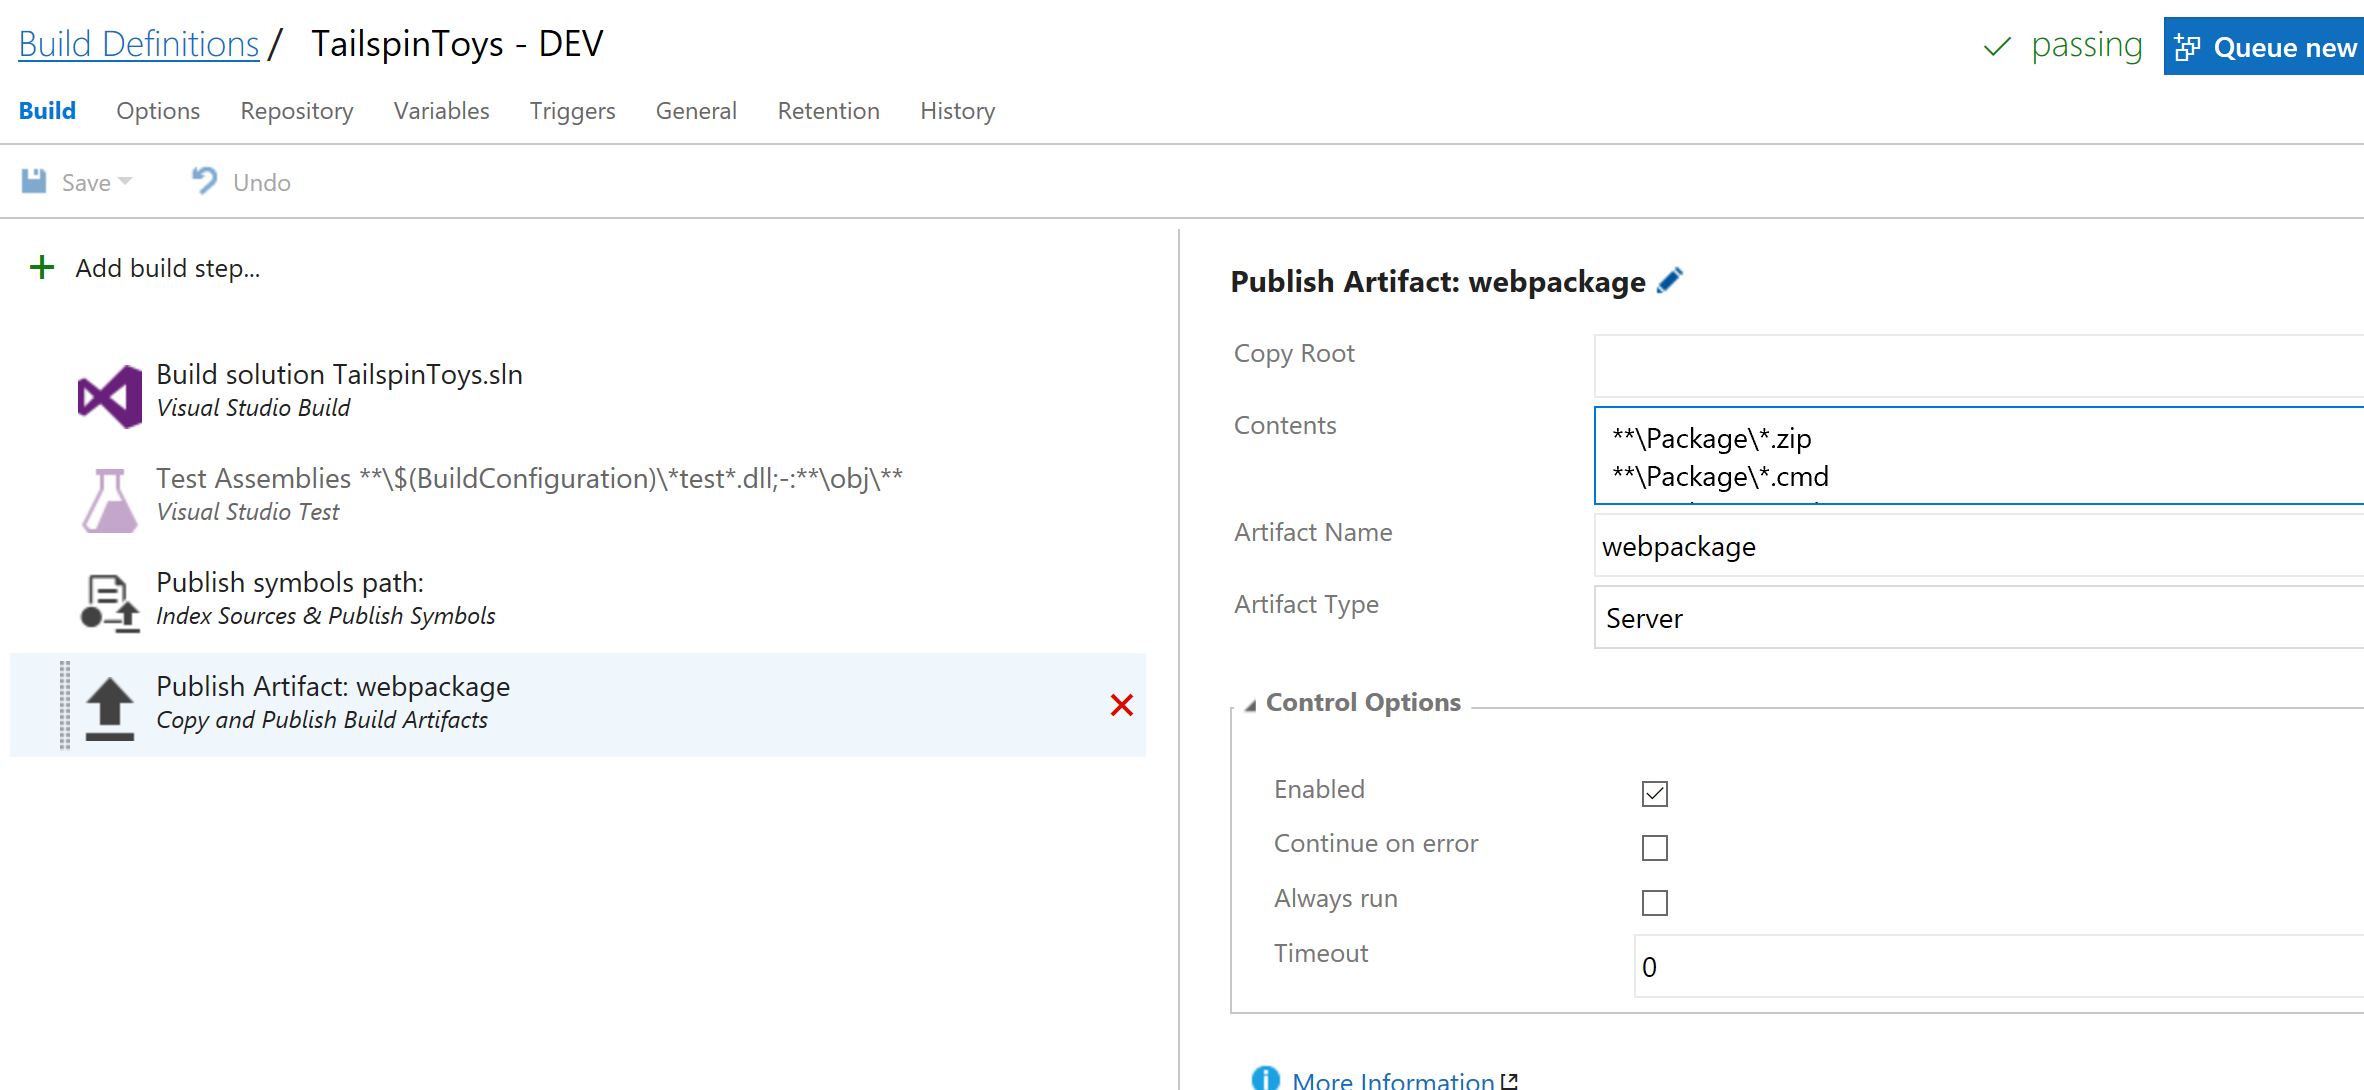 Artifacts to be published[/caption]
Once the build is successfully executed, we can see the artifacts published and ready to be used:
[caption id="attachment_315" align="alignnone" width="1024"]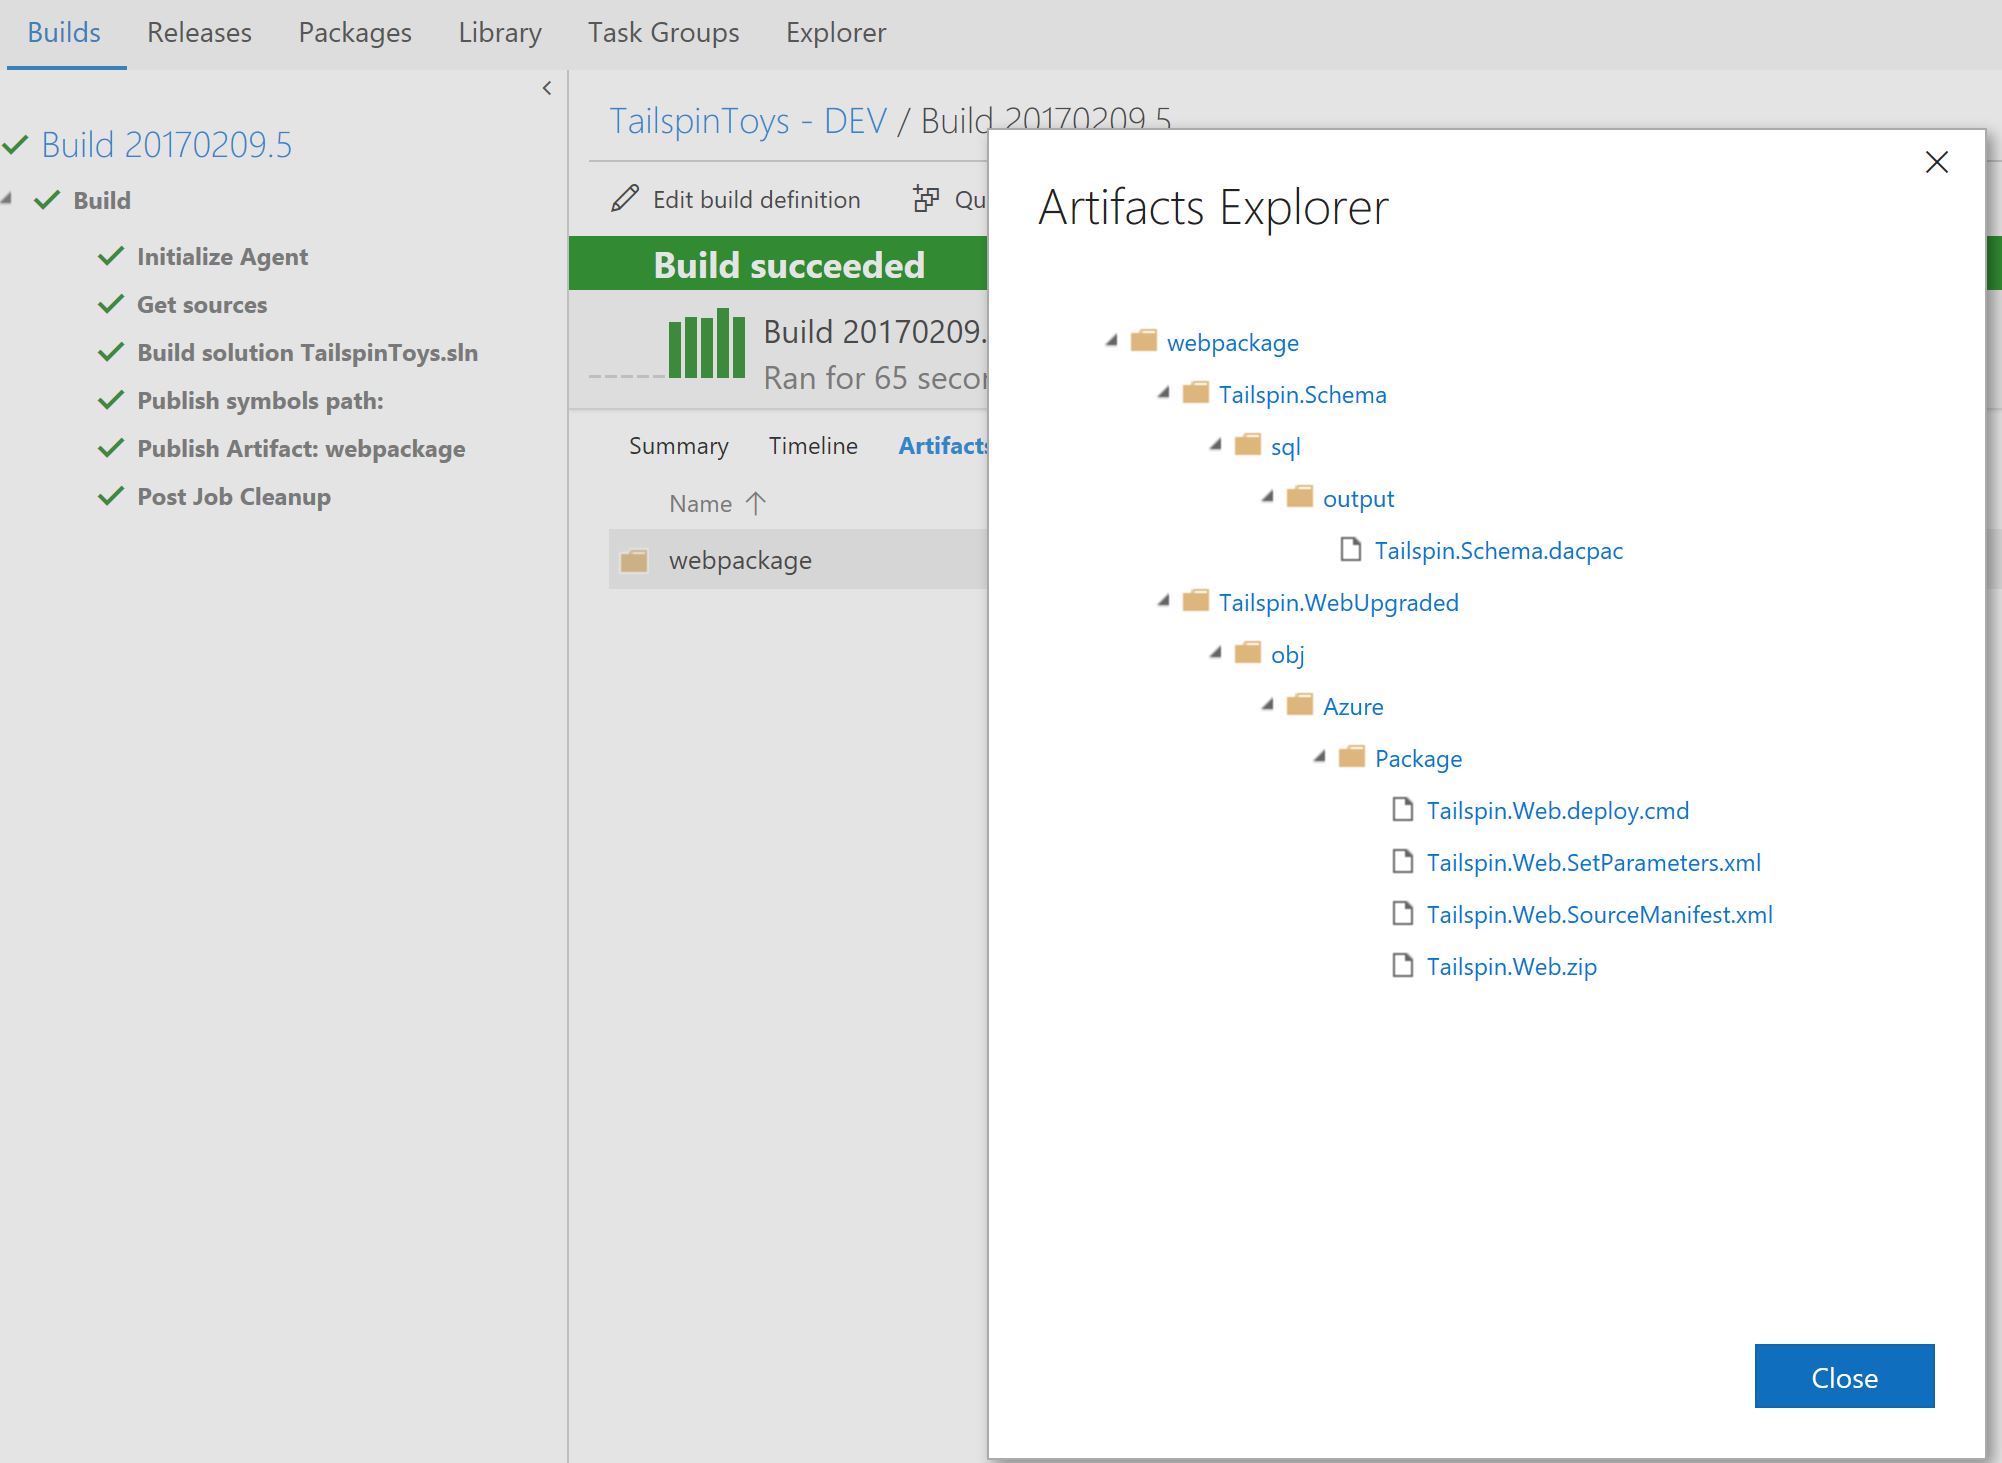 Build artifacts created after successful build[/caption]
Let's download the folder "Package" with all the web deploy files and examine the SetParameters file:
[caption id="attachment_335" align="alignnone" width="1024"] Parameters.xml file[/caption]
Notice that our tokenized connection string is created for us here. If you'd like to add more parameters, even if not in web.config take a look at this article.
Next step is for us to create a release definition that deploys the web app and database to the QA and Production environments we created earlier. The definition will replace the tokenized config set in the parameters with the correct connection string to the corresponding database.
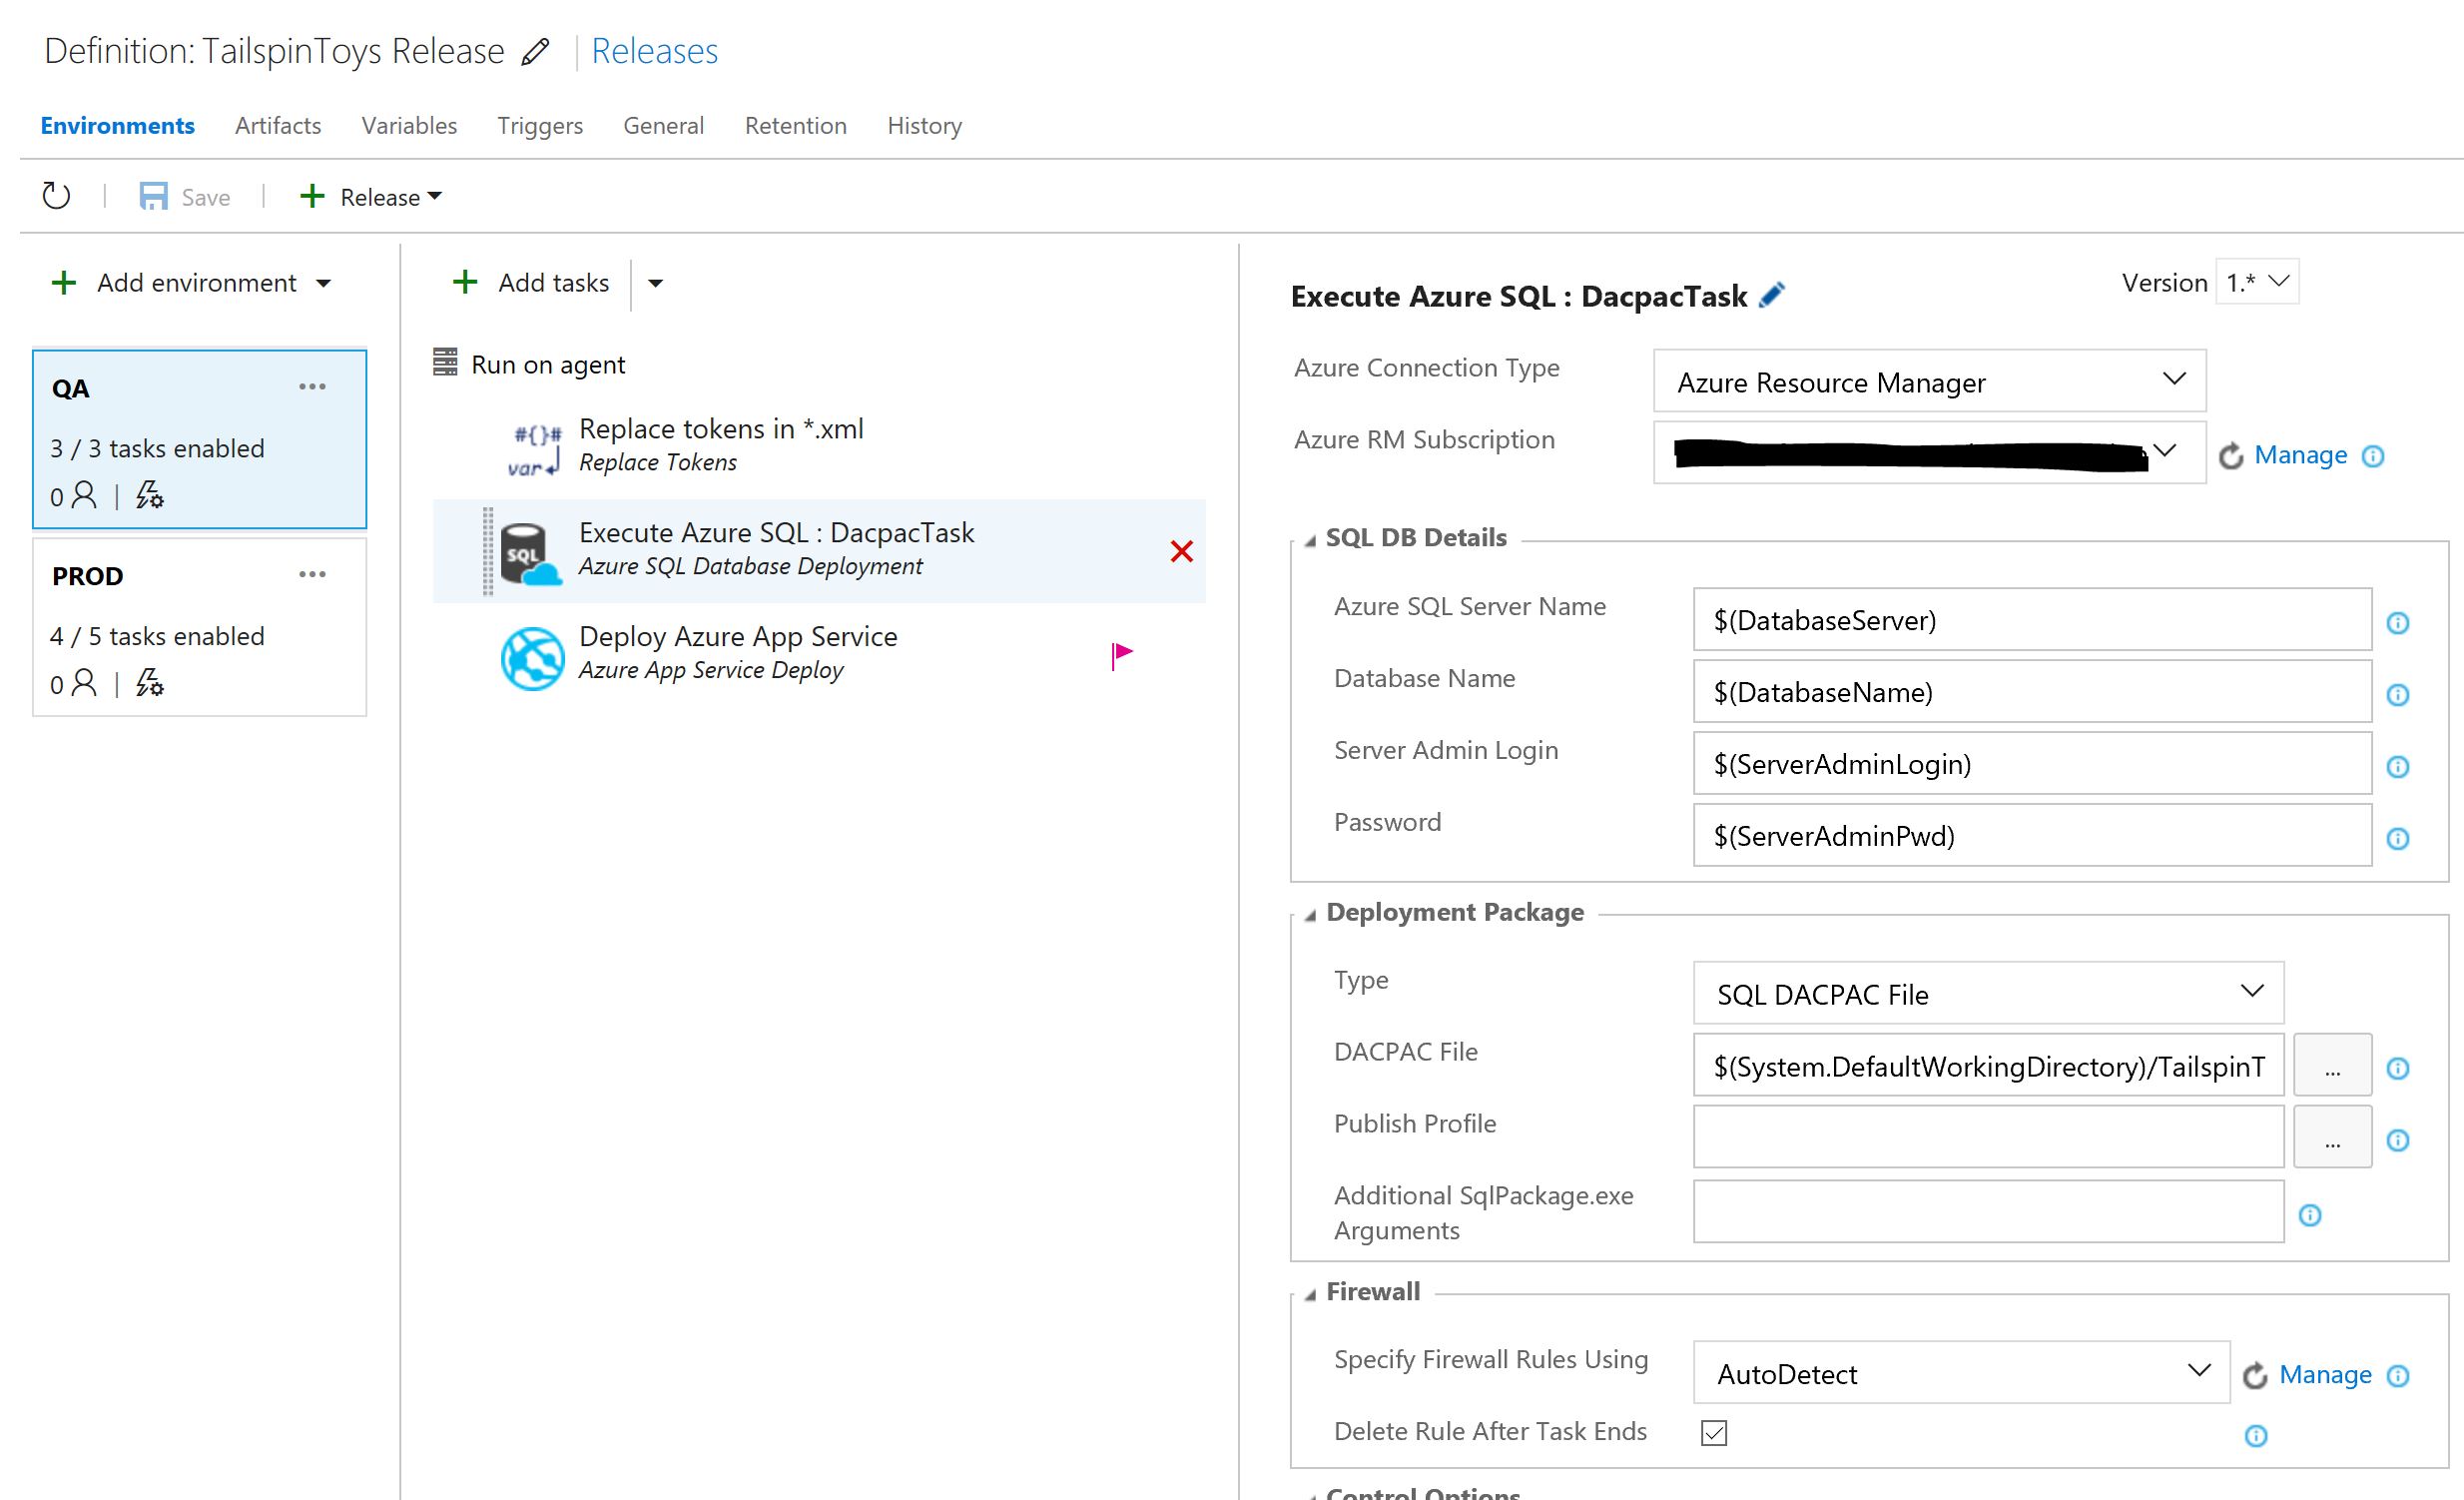
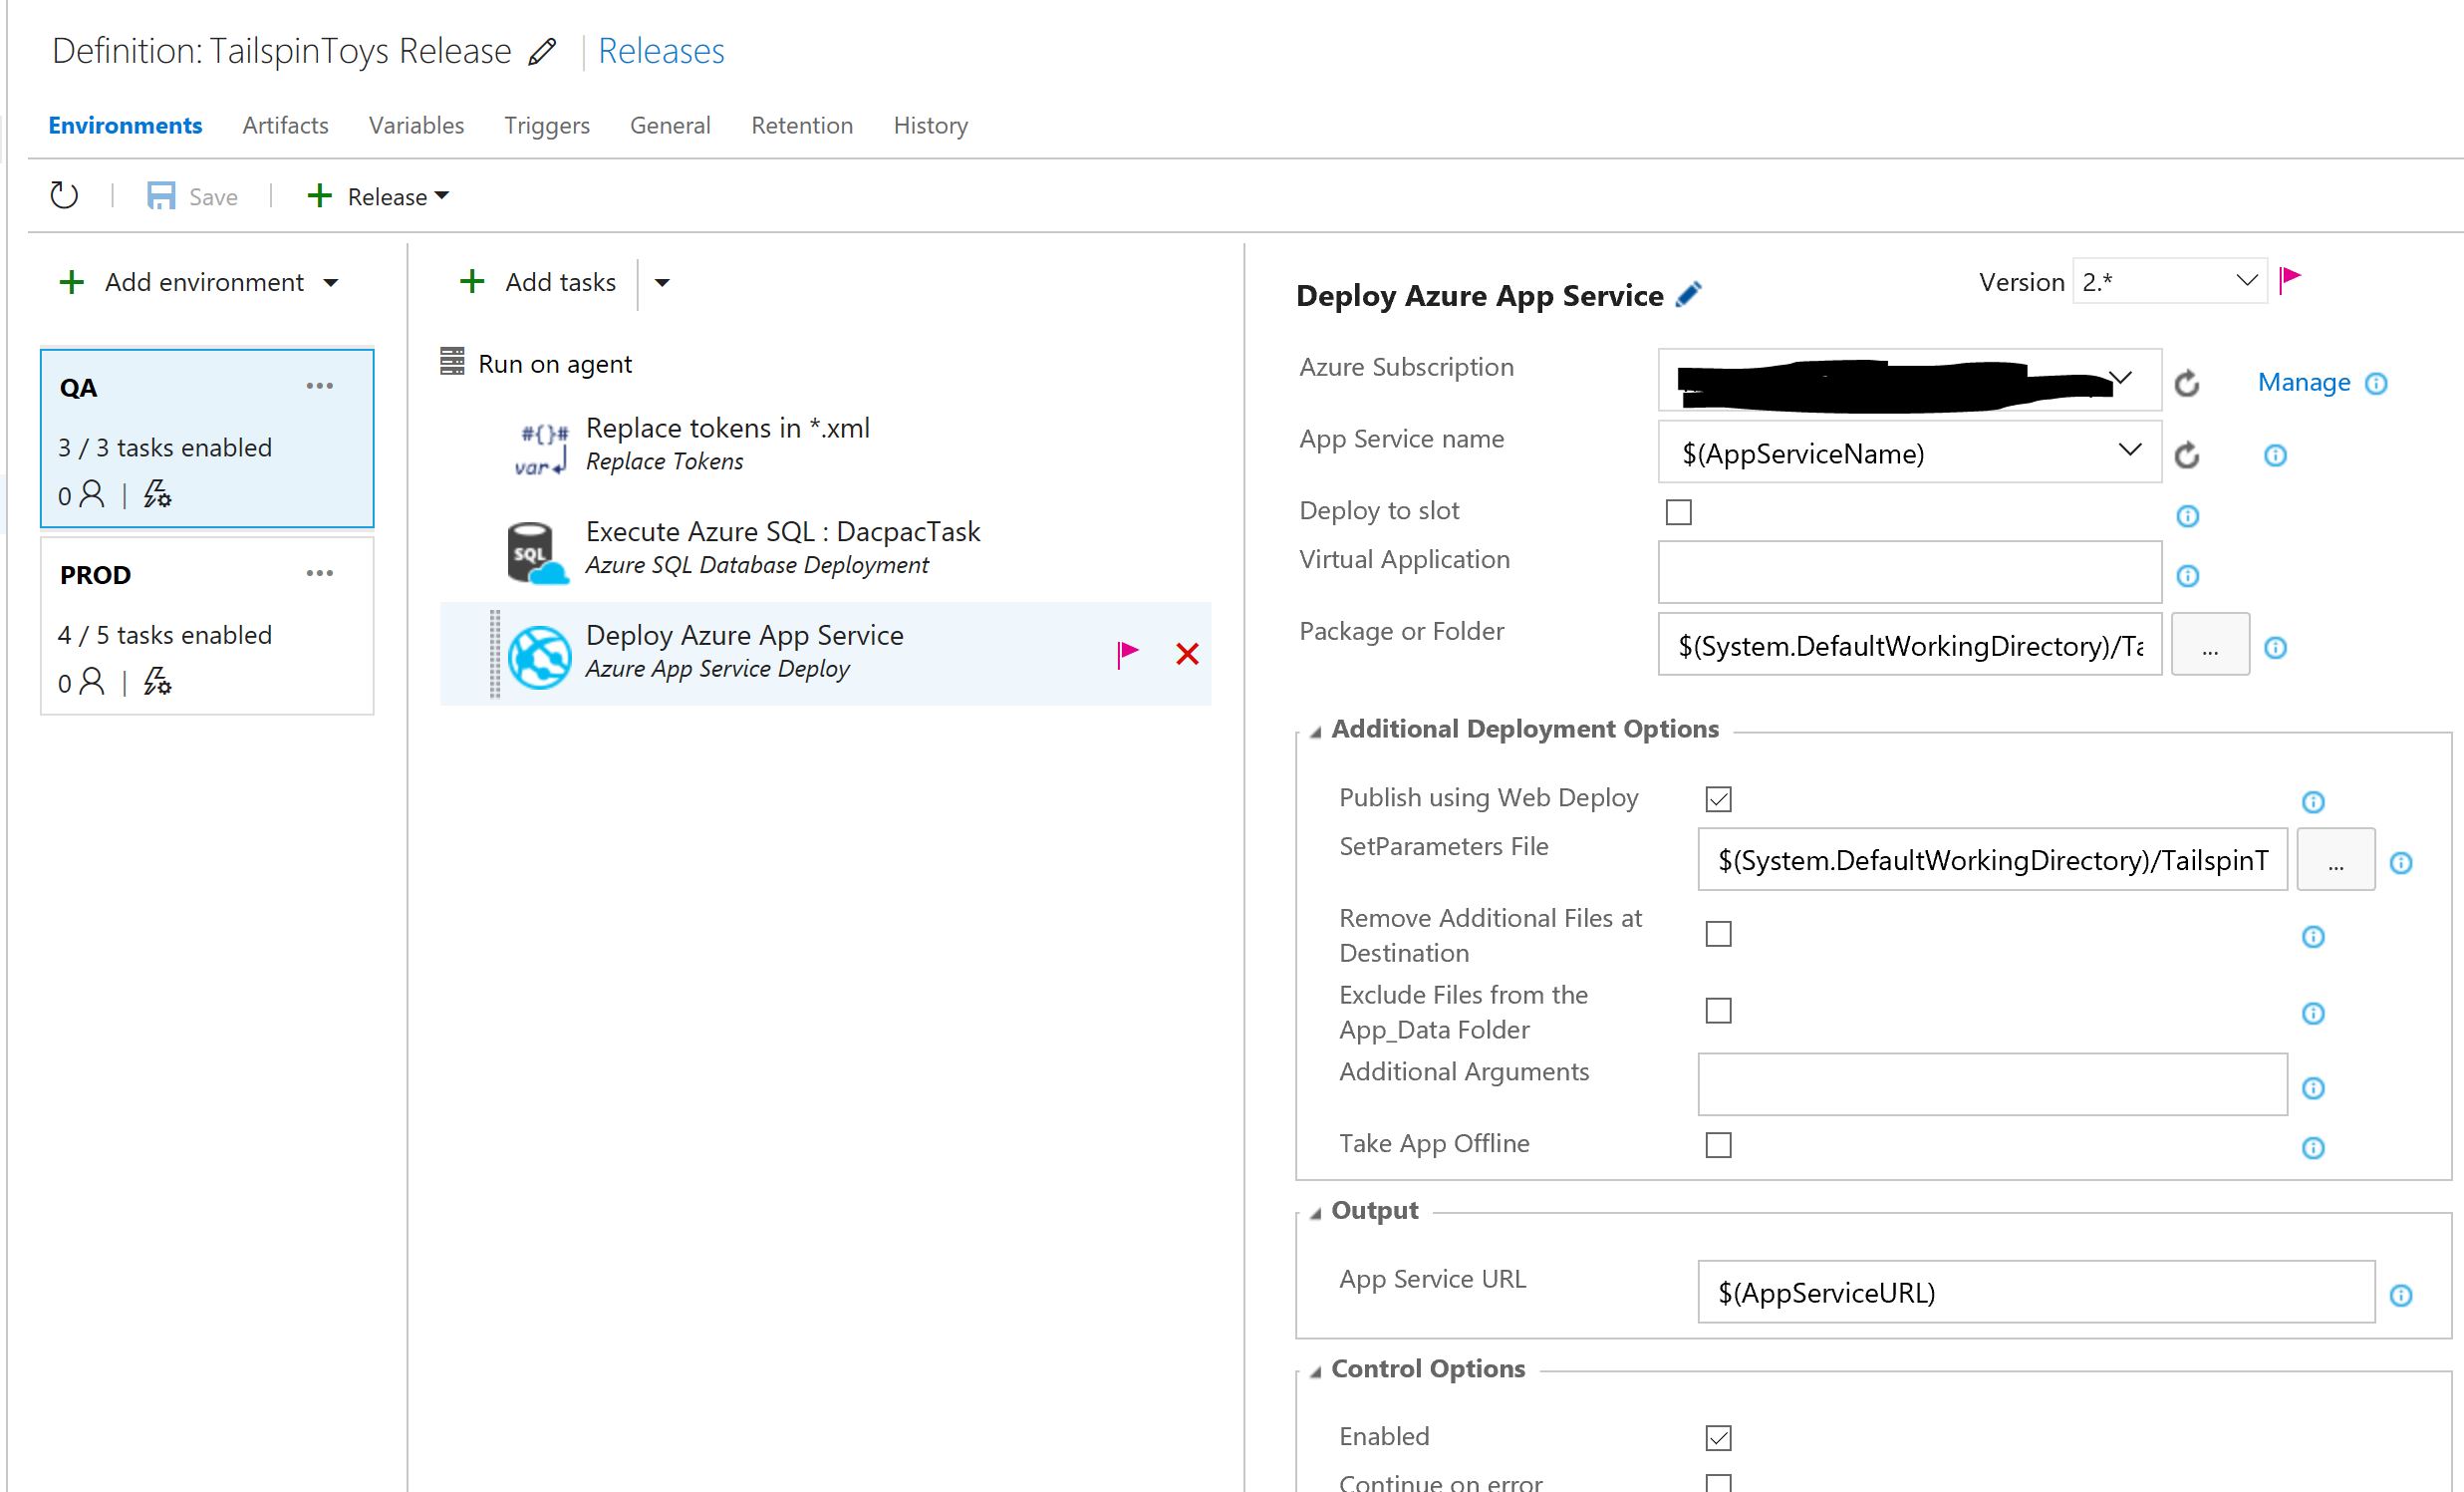
The steps to deploy to QA should be:
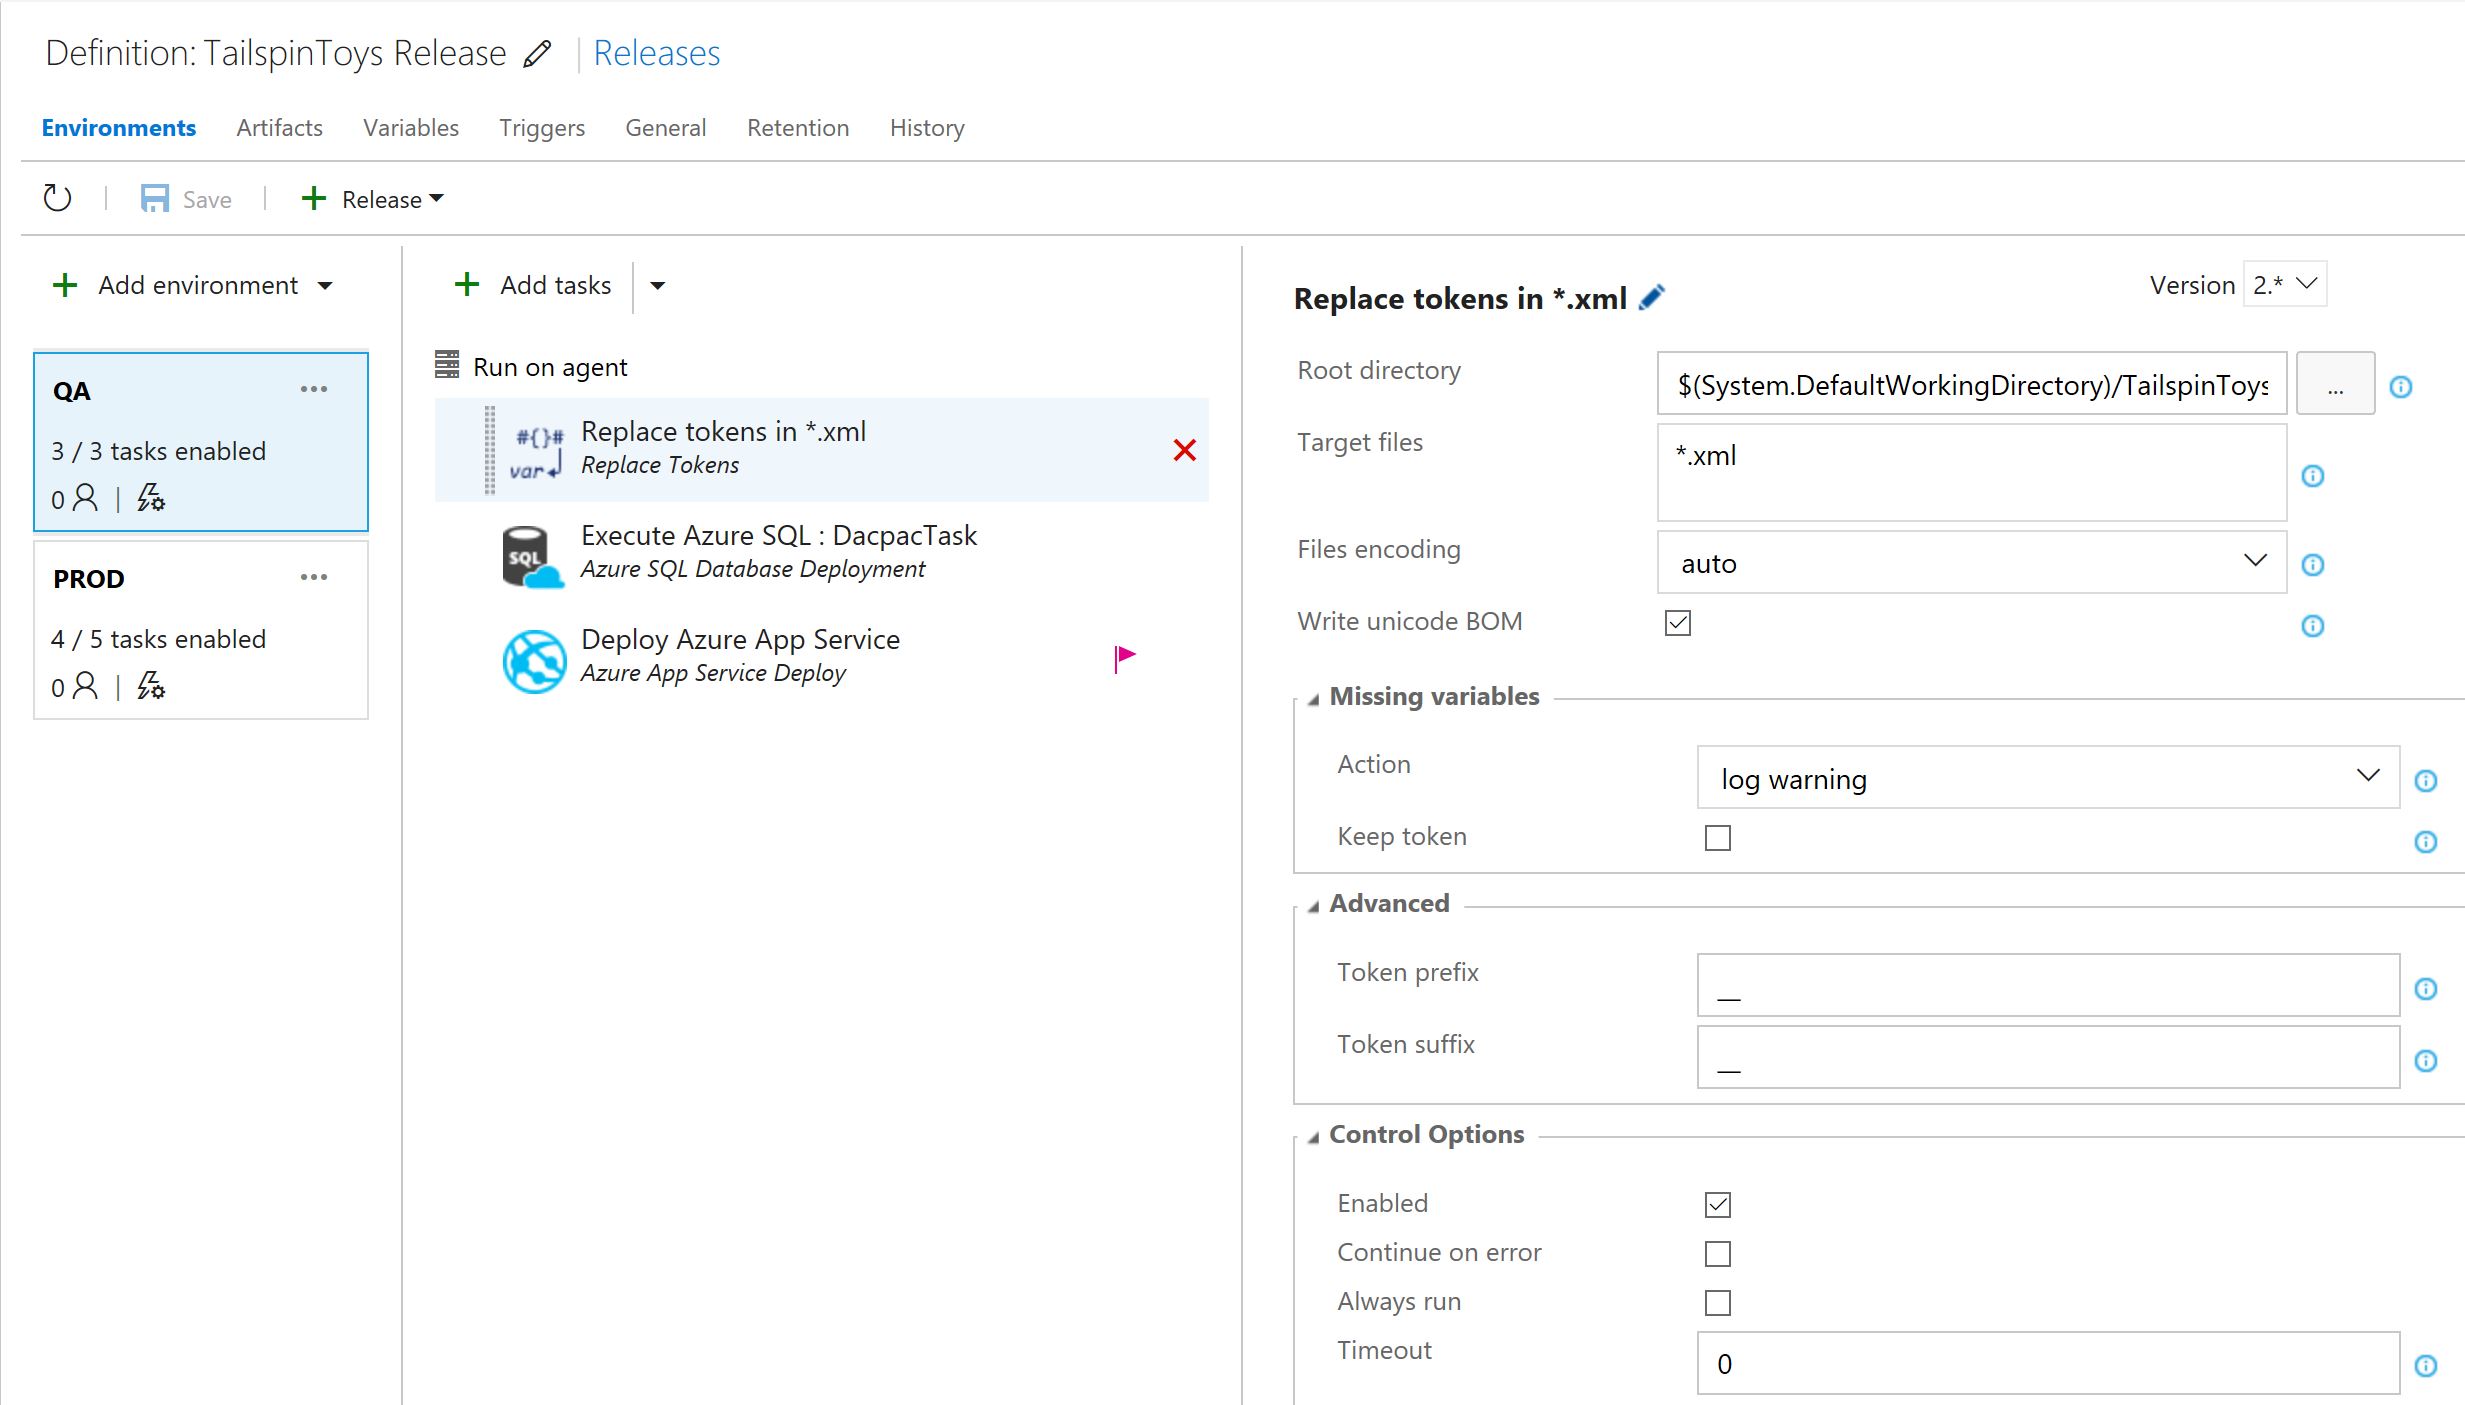
A couple of points here:
- I used one of the replace token tasks available on the VSTS marketplace. You can use any other, just make sure you know how to configure them to identify the tokens
- Notice that I specify the token delimiters as "__". In this task you can use anything. I kept the "old" setup to make it simple.
- I specify the parameters file directly (full path) but you don't have to. Same for the package zip
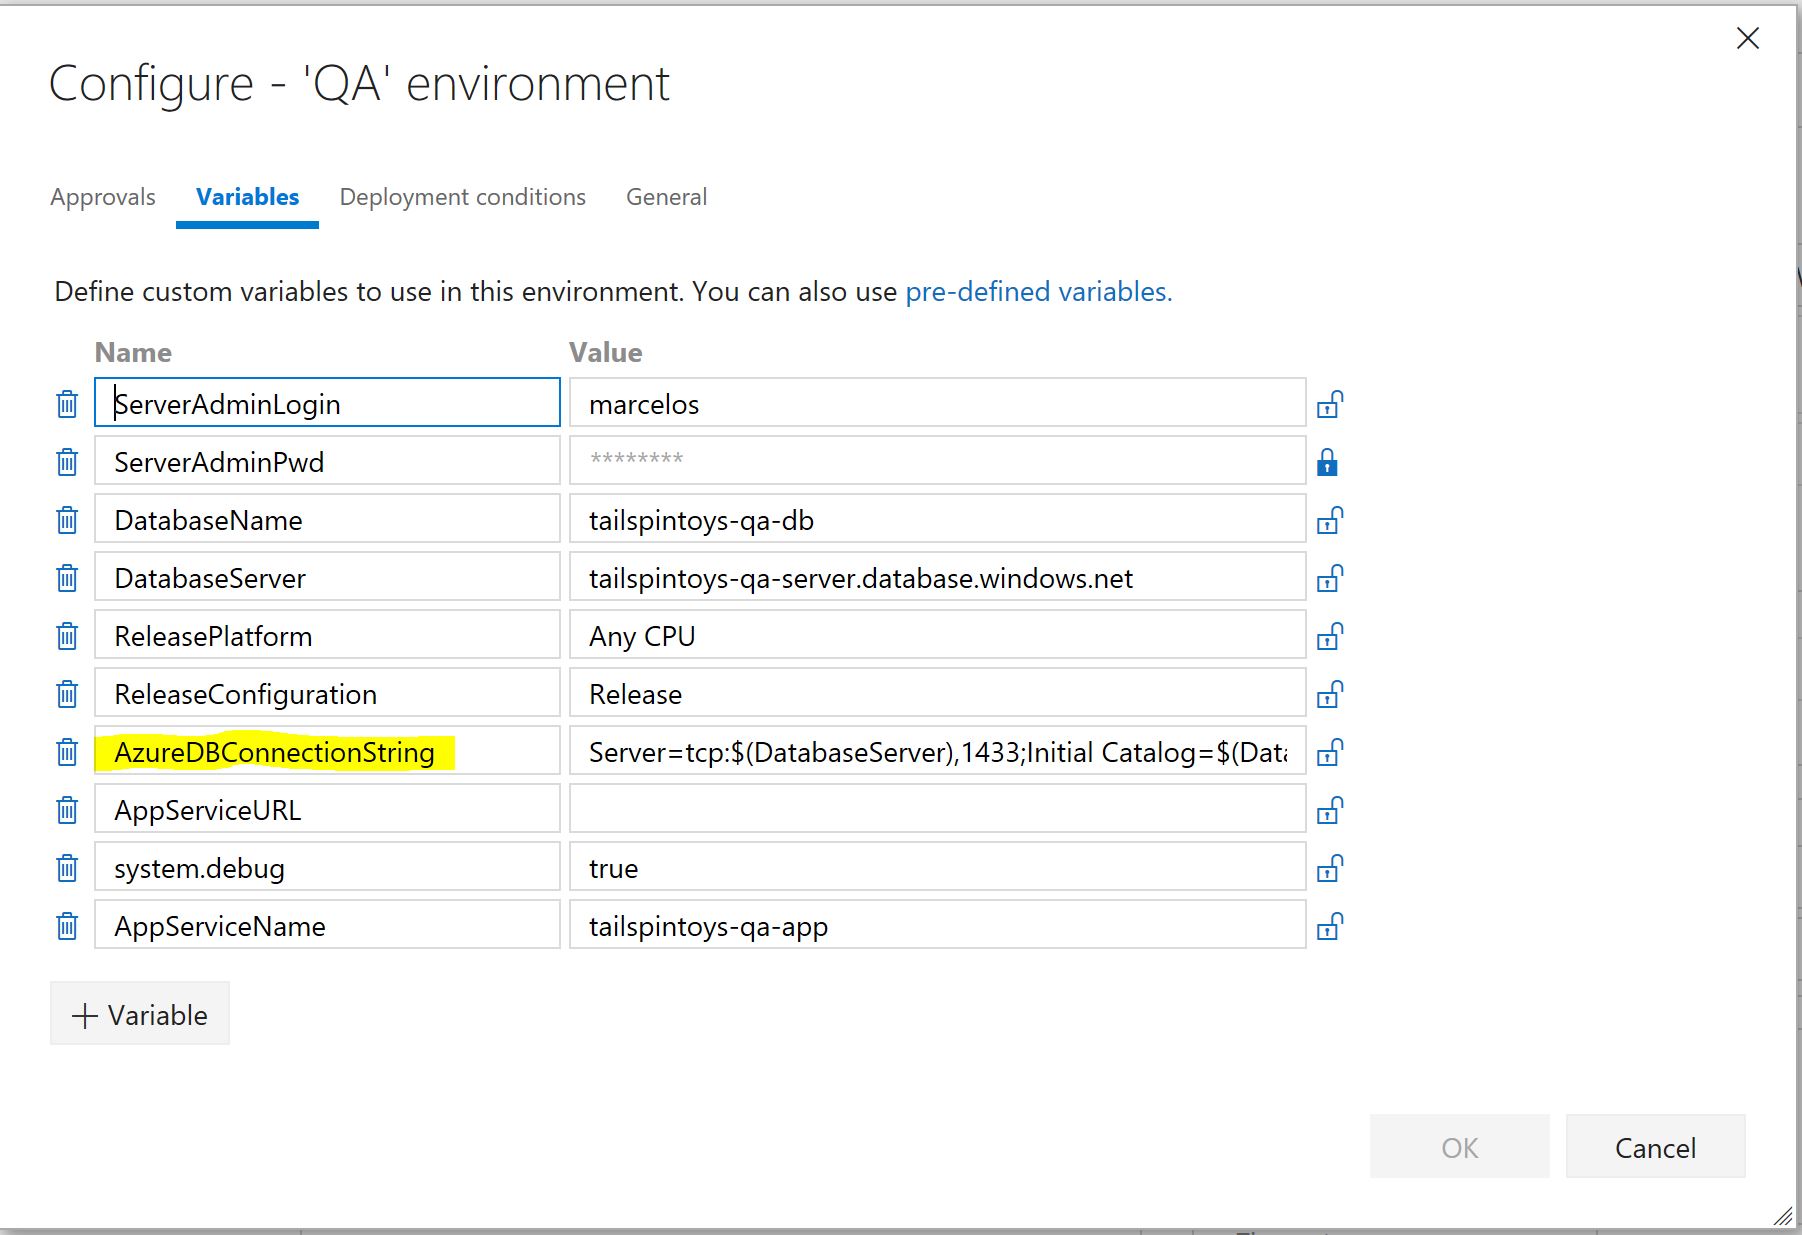
The variables are set at QA environment level. Notice the variable with the same name as the token, without the "__":
The production environment will be very similar, but this time we want to accomplish a couple more things:
- Deploy only if QA is successful
- Deploy to staging slot first then wait for manual confirmation
- Swap staging and prod slots for final deployment
The production deployment steps will then look something like this:

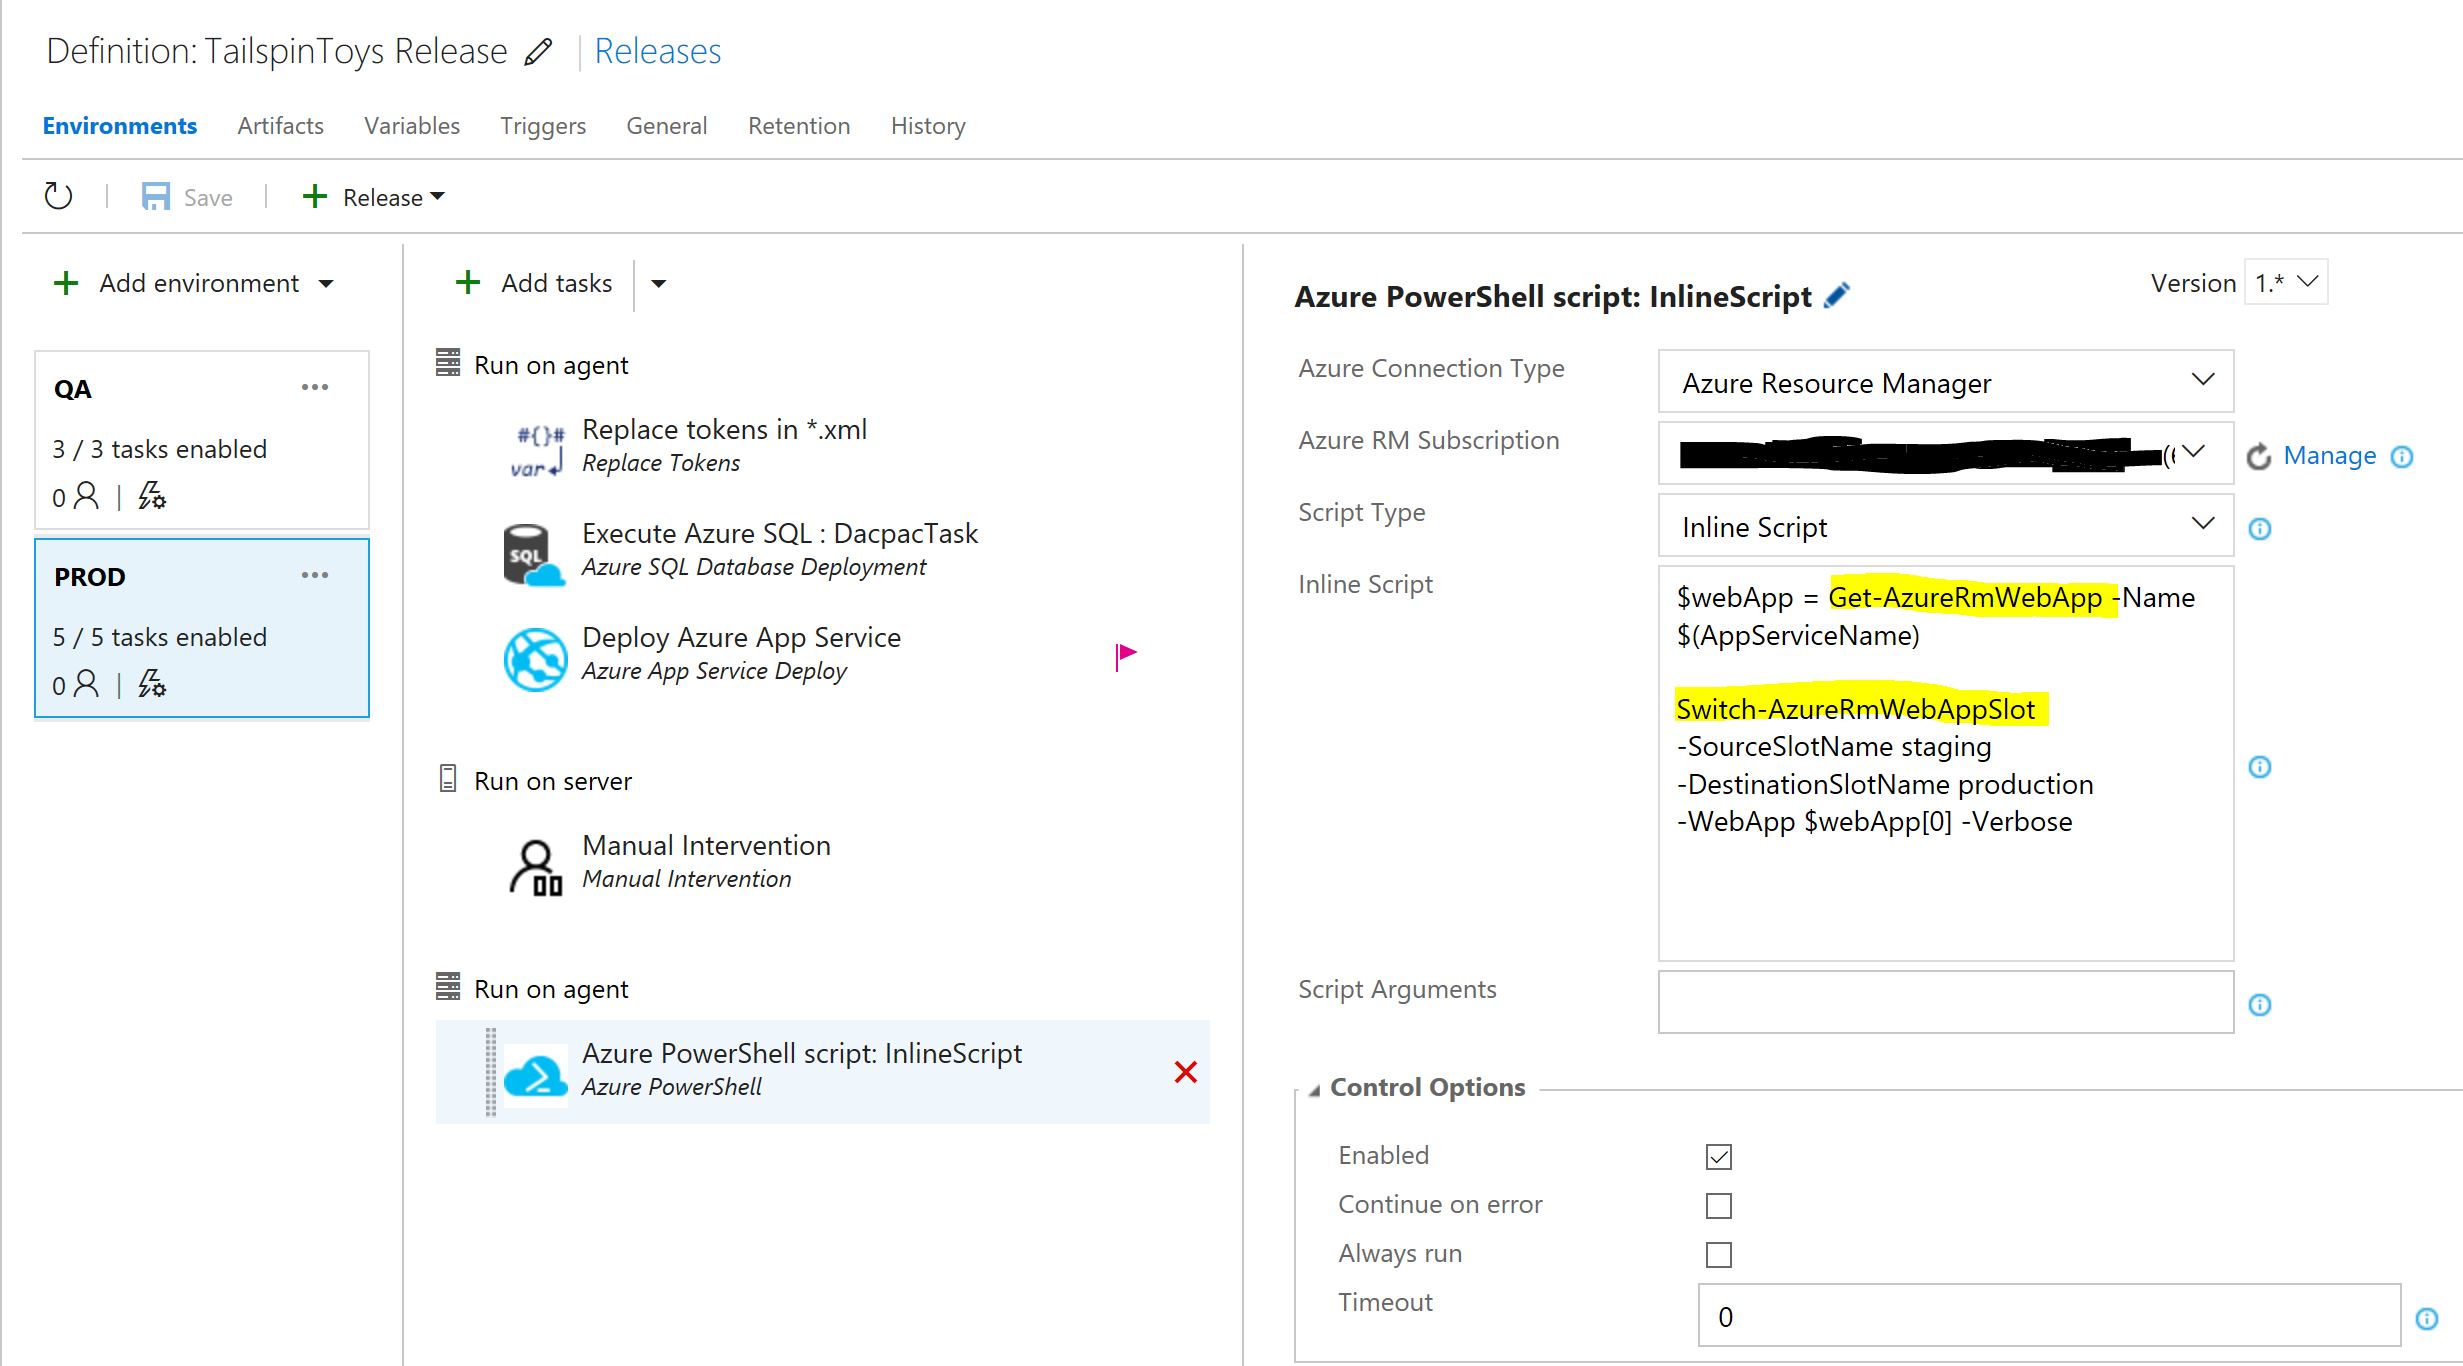
Notice:
- Variables are the same as in QA, but with production values (server names, etc)
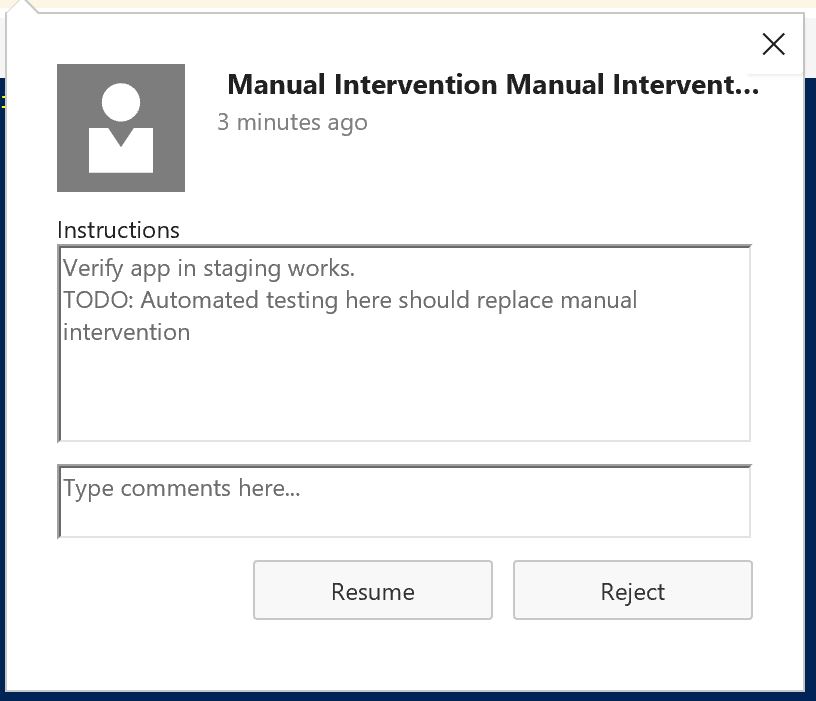
- Manual intervention step is created. Here you should consider whether you really need manual intervention or even better: automate smoke tests to run against the staging environment and proceed with slot swap only if those tests pass
- There's no swap for the prod DB, which is deployed regardless. It may be better to consider creating a staging DB to be used or use a refactoring pattern for DB changes that allows for deployments that don't break the existing application running in production
- The swap slot step has an inline PowerShell script. You can choose to check that in as code and have a task call that script instead.
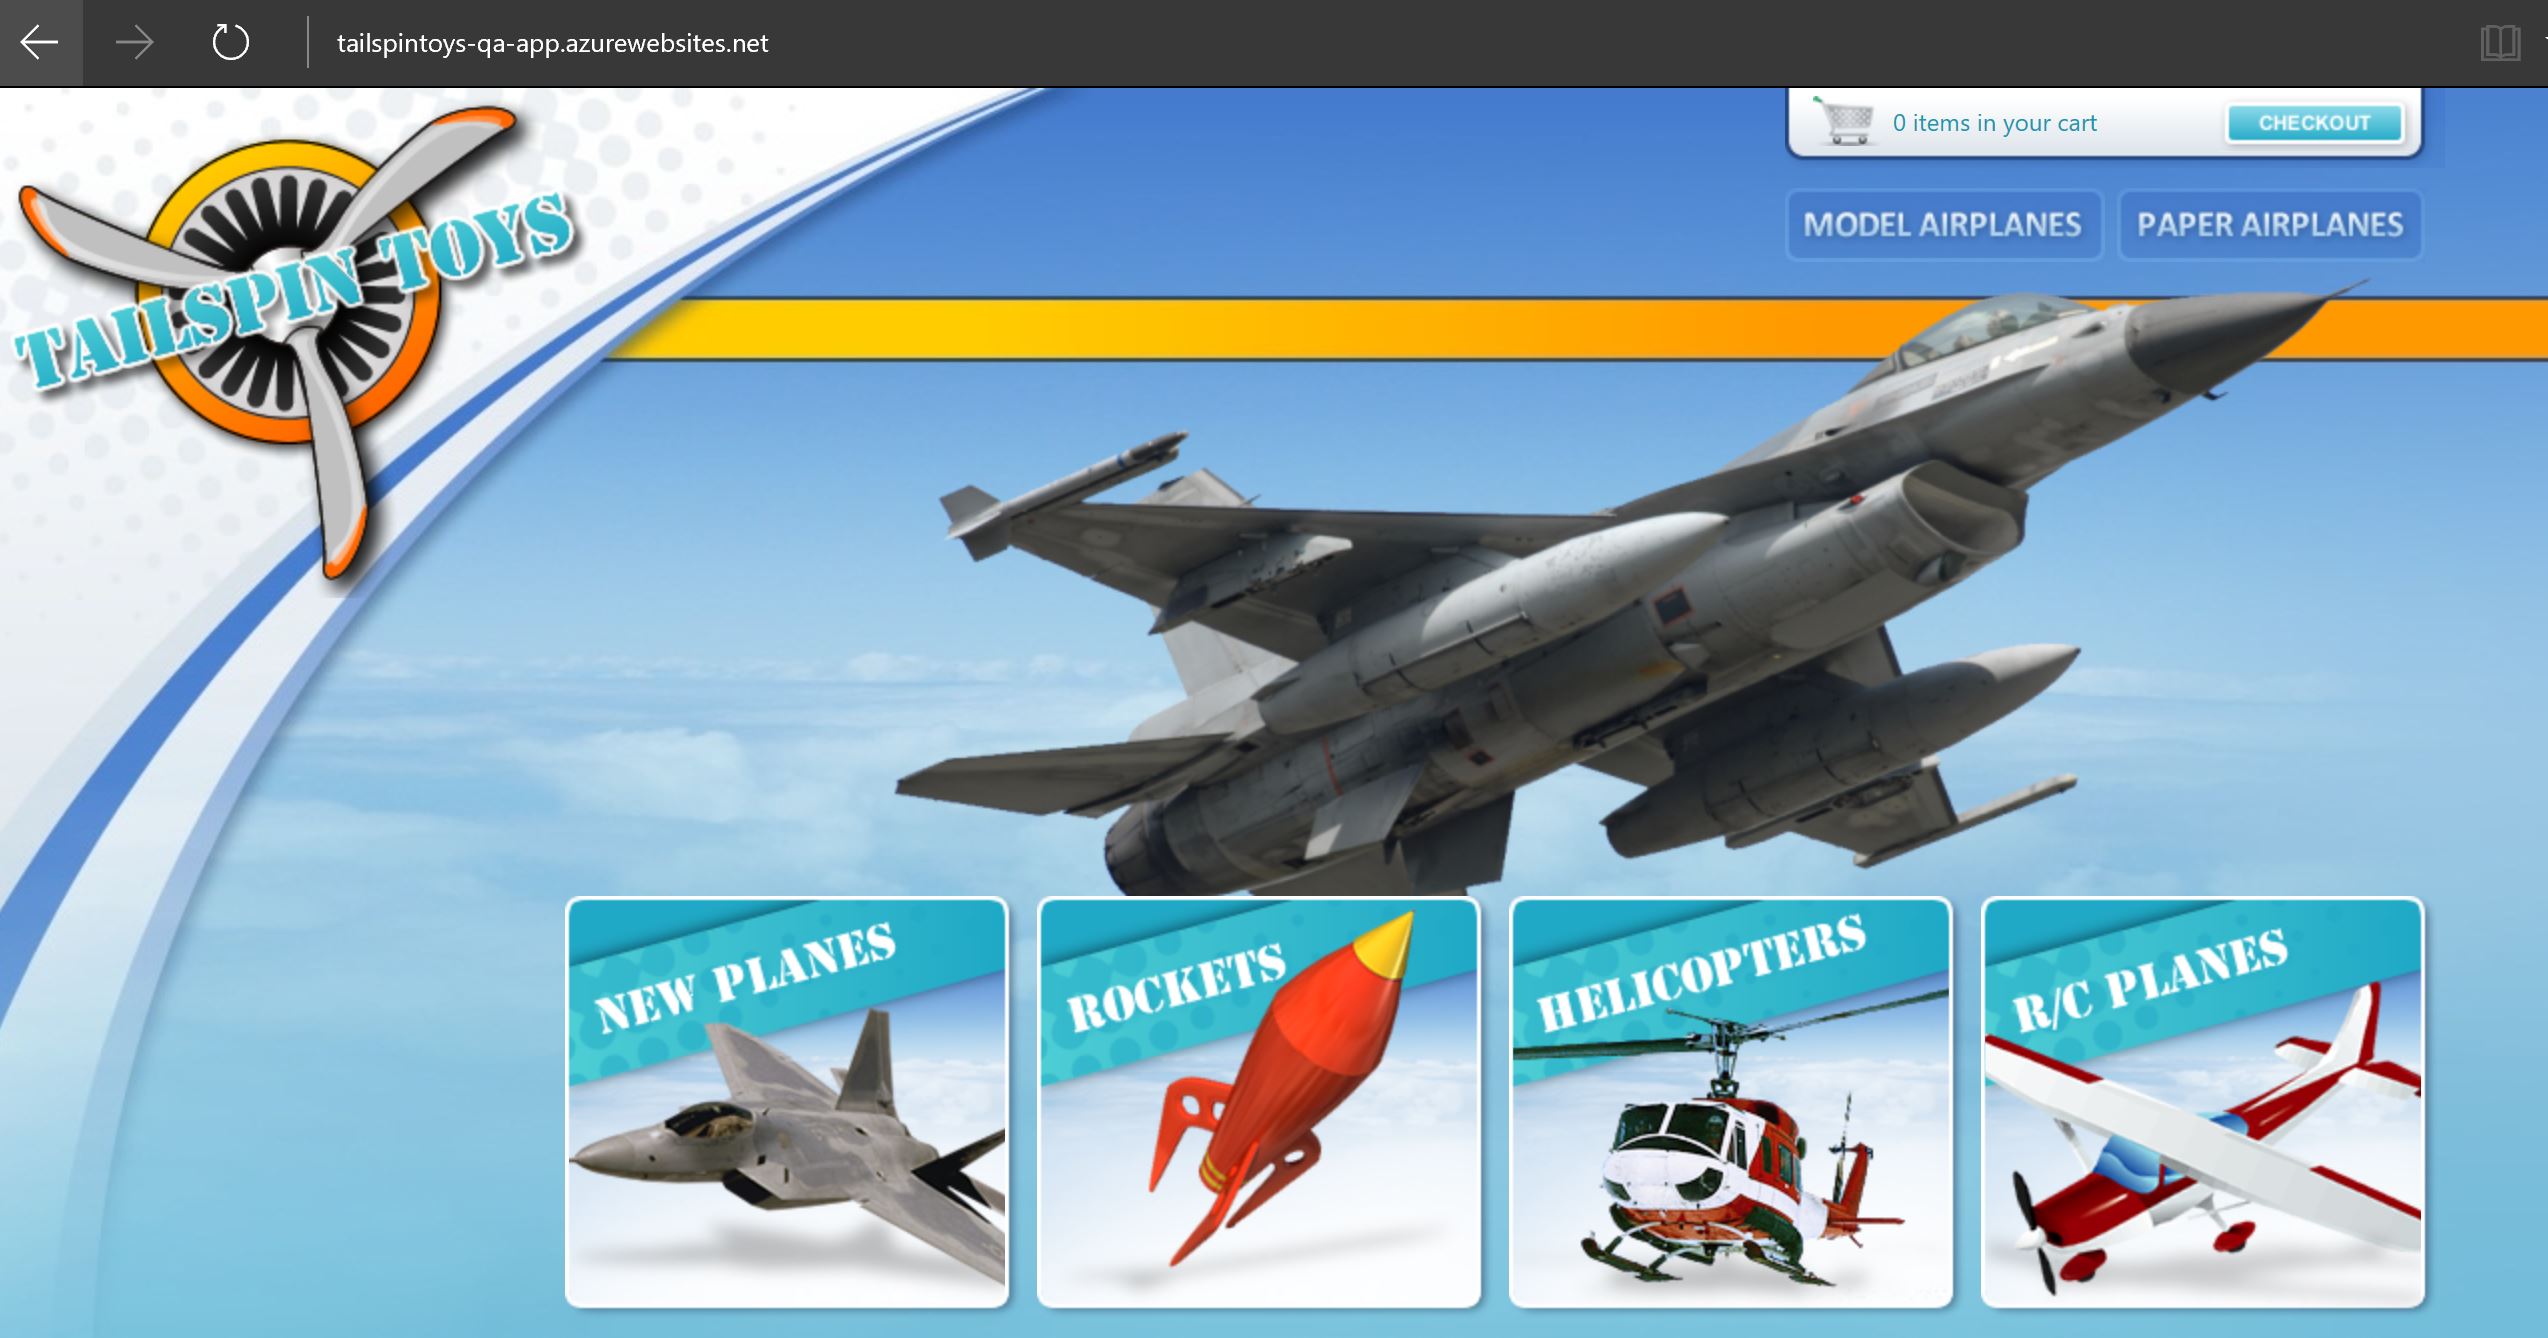
Running the release we get the app deployed and running in the QA environment:
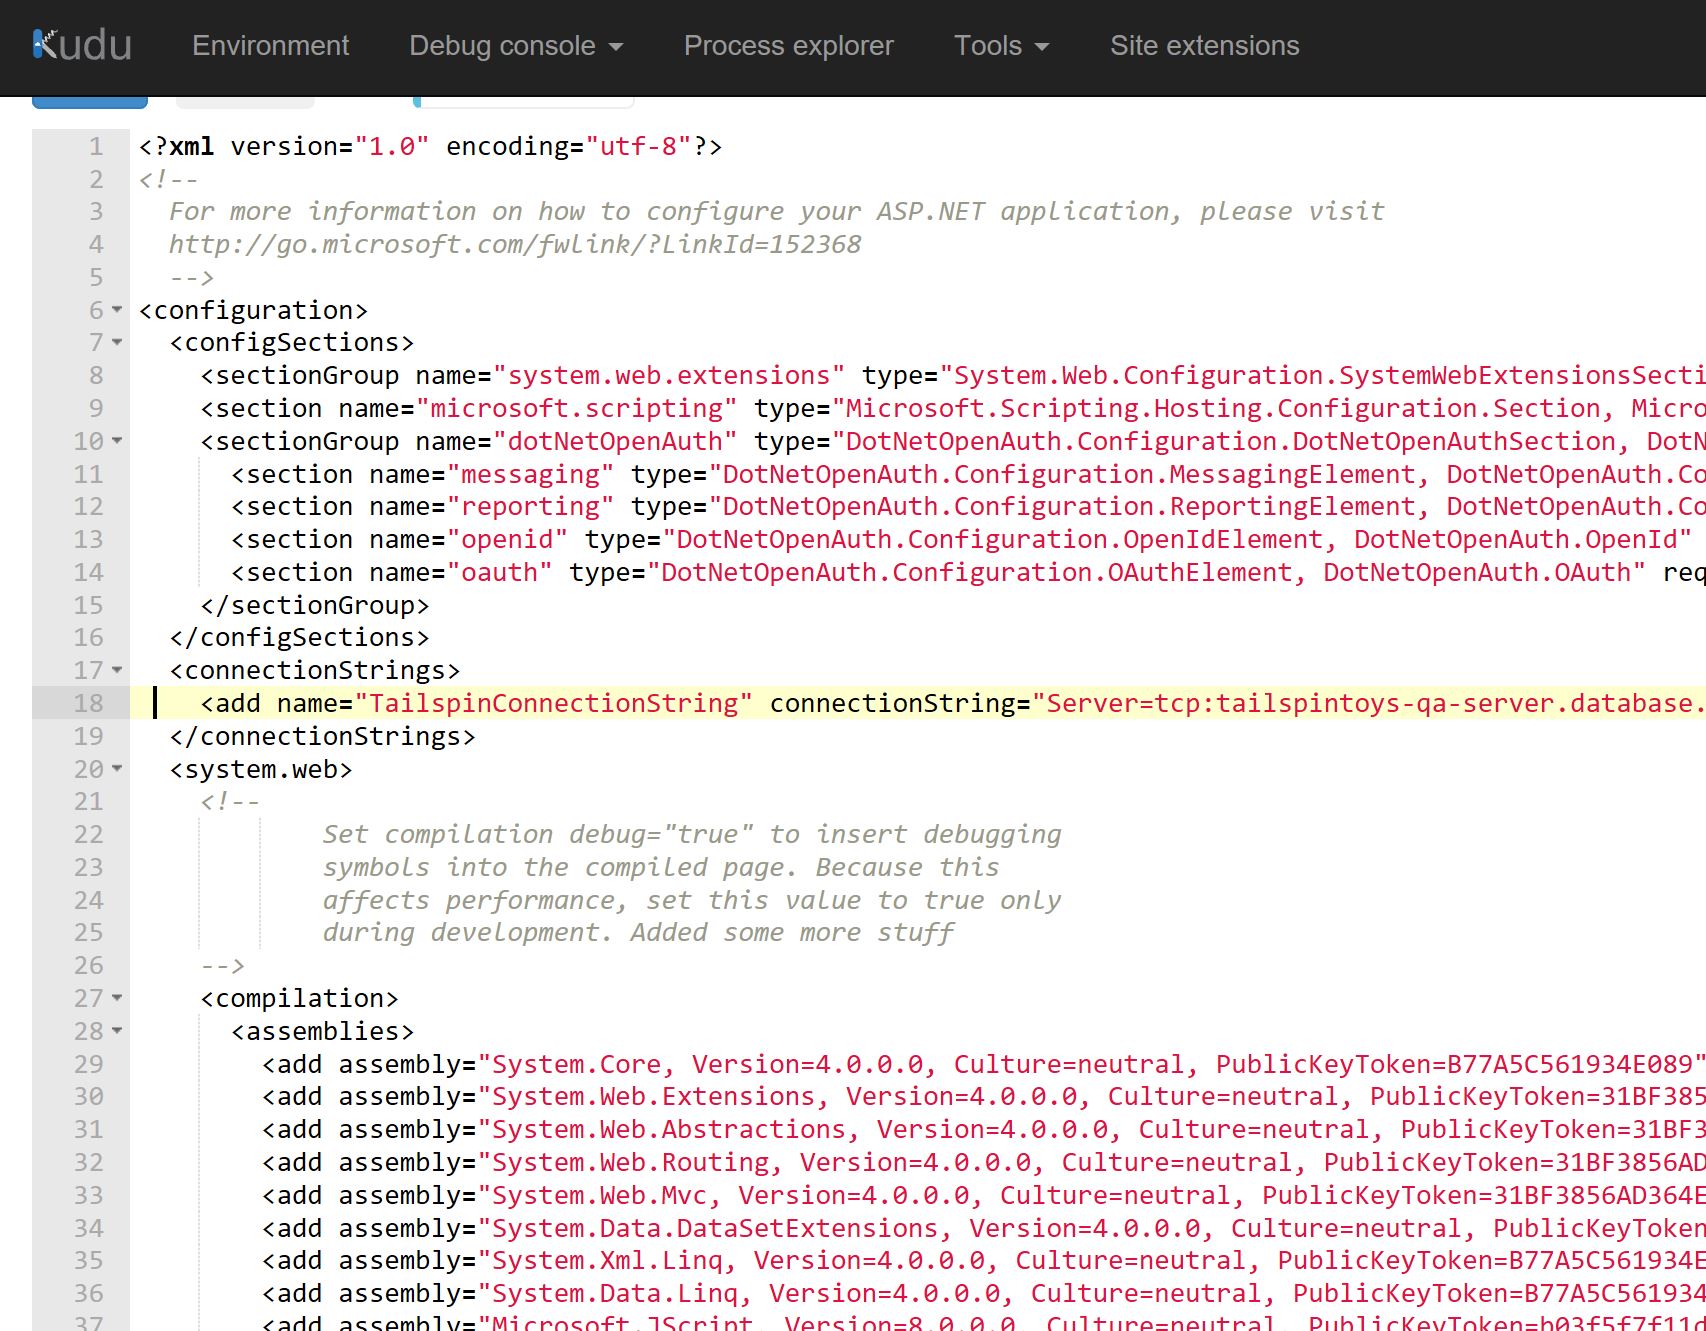
If we go to the Kudu console for the web app in QA, we see that our web.config transformation happened without issues:
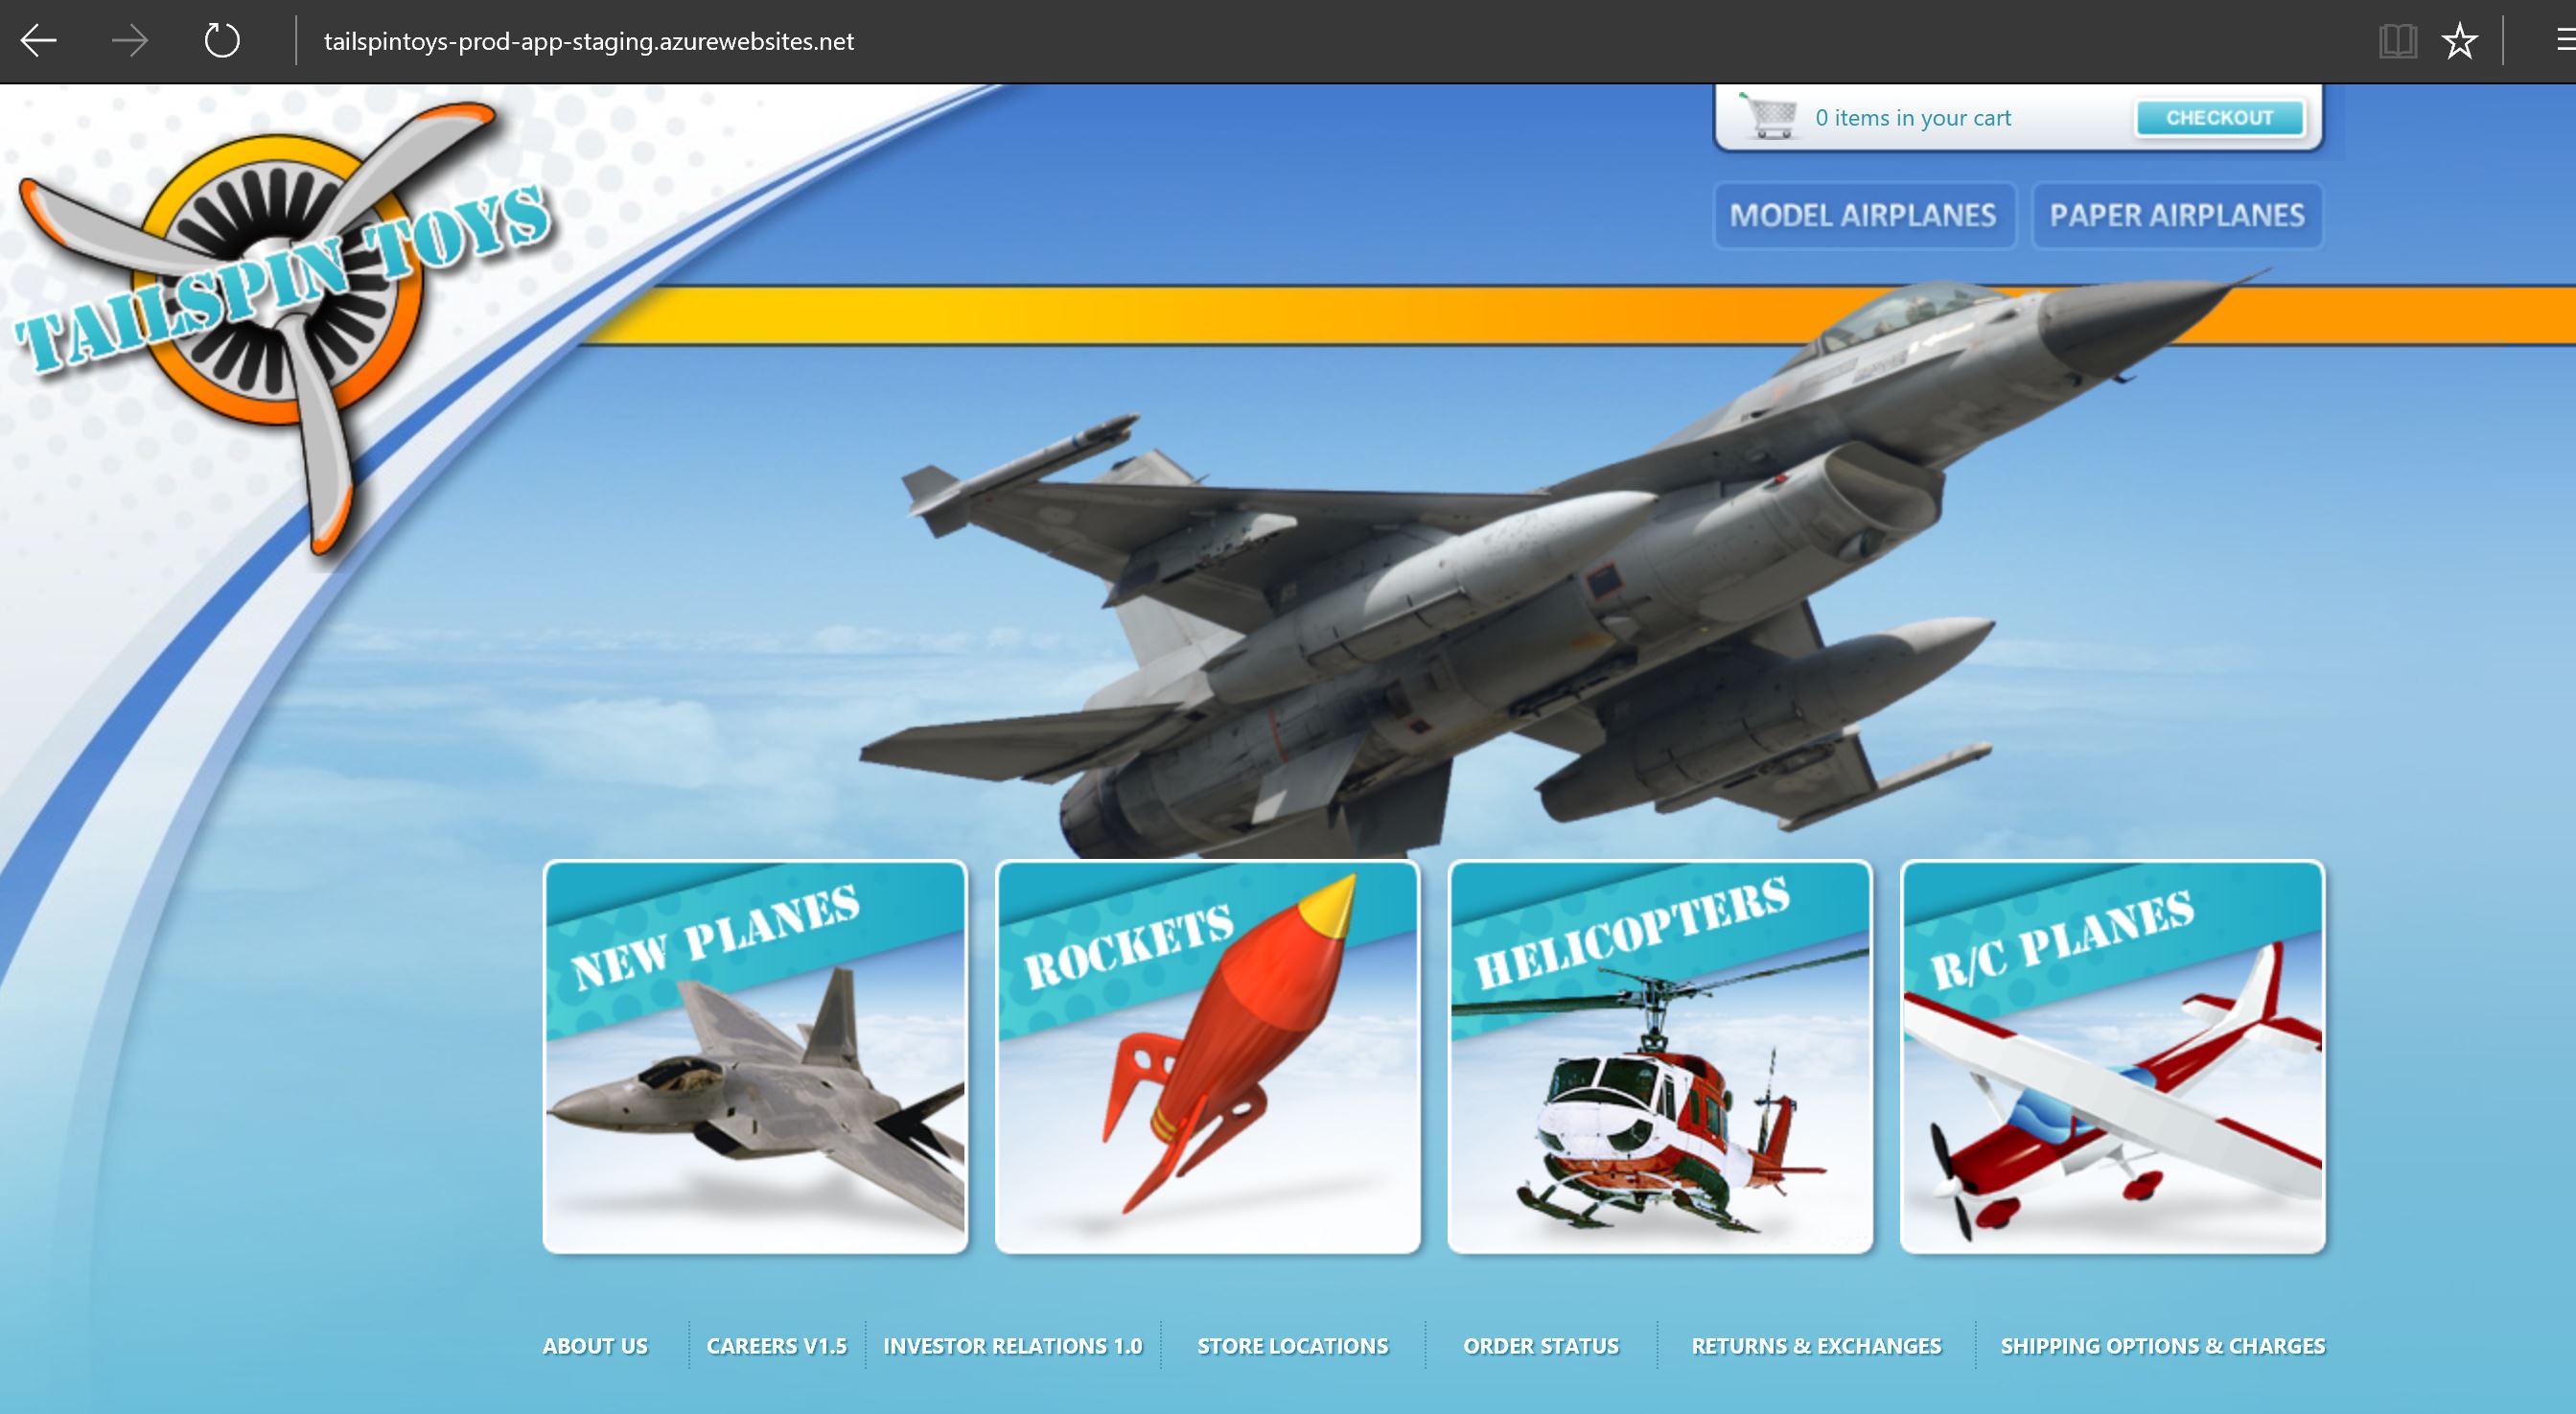
Now, in production is the same pattern. The only difference is that the app is deployed first to the staging slot.
Running in staging slot:
But not yet in production slot:
Once the deployment happens to staging, approval is needed for the manual intervention:
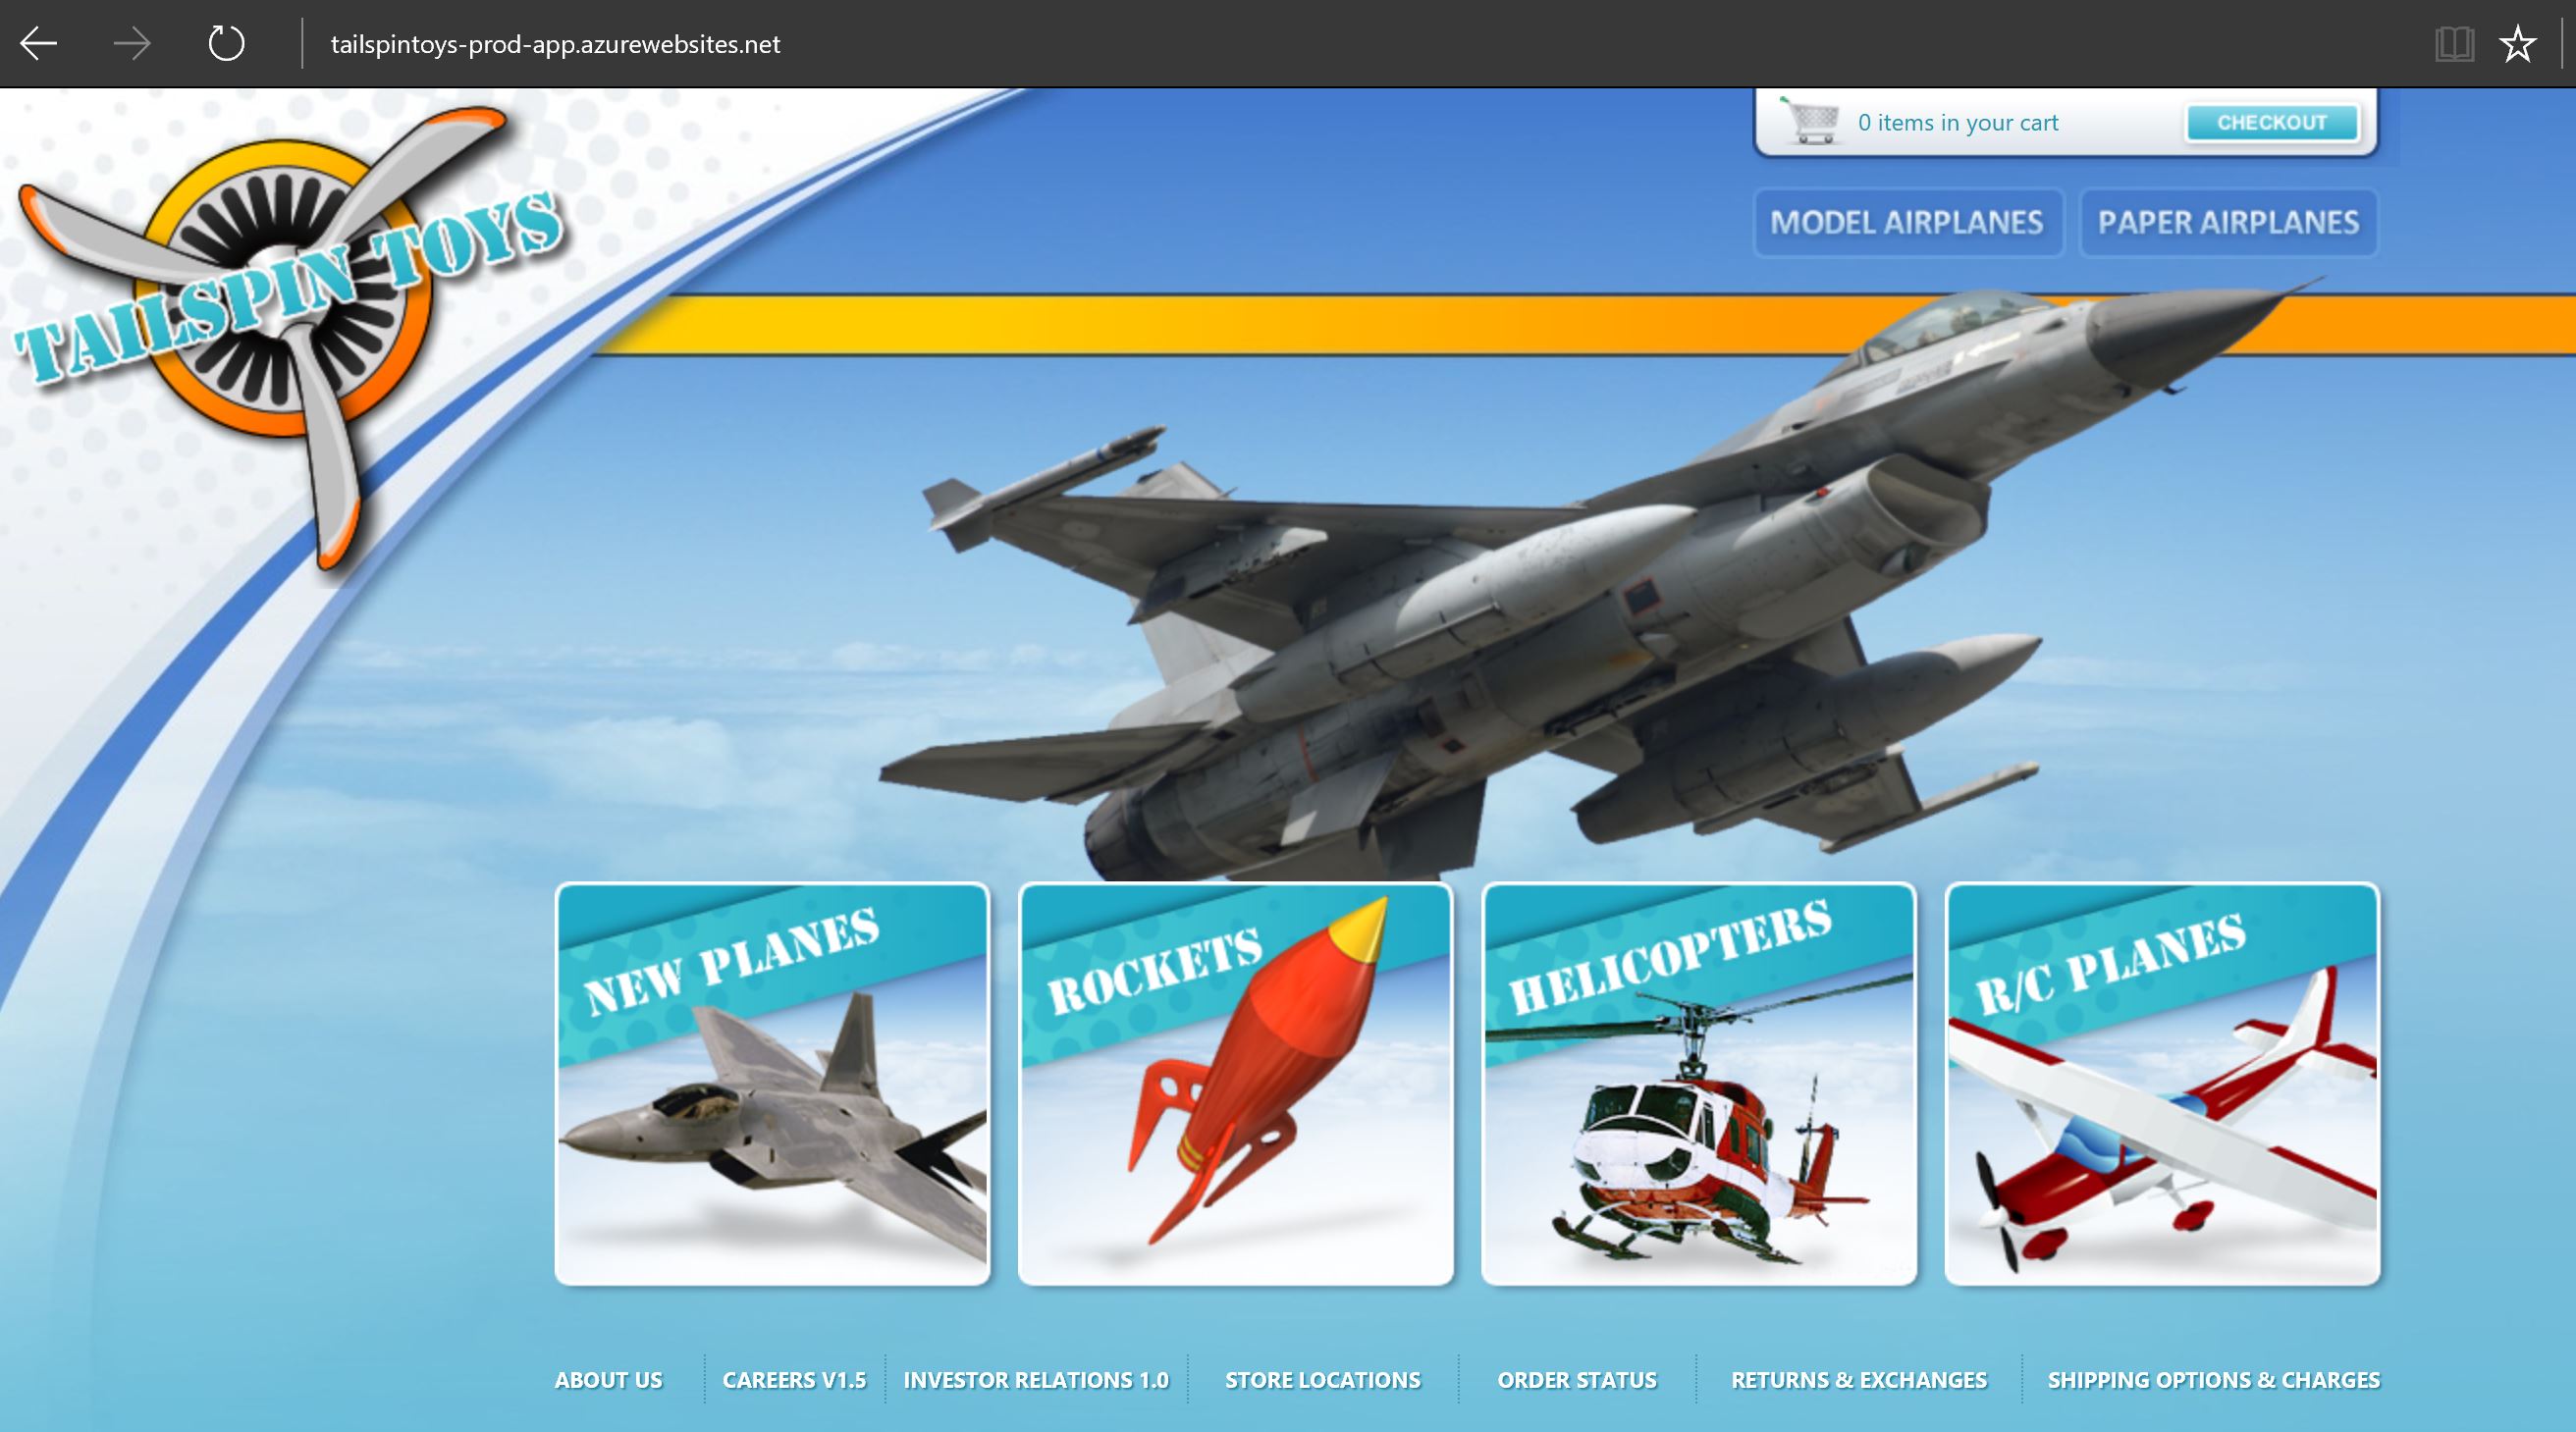
Then the slot is switched and the app is now running in production:
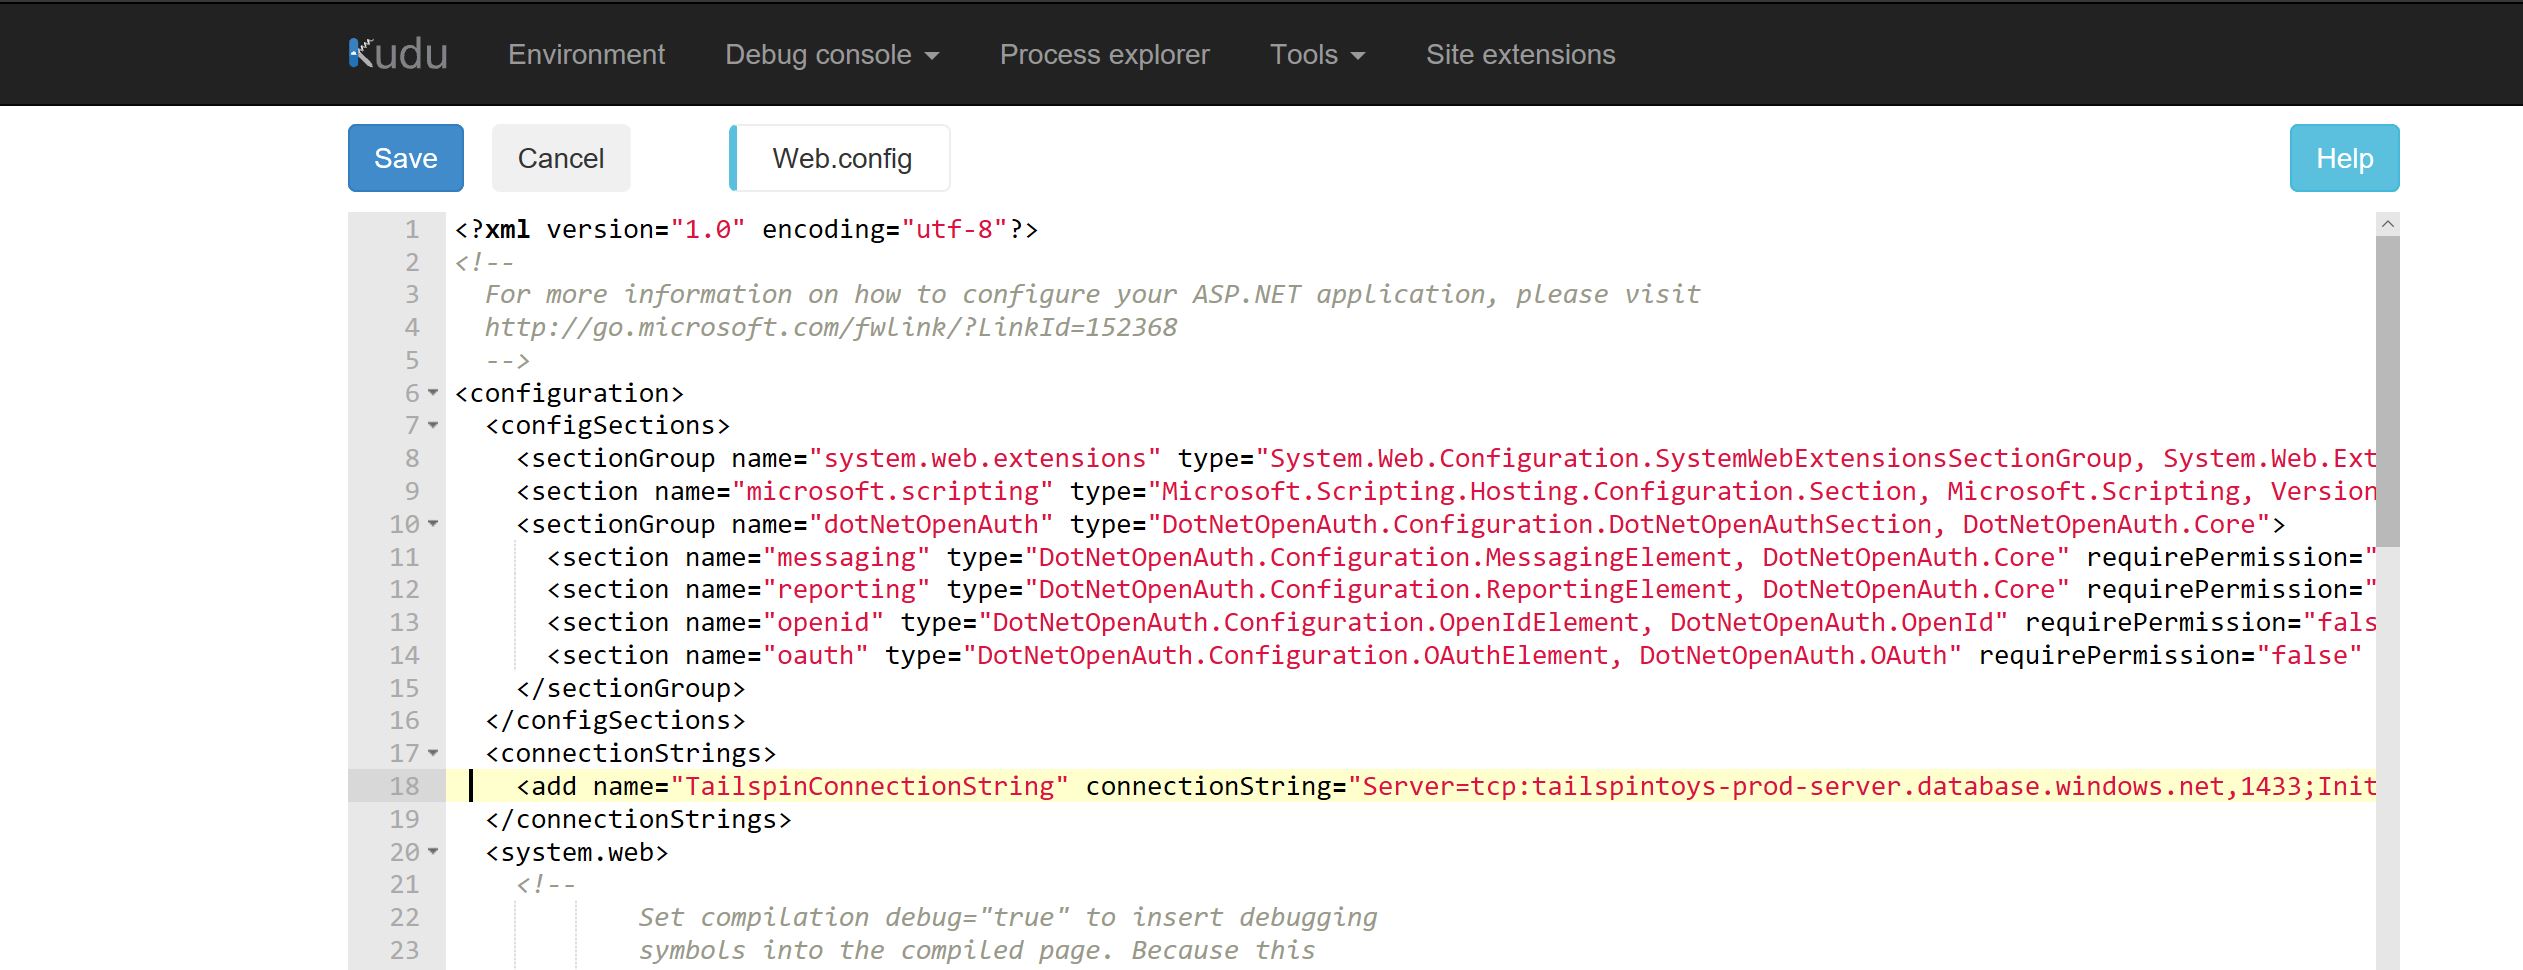
We can also verify that the web.config correctly points to the production database in Kudu:
There you have it. Now on to another post soon.