Getting a CMD prompt as SYSTEM in Windows Vista and Windows Server 2008
Ned here again. In the course of using Windows, it is occasionally useful to be someone besides… you. Maybe you need to be an Administrator temporarily in order to fix a problem. Or maybe you need to be a different user as only they seem to have a problem. Or maybe, just maybe, you want to be the operating system itself.
Ehhh-whhhaaaaa?
Think about it. What if you are troubleshooting a problem where an agent process like the SMS Client isn’t working? Or an anti-virus service is having issues reading the registry? If only we had some way to look at things while logged in as SYSTEM.
What is SYSTEM and why is Vista/2008 special?
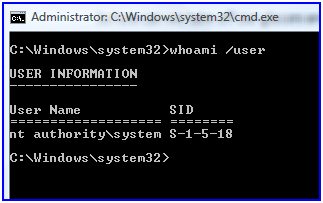
SYSTEM is actually an account; in fact, it’s a real honest-to-goodness user. Its real name is “NT AuthorityLocal System” and it has a well-known SID of S-1-5-18. All Windows computers have this account and they always have the same SID. It’s there for user-mode processes that will be executed as the OS itself.
This is a bit tricky in Windows Vista and Windows Server 2008 though. In previous operating systems you could simply start a scheduled task CMD prompt and have it interact with the desktop easily. This was construed as a security hole to some people, so in Vista/2008 it’s not possible anymore.
So how can we take off our glasses and put on the cape with the big red S?
Method one - PSEXEC
An easy way to get a CMD prompt as SYSTEM is to grab PSEXEC from Microsoft Sysinternals:
1. Download PSEXEC and unzip to some folder.
2. Open an elevated CMD prompt as an administrator.
3. Navigate to the folder where you unzipped PSEXEC.EXE
4. Run:
PSEXEC -i -s -d CMD
5. You will have a new CMD prompt open, as though by magic.
6. Type the following in the new CMD prompt to prove who you are:
WHOAMI /USER
There you go – anything that happens in that CMD prompt or is spawned from that prompt will be running as SYSTEM. You could run regedit from here, start explorer, or whatever you need to troubleshoot as that account.
That was pretty easy – why do I have some more methods below? Unfortunately, in several previous versions of the PSEXEC tool the –s (system) switch has not worked. As of version 1.94 it does work again, but that is no guarantee for the future. This brings us to a more iron-clad technique:
Method two - REMOTE
We can use the REMOTE.EXE tool which comes as part of the Windows Debugger. While it’s a bit more cumbersome, it will always work:
1. Download the Windows Debugger (x86 or x64) and install it anywhere (we just need its copy of REMOTE.EXE, so feel free to copy that file elsewhere and uninstall the debugger when done; in the example below I installed to “c:debuggers”).
2. Open an elevated CMD prompt as an administrator.
3. Run:
AT <one minute from now> c:debuggersremote.exe /s cmd SYSCMD
Where you use 24-hour clock notation (aka ‘military time’). For example, right now it is 3:57PM, so I type:
AT 15:58 c:debuggersREMOTE.EXE /s cmd SYSCMD
4. Then once 15:58 (3:38PM) is reached, you can run:
C:debuggersREMOTE.EXE /c <your computer> SYSCMD
Where you are typing your computers’ own NetBIOS name. So for example:
C:debuggersremote.exe /c nedpyle04 SYSCMD
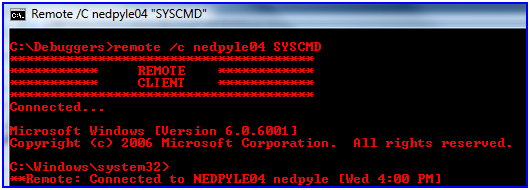
Neato. I used REMOTE to connect to REMOTE on the same computer. This is a good example of a client-server RPC application. The SYSCMD option I keep using is just a marker that identifies the remote session. Technically you could have lots of these going at once, each with a different marker.
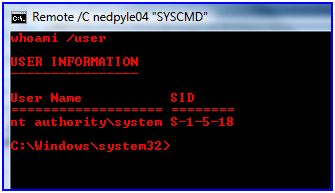
If I then use WHOAMI /USER again, the proof:
To leave just type EXIT 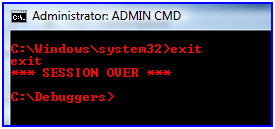
Method two and a half – REMOTE and the Task Scheduler
Maybe you want to have REMOTE ready to go at a moment’s notice (you plan to do this a lot, eh)? Or what if you want to use one of the other SYSTEM-type accounts, like “Local Service” and “Network Service”? PSEXEC can’t do that and neither can the old AT command.
Here’s some XML and commands you can use to make the server portion of REMOTE be ready at an instant for various accounts. This time we’ll use the newer, slicker SCHTASKS tool:
1. Copy the following sample into notepad and save as <something>.xml (in my sample below, I save to “c:tempRaS.xml”)
<?xml version="1.0" encoding="UTF-16"?> <Task version="1.2" xmlns="https://schemas.microsoft.com/windows/2004/02/mit/task"> <RegistrationInfo> <Date>2008-03-26T16:40:47.4520087</Date> <Author>CONTOSOAdministrator</Author> </RegistrationInfo> <Triggers /> <Principals> <Principal id="Author"> <UserId>SYSTEM</UserId> <RunLevel>HighestAvailable</RunLevel> </Principal> </Principals> <Settings> <IdleSettings> <Duration>PT10M</Duration> <WaitTimeout>PT1H</WaitTimeout> <StopOnIdleEnd>true</StopOnIdleEnd> <RestartOnIdle>false</RestartOnIdle> </IdleSettings> <MultipleInstancesPolicy>IgnoreNew</MultipleInstancesPolicy> <DisallowStartIfOnBatteries>false</DisallowStartIfOnBatteries> <StopIfGoingOnBatteries>true</StopIfGoingOnBatteries> <AllowHardTerminate>false</AllowHardTerminate> <StartWhenAvailable>false</StartWhenAvailable> <RunOnlyIfNetworkAvailable>false</RunOnlyIfNetworkAvailable> <AllowStartOnDemand>true</AllowStartOnDemand> <Enabled>true</Enabled> <Hidden>false</Hidden> <RunOnlyIfIdle>false</RunOnlyIfIdle> <WakeToRun>false</WakeToRun> <ExecutionTimeLimit>PT0S</ExecutionTimeLimit> <Priority>7</Priority> </Settings> <Actions Context="Author"> <Exec> <Command>"C:debuggersremote.exe"</Command> <Arguments> /s cmd SYSCMD</Arguments> <WorkingDirectory>C:debuggers</WorkingDirectory> </Exec> </Actions> </Task>
Note the highlighted elements above. You will need to make sure that these paths match where REMOTE.EXE is located. Also, the UserID can be set to anything you like, including “nt authoritylocal service” or “net authoritynetwork service”.
2. Open an elevated CMD prompt as an administrator.
3. Run:
SCHTASKS /create /tn <some task name> /xml <path to xml file>
Where you provide a real task name and XML file. For example:
SCHTASKS /create /tn RemoteAsSystem /xml c:tempRaS.xml

4. This created a scheduled task with all the REMOTE info filled out.
5. Now we can run the REMOTE server piece anytime we want, as often as we want with:
SCHTASKS /run /tn RemoteAsSystem

6. Now we can connect with just like we did back in method two:
REMOTE /c % COMPUTERNAME% SYSCMD
That’s it. Hopefully you find this useful someday (or maybe I should hope you never have to find it useful). Got a comment, or another way to do this? Let us know.
- Ned “Nubbin” Pyle