BizTalk Services – Signup & Dependencies
Earlier this week, we announced the public preview of Windows Azure BizTalk Services (WABS). The responses so far has been quite positive. Within a short amount of time, we have reached the initial capacity that we planned to auto-approve. While we were clearly not expecting such phenomenal response, it is a good problem for us to have. We are in the process of manually clearing out the pending queue. Meanwhile, if you want to speed this up for your subscription, drop an email to wabssignup@microsoft.com with a brief note on what you are intending to do. We shall try to take that up in priority. Please continue to use the support forum on MSDN for any other issues.
Some of you have also expressed some troubles in creating a new BizTalk Service. We have documented elaborate steps to provision a new BizTalk Service, but we see that most of the feedback so far has been to do with the dependencies / pre-requisites. So, in this post, we will look at what they are and some of the things you need to take care of.
BizTalk Service has the following main dependencies, listed below in the order in which you encounter in the create wizard:
- Tracking Database
- Access Control Service
- Monitoring Store
- SSL Certificate
Of the above, the ACS and the SSL certificates are pre-requisites that must be created before you try to create your BizTalk Service.
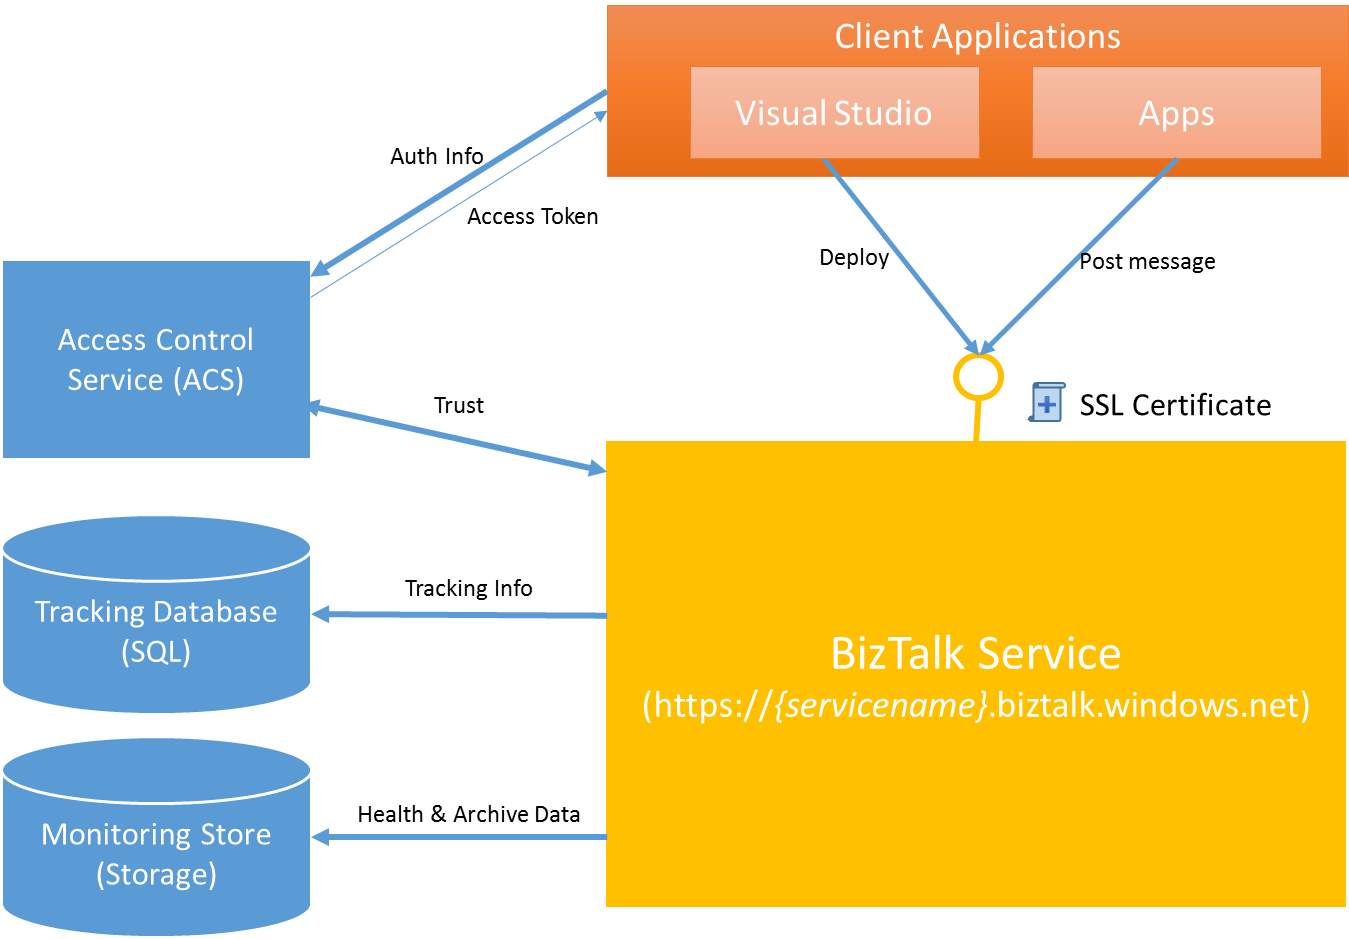
Figure 1 BizTalk Service and its dependencies
Tracking Database
As BizTalk Service receives and processes messages, it emits information that helps keep track of the various processing of the messages and allows you to troubleshoot any issues. This information is written to a SQL Azure Database, which we refer to as Tracking Database. For most of you, the easiest way to specify this would be to select the option to “Create a new SQL Database Instance” in the create wizard.
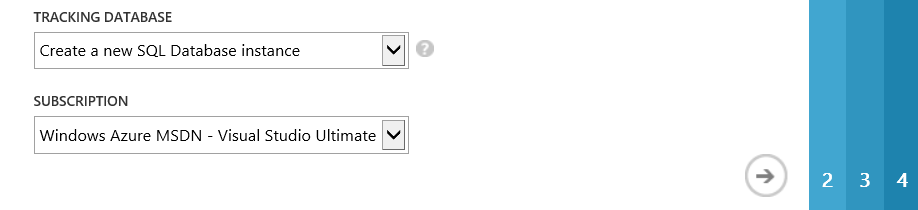
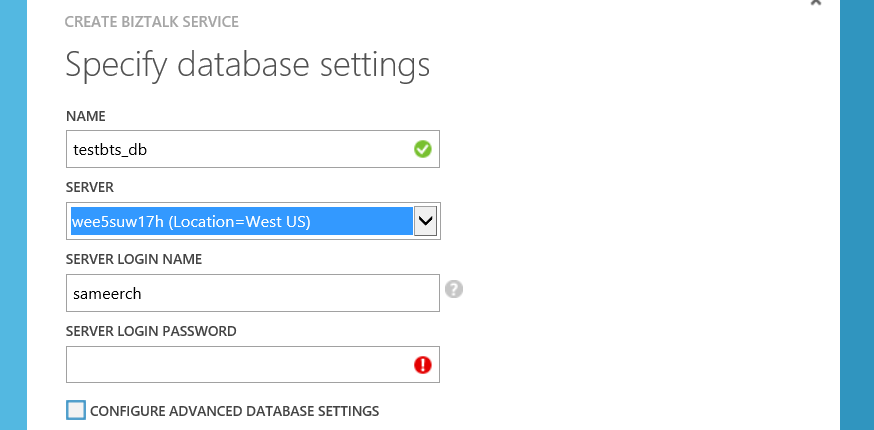
When this option is specified, you can choose the name of the database, the server and the credentials. I usually select an existing SQL Server but you could create a new one as well.
Access Control Services
All requests to BizTalk Service, whether it is deploy of a new bridge, agreement or posting a message, requires a valid token issued by Access Control Service (ACS). Thus, an ACS namespace needs to be associated with a BizTalk Service. You can read more about how ACS works in general here. In a nutshell, the client application will fetch a token from ACS by specifying certain credentials. The client will then present this token to BizTalk Service for authorization. BizTalk Service will determine if this is a valid token or not. The trust between BizTalk Service and the ACS namespace needs to be establish for this – and is achieved through a symmetric token signing key. All this is taken care of when the BizTalk Service is created.
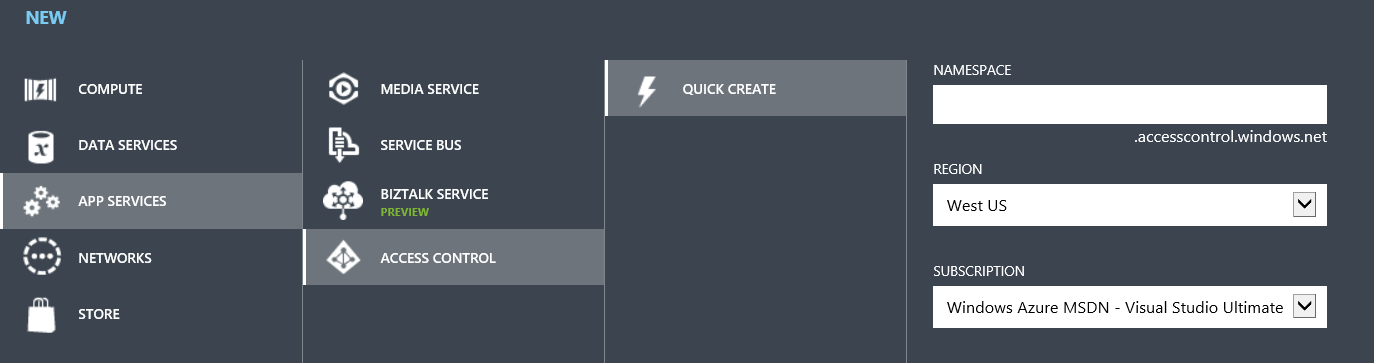
However, as a pre-requisite, you must first create an Access Control Namespace and provide this in the create wizard. Creating a new ACS namespace is as easy as selecting a namespace, a region and a subscription:
To be more precise, when a BizTalk Service is created, the following will be created in the associated ACS Namespace:
- A relying party application for itself
- A default service identity with the name “owner” that clients can use to fetch a token
- A default rule to stamp the various claims required for the default service identity. BizTalk Service uses 3 claims: Manage, Listen and Send.
- A token signing key
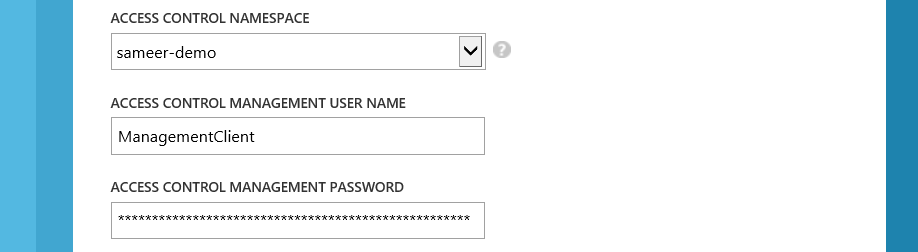
To do the above, BizTalk Service requires a Management Service account with a password credential type. By default, when you create an ACS namespace, a default management service account called “ManagementClient” is already created for you. You can look that up from the ACS Management portal.
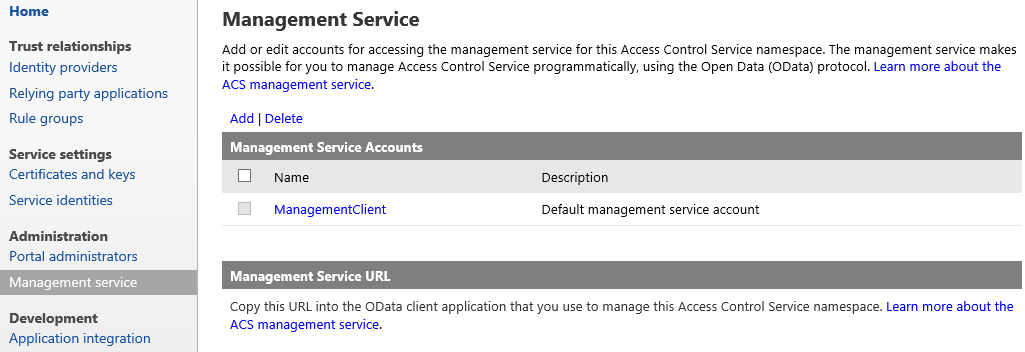
You need to retrieve the password and specify that in the BizTalk Service create wizard:
Monitoring Store
BizTalk Service uses an Azure Storage Account to write system monitoring information like Performance counters, trace files, as well as all the archived messages, which you can enable in certain scenarios. Again, the easiest way to specify this would be to select the option to “Create a new storage account”. You can then specify a name for your storage account.

NOTE: The name of the storage account must be between 3 and 24 characters and can contain only lowercase letters and numbers.
SSL Certificate
The BizTalk Service endpoint is securing using SSL/TLS. An X509 certificate with a private key in PKCS#12 format (.pfx file) is used to authenticate the service to the client. If you have your own custom domain name, you will also likely to have your own certificate issued by your trusted CA. For those of us who like to use BizTalk Service for testing or development purpose, a self-signed certificate can be used as well. A (self-signed) certificate can easily be created using the makecert.exe utility that comes with Windows SDK and Visual Studio. Here is an example:
makecert.exe –pe -r -n "CN=servicename.biztalk.windows.net" -e "01/01/2015" -ss my
NOTE: Your certificate should not have an expiry period of more than 5 years.
The certificate above can then be exported in .pfx format along with the private key. For that, you can use either certutil.exe, or the UI tool certmgr. I prefer certmgr as it is easier for me to browse and specify the inputs. Because a private key will need to be exported, a password needs to be specified when you export the certificate.
Once you have the above, you can specify that in the create wizard of BizTalk Service.

And that is the last step required for creating BizTalk Service. Once you complete the wizard, the creation of BizTalk Service will start.

One last thing…
As mentioned above, the BizTalk Service endpoint is secured using SSL/TLS and Access Control Service. For SSL to work, your client machines, from where you will either deploy apps or send messages to, will need to trust the SSL certificate that you have specified. For that, import the certificate to the “Trusted Root Certificate Authorities” store. NOTE: You do not need to share the private key for this. You could export a key without the private key.
To fetch a token from ACS, you need to specify an identity claim. As mentioned above, we create a default service identity called “owner”. You can retrieve the password for this identity from the Access Control Management portal. You will need that when you deploy your applications from Visual Studio or when you register your service in the BizTalk Portal. By default, we use the same password as that of your ACS management service account. But, you can always go ahead and change that. Or, you could create an entirely new identity – it is entirely your call. Just make sure you update /define the necessary Rules to stamp the right ACS claims.
Summary
This post tries to provide a brief summary of the dependencies of BizTalk Service. Hopefully, it will take care of some of the pain points you are facing while signing up and creating a new BizTalk Service. We are always looking for feedback. So, keep sending them across – either as comments to this post, or in the support forum.
Thanks!
The BizTalk Team