Basic Skype for Business/Lync 2013 VDI Plugin Test Lab
Hi all
I don't get to see the Lync 2013 VDI Plugin in action too much and so I thought I would try and work out how to lab it up, to get a better understanding of how it works. The good news is that it is a lot easier than I expected.
In my lab I have a single laptop running a Skype for Business Front End Pool. I have a lot of other roles etc running, but for the purposes of this blog, you only really need to know that I have a Front End Pool in a contoso.org Active Directory domain. My Front End Pool is called skype.contoso.org. My sip domain is contoso.com.
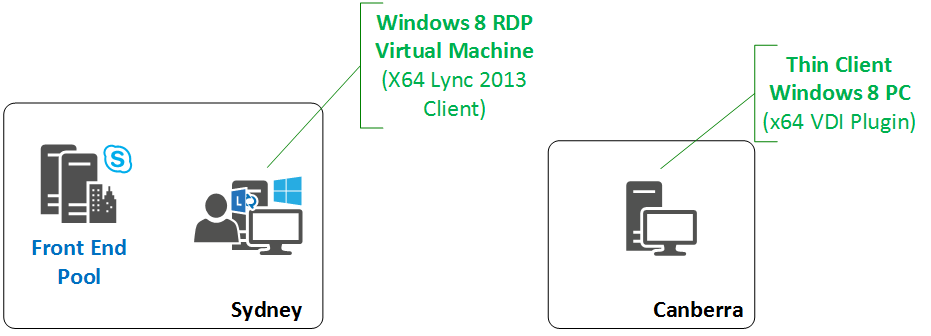
Thin Client Machine
So basically the setup I have used in this lab is to have a virtual machine running Windows 8, and the Lync 2013 VDI client (x64). This client is not joined to the domain. I am not sure that this is strictly required, but this is what I did for my lab.
One important change you don't want to forget is to setup the Trusted Root Certificate that is used to sign your Front End certs, and add this certificate to the Trusted Root of the thin client device (as the VDI client is like a cut down Lync client and needs to trust the Front End Pool). Make sure you don't have the full Lync client installed on this machine. (As this was a lab I just uninstalled the full client I had in place to start, but start clean when you are doing it for real). I was running the Virtual Audio Cable software on this VM so the device thinks it has a audio device attached. https://software.muzychenko.net/eng/vac.htm. This software is kewl for a lab environment, but don't go using it for production.
You can get the VDI client here https://www.microsoft.com/en-au/download/details.aspx?id=35454.
RDP Machine (Machine that will be RDP'd to)
I used another Windows 8 machine that would be RDP onto from my thin client. This machine was joined to my domain and had the x64 Lync 2013 client installed. I also installed SP1 for Office, and the May 2015 and September 2015 CUs for the Lync client. The important thing here to note is that it is recommended that the Lync VDI client and Lync 2013 client match, and that the VDI client version is driven by the OS of the thin client machine. In my case, my thin client Windows device was running x64 OS, so I needed to use a Lync 2013 x64 client and the Lync 2013 VDI client. I was also running Virtual Audio Cable on this device.
Make sure you patch this machine as well to make sure you have the latest and greatest.
Enable Media Redirection
You will need to enable media redirection for all your users who are signing into the Lync client. This is done with a client policy. The commands to enable media redirection are:
New-CsClientPolicy VDI -EnableMediaRedirection $True
grant-csclientpolicy -PolicyName vdi -Identity sip:batman@contoso.com
The RDP Connection
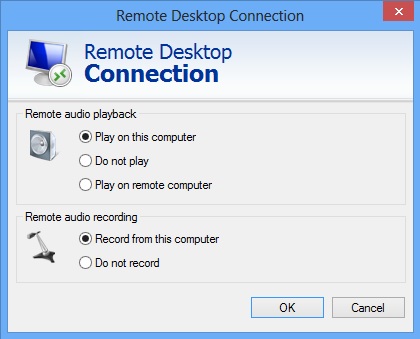
The next thing to do is to get the RDP connection right. You need to make sure that audio is playing on the thin client device. My RDP connection options I used to connect to the "RDP Machine" with were as follows.
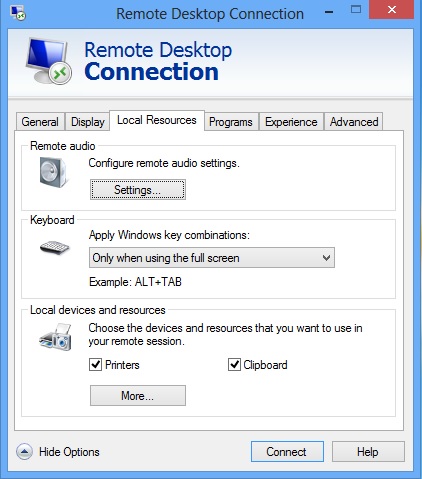
The main options are the settings below where audio is played on the thin client.
Registry options
I had some issues getting the Lync VDI client to connect successfully to my Pool. I looked at TrustModelData registry keys as my pool FQDN (contoso.org) does not align with my SIP domain (contoso.com) but I didn't have luck with these keys (tried HKCU and HKLM). Anyway, I then looked at hard coding the pool name via registry on the thin client and this did the trick. So the commands I ran on my thin client were:
reg add hkcu\Software\Microsoft\Office\15.0\Lync /v ConfigurationMode /t REG_DWORD /d 1 /f
reg add hkcu\Software\Microsoft\Office\15.0\Lync /v ServerAddressInternal /t REG_SZ /d "skype.contoso.org" /f
reg add hkcu\Software\Microsoft\Office\15.0\Lync /v ServerAddressExternal /t REG_SZ /d "lync-edge.contoso.org" /f
So this hard coded for the VDI client where to go, which made sure that the destination was considered trusted.
Once I had the registry keys setup, I then RDP'd across to my Lync 2013 full client machine and the Lync VDI client magic did the rest.
When you have paired successfully, you will see this little icon in the bottom right of the Lync 2013 client.
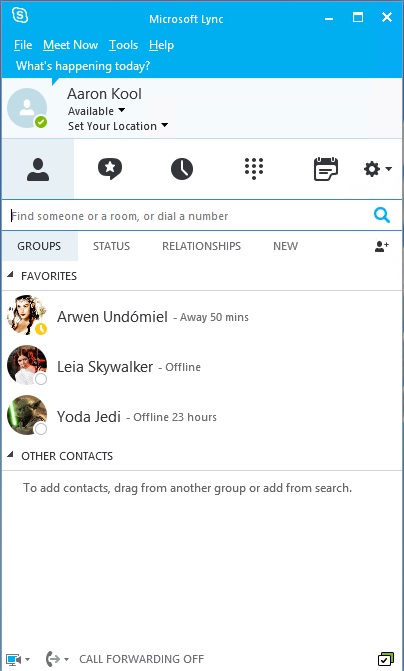
The paired icon....

Confirming that the VDI client is doing its thing
The VDI client actually masquerades as mstsc.exe. So when you do a network trace you will see a lot of traffic not surprisingly as mstsc.exe. In my case I was going to do a call to my fake PSTN gateway and this traffic would go via mediation server which is also my Front End. So what i wanted to confirm was that i could see Media traffic going directly from my VDI client machine to a Front End (and not via my Full client machine). So while making the call i opened up netmon on my thin client. I could then see traffic from my thin client (w8-220915) to my Front End 192.168.15.159 not going via my full Lync client (192.168.15.58) so the VDI was kicking and doing it stuff.

Logs
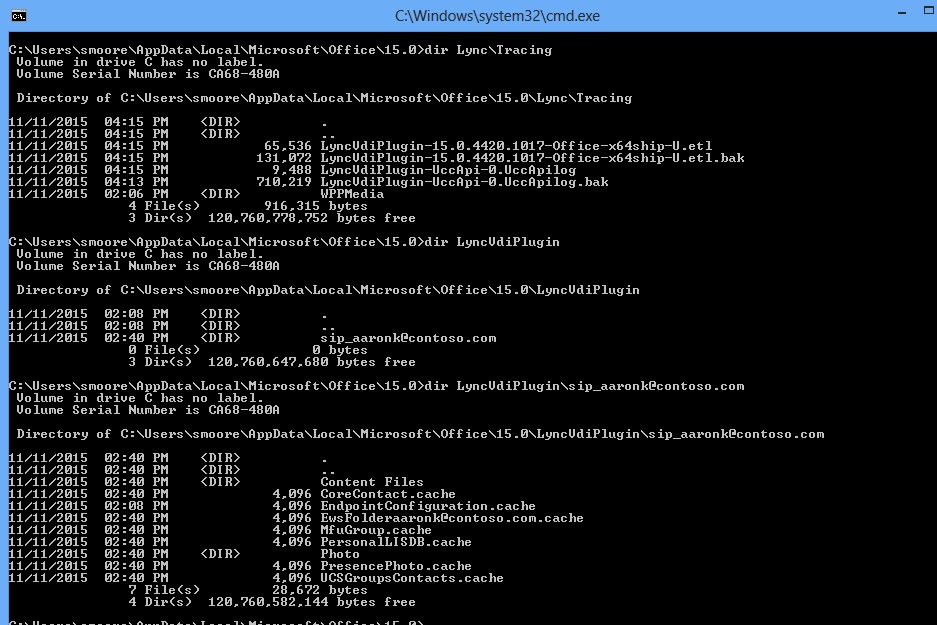
By the way there are logs for the VDI client in the usual place %UserProfile%\AppData\Local\Office\15.0\Lync\Tracing so you can see stuff there about what is going on.
More resources
Now if you have problems pairing your Lync VDI client and Full client then go and have a look at this video, "Understanding and Troubleshooting VDI scenarios - https://channel9.msdn.com/Events/Lync-Conference/Lync-Conference-2014/CLNT401". I found it very helpful.
Anyway, i hope this blog gets you started with playing around with VDI so you can get a better understanding of how it works (i am madly playing around with it now :)).
Happy Skype'ing
Steve