Deploying a Simple Cloud App: Part 3 - Configuring the Service Package
If you’ve started reading from this post, you’ll need to go through the previous parts of this series before starting this one:
Introduction
Part 1: Provisioning and Configuring SQL Azure
Part 2: Provisioning a Storage Account
![Deploying-a-Simple-Application_thumb[2]_thumb Deploying-a-Simple-Application_thumb[2]_thumb](https://msdntnarchive.blob.core.windows.net/media/TNBlogsFS/prod.evol.blogs.technet.com/CommunityServer.Blogs.Components.WeblogFiles/00/00/00/48/12/metablogapi/6406.Deploying-a-Simple-Application_thumb2_thumb_thumb_1FEAF223.png) With the database and storage account created, the application has to be configured to use them.
With the database and storage account created, the application has to be configured to use them.
Though developers are used to placing configuration parameters in the web.config or app.config, with Cloud applications, these two files are not easily accessible. They’re wrapped into the service package that is encrypted when it’s created. For configuration parameters, such as database connection strings and storage account details, it’s best to place these in the Service Configuration file. This way, the parameters can be changed at any time and will not require the service package to be recompiled and re-uploaded.
Technically you can provide the database and storage account information to the developers who can go into the service configuration file, make the changes, and then send it to you. However, in order to maintain separation of concerns (required by some regulatory bodies) and to maintain the security of the information, it is best not to share the configuration information unless absolutely necessary. The service configuration file is an XML file that can simply be edited using Notepad or your favourite XML editor. For this walkthrough, we’ll use Notepad.
Let’s get started.
Open the Service Configuration File
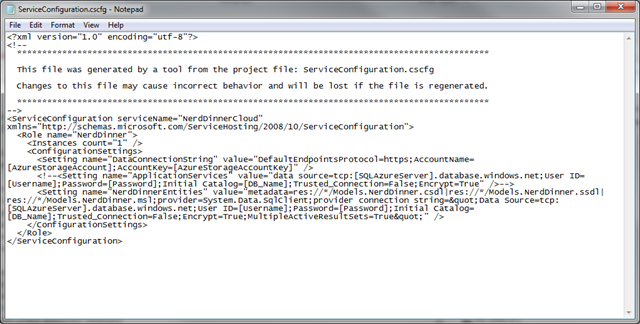
Use Notepad to open the ServiceConfiguration.cscfg file provided in the deployment package from the developers."
Retrieve and Setting the Storage Account Information
If you closed the Windows Azure Management Portal window, log back in.
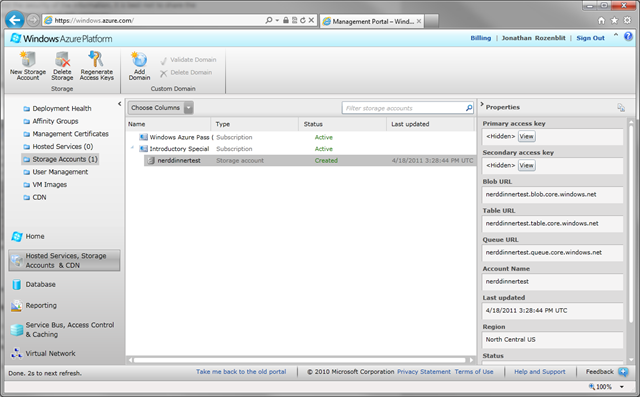
Click on Hosted Services, Storage Accounts & CDN in the left hand bottom navigation.
Click on Storage Accounts (X) (where X is the number of storage accounts that you have provisioned. Most likely this will be 1).
In the list on the right hand side of the screen, click on the storage account previously created.
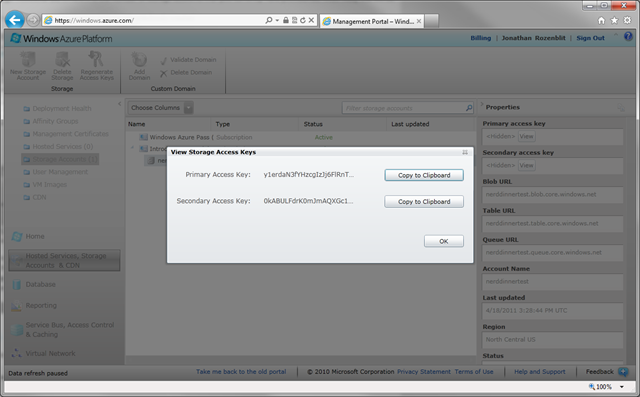
Click View under Primary access key in the right hand Properties pane.
If the properties pane is not visible, it may be closed. Click the arrow at the top of the closed properties pane to open it.
Click on Copy to Clipboard to the right of Primary Access Key.
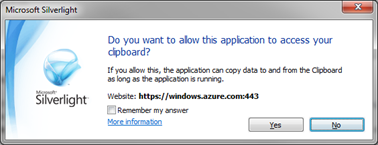
You may receive a message from Silverlight asking if you would like to allow the application access to your clipboard. Click Yes.
Click OK to return to the storage account list.
With the storage account still highlighted, make note of the Account Name in the Properties pane. You’ll need that as well.
Go back to your Notepad window.
Locate the below in the file:
Replace [AzureStorageAccount] with the Account Name noted in the Properties pane.
Replace [AzureStorageKey] with the key copied to the clipboard from the Management Portal.
Save.
The application is now configured to use the storage services account securely.
Retrieving and Setting the Database Connection Information
If you closed the Windows Azure Management Portal window, log back in.
Click on Database in the left hand lower navigation.
Expand the subscription node under which you provisioned the SQL Azure server in part 1.
Expand the SQL Azure server under which you provisioned the NerdDinner database in part 1.
Click on the NerdDinner database.
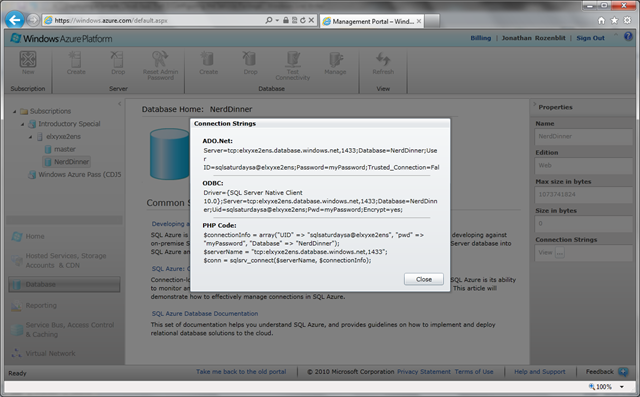
Click on the … button under Connection Strings in the Properties pane. A message will pop up displaying the connection string to use in the application to connect to the SQL Azure database.
Since the application the developers packaged up for you is a .NET-based application, you’ll be using the ADO.NET connection string. Copy the ADO.NET connection string.
Click Close.
Go back to your Notepad window.
Locate the below in the file:
Highlight the text between provider connection string=" and " “/> and replace it with the connection string you copied to the clipboard. Make sure you don’t delete the two " tags.
Find Password=mypassword in the text you pasted in. Replace mypassword with the password of the SQL Azure server provisioned in part 1.
Save.
The application is now configured to use the SQL Azure database.
Let’s go back to our to do list and see what we have to do next.
