Step-By-Step: Azure RemoteApp QuickBooks Domain Configuration
A few weeks ago we provided a Step-By-Step detailing how to configure Azure Remote App for QuickBooks. In this Step-By-Step we will be taking this one step further and adding in a domain that is hosted in Azure. For those of you unaware of Azure RemoteApp, it is Microsoft RemoteApp backed by Remote Desktop Services in Azure. This service provides remote secure access to applications from different devices; users can access their applications on their devices while you manage the data and access via Azure. Your data can be hosted in Azure or on premise.
In this step-by-step, I will demonstrate how to configure Azure RemoteApp with a backend infrastructure in Azure in a domain environment. Azure RemoteApp can also be configured for a workgroup environment on Azure see Step-by-Step or you can use your existing on-premise environment. For this article I will be using QuickBooks as the line of business (LOB) application. The database will reside on the backend server (LOB-BE) and the client application will be on the frontend server (LOB-FE). The backend server is Server 2012 R2 VM hosted in Azure. My domain is CanITlob.com. I have installed Azure Active Directory Connect on LOB-BE. As of January 2016, Azure Remote App is only available via the Classic portal, therefore this step-by-step has been completed in the Classic portal. I will update this as the Azure Remote App functionality is available in the New portal. You can do this with any application that is supported. For more details about App requirements see https://azure.microsoft.com/en-us/documentation/articles/remoteapp-appreqs/. Detailed information for Azure RemoteApp can be found on the Azure RemoteApp documentation page.
This step-by-step is long and detailed, but please do not let that deter you, as Azure RemoteApp is a great alternative to Remote Desktop Services and is not that difficult to implement. I have broken down the article into 3 sections:
Section 1 - Creating the front and backend infrastructure
Section 2 - Creating the RemoteApp Collection
Section 3 - Configuring and Publishing the Frontend
Let's get started!
Section 1 - Creating the front and backend infrastructure
As with any infrastructure project (whether it’s on-premise, in the cloud, or a hybrid deployment) planning is the key to success. Azure RemoteApp will require several steps and planning is critical.
Our process for creating backend infrastructure for Azure RemoteApp will be:
Step 1. Create the virtual network
Step 2. Create and configure the virtual machines
Step 3. Prep the frontend virtual machine
Please note that some best practices, such as only opening specific ports on firewalls, closing endpoints, etc. have not been put into practice for this demo. As always, please follow all best practices regarding security, hardening, and configuration.
Step 1 - Creating the virtual network
The first step is to create the virtual network for your infrastructure. I always create a virtual network, as this provides isolation from other virtual networks, and a gateway IP if required.
I will be creating an active directory domain and will need to ensure I register the DNS server in the virtual network.
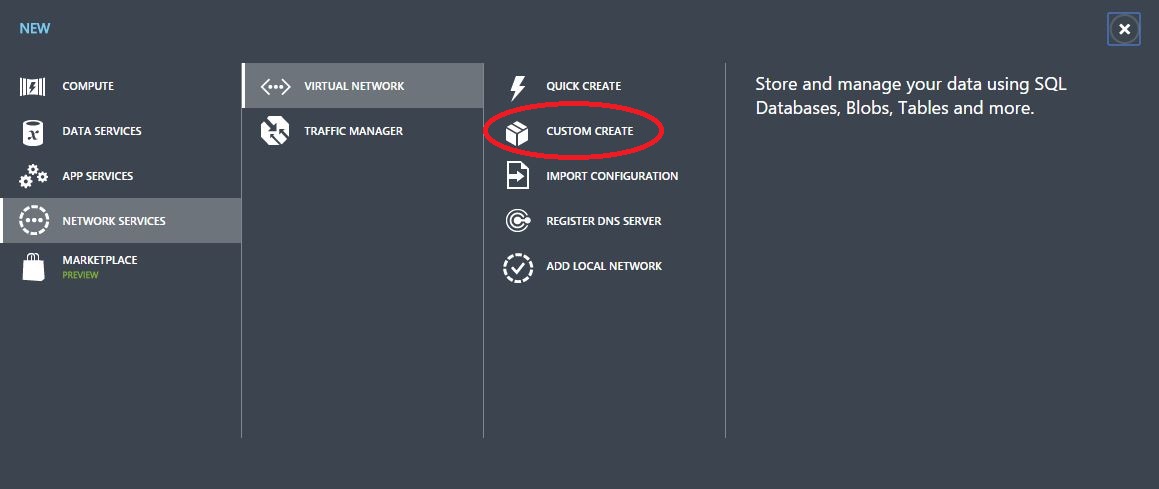
To create the virtual network in the Classic portal, click on New -> Network Services -> Virtual Network -> Custom Create
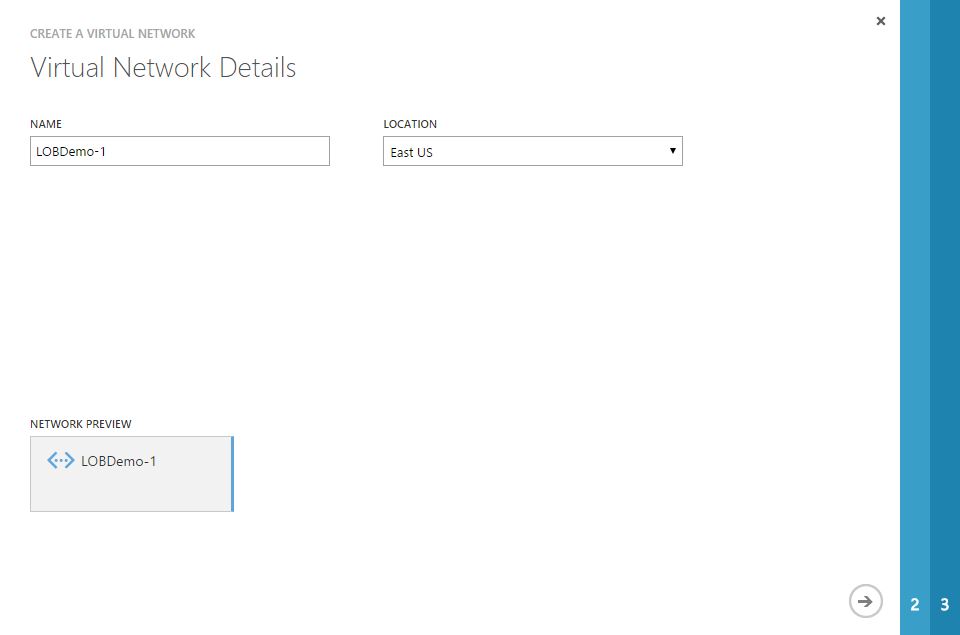
Provide a name for the network (I am going to use LOBDemo (-1) in the screenshot for reference only) and select the location.
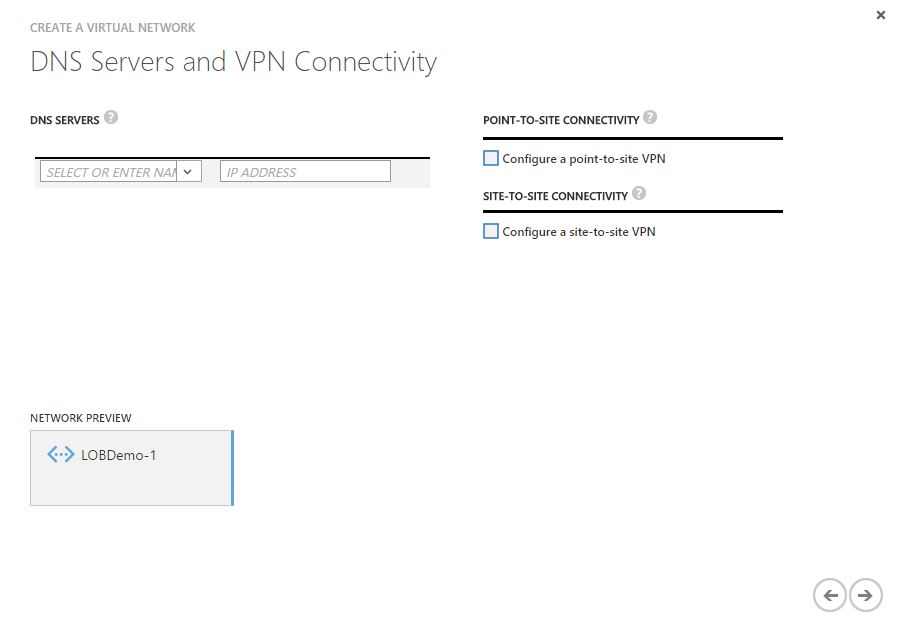
We will not setup our DNS servers and VPN connectivity at this point but we will have to configure this once our domain controller has been provisioned.
Since we are not connecting to an on-premise site or using Active Directory at this time, we can move to the next screen. We will revisit this once our DC is running.
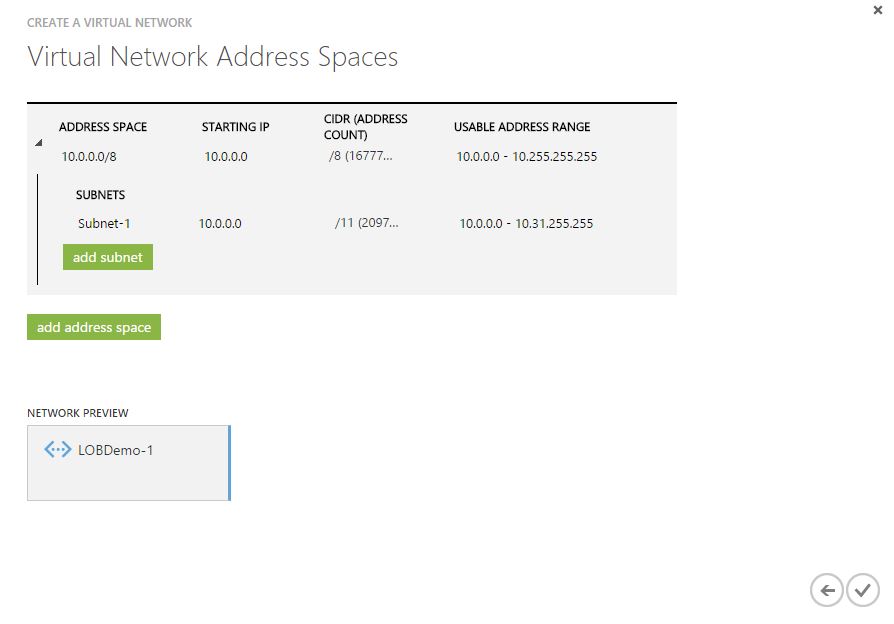
Our final step for the virtual network is to define the Virtual Network Address Space. I selected the default IP address space for this example, you would use the address space appropriate for your environment.
Once your virtual network is created you can start to build your virtual machines for your Azure RemoteApp solution.
Step 2 - Create and configure the virtual machines
I need to create two virtual machines: the backend server where my data and QuickBooks will reside, and the frontend server which will become my RemoteApp template.
Let's start with the backend server. This will be a Server 2012 R2 virtual machine. When selecting the size of your virtual machine, the machine must meet the requirements for the application(s) you are going to run.
When creating the virtual machine, be sure to add it to the network you just created.
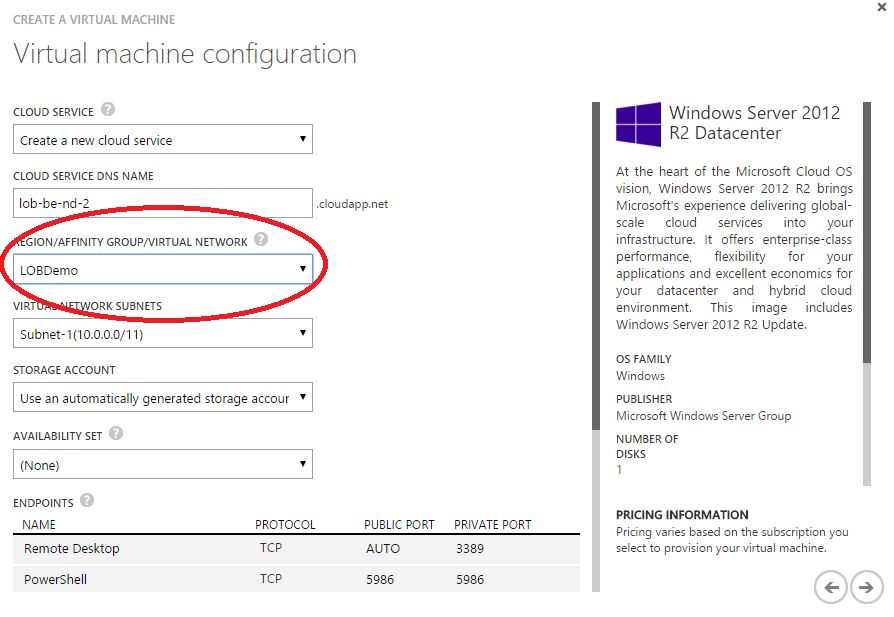
If creating the virtual machine using the New portal, please be sure to select "Classic" in the deployment type. As already stated, I created my environment in the Classic portal; if you are unfamiliar with how to create a virtual machine in Azure please refer to the xdot509 step by step article.
Once this virtual machine has been provisioned, I attach a data disk. This disk will become my virtual machine share for my QuickBooks files.
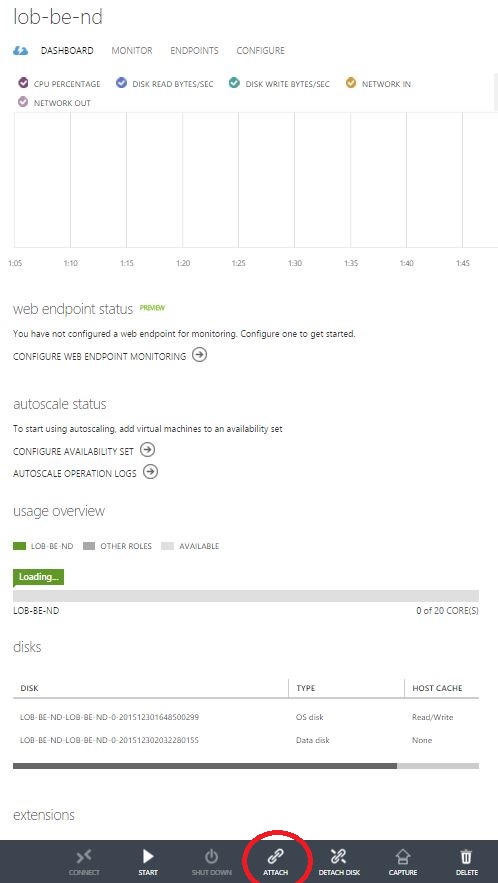
The attached data disk will need to be initialized the disk using Disk Management on the virtual machine.
Next I promote this server to a domain controller. If you have not done this previously here are the steps.
Once the system has been promoted, go back to the virtual network settings and add the server name and IP to the DNS settings. A reboot of the virtual machine will be required.
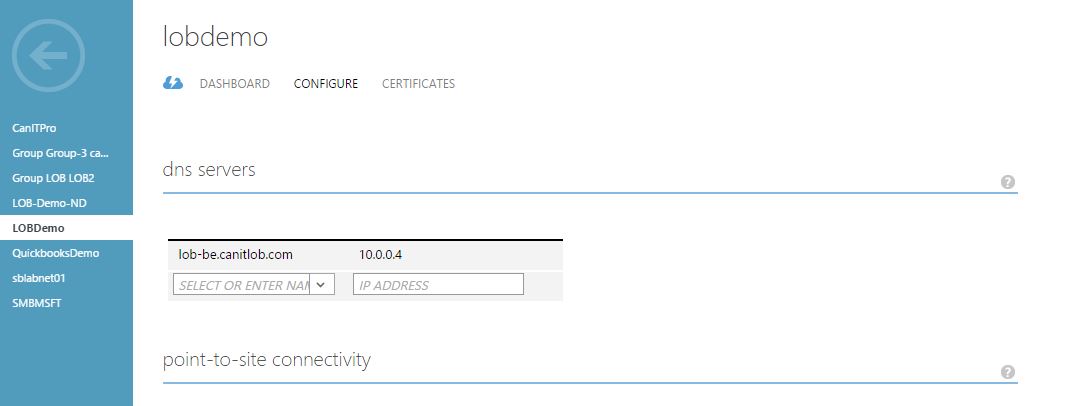
Classic Portal 1
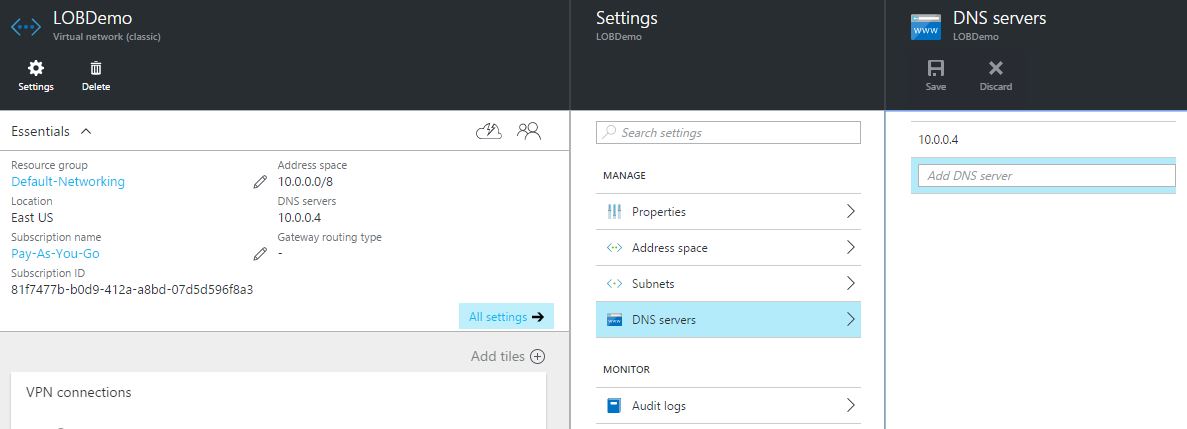
New Portal 1
Then I setup File and Printer Sharing on my virtual machine and create a share on the disk that I attached in the previous step.
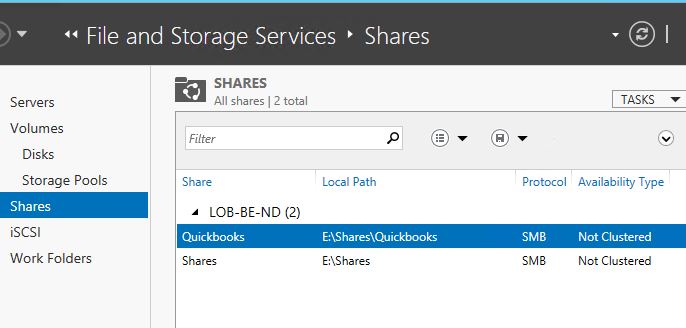
Now I am ready to install QuickBooks. First, I changed the default location to a folder on my attached storage drive. I also configured the QuickBooks data file to reside on a dedicated shared folder on the attached drive. In my demo, I am sharing to “everyone,” but in a production environment you would be using best practices for folder sharing. Do not forget to configure QuickBooks for multi-user mode. Instructions for configuring multiuser can be found here.
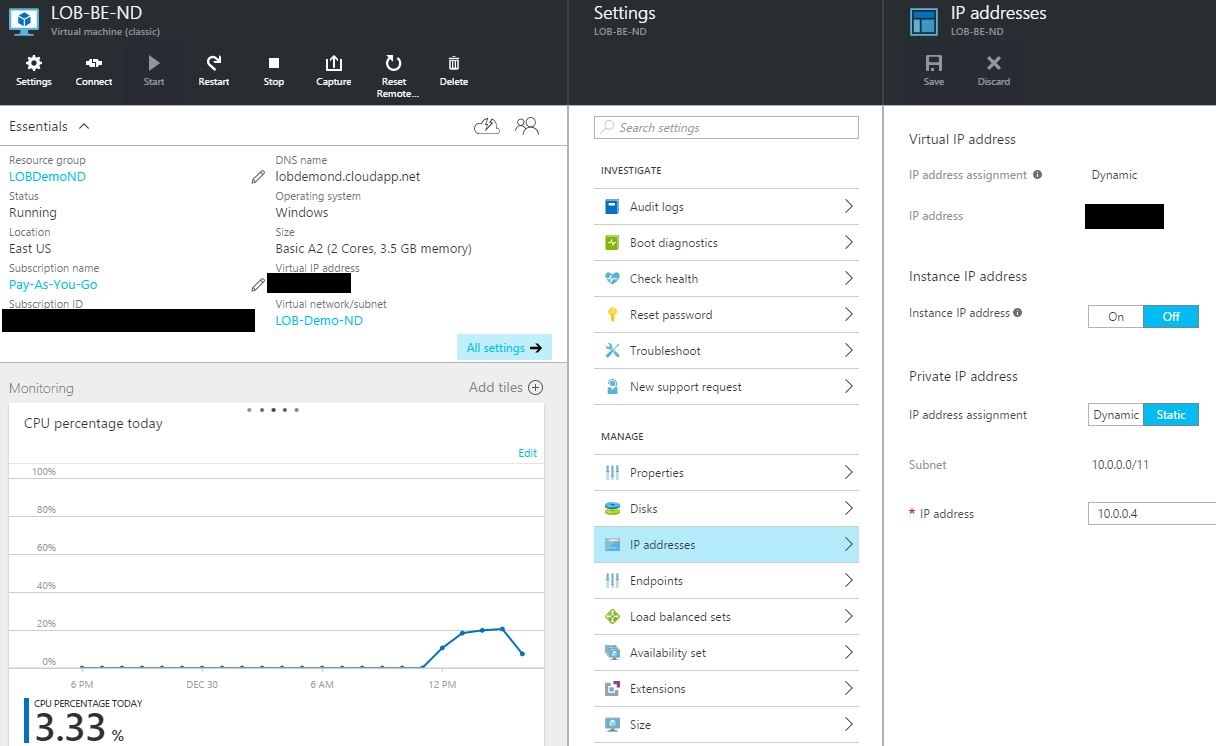
I am going to reference the share via the UNC path of the backend virtual machine but I still want to assign a static IP to my domain controller. Azure may not assign the same IP to the LOB-BE, therefore I will assign a static IP to the virtual machine. You have two options for setting the static IP: PowerShell (instructions here) or the New portal. In the New portal you can set the IP in the virtual machine IP address settings.
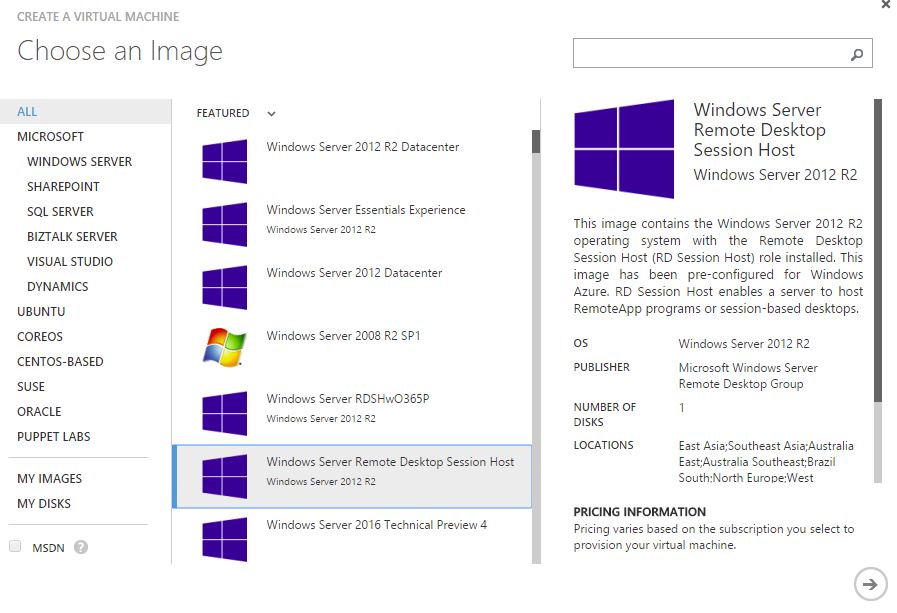
It is now time for the front-end server. Once again, I am going to create a virtual machine from the Gallery and ensure the virtual machine is in the virtual network we previously created.
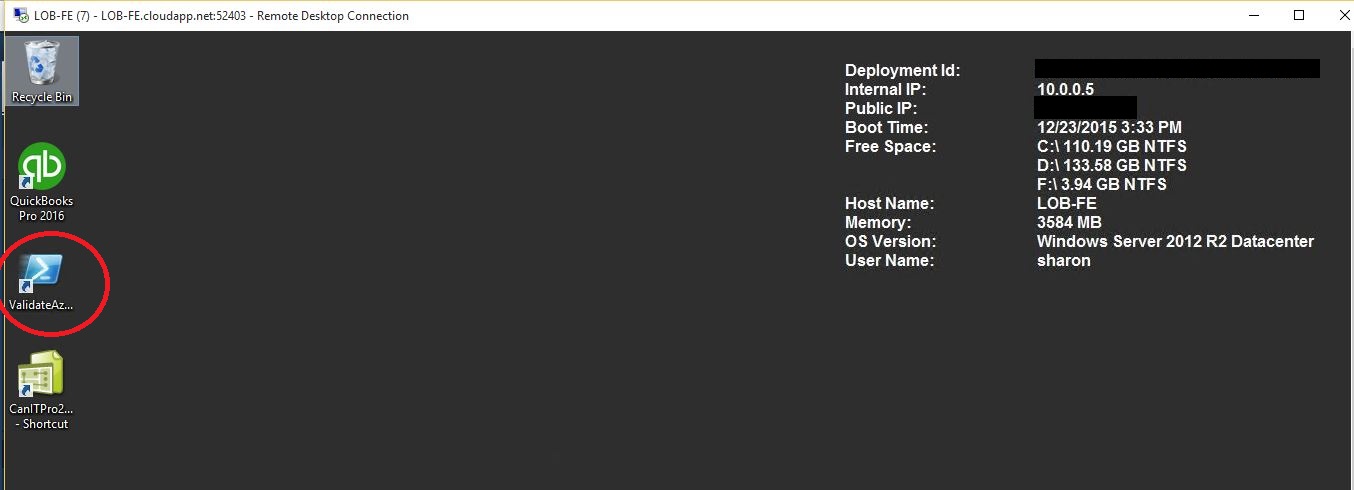
You need to select the Windows Server Remote Desktop Session Host image. This image contains the PowerShell script to validate and prep your image for Azure Remote App. If you prefer to do this on your own, here is a great how-to-article.
Whether you are in the Classic or New portal, you will build your virtual machine as you normally would; providing a virtual machine name and ensuring the machine is in the same network as your backend virtual machine. Please note that this virtual machine will take a little longer to provision.
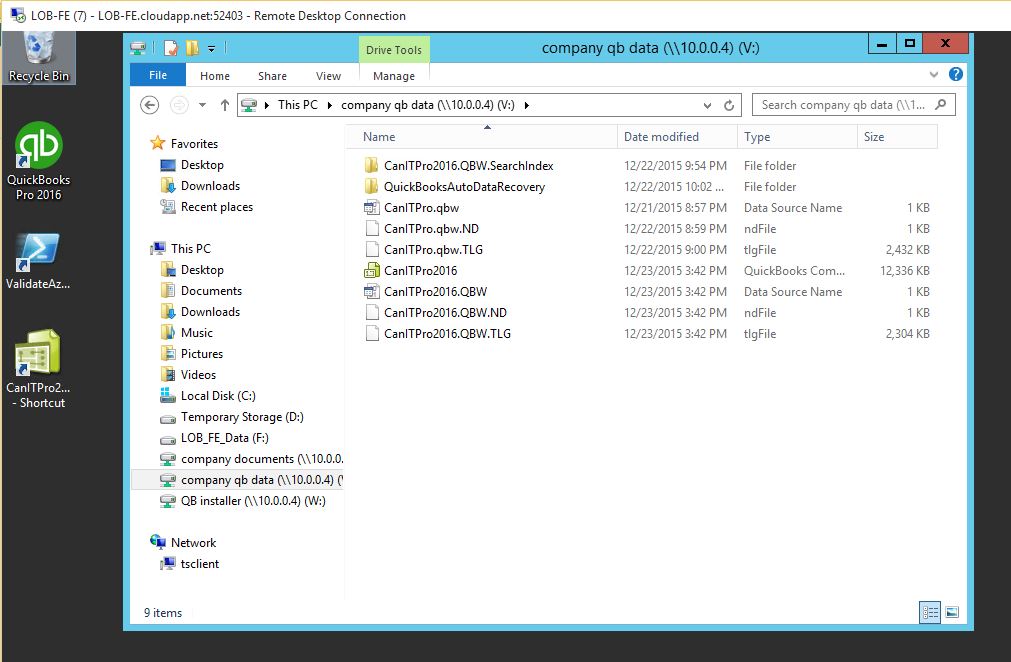
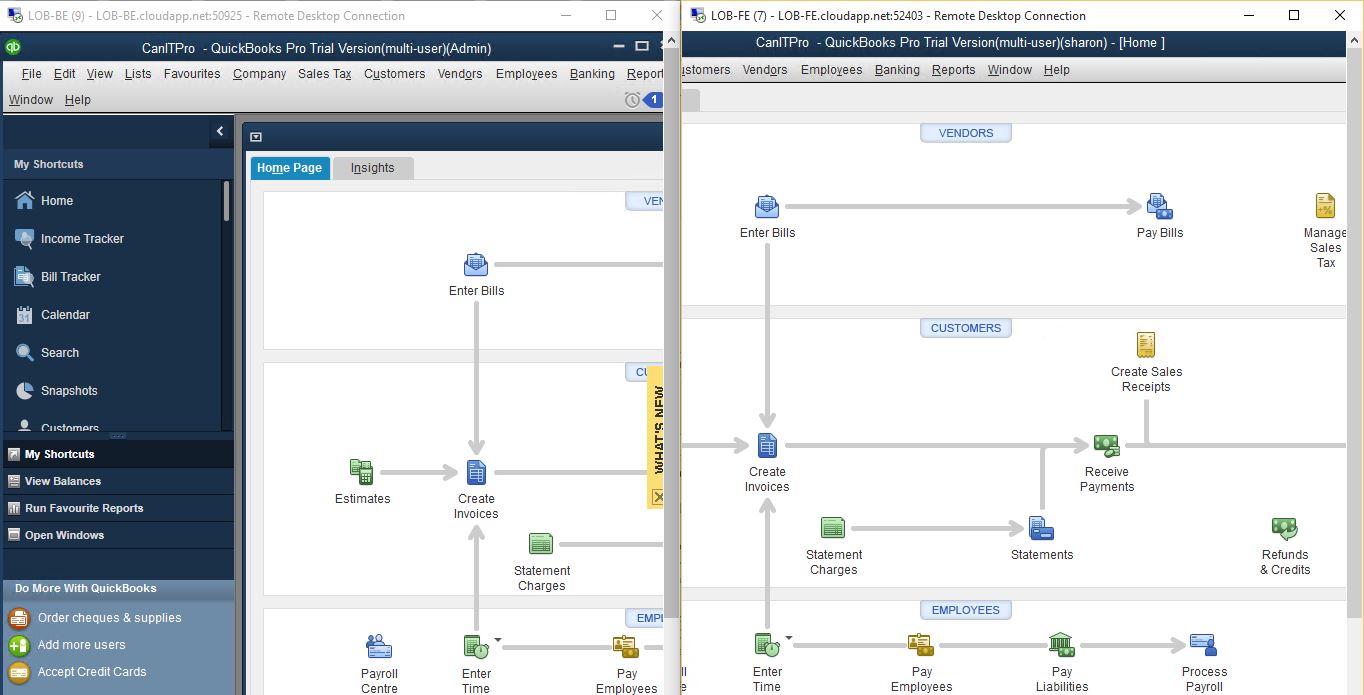
Once the virtual machine was provisioned, I joined the server to the domain. Once the server was domain joined, I mapped to the shared drives that were created on LOB-BE. I then mapped the drives using the virtual machines shares and installed and configured QuickBooks.
Once both servers are configured and the application(s) have been tested, you can prep the front-end server for deployment to Azure RemoteApp. If you have not already done so, close all your applications before proceeding.
Step 3 - Prep the frontend virtual machine
Since we used the Remote Desktop Services template image, creating an image of our front-end server is very easy. You will launch the Validate PowerShell script. The script will start to run and prompt you for confirmation.
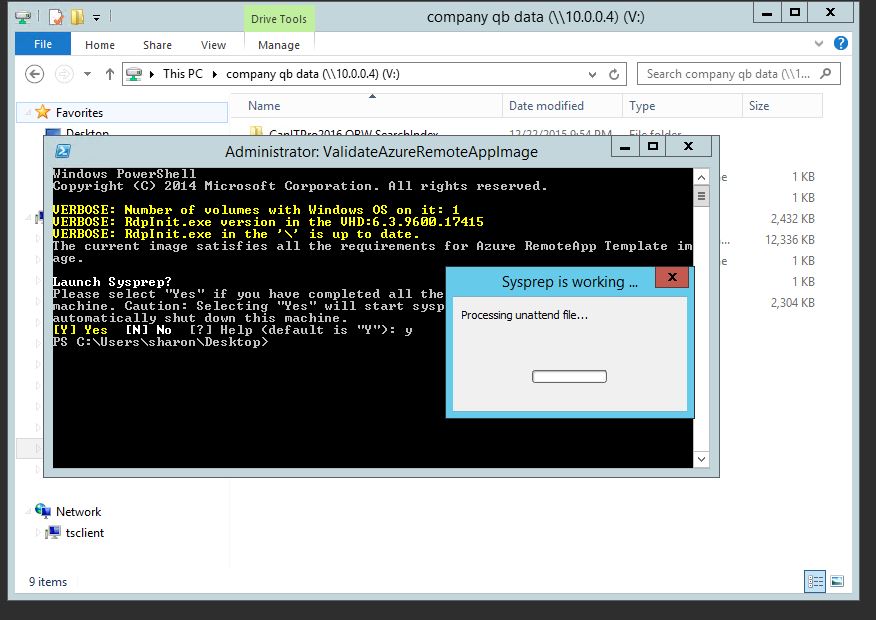
Next, grab a cup of coffee and relax, as this will take several minutes to complete. Once the script has completed you will have an image of your front-end server. Please note that your virtual machine is still running and you are incurring charges. The script stops the virtual machine, but does not deallocate it. Do not delete the virtual machine at this time.
Section 2 - Creating the RemoteApp Collection
Congratulations, you are halfway done!
The process for creating the RemoteApp Collection can be broken down as follows:
Step 1 - Importing the image into Azure RemoteApp
Step 2 - Creating the collection
Step 3 - Linking the image to the collection
Step 1 - Importing the image into Azure RemoteApp
Once your virtual machine is in the stopped state you can proceed with the next step.
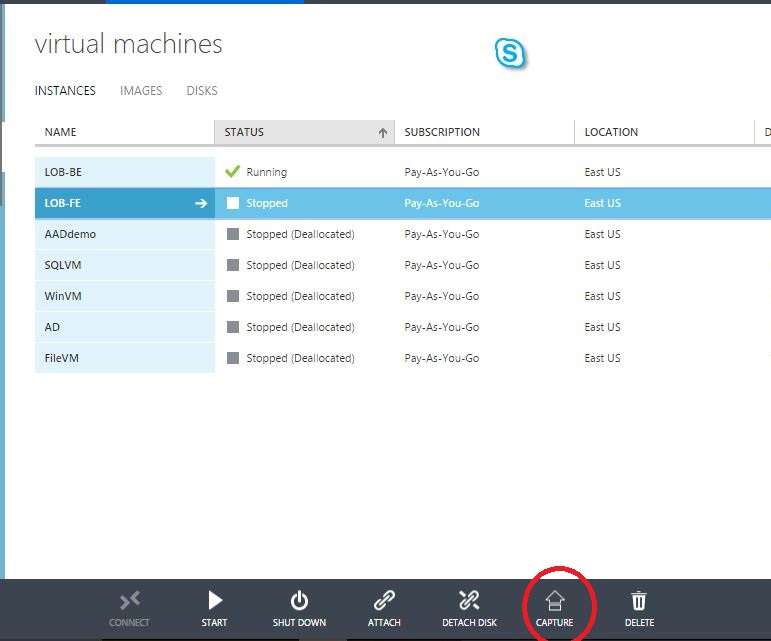
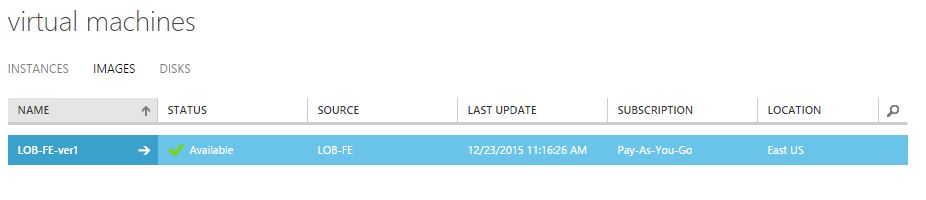
Now you can capture your virtual machine image to redeploy it as an Azure Remote App Template.
Once the image is captured, the status will change to Available.
Our image is now ready to be imported into the Azure RemoteApp templates. As I stated earlier, I am doing this in the Classic portal. As of this date, January 17th, 2016, Azure Remote App can only be leveraged via the Classic portal.
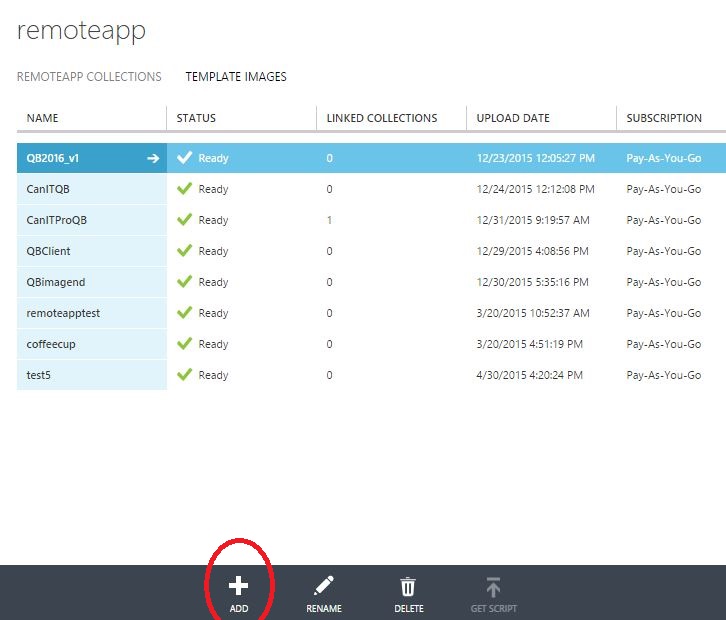
Click on the Azure RemoteApp tab in the Classic portal, and then template images. You will see a list of existing template images if you have any. The image we just created will not be in this list, and we need to add it. To do so, click the add button at the bottom of the page.
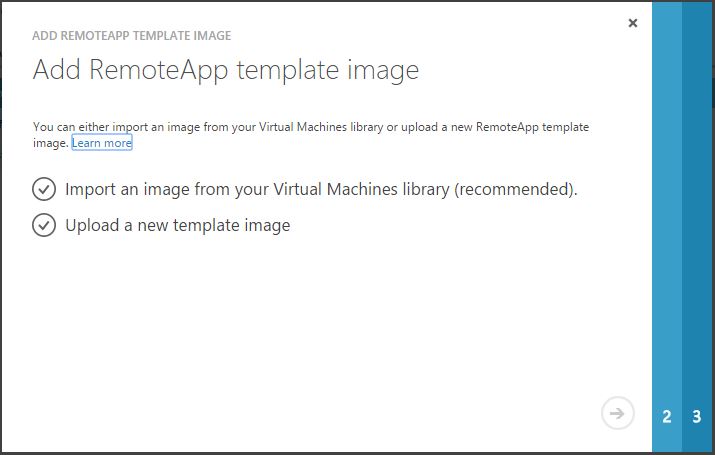
Because we have already created and captured our image, we are going to select Import an image from your Virtual Machine library (recommended).
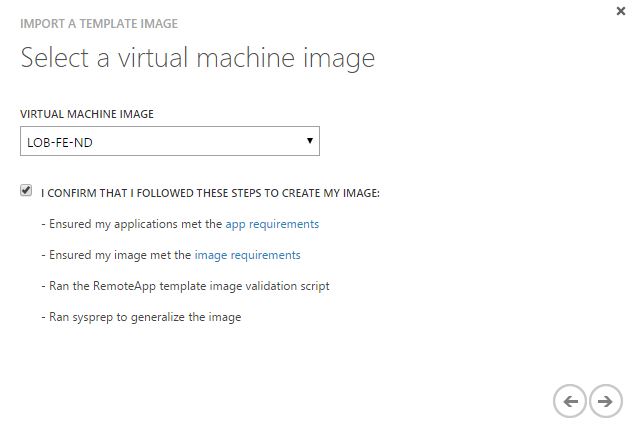
Select the virtual machine image you want to import from the dropdown, and then click the checkbox confirming you have followed the correct steps. The validation script that we ran to prepare our image ensured the last 3 steps were taken.
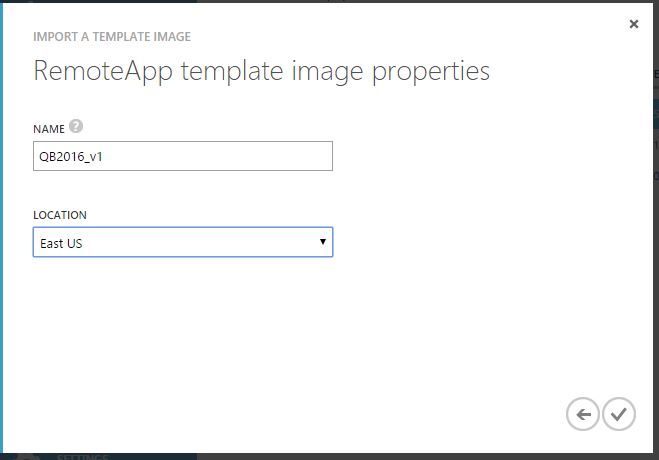
Next, name your image and select your location.
Time for another coffee. This will take some time.
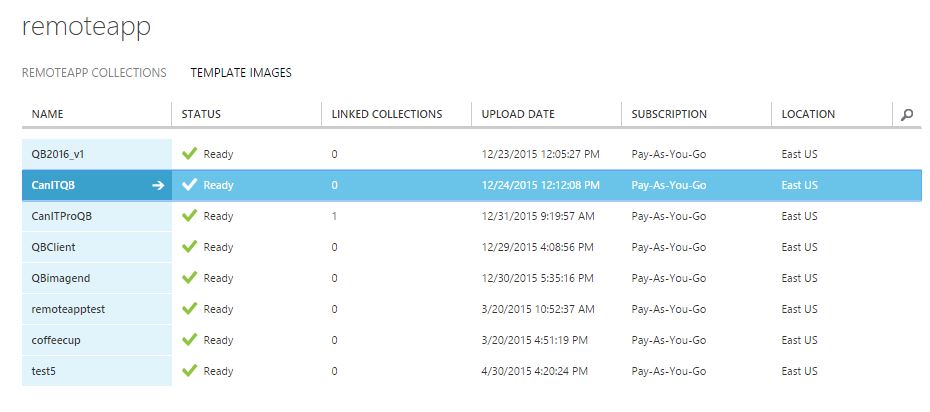
Once the import is complete, a notification will appear and the image will be in your list of template images.
Step 2- Creating the Collection
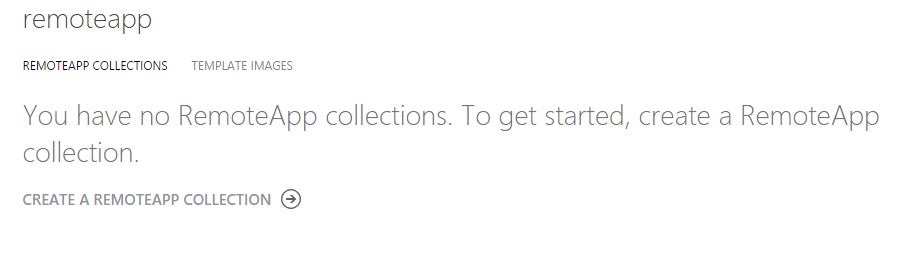
On to our next step. We now need to create the RemoteApp Collection. Select the RemoteApp Collections tab and then the Create a RemoteApp Collection link.
Next I will select create with VNet, as this will allow me to add this image to my network, ensuring the application will connect to the backend server correctly.
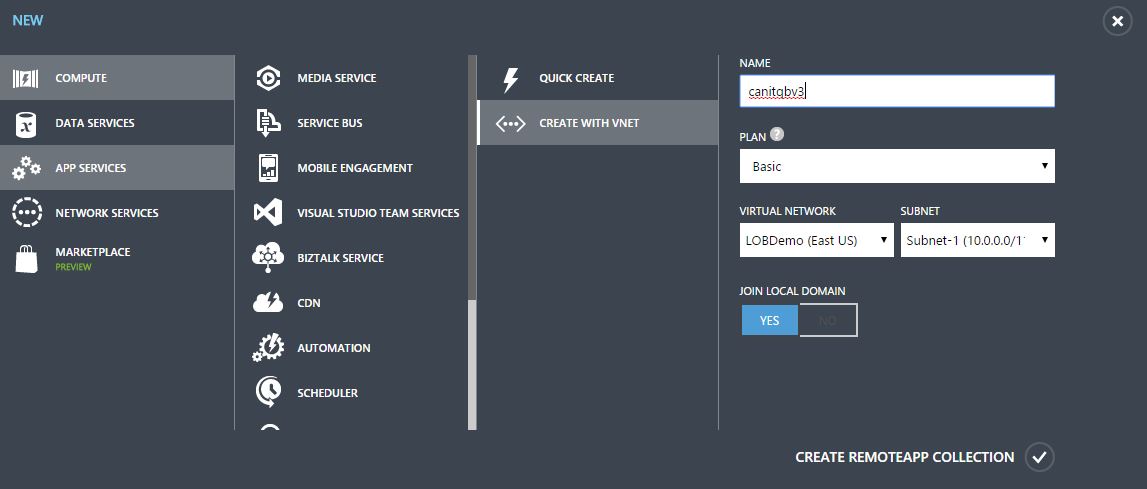
Since we are using a domain I will change the default Join Local Domain to YES,ensuring the correct virtual network and subnet are selected.
Step 3 - Linking the image to the collection
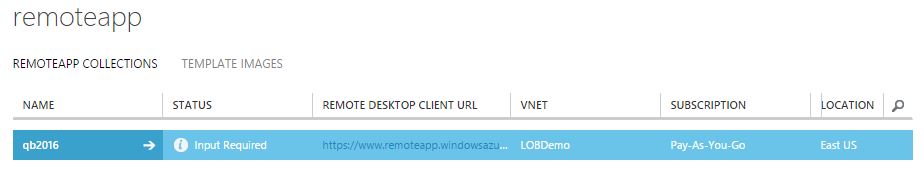
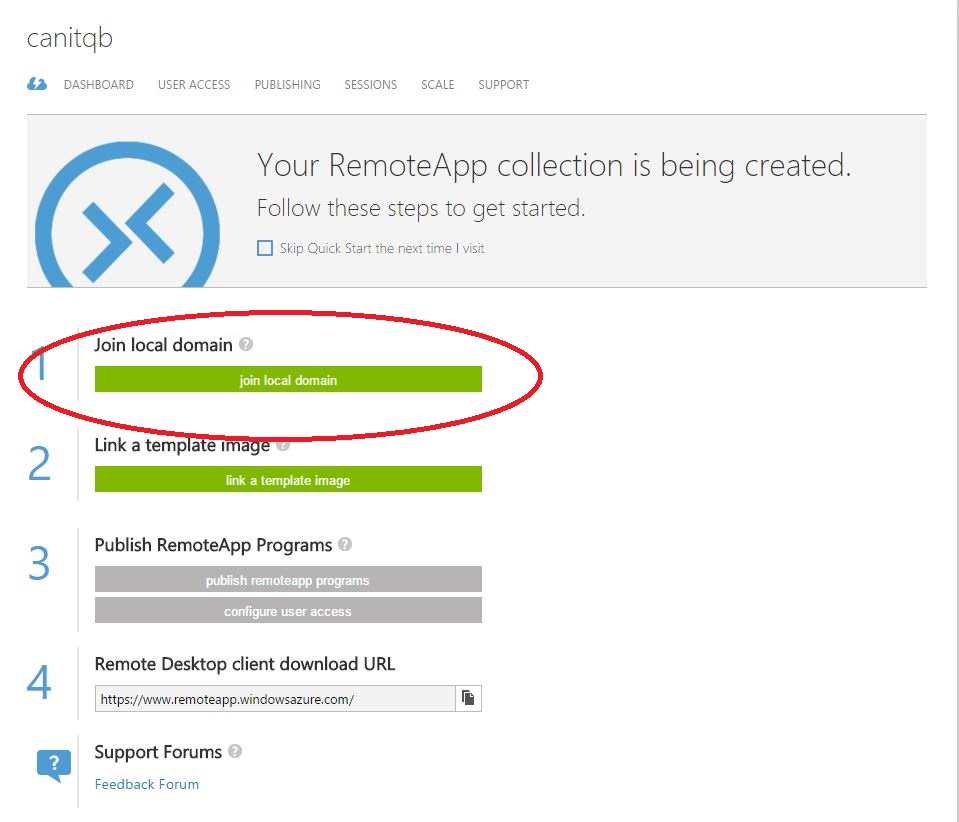
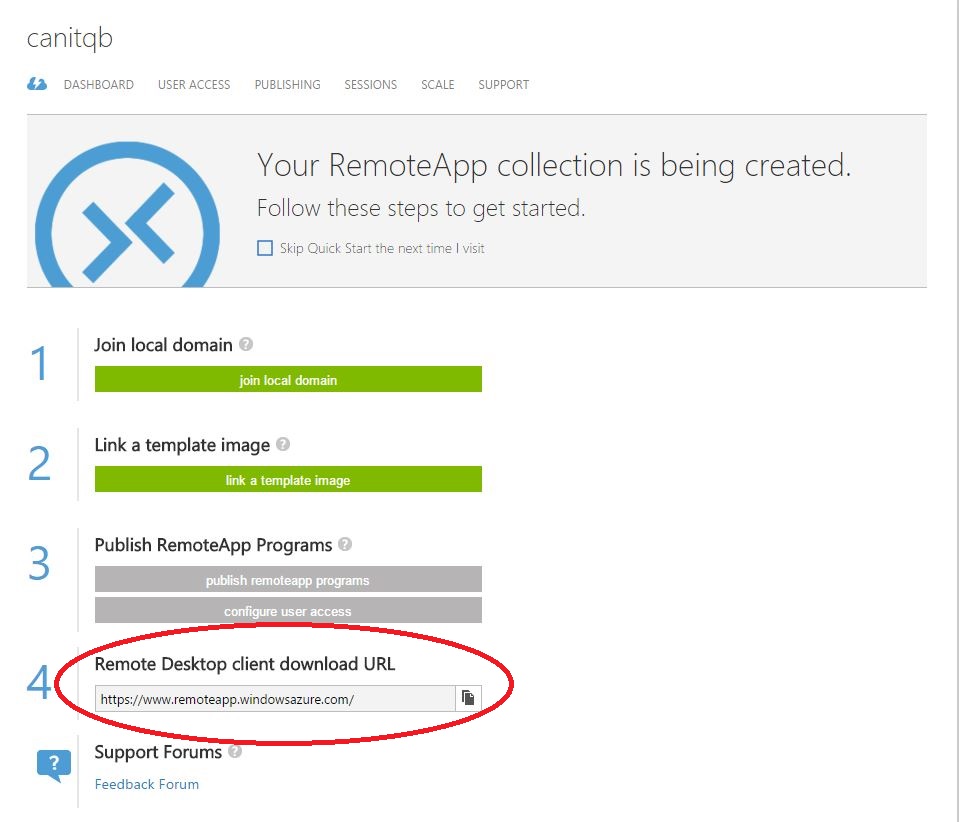
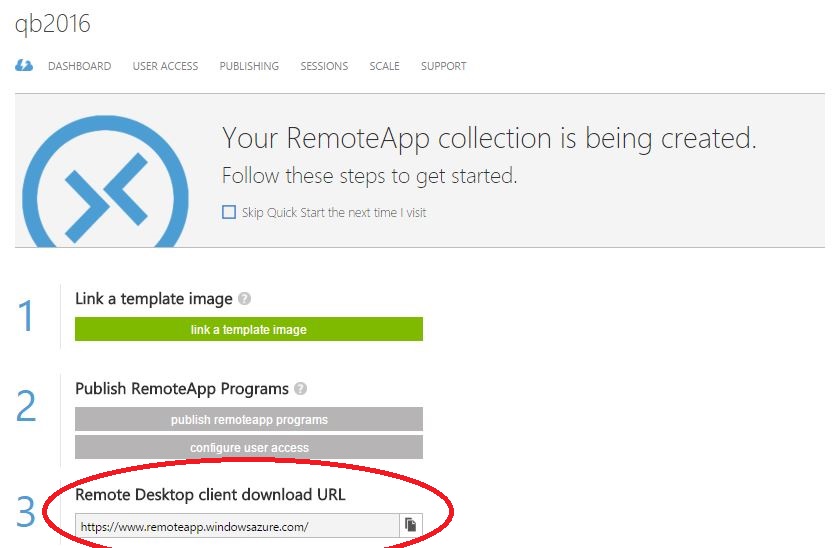
Next, I will need to associate the RemoteApp collection to the image. Click the Input Required link, and then follow the steps on the Quick Start Page, as shown below
First we must join the collection to the local domain.
Now we need to provide the domain details to join this image to the domain
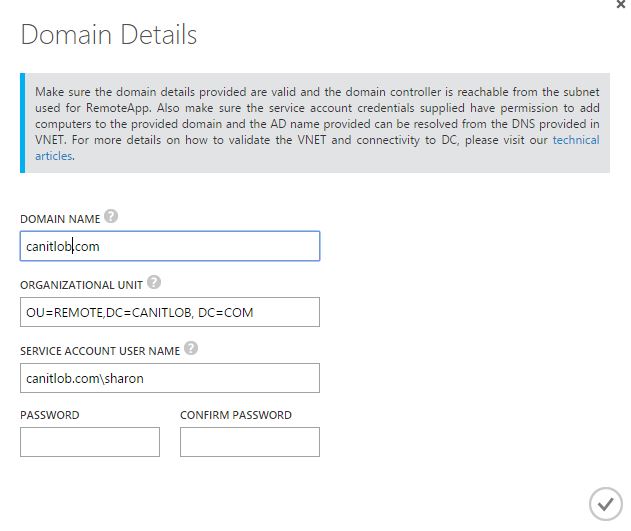
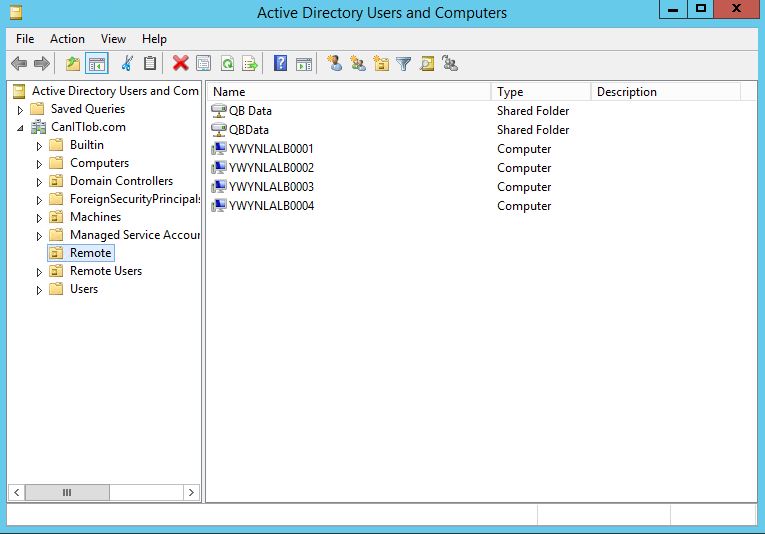
The image will be added into the Remote OU on the server.
Next, select the link a template image link.
As we have already imported our image we can select Link an existing template image.
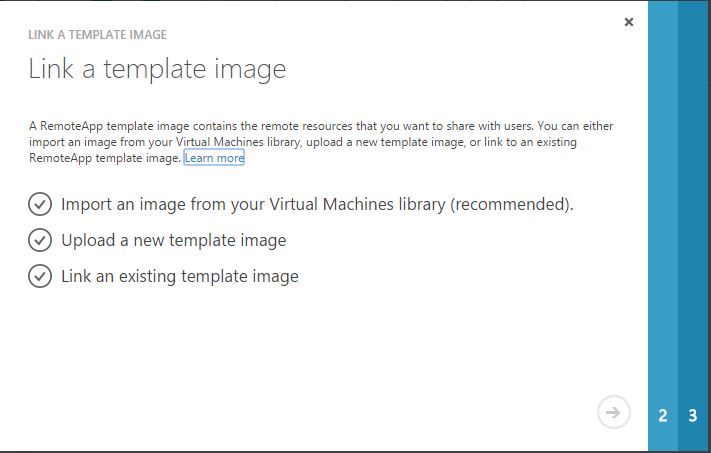
If you had not imported the image previously, you could import and link in one step by selecting Import an image from your Virtual Machines library.
Select the appropriate image from the dropdown menu.

This would be a great time for lunch as it could take up to an hour to provision the collection.
Section 3 – Azure Active Directory Connect
In a domain environment AD users accounts should be synced to Azure Active Directory to be able to assign users rights to Azure RemoteApp. I installed Azure Active Directory Connect on LOB-BE for this demonstration. Please note, best practice dictates Azure Active Directory Connect would NOT be installed on a DC but a member server instead.
If you are unfamiliar with the Azure Active Directory Connect tool Pierre Roman created a great Step-By-Step.
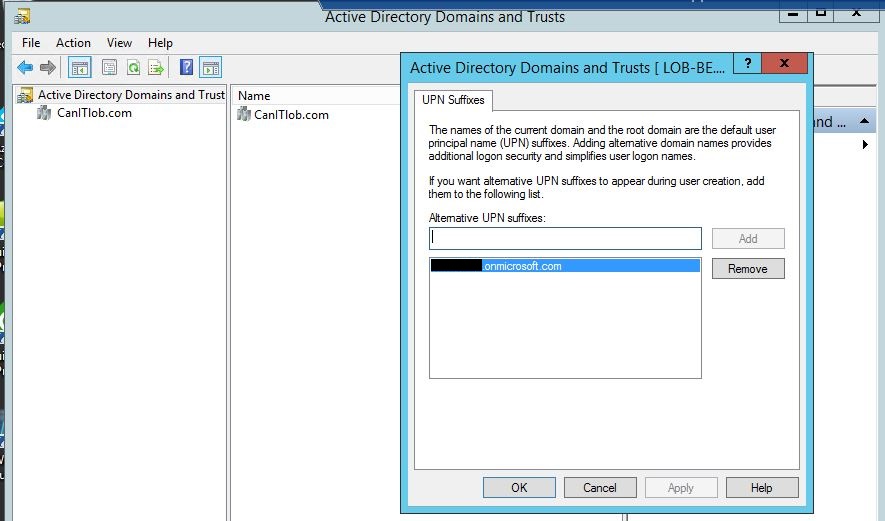
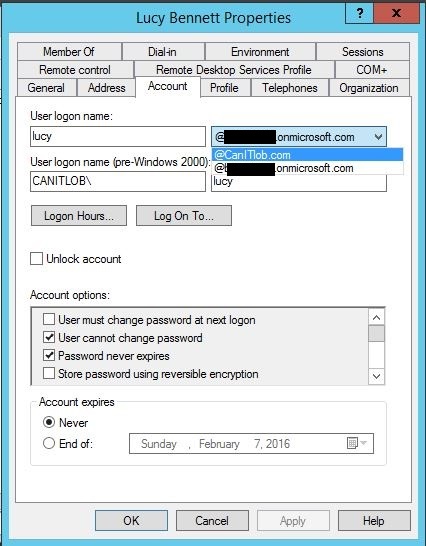
Note: If your domain name is different than your Azure Active Directory you must add the Azure Active Directory name to the UPN suffix on your server, then creating users using that suffix. In my example, I created user "lucy@mydomainname.onmicrosoft.com" where mydomainname is my Azure Active Directory name. I can now assign Lucy to the Azure RemoteApp template in a future step.
UPN Suffix
Section 4 - Configuring and Publishing the Collection
We can work through this last section in 3 steps:
Step 1 - Publishing Applications
Step 2 - Assigning Users
Step 3 - Using Azure Remote App & QuickBooks
You are almost there...the end is in sight.
Step 1 - Publishing Applications

Now that our collection has been provisioned, we can publish the programs and assign users to the collection.
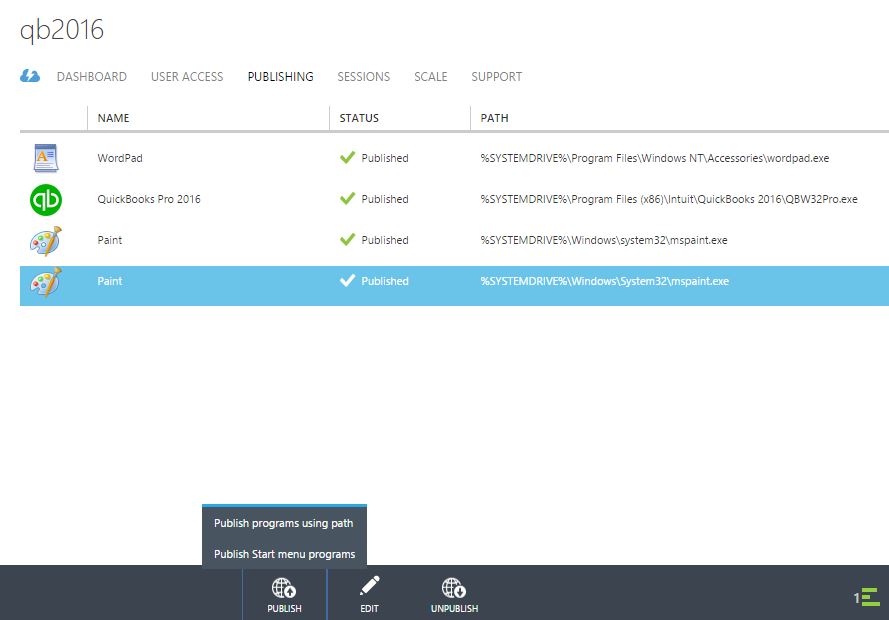
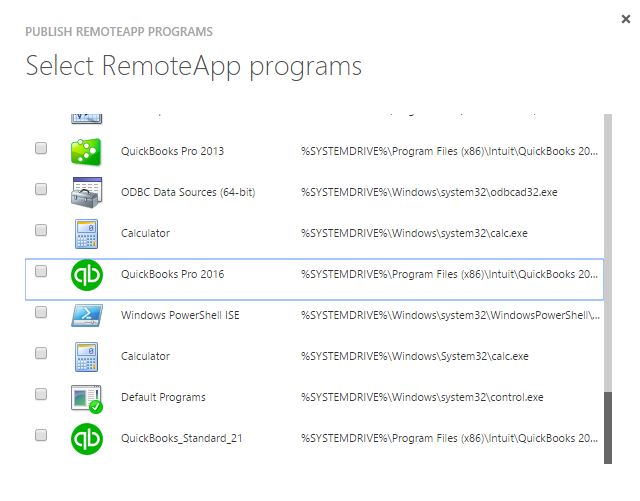
Let's start with publishing apps. Click the Publish RemoteApp Programs link on the Quick Start page. Alternatively, you could use the Publishing tab located at the top of the page.

Next, scroll through the list of applications available for publishing, selecting the applications you wish to publish. Do not forget to click the checkmark at the bottom of the list after you have made your selections.

As mentioned about you can also add apps by clicking the Publish icon at the bottom of the page.
Using this option, you can select programs using a path, or programs already in the Start menu.
Step 2 - Assigning Users
The final step in our Azure RemoteApp setup is give our users access to the collection. Click on the User Access tab and add the users that require access to the collection. Please note the image below is incorrect, the user should be lucy@mydomain.onmicrosoft.com, as this is the user in my domain.
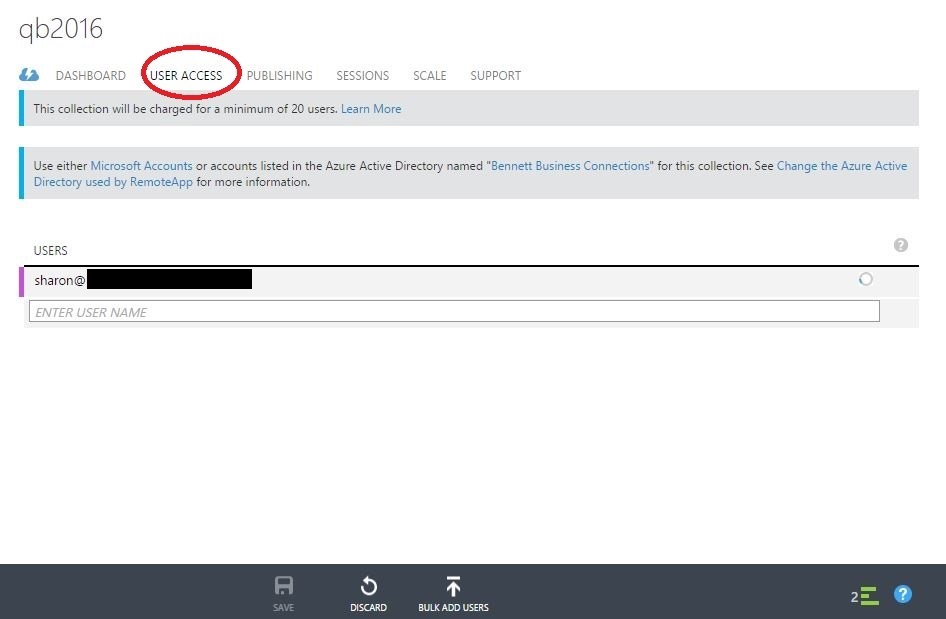
Note: If your domain name is different than your Azure Active Directory you must add the Azure Active Directory name to the UPN suffix on your server, then creating users using that suffix. In my example, I created user Lucy@mydomainname.onmicrosoft.com where mydomainname is my Azure Active Directory name. I can now assign Lucy to the Azure RemoteApp template. We will do this in a following step.
Our collection is finally ready for our users. You will need to distribute the Azure RemoteApp download to your users. The Azure RemoteApp application can be downloaded from the Quick Start page.
Step 3 - Using Azure Remote App & QuickBooks
All that's left is to have your users launch the Azure RemoteApp and sign in.

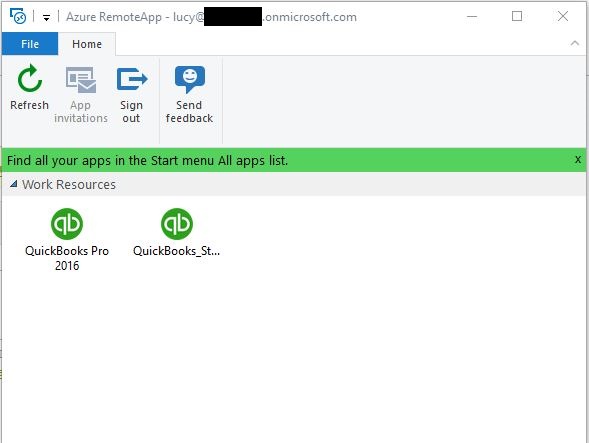
Once the user logs in, they will be presented with a list of the applications they have access to.
The user can now launch their application. Please note that the first time they launch the app, there may be a lag. That will be reduced on the next launch.
In our example, QuickBooks will launch but the mapped drive is not available. You can access the QuickBooks data file by connecting to the mapped drive on the backend server.
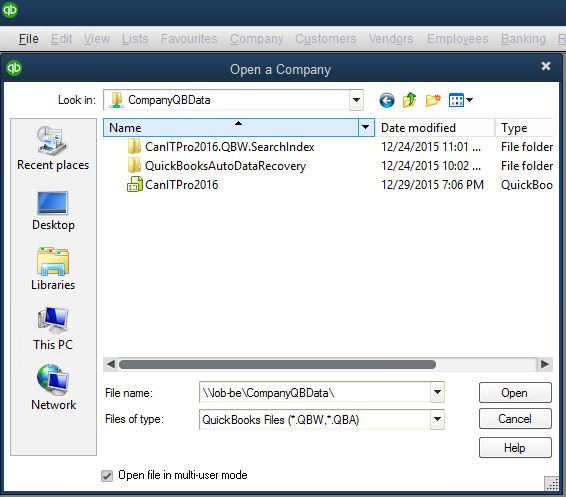
After launching QuickBooks I manually referenced the share and I am now able to open the .QBW file.
Do not forget to check the box next to Open file in multi-user mode.
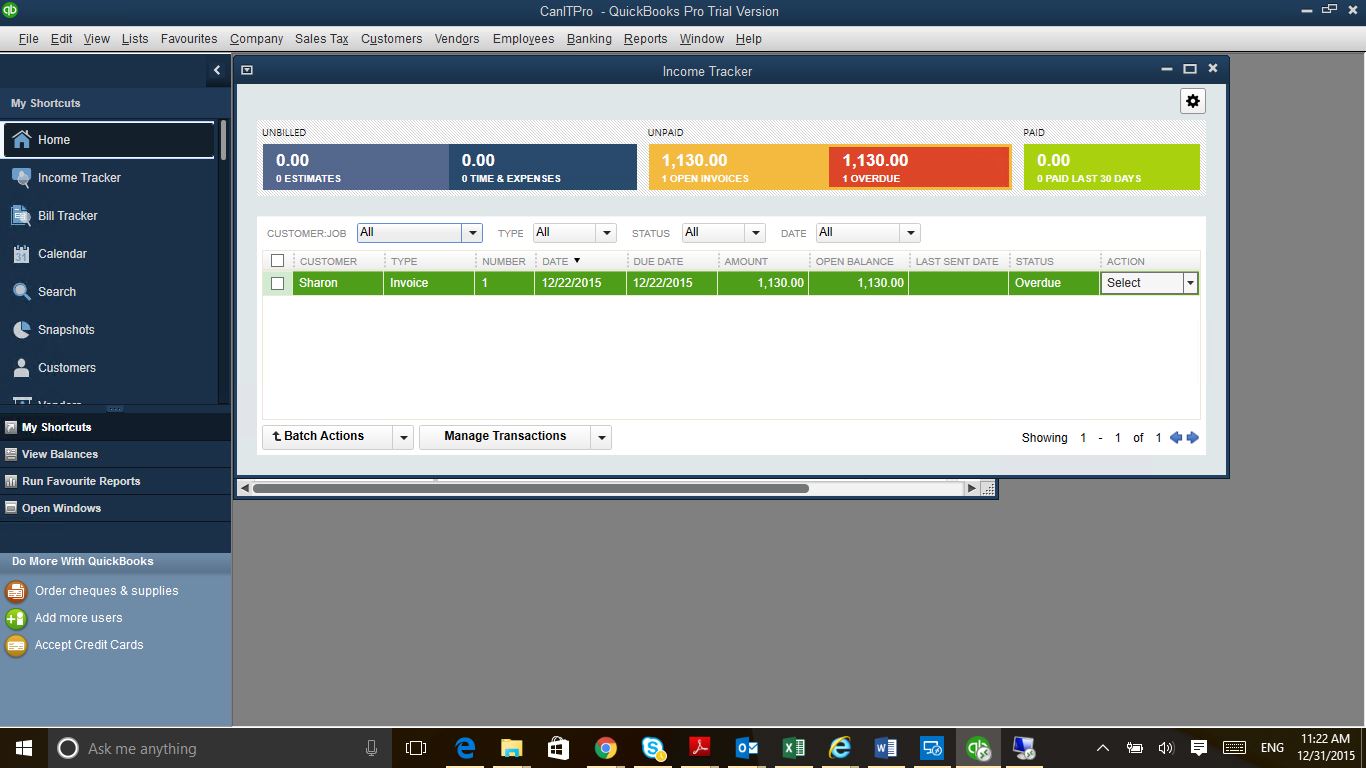
Users can now work on the company QuickBooks file from almost any device and all the data is securely retained in the Azure virtual machine shared drive.
I hope these two posts provided a clear overview of how you can leverage Azure RemoteApp for your clients.