Step-By-Step: Installation of Skype for Business Server 2015 Enterprise Persistent Chat
The role of Persistent Chat Server allows users to participate in multi-stakeholder thematic conversations persistent over time.
Teams can efficiently share information, ideas and decisions with each other. Discussions are persistent, allowing users in different geographical areas to participate even when they are not simultaneously online.
This role allows you to search content, to create notifications and filters to follow conversations on specific topics.
Since Lync Server 2013, the feature is available directly in the Lync client.
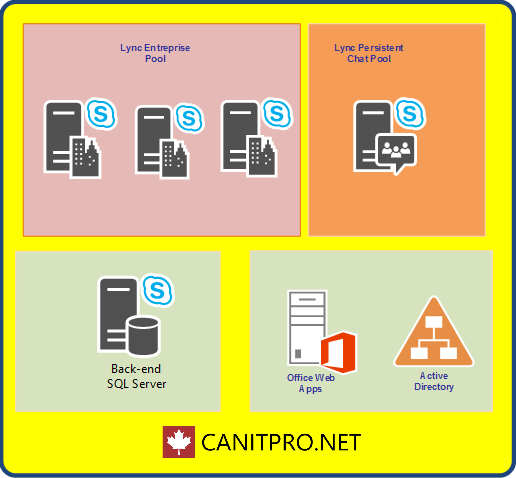
Persistent Chat server is an optional role in Skype for Business 2015. Servers are managed in a dedicated farm and depends on the front end to the routing of the messages.
This role is primarily composed of conversation and compliance services. The Conversation is responsible for persistent chat server database service. The compliance service enables archiving of the content of conversations and events.
Web services, dependent on IIS, they are handled by the front-end server. Web services are used for the publication and recovery files as well as the management of the conference rooms.

Persistent Chat Server uses two databases:
- The database 'mgc' for the hosting of data such as history and the content of conversations, configuration and provisioning of user data
- The database "mgccomp" for compliance data archiving
These databases can be located in the same SQL Server instance or different SQL Server servers.
Persistent cat is the only role Skype for Business server whose farm can be stretched between two sites.
Various architectures options available:
- Environment Standard edition including the role of persistent chat collocated with the front end server
- Environment Standard edition including the role of persistent chat deployed on a dedicated server
- Environment in Enterprise edition including the role of persistent chat deployed on a dedicated server
- Environment in Enterprise edition including the role of persistent chat deployed on several separate servers
The following table summarized the capabilities supported by the role:

This paper presents a Skype for Business 2015 Enterprise Server installation.
The upgrade scenario diagram is as follows:
The prerequisites to deploy Skype for Business 2015 Persistent Chat Server:
The good success of a deployment must take into account all of the technology.
- Operating systems supported for Skype for Business:
- Windows Server 2012 R2 Enterprise OS
- Windows Server 2012 R2 Standard OS
- Windows Server 2012 Datacenter OS with SP1
- Windows Server 2012 Standard OS with SP
- **Windows Server 2008 R2 (Lync Server 2013 migration required)
- Back end support for the following databases:
-
- Microsoft SQL Server 2014 Enterprise (64-bit Edition)
- Microsoft SQL Server 2012 Enterprise (64-bit Edition)
- Microsoft SQL Server 2008 R2 Enterprise (64-bit Edition)
- Microsoft SQL Server 2014 Standard (64-bit edition)
- Microsoft SQL Server 2012 Standard (64-bit edition
- Microsoft SQL Server 2008 R2 Standard (64-bit edition)
Back end support for the following database services:
- SQL Mirroring
- SQL Clustering
- SQL Always On
Applications required on all servers Skype for Business Persistent Chat:
- Windows PowerShell 3.0
- Microsoft .NET Framework 4.5
- Windows Identity Foundation
- Remote Server Administration Tools
- MSMQ
Step 1: Install prerequisites
Installation prerequisites on Persistent Chat Server with the command:
Add-WindowsFeature Net-Framework-Core, RSAT-ADDS, Windows Identity Foundation, NET – WCF-HTTP-Activation45, Web-Asp-Net45, MSMQ
Step 2: Topology builder
- The beginning of the installation consists in the creation in the builder of our farm topology of persistent cat in Enterprise version consists of a single server
- Open the topology builder, select Persistent Chat pools and New Persistent Chat Pool

- Specify the name of your pool, in our case, the chosen option is This pool has multiple servers


- You can specify a display name for your farm. Compliance activation option is optional, for this example, it will be enabled

- Select the SQL Server from host the database mgc

- Select the SQL Server from host the database mgccomp

- Specify the file used by the farm share

- Select your Server Front end as next hop farm

- The configuration is summarized below


- After you have validated the information, we can now publish the topology

- Select Next


- Select Use SQL Server instance defaults


- The help file we callback to validate replication

Step 3: Installation of the components
- The installations of the components step takes place on the server from host role
- Run the installation setup and choose 'Install' to deploy the Core module

- Accept the terms

- The deployment wizard is now available. Choose install or update the Skype Enterprise Server system

- Run step 1 to deploy the instance SQL Server Express 2014 going to host a local replica of the CMS

- Choose the default option and select Next

- End of the installation from step 1

- Start step 2. From the information contained in the local replica of the CMS, the deployment wizard will deploy the components assigned machine name declare in the topology builder

- Choose Next

- You observe in the logs installation of desired components

- Start now step 3 to assign a certificate to the role

- Choose Ask

- Select certification authority from answer your query
Specify information such as:
- Friendly name
- Organization name
- Name of the organizational unit
- Country/Region
- Department/Provence
- City/town
You can choose the 'Advanced' option to specify alternative configurations
- Select "Next" to start the process


- After you have validated all the information, you can send the query by selecting Next


- It is possible at this stage to assign immediation certificate to the role


- Logs allow us to confirm the success of the operation

- You can run services with the command Start-CsWindowsService
-

- Validation can be performed with the Get-CsWindowsService command

Step 4: Configuration persistent cat:
- The security group CsPersistentChatAdministrator allows to grant privileges of Directors for this role (a) of the identified users. Members can access various commands of the role through the PowerShell interface or control panel Skype for Business 2015

- At this stage, we can now configure strategies servers and users
For example, the configurations will be carried out "globally"
- You can customize the strategies the role servers in Control Panel Skype for Business, navigate 'Persistent Chat' - 'Persistent Chat Configuration.

- Customizable settings are visible below

- Now navigate Persistent Chat - Persistent Chat Policy and activate the option Enable Persistent Chat

- Several permanent chat rooms can coexist and can be arranged into a set of categories on the server. Each chat room belongs to only one category. The categories allow to manage access to chat rooms and the different roles
- The configuration of a category is done in 'Persistent Chat' - 'Category.

- Select your farm

- Set the desired settings for this category


- The category is now active and possesses no chat room

- It is possible to associate URLs with permanent chat rooms
- Now navigate through 'Persistent Chat' - 'Add-in '.

- Select your farm

- Set the name and the URL

- The configuration for this example is completed
Step 5: User Experience
The user now has a new tab in its Skype business client

The user now has the required permissions to create a chat room

- The selected option directs you to a web page

- Create a new chat room

- Set the desired parameters


- The permanent chat room is now accessible from your Skype enterprise client

- Accessible via a single click
