Smart bulbs or how to be lazier (part 2)
In the previous post we discussed which components we can use in order to connect ZigBee bulb to AllJoyn network. Today, we will try to assemble all these components and, finally, to switch on the bulb.
First of all, we have to setup the XBee controller. We are going to control all our bulbs from Raspberry, so we have to assign coordinator (aka co-ordinator) role to the controller. Coordinator is the first node in your network that allows other devices to join the network.
Once we have a coordinator in the area, all bulbs and other ZigBee devices can connect to the coordinator automatically. If the GE Link bulb blinks three times, it means that the bulb was successfully connected. Once a ZigBee device is connected to the coordinator, it will be looking for the same coordinator each time. In order to disconnect the device from the coordinator, you have to follow a special instruction. For example, in order to disconnect the GE Link bulb, you can switch on/off the bulb several times applying 3 second pauses between each action. If you see that the bulb is dimming(??), it’s disconnected. Usually, you have to follow this procedure if you buy a bulb with a hub because the bulb can already be connected to the hub.
In order to setup an XBee device, we need to connect it to a PC and install all needed drivers and tools. You can find an FTDI driver for various operating system using this link. In order to setup XBee you can download the XCTU tool directly from digi.com site.
Use XCTU tool in order to recognize your XBee controller and read the current settings.

First of all, you have to use Update button in order to assign the coordinator role to the controller and update firmware.

Once you update the role, you have to change some settings. The most important settings are:
- ZS ZigBee Stack Profile: you have to assign it to 2 which means that you are going to use an enhanced set of ZigBee protocol.
- NJ Node Join Time: the time that the device will allow other devices to join to it. We have to set it to 0xFF in order to allow other devices to join the network any time.
- EE Encryption Enable. You have to enable encryption to establish secure connection between devices.
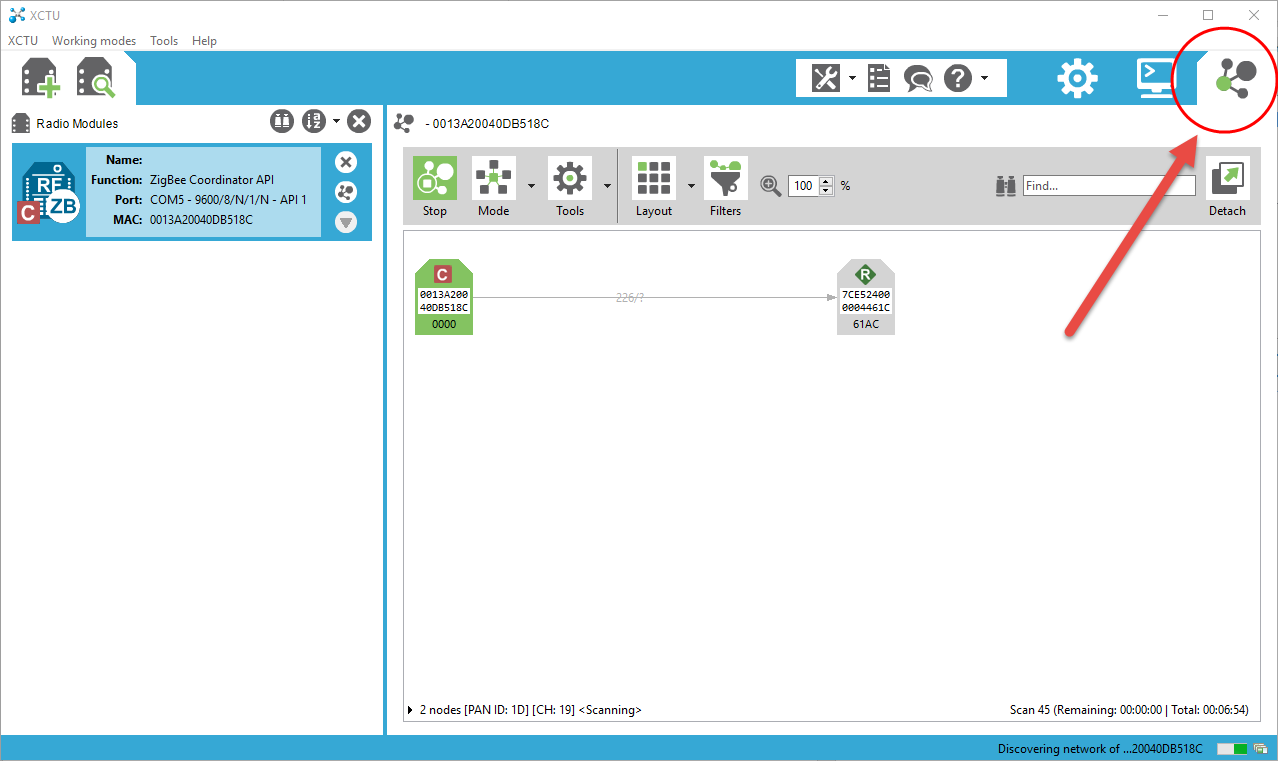
Now, you can turn on the bulb and see if it has connected to the coordinator (it should blink three times). If it has connected you can switch XCTU to Network working mode and see the coordinator itself and all connected devices:
Ok. On this stage we are ready to use XBee adapter that we can connect to our Raspberry Pi (hub). Windows 10 IoT Core has all needed drivers for serial communications. So, you have to use USB cable to connect XBee to your Raspberry. It’s time to think about software.
Before implementing a module that will help us to switch on/off the bulb using Azure, I want to show how to work with the bulb in a local network using AllJoyn. First of all, we need to deploy ZigBee bridge for AllJoyn to the Raspberry. You can find the solution visiting the following link. You have to compile it for ARM and deploy the solution to your Raspberry (headed or headless). That’s all. Right now you can manage the bulb.
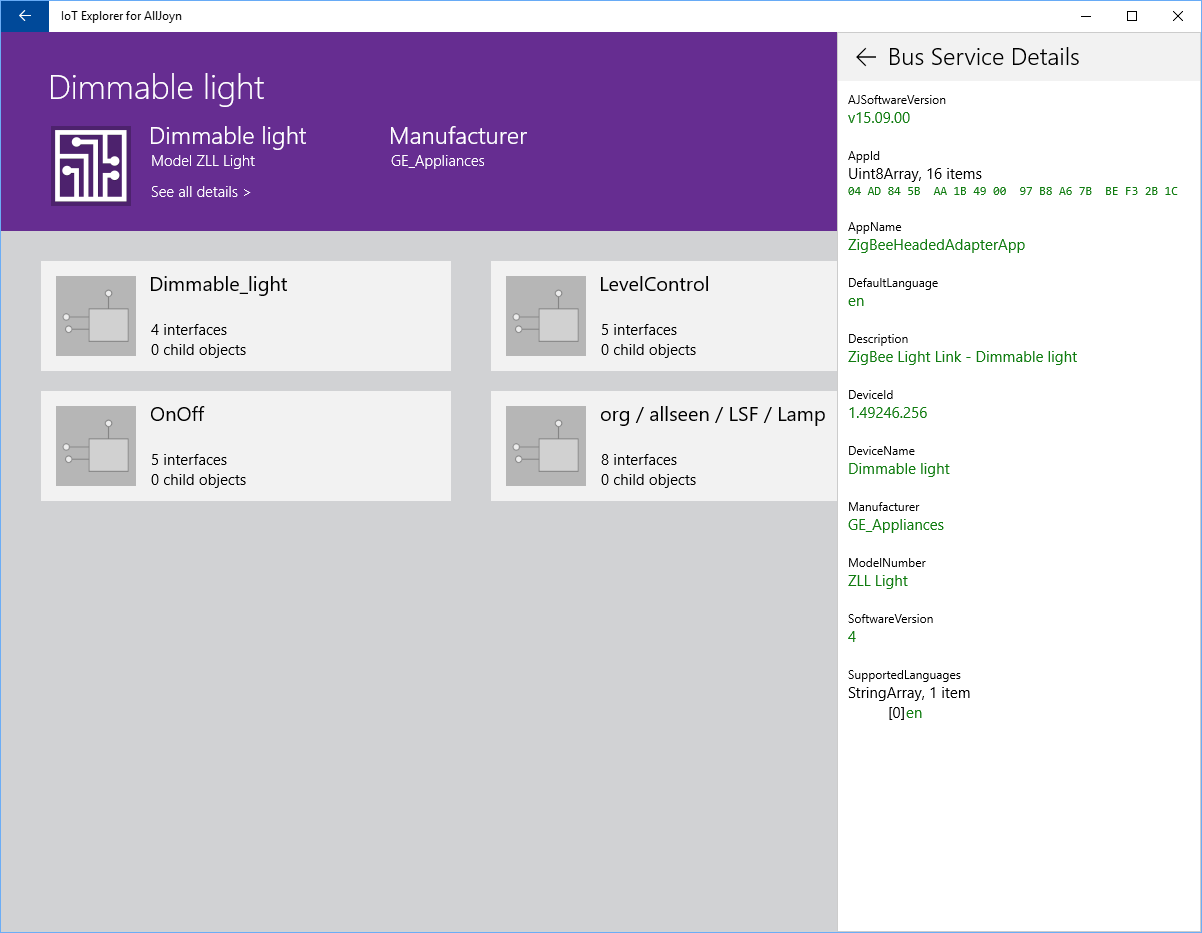
Install IoT Explorer for AllJoyn and run it on your Windows 10 device. The Explorer will automatically recognize your Raspberry and all devices connected to Raspberry thanks to the bridge. You can see that we have access to the bulb now and we can play with it.
Next time we will discuss the bridge structure and will enable several Azure services in order to work with the bulb remotely.