How to make Sub Groups in a Page
In the new RoleTailored client in Microsoft Dynamics NAV 2009 you do not have the possibility to place a field exactly where you want on a page. You can control in which order they should be shown, but where the field will be placed, is up to the RoleTailored client. This is quite different compared to the Classic where we could define Xpos and Ypos for each control.
Using Sub groups in the Page Designer you can control how fields are grouped. This way you can fix fields to the left side of a FastTab and to the right side of the FastTab. Let see an example of this.
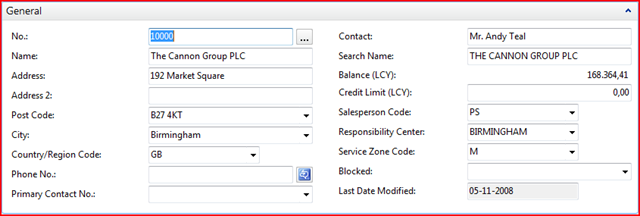
Here is how the "General" FastTab on the Customer Card looks out of the box with no customizations:
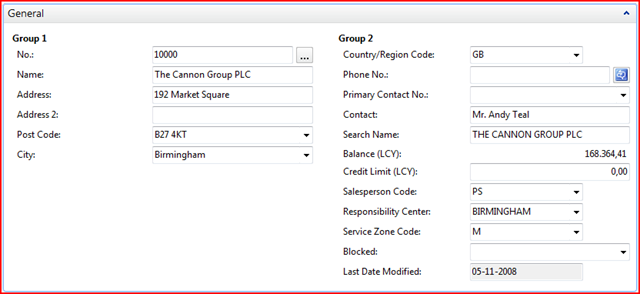
But adding 2 Sub Groups you can have the General FastTab look this:
How did I do this? Well let's have look at Page 21 in Page Designer where I have added these 2 groups marked with blue:
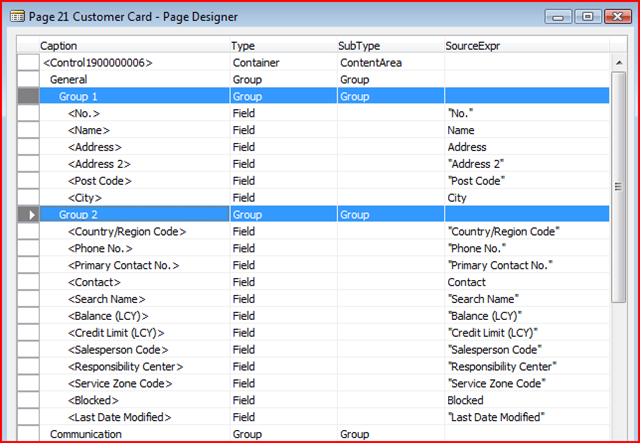
While the "General" and "Group 1" seem very similar in Type and Subtype, the important part to notice here is INDENTATION. My "Group 1" is indented under the "General" FastTab group. And when indented under a FastTab group this will be displayed as group and not as a FastTab.
Then of course I have indented the fields "No., Name, Address, Address 2, Post Code and City" below "Group 1" to have these fields captured in this group. For "Group 2" I done the same.
Actually we go one indention level deeper. Try to add a Sub Group in either "Group 1" and "Group 2" and indent some of the fields into to this new sub Group.
Using Sub Groups gives a bit more control on where fields are placed in the page on the RoleTailored client.
Thanks,
Claus Lundstrøm, Program Manager, Microsoft Dynamics NAV