Azure Automation Graphical Editor from a Coder's Perspective
I have been coding since I was 9 years old and I have always loved coding, but have never made it a primary part of my career which is why I never became a Software Engineer or went down that path. That being said, when I get a chance to write a script or application, I really grab a hold and enjoy it.
A few weeks ago, I was asked to put together a couple of scripts for a customer that would be run within the Azure Automation service. However, the customer did not have much in the way of PowerShell experience, so they wanted the scripts to be built and developed using the Graphical Editor rather than using straight PowerShell cmdlets. This was a first for me. I knew that if I did the work in straight PowerShell, I could probably have the scripts ready in about 4 hours, because they were not very complicated. Unfortunately it was not quite that easy using the Graphical Editor and I thought that my journey might be interesting to others, especially other Coders.
Graphical Editor
Before we talk about the scripts and how I put them together, let me start by providing an overview of the Graphical Editor for Azure Automation. First of all, Azure Automation Runbooks is a service that allows customers to upload PowerShell scripts into a managed environment where the scripts can be Run, Audited, Scheduled, Edited, and made available as Webhooks.
The basic editor is a standard PowerShell editor, much like PowerShell ISE. However, the Graphical Editor allows you to create scripts using commands that look like bubbles and then you chain them together to perform the necessary work and this chaining does allow for logic, filtering, and data flow to the commands and the objects being worked on within the script.
You can take a look at the screenshots of the actual scripts that I created further down in the blog to understand what the graphical editor looks like.
Script Scope
Now that you have a good understanding of what the Graphical Editor is and why some customers may use it over the Standard Editor, let's spend some time to talking about the scope of the scripts that I was asked to create. As I mentioned, these were not very complicated, but they did require a number of very common pieces of functionality that is available within Azure Automation.
The customer had a need to put some of the Azure VMs on a Start/Stop schedule, specifically their Development and Test environment servers, but unfortunately different servers within those environments required different schedules. Therefore, it wasn't quite as easy as pulling all VMs that are part of a single resource group and then either starting or stopping them. They had tagged their servers within their resource group so that they could make sure that servers started in the right order. In other words, the SQL Servers needed to be up and running before the Web Servers came online, because the web application needed database connectivity.
So the reason that this customer needed a CSA for this is because there are no scripts available within the PowerShell Runbook gallery in Graphical format that will filter VMs based on Tags. In addition, the filtering of VMs by tags, actually has to be done using a generic Resource based filtering command rather than one that is part of the AzureRm.Compute module. Therefore, the script to provide this functionality required some logic and workflow between commands.
Creating the Start Script
If you have ever worked with the Azure PowerShell cmdlets, you will know that all of them require parameters and many of them create output variables as well and that is how the flow of is created within the Graphical Editor. Below you will find the Start script that I created for the customer. Let me walk you through what this image is and how it actually does Start a specific set of VMs. 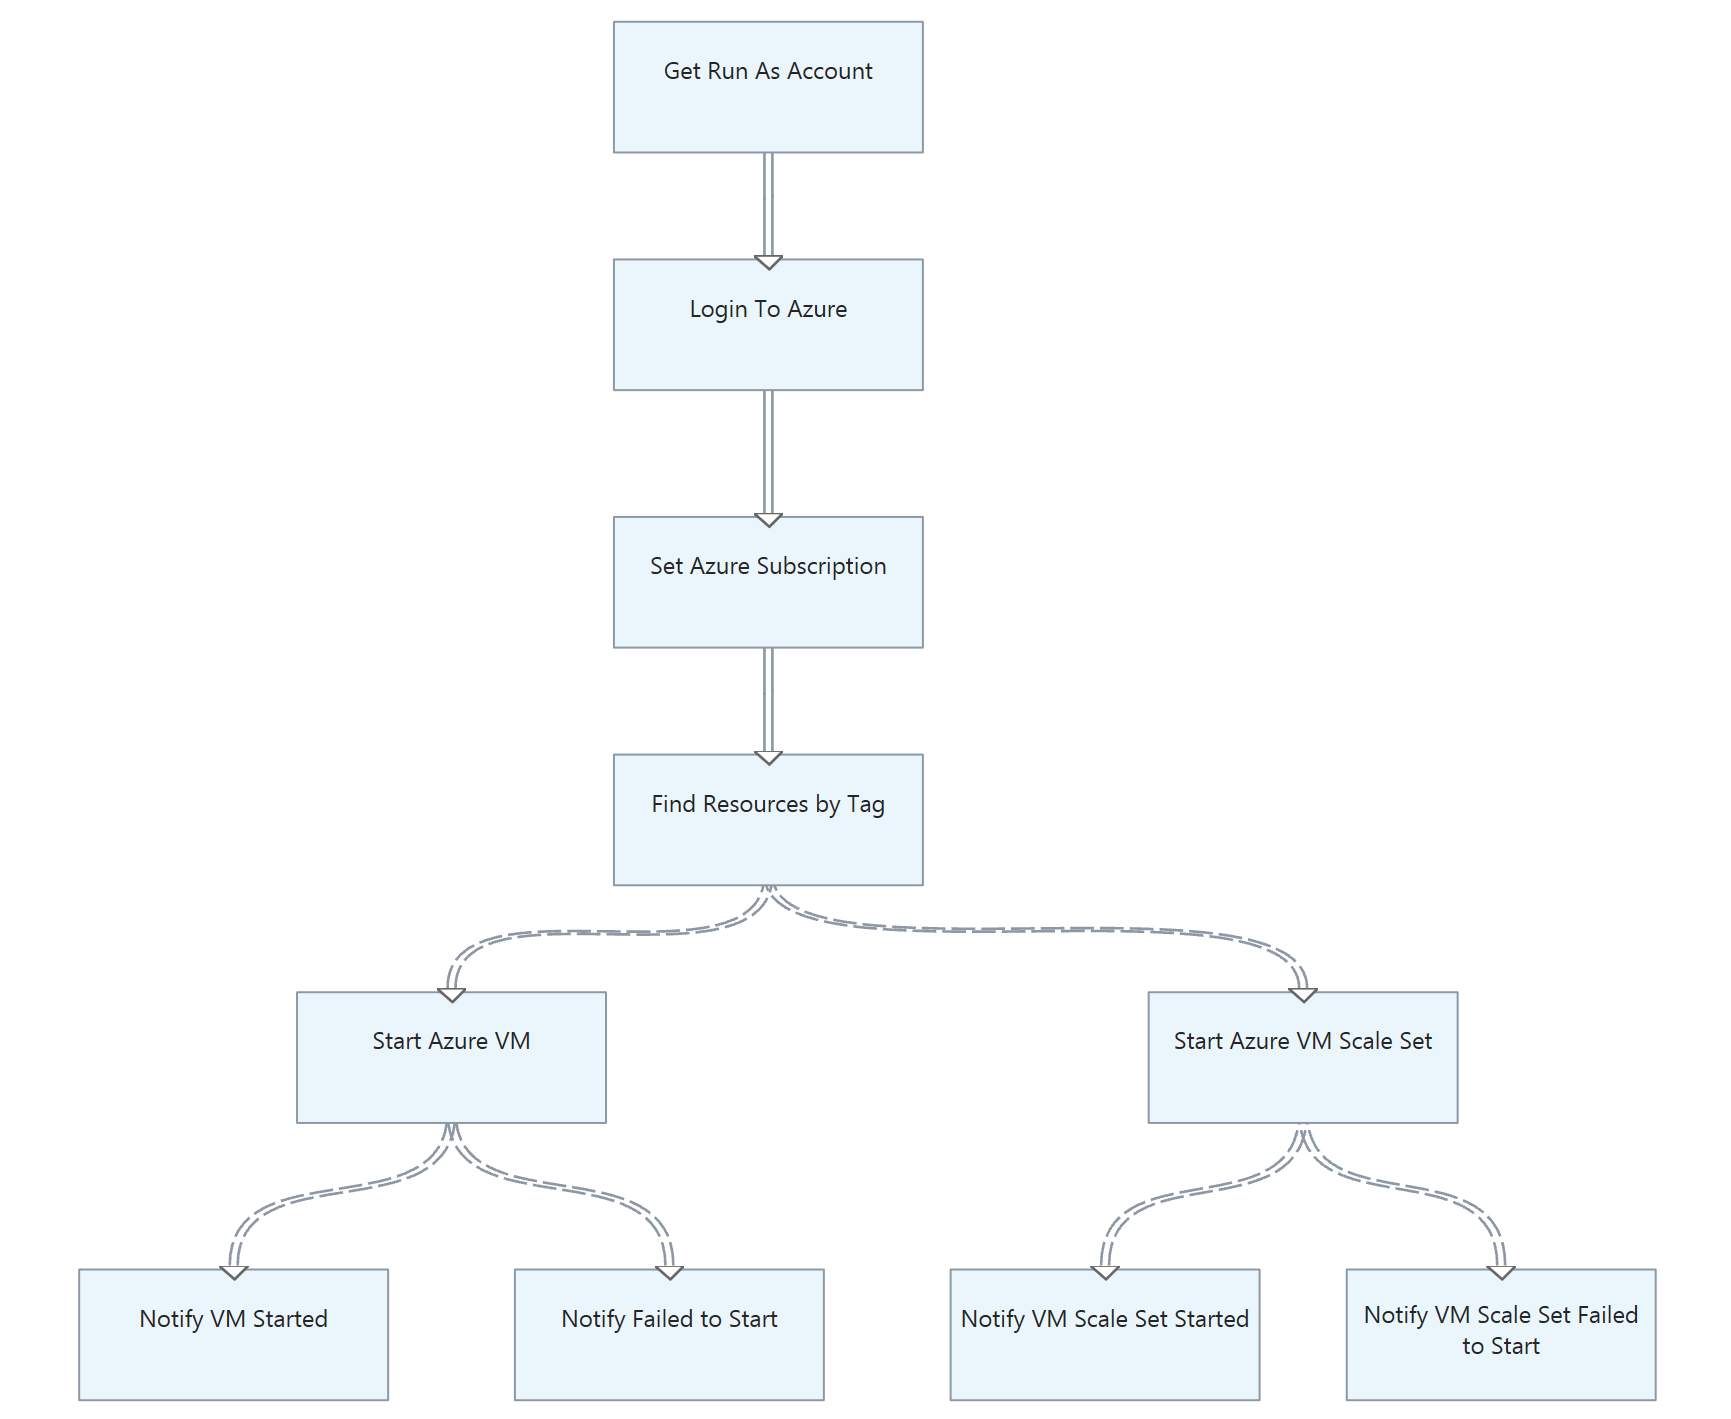
Figure 1: Graphical View of Start Script
- This script is run using an Azure Automation RunAs Account which is considered a Service Principal User within the Azure Active Directory tenant associated with your Azure Subscription.
- The Service Principal Account is created as a Connection asset within the Azure Automation Account.
- This Service Principal account is passed as a parameter to the "Login to Azure" command from the "Get RunAs Account" command
- Each box corresponds to a PowerShell cmdlet, however they are given more user friendly display names. i.e. "Login to Azure" = Add-AzureRmAccount
- All input parameters are configured within the Graphical Editor specific to each cmdlet. In this case, the majority of the parameters are specified as Variables assets that are stored within the Azure Automation Account. Please see Figure 2:
- Each arrow shows that a single or an array of output objects are passed on to the next command.
- Each arrow can be customized to filter the output.
- The arrows that are shown as dotted line are ones that have been modified to filter the objects based on a specific set of logical operations before passing them to the next command. Please see Figure 3:
- The last set of commands are used to provide notifications back to the Console and therefore, back to the Runbook Auditing engine whether the Start/Stop process succeeded or failed. Using these commands allows you to add additional auditing beyond what Azure provides out of the box.
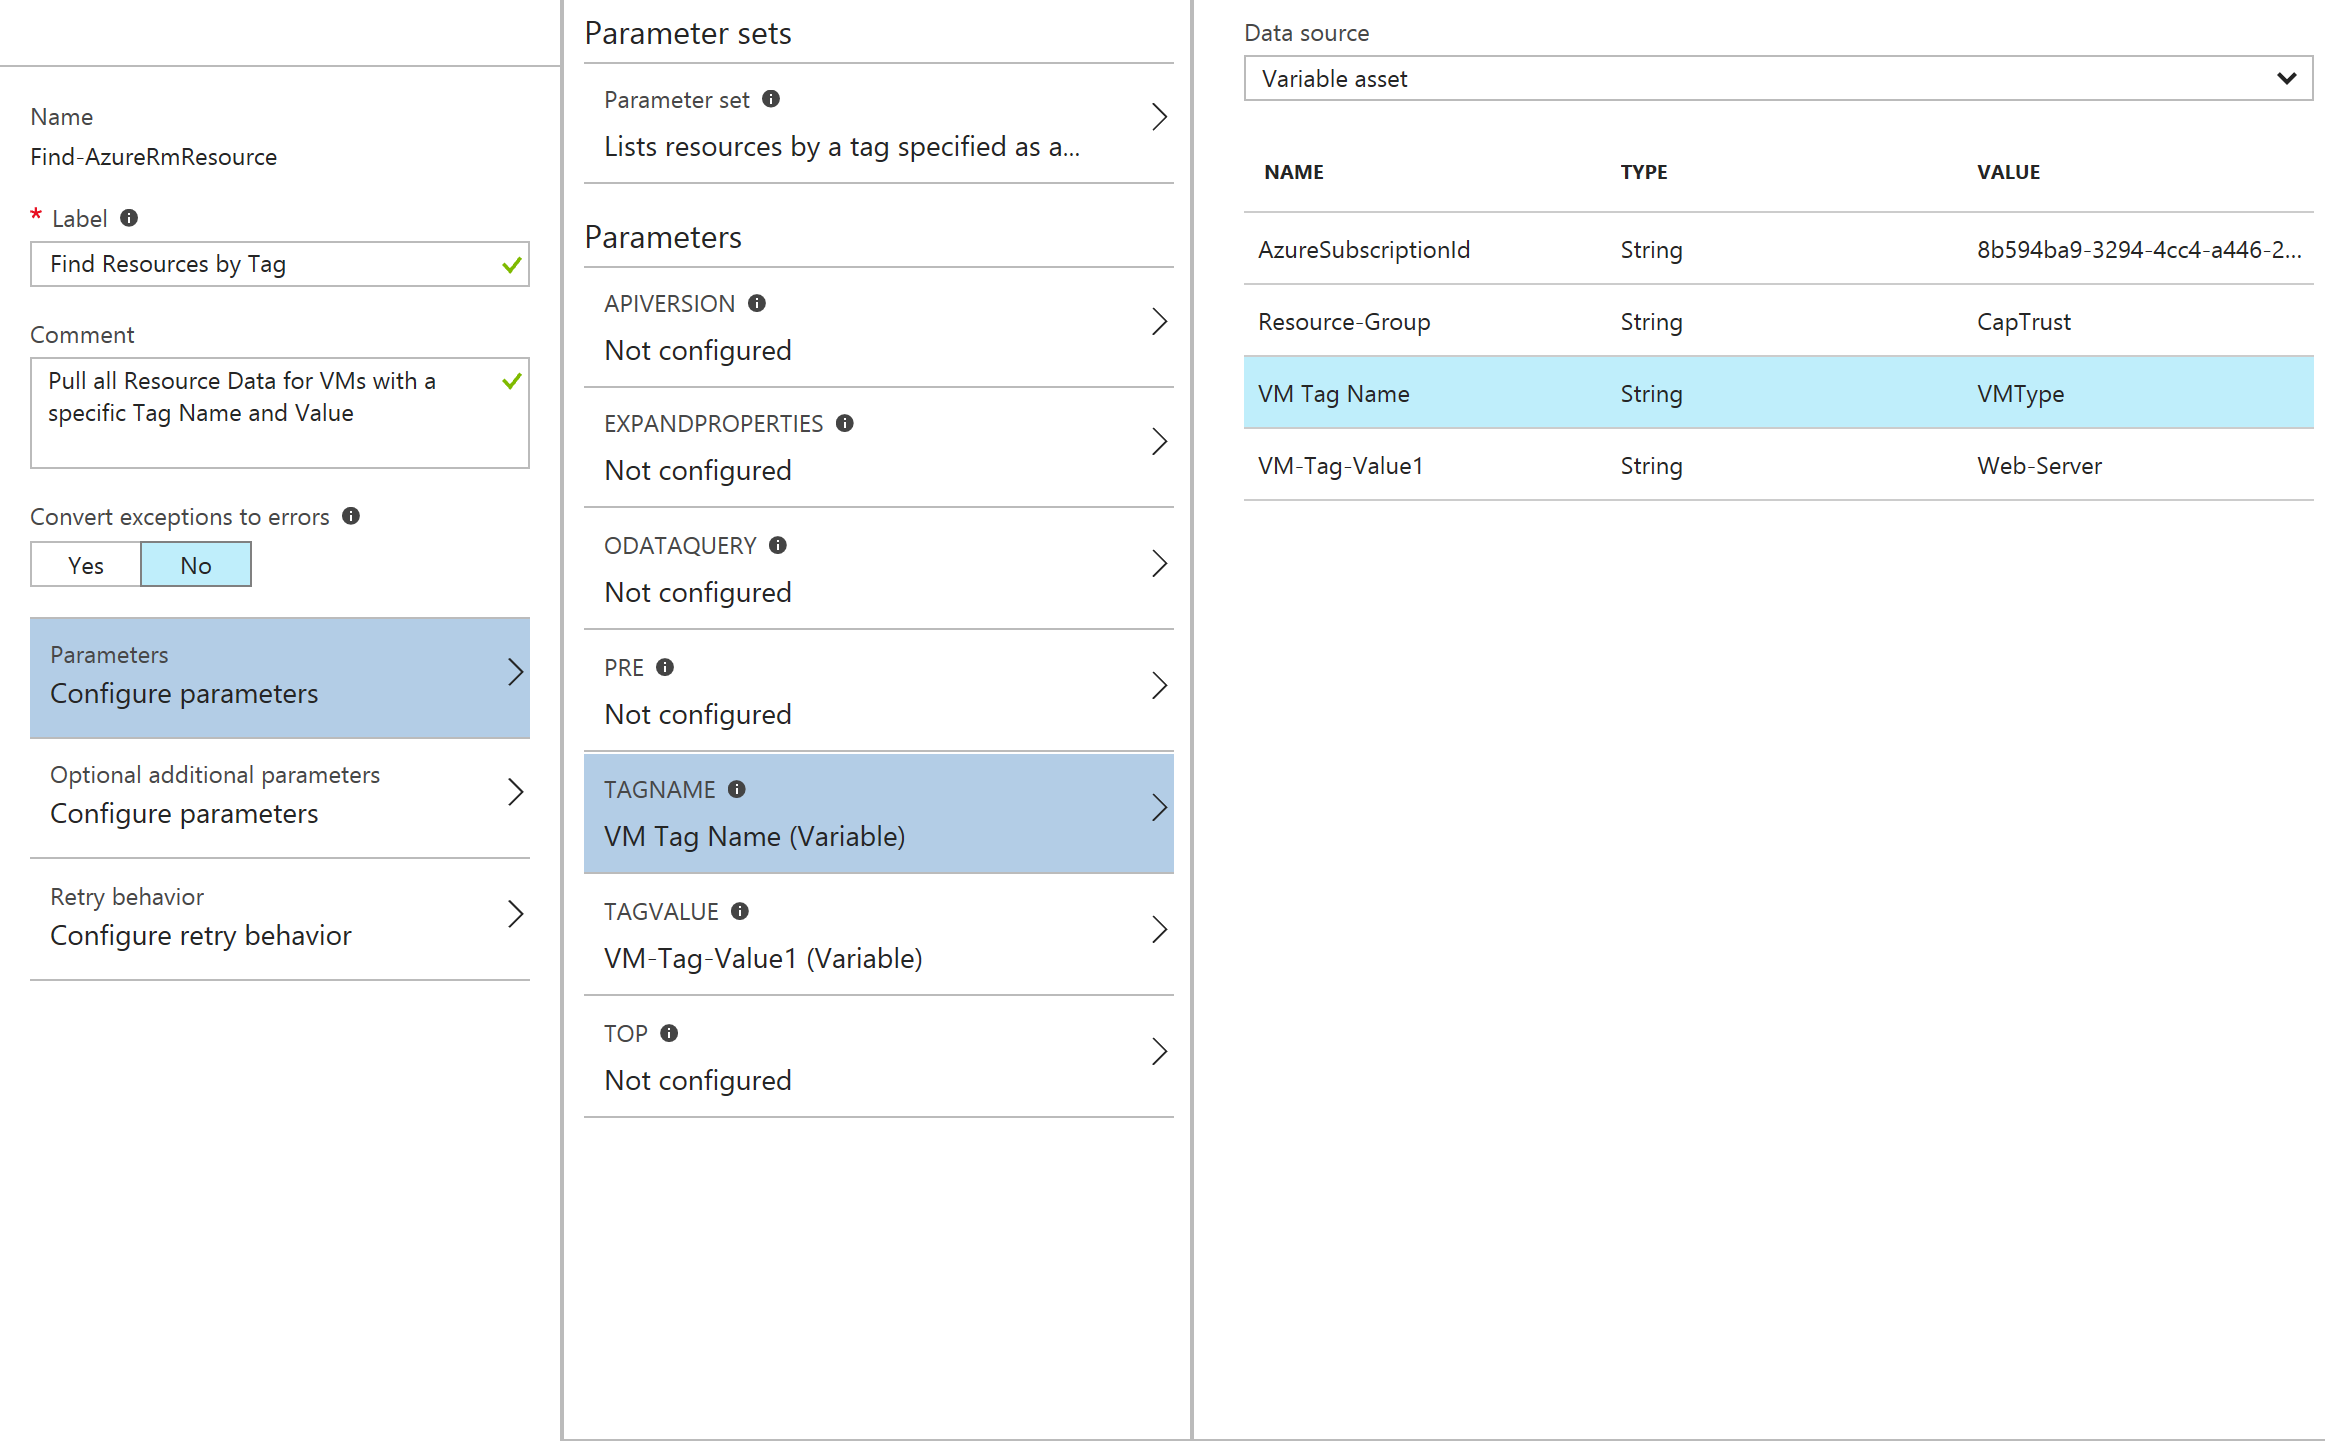
Figure 2: Configuring Parameters for Cmdlet
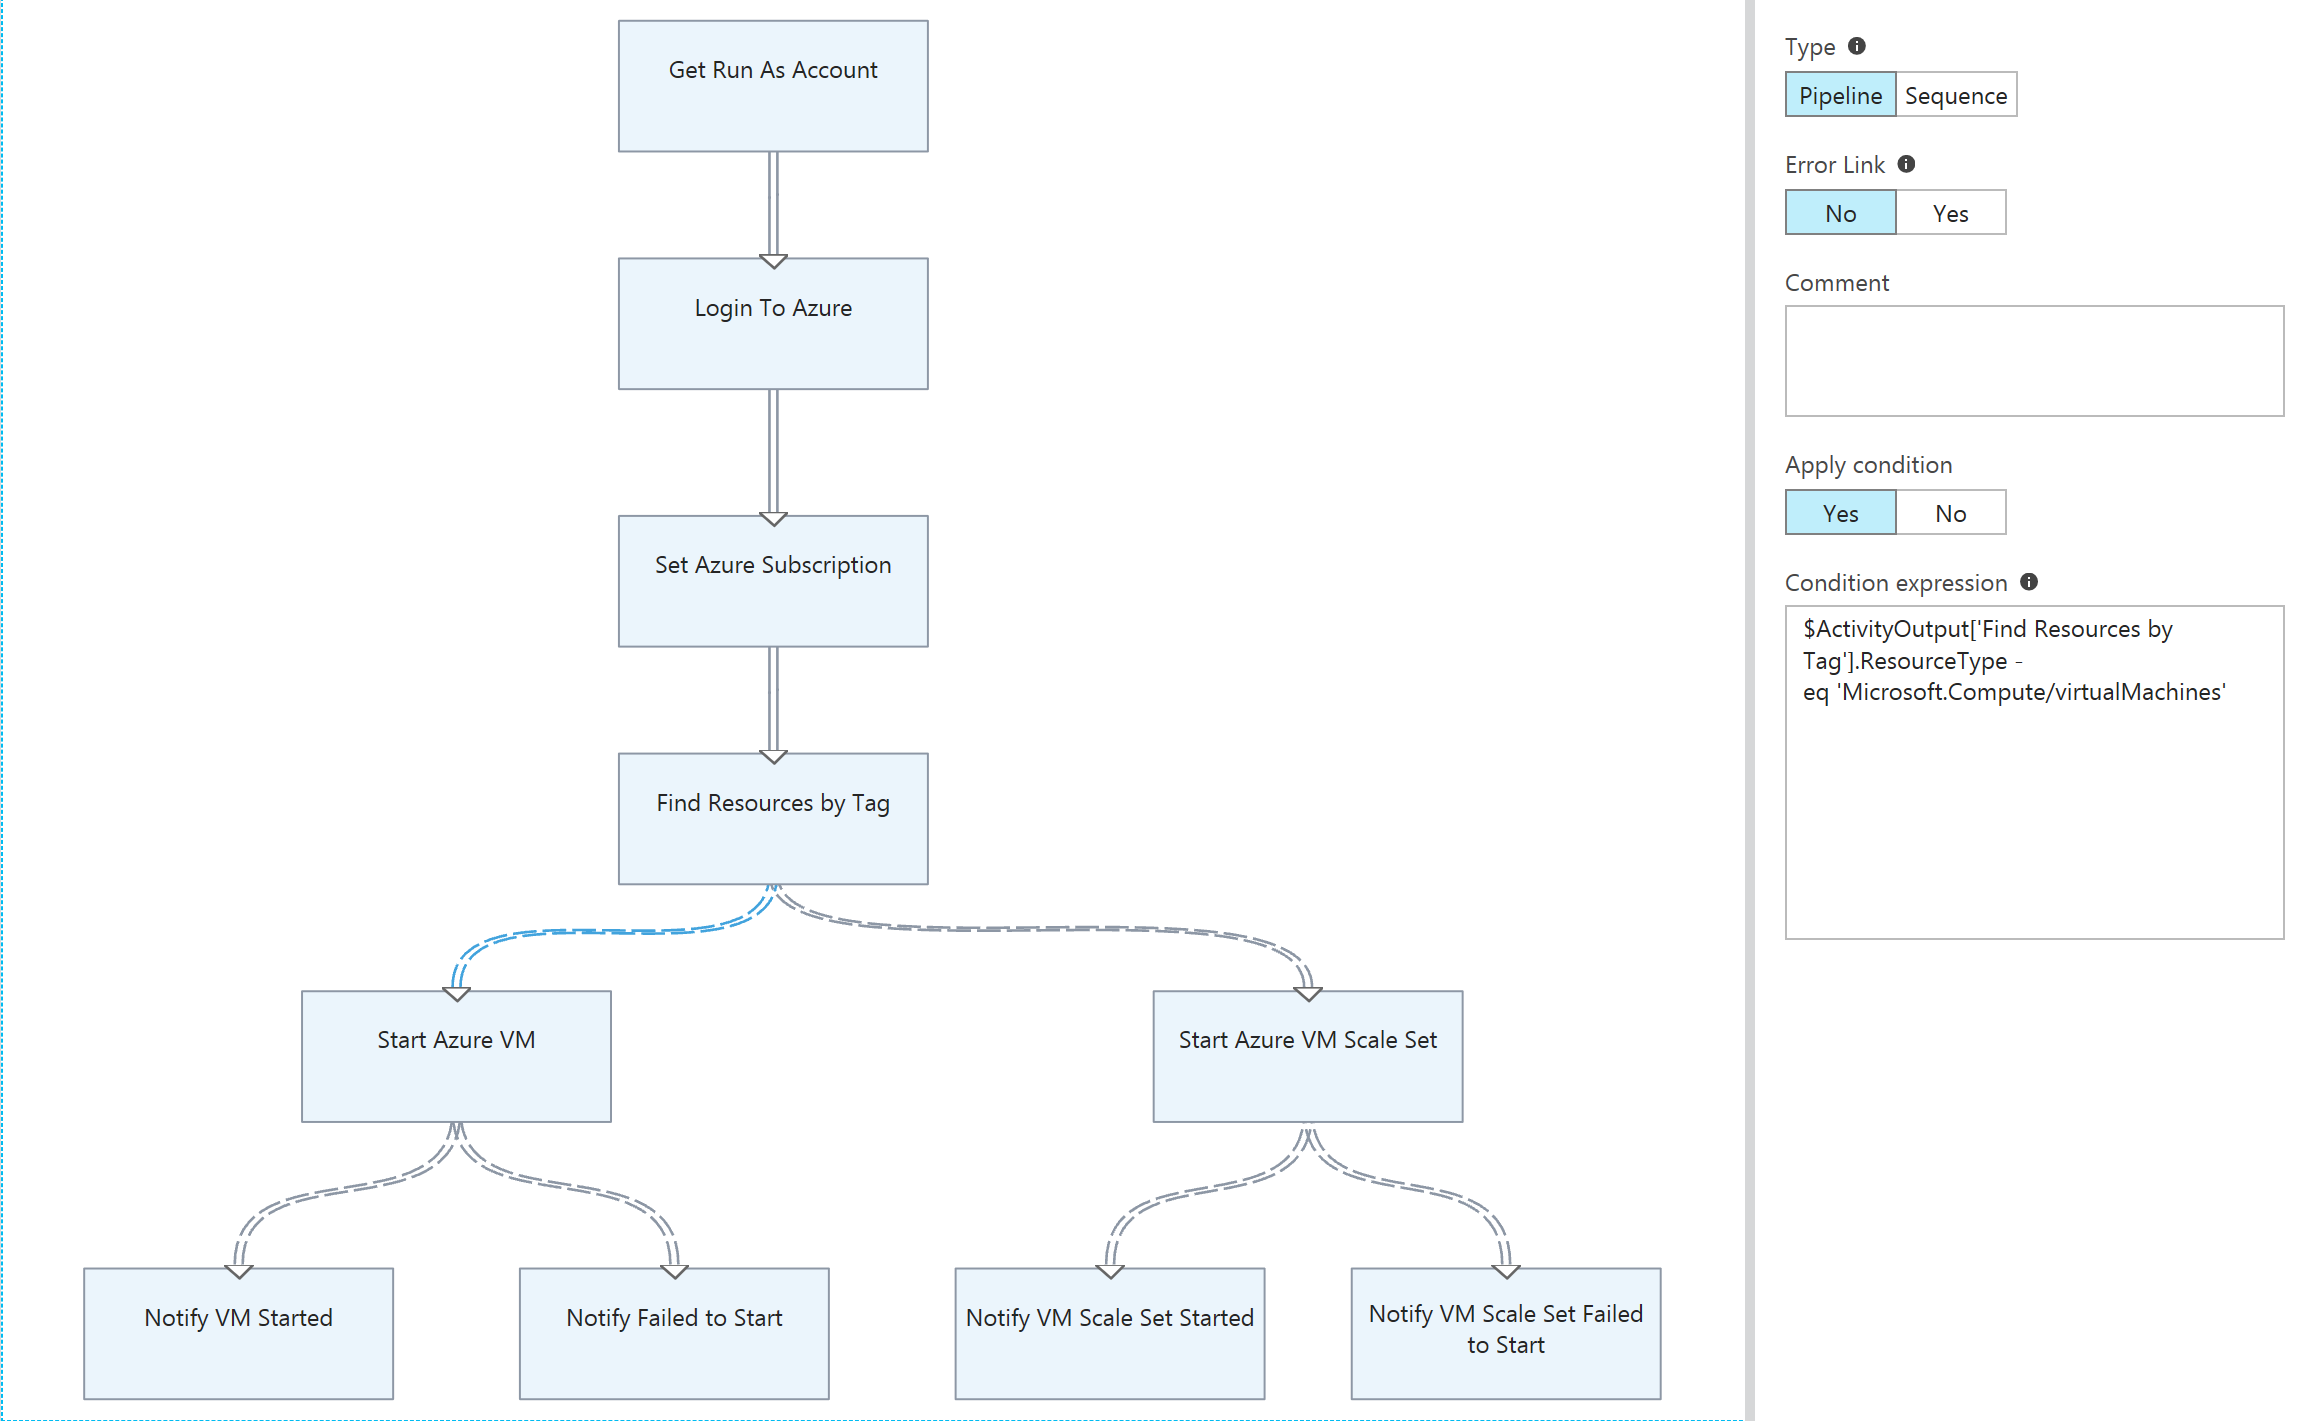
Figure 3: Filter the Flow of Objects between Commands
Conclusion
I hope that this shows that it is perfectly reasonable to create simple to mediocre complexity level scripts using a completely graphical and configurable method rather than a pure coding method. In addition to the information that I have provided above, I have published both of the scripts to the Technet Script Gallery so that they can be imported into the Azure Automation Runbook gallery and consumed by other customers. The links to these script repositories are listed below in the Additional Resources section.