Setting Up Your New Blog Using IIS 7 on Windows Server 2008 Easily With The Web Platform Installer
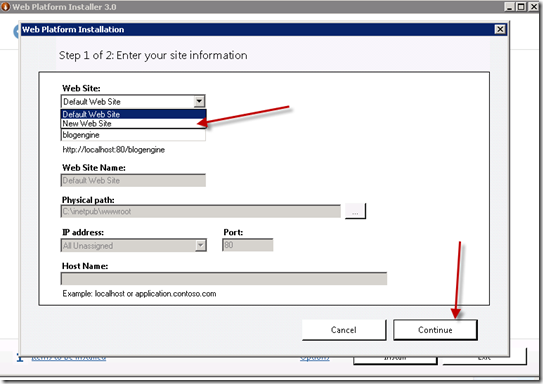
I went looking for documentation to setup a blog engine on IIS and found a ton of stuff. Starting walking through this very convoluted process and thought there must be a better way. I then went to see if I could find someone that created a video on the topic and stumbled on an automated installation process for installing web applications on Windows Server 2008 and IIS 7. I understand it works with other platforms as well. I restored my Hyper-V virtual machine back to before I started, found a free blog platform (BlogEngine.NET) that looked appealing to me, downloaded and installed. This automatically installed the Microsoft Web Platform Installer ahttps://www.microsoft.com/web/downloads/default.aspxnd then installed BlogEngine.NET. A very simple wizard walked me through creating a new website (on IIS) and setting up the blog.
I did have one minor problem. I was getting an error message when I first went to run the application from (in my case) https://localhost/itproguru. Since I did not put the application in my default site or even in the default folder, I needed to set proper permissions on the web.config file. The error message I got was:
 Server Error in '/ITProGuru' Application.
--------------------------------------------------------------------------------

Access to the path 'D:\inetpub\wwwroot\ITProGuru\Web.Config' is denied.
Description: An unhandled exception occurred during the execution of the current web request. Please review the stack trace for more information about the error and where it originated in the code.

Exception Details: System.UnauthorizedAccessException: Access to the path 'D:\inetpub\wwwroot\ITProGuru\Web.Config' is denied.
Server Error in '/ITProGuru' Application.
--------------------------------------------------------------------------------
I was able to fix this easy enough. I simply went in to the properties of the folder D:\inetpub\wwwroot --- right click, select properties, go to Security tab, Cliick Edit, then Add … type in IIS_IUSRS to add the local IIS user rights, click check names then OK. By Default this user has Read, execute and list rights which is fine for this folder.
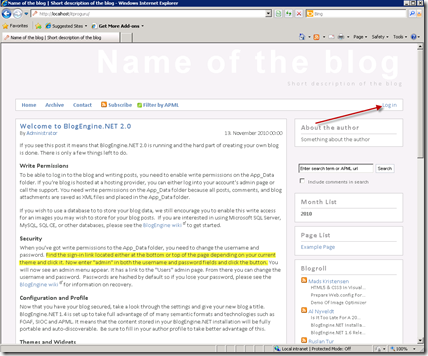
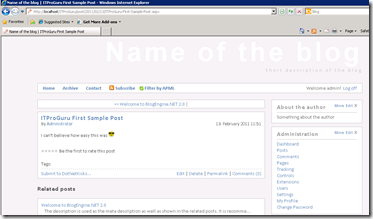
I now have my blog up and running which looks like this…
Notice that there is a Log In link in the upper. I clicked the Log In link put in admin for the username and admin for the password and I have the Admin functionality.
There are still a few things to do as the default blog post tells us we need to setup write permissions in order to post to the blog…
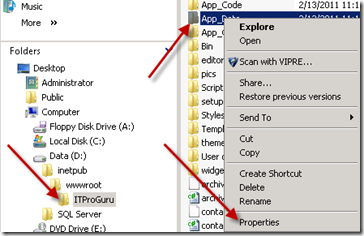
Initially, I am going to just store my blog entries as XML files so I will be setting up folder level permissions. In my case I open Windows Explorer
navigate to D:\intepub\wwwroot\itproguru
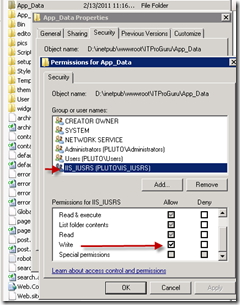
… right click on the App_Data folder, select properties, click the Security Tab, click Edit, select IIS_ISSRS user, scrill down in the bottom box and turn on the Allow checkbox for write.
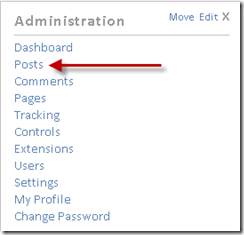
Now I can create a post… on the right nav, select post, then in the upper right corner, write a post, fill in the data and click Save Post at the bottom.
Now all I have to do is configure it to have the look and feel I want it to have, add some additional users, allow outside access through my firewall, set external DNS for my host name, setup host headers for my external name (in IIS) and I am good to go.
Fooled You ![]() I am going to share how to do more of these things…I am going to have to let you fend for yourself on some of them as the instructions will be very different depending on what you are using (like setting up firewall rules) so I cannot go through that in great detail.
I am going to share how to do more of these things…I am going to have to let you fend for yourself on some of them as the instructions will be very different depending on what you are using (like setting up firewall rules) so I cannot go through that in great detail.
First let’s make sure we can get to our site using the external DNS Name. To minimize the variables (like firewall, routing, etc) I am going to start by adding an entry to my local host file for the name I want to use for my blog so I can test without ever leaving my isolated and secure network.
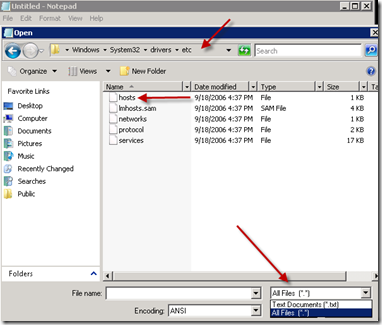
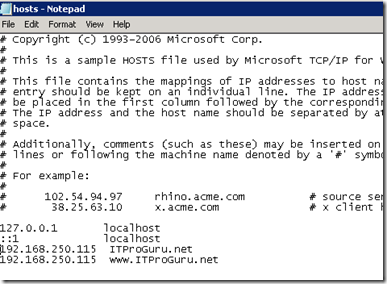
to do that I have to be logged onto windows with administrator permission. I am going to open Notepad (Start – Notepad from server 2008 or above [need to run with elevated permissions]) Then File – Open and navigate to c:\windows\system32\drivers\etc and press enter. You will not see any files at first. If you change the file type dropdown to all files you will see a file called hosts. Go ahead and open this file by double-clicking on it.
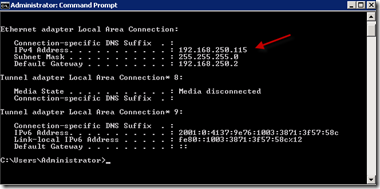
for the next step, you will need the local IP address of the server you are on. Start – cmd – enter- in the command window type IPConfig and press enter
In my case the internal IP address is 192.168.250.115.
I need to type that number into my notepad of the hosts file followed by at least one space then the external name you want to use to access this site. In my case it I am going to add an additional line for a second host header which will look like this:
192.168.250.115 ITProGuru.net
192.168.250.115 www.ITProGuru.net
You can use all lower case. It is not case sensitive. From the File Menu, select Save.
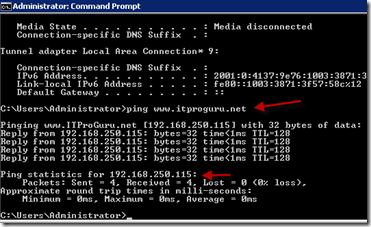
We can test to make sure this works by opening a cmd prompt and pinging that name.
We can see that the name is resolving to my current IP address. You can close the cmd window and notepad if you like.
Next we need to open Internet Information Services (IIS) Manager
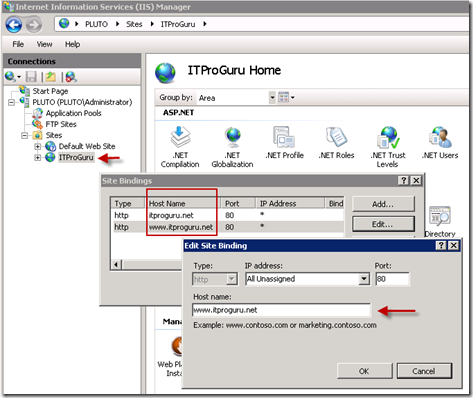
Navigate to your site … right-click select edit bindings, put in the external url you will be using to access the site into the Host name field. In my case I am going to use itproguru.net. and click ok. I am also going to Add an additional binding for www.itproguru.net
the finished product will look something like the following screenshot
Now I can open my web browser and go to the site with the external name + the name of the webapp I want to open which in my case is…
https://www.itproguru.net/ITProGuru/ (If you do not have success with this, put the name of the page in as well)
https://www.itproguru.net/ITProGuru/default.aspx <= if this works but the above did not, you will need to set the default page in IIS – Click the Website, in the middle pane, double-click Default Document and add Default.aspx. While you are there, you might want to move it to the top of the list (Move Up in the upper right corner) you might get a warning about not inheriting if you continue… that is fine.
