Zune Games with XNA - Understanding Game State Management
I've covered Game State briefly in the past, but I have always used complex switch statements to handle different logical scenarios within the game. This works for small, simple examples, but is not optimal for more complex projects.
In the coming weeks, you'll see an example of a networked XNA game that relies heavily upon the concepts introduced in this lesson.
First of all, if you haven't seen the original example for PC and Xbox 360, download the GameStateManagement example from the Creators Club website and walk through it. It might also be useful for you, going forward, to check out the Network Game State Management example (geared toward Xbox Live) and the Peer to Peer Network Architecture example (more appropriate for the Zune).
Now, onto our lesson for the day: Game State Management on the Zune.
Lesson Resources
- Download the Source Code (114 KB)
this is not perfect, just an example! - Download the Video (42.3 MB)
optional, you can just watch it below if you want
Video Tutorial
What is Game State and why do I want to manage it?
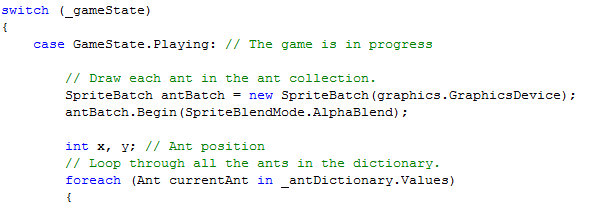
Game State refers to... well.. the state of your game at any given time during its life. Example game states might include Loading, Playing, Waiting for Network, Finding Players , etc. Previously you might have seen me manage game state using a custom enumeration containing these game states and a giant switch statement encompassing all possible game states in the Update and Draw methods of my game, like this really simple game I made a year or so ago:
That's alright, but we are looking at making a networked Zune game. This introduces a ton of new states, particularly around the networking / peer matching aspects. Adding a new case statement would be okay, but it might be nice to be able to manage transitions between drawable screens, message bubbling and all that jazz. Essentially, that's what the Game State Management example covers - the work that's already been done for you so that you can create new screens and transition between them with minimal work on your part.
I have the code open, what does it all mean?
First, check out the Update and Draw methods in Game.cs. Notice anything funny? There's nothing in them. Weird for an XNA game, right? Previously I would stick all the logic for each of my screens in a big switch, but now, each of the individual screen logic has been offloaded to appropriate classes.
Let's start at the top and examine a little bit.
The ScreenManager
One of the first things you notice is a ScreenManager instance being added as a game component. The ScreenManager is the workhorse of this application. It derives from DrawableGameComponent, meaning it can be added to the component collection, and it overrides GameScreen's Update and Draw methods to update and draw all the visible screens.
It's responsible for showing, hiding, transitioning and bubbling messages through each screen. Also, be aware that we are talking about screens now, not individual pieces of logic - the logic for each screen is tied to that particular entity; the MainMenuScreen has the menu display logic in it; the GameplayScreen has all of the gameplay logic in it.
InputState
This class serves as a wrapper for input. Rather than a clunky if statement checking if certain keys are down or newly pressed, you can define custom properties in this class and simply check input.MenuSelect to see if the button for "menu select" was pressed.
GameScreen
This is an abstract class that has everything a screen needs, including three virtual methods (meaning you can override them in derived classes) for Update, Draw, and HandleInput. The base class also has some default logic for transitions and a reference to the ScreenManager component.
MenuEntry
Encapsulates a menu entry for a menu. Also contains some animation logic to make each menu item look interesting. It also contains an event, Selected, which you can handle when the user selects a particular menu item.
MenuScreen
A base class for a menu, which inherits from GameScreen. It's abstract, so you need to create your own BlahMenu base classes. In such a derived class, just add new menu items to it, handle the events, and you are off.
Other Screens
Check out the other screens that come with the example. They all handle input, update and draw differently, which illustrates the beauty of this approach. It's modular and easy to use.
Conclusion
Understanding this approach to game state management will make your game development experience a lot easier, especially if you are involved in even a slightly complex game that has more than a couple of potential screens. In good OO practice, it also means that you can test screens individually and easily add them to your ScreenManager. Start thinking about the game states and screens needed to implement a game using the P2P network architecture, and you'll be well on your way to understanding my next vlog!