Using Blend to Design HTML5 Windows 8 Application (Part III): Style Game Board, Cards, Support Different Device, View States
In part I, Using Blend to Design HTML5 Windows 8 Application (Part I), it helps you to get start with. In part II, Using Blend to Design HTML5 Windows 8 Application (Part II): Style, Layout and Grid, I have demonstrated how to create styles, how to develop a flexible grid layout and how to fill, position the gird. In part III, I will continue from Part II, to show you how you can create a lightweight, dynamic version of the memory game in Blend. I will show you how to style the game board, the image cards and how to support different view states.
Many thanks for Christian Schormann, Josh Pepper and Ryan Salva from Blend team to provide the content for this project.
Review
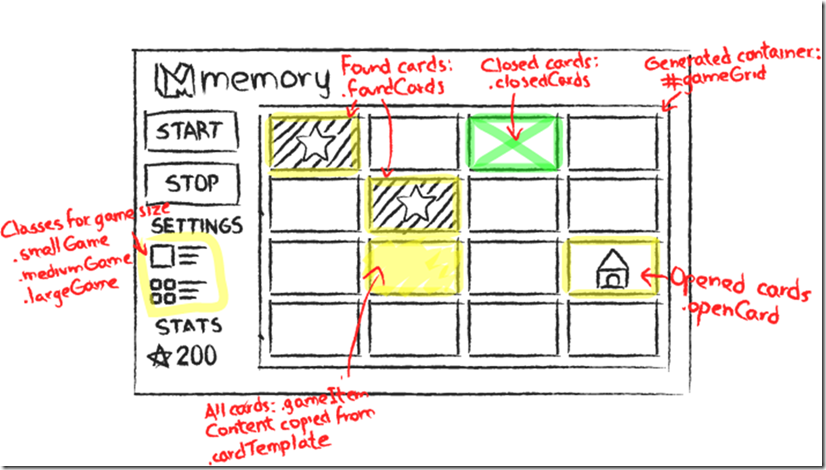
Now, let’s refresh the memory to take a look the sketch diagram we discussed in Part II.
The gameGrid element is a container that holds the game cards. The cards are generated by JavaScript. Each card is a clone of the content of the cardTemplate element, which is only used as a template for the game cards. The code looks inside the template and sets the source property of any img element it finds to a card image for the game. Every game card has a class name gameItem assigned to it. Use the gameItem class to style against the card. The element is dynamically generated, so you don't see it in the markup. However, you can still style these dynamic elements using Blend.
Style the Game Board
Now that all of the elements of the game are in position, you can begin to style the game board, including the dynamic elements generated by JavaScript. Use the gameItem class to style against the card. The element is dynamically generated, so you don't see it in the markup. However, you can still style these dynamic elements using Blend.
The CSS flexbox allows you to arrange content within the box vertically or horizontally. In addition to creating and styling the flexbox, you'll also be modifying the gameItem class to style how the cards appear inside the flexbox.
In the demo below, I will show you how to style the game board.
You can get the project for this demo here.
Style Cards
From what we have discussed in Part II, we has defined three card classes:
- closedCard
- openCard
- foundCard
The face down state is the closedCard class, the face up state is the openCard class, and the matched state is the foundCard class.
These classes are informed by the state the cards are in, and these states are triggered by the code. By default, the cards are assigned the closedCard class. However, when the cards are revealed, they are assigned the openCard class. When matching pairs are found, they are assigned the foundCard class.
We can use these classes, along with Blend in interactive mode, to style the cards according to the class they are assigned. The transitions between the openCard state and the closedCard state are instantaneous. We will add more visual interest to the app by adding a style that eases the transition between these two states, giving a more fluid feel to the app.
The demo below will show how to style the cards in different card classes.
You can get the project for this demo here.
Support Portrait View
Expression Blend HTML media queries allow you to specify different rules for the different display modes in Windows 8. The standard Windows 8 display modes are the following:
· Landscape |
|
· Portrait |
|
· Snapped |
|
· Filled |
Blend can show each of these display modes. To select a different display mode, click the Devicepanel and select a display mode by clicking the appropriate icon. Click the  Portrait display button. While the app layout isn’t exactly ugly in portrait, it doesn’t make efficient use of the available display space.
After we have added a media query for portrait view and set the insertion point so that new style rules are added inside the portrait view media query, create style rules and set their properties as follows:
Selector |
Properties |
Value |
#gameBody |
-ms-grid-columns -ms-grid-rows |
40px 220px 1fr 1fr 2fr 40px 80px 60px 60px 80px 40px 1fr 40px |
#settings |
-ms-grid-columns -ms-grid-rows -ms-grid-column-span -ms-grid-row display |
210px 1fr 1fr 2fr 60px 90px 1fr 4 3 -ms-grid |
#gameSize |
-ms-grid-column -ms-grid-column-span -ms-grid-column-align |
3 3 start |
#stats |
-ms-grid-column -ms-grid-column-align -ms-grid-row display |
4 start 4 -ms-grid |
#score |
-ms-grid-column display |
2 -ms-flexbox |
#gameBoard |
-ms-grid-column -ms-grid-column-span -ms-grid-row -ms-grid-row-span |
2 4 6 1 |
#startStop |
-ms-grid-column -ms-grid-column-span -ms-grid-row-span margin-top margin-right |
1 2 2 20px 20px |
#gameTitle |
-ms-grid-column -ms-grid-row-align |
3 end |
#gameTagline |
-ms-grid-column -ms-grid-column-span -ms-grid-row-align |
3 3 center |
#time |
padding-right width |
30px 90px |
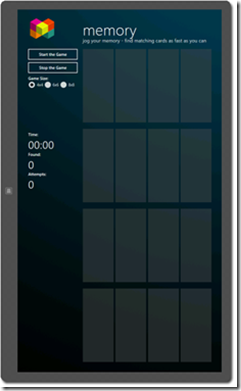
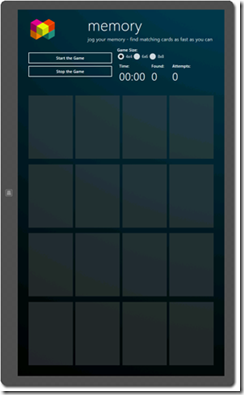
Here is the portrait view before and after after we apply all the styles in portrait view.
Before After
The follow demo will show a few key steps how to support in Portrait view.
You can get the project for this demo here.
Build and Run Project in Blend and Visual Studio
Both Blend and Visual Studio 2012 let you preview your app on your local machine and on a simulator. The advantage of previewing on the local machine is that your app will run more quickly. If you need to test display rotation, different display resolutions, and suitability for touch input, previewing on the simulator provides you with these advantages without having to deploy to one or more physical devices.
Here is a quick demo to show you how to run the application in both Blend and Visual Studio 2012.
This concludes the Windows 8 style Memory Game development using HTML5, CSS3 in Blend and Visual Studio 2012. Hope you enjoy it.


