Publishing Microsoft ActiveSync through IAG 2007 – Part 1 of 2
1. Introduction
Publishing Microsoft ActiveSync through IAG 2007 in theory is pretty straight forward. When I say in theory it is because just following the wizard steps may not be enough. There are some scenarios that require you to make customizations to the configuration after finishing execution of the wizard.
This post will be divided in two parts as follow:
· Part 1: Will explain how to create a Microsoft ActiveSync Trunk and how to customize authentication. We will also use the Windows Mobile 6.1 Professional Emulator to simulate the external Mobile device.
· Part 2: Will explore the most common issues with IAG and ActiveSync, and how to troubleshoot them.
2. Scenario
For the purpose of this guide, IAG 2007 is a standalone server, the mobile device is a Windows Mobile 6.1 device, and the Domain Controller is running Exchange 2007 with active sync enabled for all users.
3. Configuring the ActiveSync Trunk
Open the IAG 2007 Configuration Console and follow the steps below:
1) On the main menu, expand HTTPS Connections, right click on it and choose New Trunk. Select Webmail Trunk as show below:
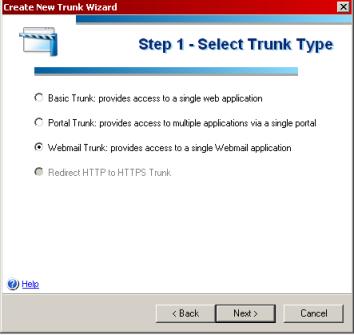
Figure 1 – Selecting the trunk type.
2) Click Next and choose the option Microsoft ActiveSync as show below:
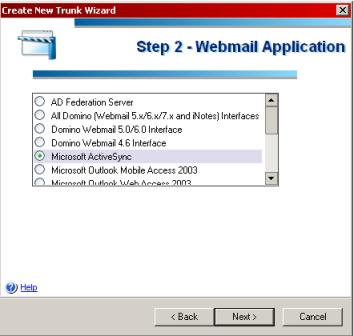
Figure 2 – Choosing the Webmail trunk type.
3) Click Next and type the trunk name, the external IP and the ports that this trunk will listen on, as showed below:
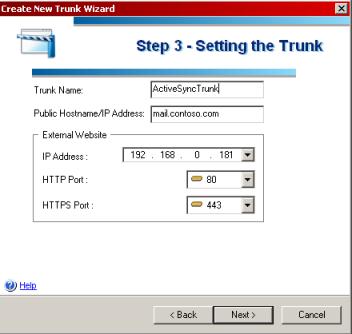
Figure 3 – Trunk information.
4) Click Next and in the “Step 4 Authentication” window you will select the authentication repository. For the purpose of this demo we are using a repository named “AD” which is an Active Directory repository. To select the repository click the Add button and select your repository from the list. There is no need to adjust any of the remaining settings and you can leave the options at their defaults, click Next.
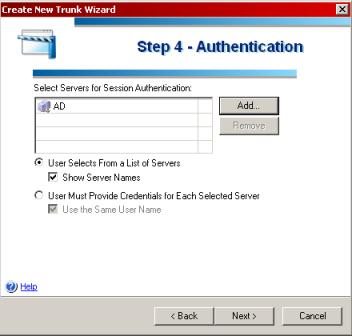
Figure 4 – Selecting the authentication repository.
5) In the next window you should select the certificate that will be used for this trunk. For this demo we are going to use the wildcard certificate *.contoso.com as show below:
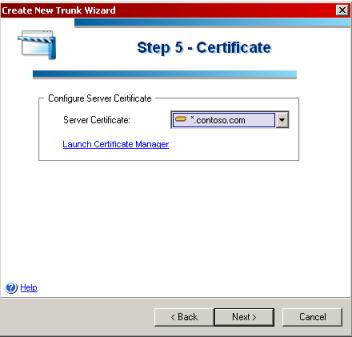
Figure 5 – Certificate selection.
6) Click Next and now you need to type the information about your Exchange Server. The IP address, port number and the hostname are all required. After finishing that click Next to continue.
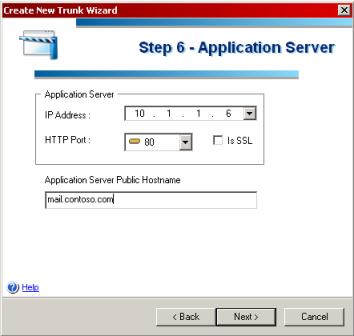
Figure 6 – Certificate selection.
Note: For this purpose of this demo we are going to use HTTP (port 80) to communicate with the Exchange Server, this is to facilitate the troubleshooting we will do in Part 2.
7) Again, you will need to specify which authentication repository you will use so IAG can auto reply to authentication requests that Exchange might send out. We must select the same authentication repository we set earlier to allow the system to negotiate authentication without having to prompt you again for authentication. Click Next.
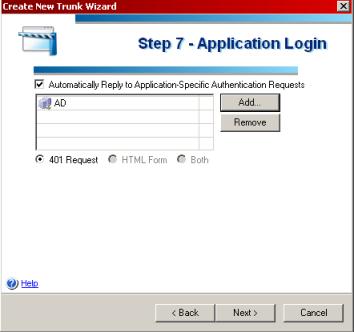
Figure 7 – Authentication repository for auto reply.
8) Click Next, leave the default endpoint policy selected and then click in Finish to conclude the wizard.
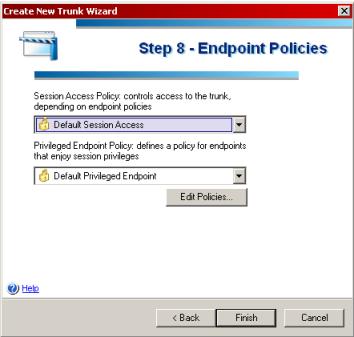
Figure 8 – Endpoint policy Selection.
9) Since the repository name (AD) is not the same as the domain name (CONTOSO) we need to edit the file \Whale-Com\e-Gap\von\InternalSite\ActiveSyncLogin.asp and change the line below:
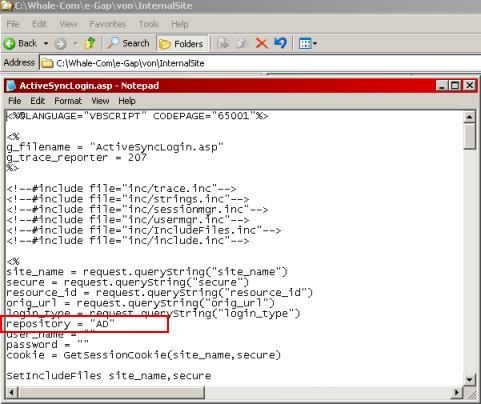
Figure 9 – Customizing the activesynclogin.asp file.
10) After changing that, save the file and close it.
11) In the IAG Configuration Click in File and Activate (or CTRL + G), type your passphrase if it is requested.
12) Click Activate and OK.
4. Testing the Access
Now that this feature is enabled on the IAG, let’s see how it will be presented to the final user. As mentioned before we are going to use the Windows Mobile 6.1 Emulator to simulate the external Mobile device. The exact image that is going to be used in this demo is called Windows Mobile 6 Professional. Here are some briefings about this tool:
- Make sure to bind the application to the network where you are testing access from. Refer to the article Establish Network Connectivity on the Emulator from Microsoft TechNet for more information on this.
- Use the Windows Mobile 6 Emulator help file to configure the IP address, name resolution and Exchange Connectivity. You also can use the tips from this blog post to configure the device.
- To get more experience with this tool you also can practice using the TechNet Virtual Labs for Windows Mobile with Exchange 2007.
After configuring the Windows Mobile Emulator client to access the trunk in Active Sync you can try to synchronize. After synchronize you should see the Windows Mobile window showing the user’s inbox as show the example below:
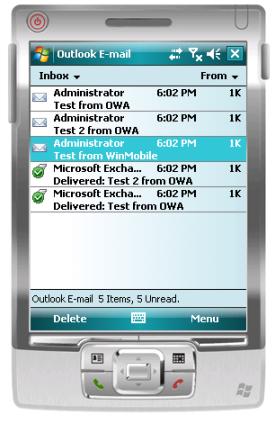
Figure 10 – Windows Mobile Emulator.
5. Conclusion
In the first part of this guide we saw how to create the trunk and use the Windows Mobile Emulator to synchronize from the outside network. The next part of the guide we will explore the most common issues with IAG and ActiveSync and how to troubleshoot them.
Stay tune.
Authors
Yuri Diogenes
Security Support Engineer – ISA/IAG Team
Microsoft – TX
Dan Herzog
Security Support Engineer – IAG Team
Microsoft – WA