Emulators make my development easier because...
When I first jumped into Windows Mobile development back in 2002 our emulator story left a bit to be desired. The request I heard most from developers was “please help me get a Windows Mobile device to start developing this stuff!” Development devices were hard to come by (even within Microsoft). We had this thing called a “Smartphone Developer Kit”… some of you may remember that one. Man, have our development tools and emulators come a LONG WAY. I truly love working with the emulators now and probably do 99% of my development work with them. I’m so impressed, I wanted to share a few of my favorite reasons …
Perhaps the greatest thing about our emulators is that it gives ANY developer a way to start building and testing code without ever having to buy a device. In fact, if you have Visual Studio Pro edition… you can start building windows mobile apps today. No qualifications, no jumping through hoops, no nothing… okay, you may have to download the latest, free mobile SDK off MSDN but the same tool you use for development on every other MS platform is simply extended target Windows Mobile. Use what you already know.... You can think of the emulators as Virtual PC for Windows Mobile. They are full blown OS environments running real versions of the Windows Mobile platforms…minus the device maker modifications you will find on retail devices.
This post isn’t just for newbies. I still run into seasoned mobile developers who tend to overlook what our emulators can do, so I wanted to write a blog post and outline some of my favorite features and reasons I use emulators. So here goes…
Windows Mobile Emulators are the Real Deal. They are not “simulators” or scaled down, make-believe, pseudo-VM environments that get you half way there. They run complete platform code in a true virtual machine with nearly everything you would see on a real device. If you build code and test on the emulator, it should run on a real device. You can also install and run retail Windows Mobile software directly on the emulator. Want to try out some software but don’t want to install it on your personal device? Use an emulator.
Emulators are simple, “clean” devices where you control the security model. I like this because sometimes issues result from memory or security settings on retail devices. Operators may lock down features, connection paths, or additional apps may startup consuming a lot of resources. Emulators are the closest thing to a pure “Microsoft” build you can get… before any device maker customizations occur. You also control security and signing through developer tools so it’s a great environment to get things up and working *first*. It’s also a great environment to compare behaviors if you do encounter production problems… does it happen in a clean environment like the emulator?
Emulators are available for every major platform, display resolution, and form factor. We do this is so you can be sure your application renders itself correctly on all the different devices that are out there without having to buy an arsenal of models to test with. Just fire up the equivalent emulator and see how your application is going to look. If you built with device independence in mind, enjoy your UI in all it’s glory. If not, then spend some time to Adapt Your App. The 2008 LOB Solution Accelerator does a great job with this as well.
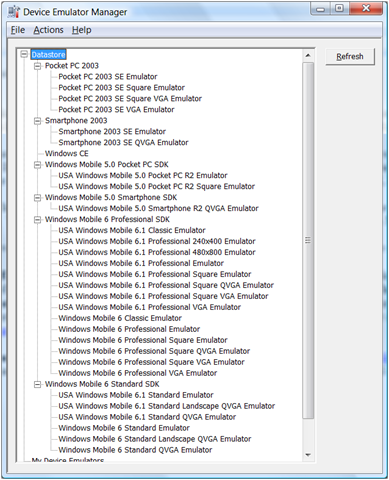
Localized and Stand-Alone Emulators. English not your cup of tea? No problem… just download the localized emulator image that suites you. It’s also easy to overlook that this is a stand-alone emulator install as well. This means your sales or marketing guys can use it to demo software as well without having to install Visual Studio or any other developer tools.
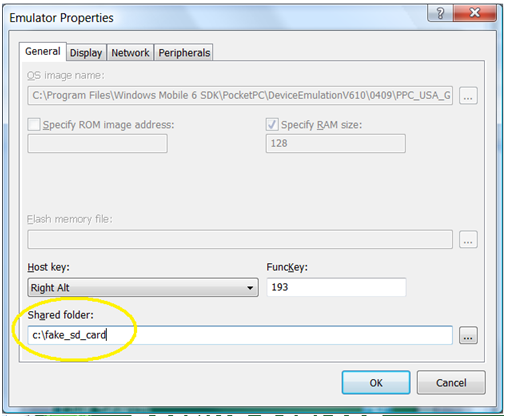
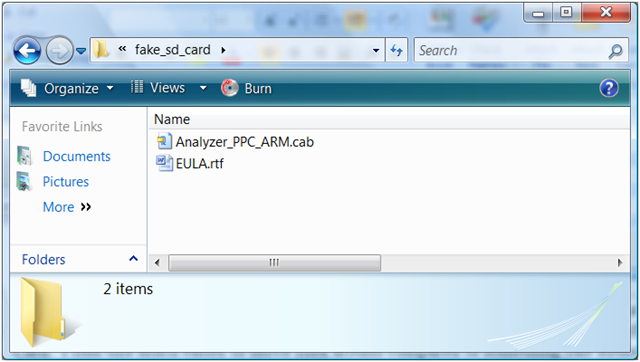
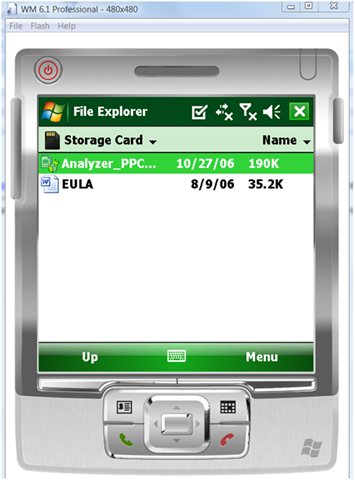
Map your local hard drive as an SD card. This little feature is useful for so many different reasons, I don’t know where to start. Just designate a local directory on your hard drive and it shows up in the emulator as an SD Card. I find this much easier to move files around during developer-- especially compared to something like Remote File Viewer.
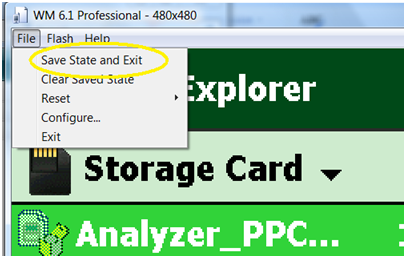
Saved State. This means two things really. #1 is that your emulator loads quickly because you’re not booting the platform inside the virtual machine, rather, instantly loading a machine at a point in time from saved memory. #2 you can start working exactly where you left off. This is great when you are debugging a problem and you want to get everything setup “just right” before you destroy it. Once destroyed, you just restore the emulator state to do it again, and again, to start clean. This is also really handy for demos or debug environments when you require several components deployed as part of your solution—but don’t want to wait to do it every time. For instance, you can grab an old 2003 emulator, install the latest version of NETCF, then save the state so it’s always there. This can save you a huge amount of time in development. The next time you are sitting through a demo and are forced to wait while a bunch of CABs getting deployed, say “Hey! Don’t you know about Save State?”. =)
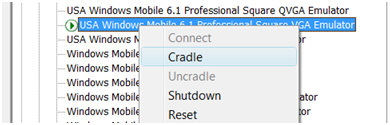
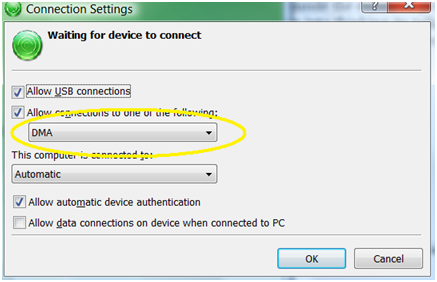
Make your desktop think it’s talking to a real device. You can deploy and debug directly to the emulator from Visual Studio using DMA transport, but what about when you need network connectivity inside the emulator, want to install applications via CeAppMgr, or do RAPI development? You could setup network connectivity via Emulator Properties but it’s kind of a tricky to get working at times and depends on additional network plumbing. The easier method is to simply cradle the emulator with your desktop via ActiveSync or Windows Mobile Device Center. From Device Emulator Manager, just right click on the connected emulator and choose “Cradle” (be sure you have enabled DMA transport inside WMDC or ActiveSync first). When you do this, you fool your desktop into thinking its talking to a real device and add network connectivity to the emulator in the process. Now your emulator can browse the net, support RAPI APIs from the desktop, talk to web services, etc. Sometimes DNS can be a bit picky if you are doing local web development, so if you have trouble talking to something like a Web Service on your desktop, try using the IP address of your desktop and make sure that any web proxy class you generate from Visual Studio (running on the device) uses the desktop IP address.
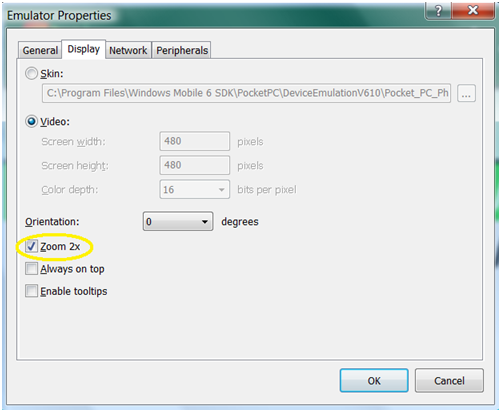
Zoom 2x. My colleague, Mike Fancis, used this at his last session during Tech-Ed and I was suddenly reminded just how cool this was. Some of the resolutions can be hard on the eyes—especially doing presentations or demos, so here’s one-click way to make it MUCH easier to see. I always bump my VS fonts up for presentations, but I always forget how easy THIS is.
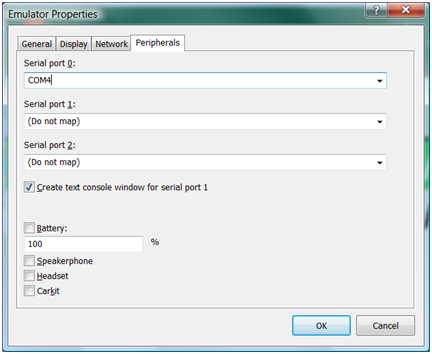
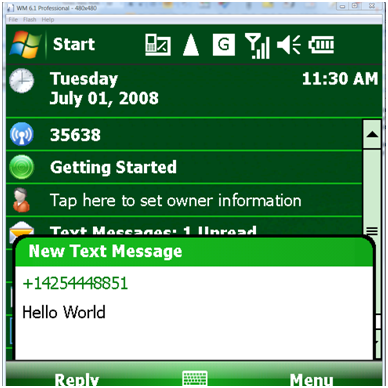
Cellular Emulator. The Peripherals Tab on the emulator Properties dialog could spark a white paper all by itself. You can map COM ports to serial ports on the emulator which opens all kinds of interesting possibilities for simulating emulator communication for peripherals you intend to support. You can also manipulate battery levels, SpeakerPhone, Headset or CarKit profiles. One of the cooler little features we added in the last SDK rev was support for cellular emulation. If you fire up the Cellular Emulator application that is included in the WM6 SDK, you see options to initiate phone calls, send SMS messages, change network status, etc. This is a handy way to test things if you are working on phone integration apps, SMS apps, or just plugging into State & Notification broker to detect network states from your app. I wrote a whitepaper to show how to do this using a fake RIL (radio interface layer) several years ago (before we had this tool) and this is just SO MUCH BETTER.
To get the cellular emulator working, just start the app and note the COM port that is displayed in the lower left hand corner. Now supply this COM port in the emulator properties on the peripherals tab for Serial Port 0. If the COM port does not show up in the drop-down list (mine never does), just type it in manually. Now reset the emulator...and presto!

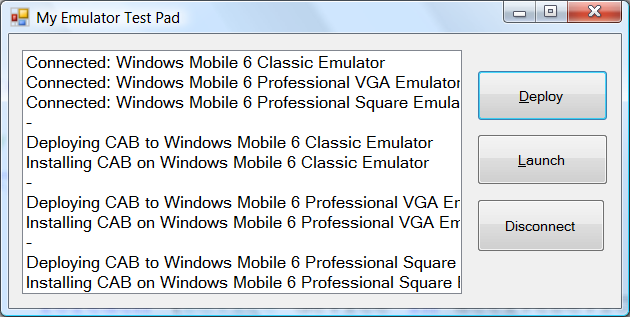
The emulators are at your command (really). Visual Studio 2008 added one more amazing developer “goodie”by exposing all the same APIs used to control the emulators from the IDE. This means that once an emulator is installed into your development environment, you could then write your own code to take advantage of it—connecting, deploying software, starting up apps, etc. This enables some interesting test and automation scenarios. For example, you might write a test app to quickly launch your software in all the different display resolutions using several emulators (to quickly see how it looks), or automate test phases at night where your app is deployed and started along with Hopper to run MTTF tests. We now provide a both native and .NET libraries (Microsoft.SmartDevice.Connectivity) so build your own tools or even do some PowerShell to kick things off. I demo’d a little managed app to show how to connect, deploy CABs, and start apps during Tech-Ed that I attached to this post for download. Check it out...
I could go on… there are just so many cool things you can do via the emulators now. They may just be the best tool in your bag of developer tricks. I’d love to see you guys post some of your favorite emulator tricks as well.
Cheers,
Reed