Managing your email with Hotmail
Plenty has been written about how to keep control of email. Or at least, to try to keep on top of the seemingly ever-increasing tidal-wave of email that hits us every day. There is certainly no shortage of advice of how to do so, and it wouldn’t surprise me if there’s an email newsletter with tips on how to reduce email…well, let’s hope I’m wrong on that one.
I have previously blogged about some of the features built-in to Hotmail that really do help you keep in control of your email, and particularly in control of greymail, those newsletters that you probably signed up to ages ago but are proving less useful these days as your inbox takes a battering.
But I thought it worth sharing a couple of techniques I use in Hotmail to help keep on top of things. In this case, handling those tricky situations where you receive an email that you do need to act upon but can’t do so right now. You might, for example, receive an email that requires you to do a bit of research or ask someone a question before you can reply to it. Or you just might not have time to deal with it right at the moment but know you need to come back to it.
One easy solution is to flag it – as I have blogged previously, if you flag an email on Hotmail it will stick right at the top of your inbox making it pretty much impossible to miss (or lose). Depending on the volume of email you receive this might be the answer. But here’s another approach you might want to try out.
Step 1 – Create a category called “Read later”
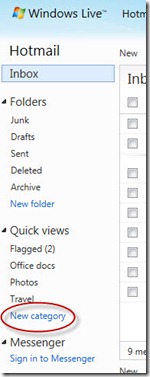
How? There are a few ways to do it, the easiest is to click on “New Category” under “Quick Views” in the left-hand pane of Hotmail:
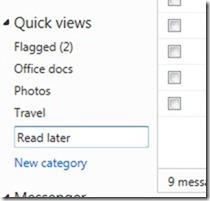
Then just type in the category name of “Read later” inline and press return:
Step 2 – Create an Instant Action
Instant Actions appear right next to each email item in your email and, with one click, can perform an action on the email. You can customise the actions which is what we’re going to do here.
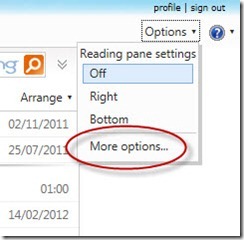
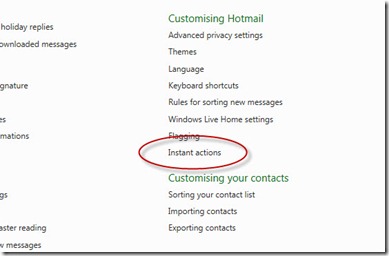
Start by clicking on Options at the top right, then “More Options”, then “Instant Actions”:
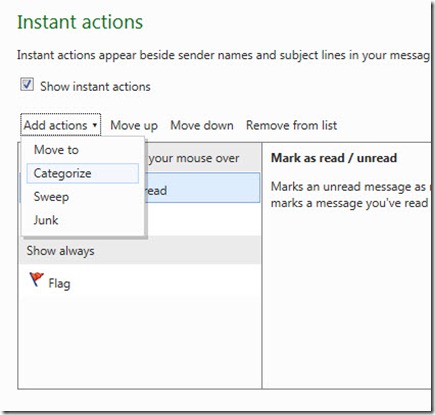
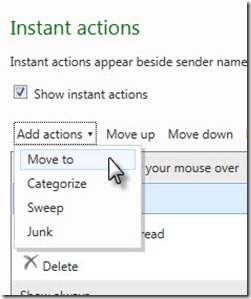
Then click on the “Add actions” dropdown, and click “Categorize”:
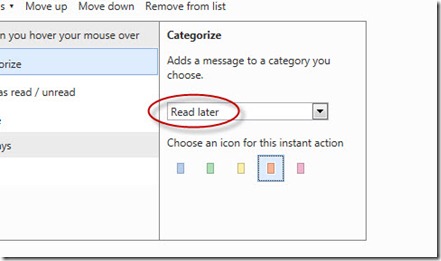
From the dropdown box choose the “Read later” category that you set up later. You can choose a colour for the icon too if you would like to, I chose red this time:
Click the “Save” button at the bottom and you’re done.
Step 3 – Give it a try
Time to head back to your inbox and try it out. As you move your mouse over items in your inbox the instant actions will appear. Click on the little rectangle and the message will be instantly categorised as “Read later”:
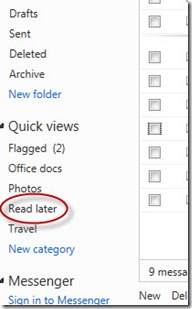
Click on the “Read later” Quick View on the left of your screen at any time to see a list of emails to read later:
You’ll see all of your emails that have been categorised as “Read later”. If you select the Instant Action now it will remove it from the category, so once you’ve dealt with it there is just a single click needed to remove it from your “Read later” list. But of course it’s still in your inbox if you need it.
Optional Step 4 – Set a daily reminder
If you feel like it you can set a reminder to check your “Read later” items every day. Maybe first thing in the morning when you have some energy :-)
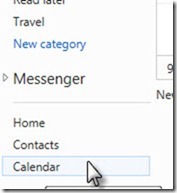
Click on “Calendar” at the bottom left of your screen:
…and double-click on tomorrow’s date to set up a recurring appointment for 9am every day.
Or do it differently if you prefer
You might prefer to actually remove items from your inbox to a “Read later” folder, instead of just categorising them. If so, create a new folder called “Read later”, when you’re setting up the Instant Action just make it a “Move to” action instead and choose to move to your “Read later” folder. Doing it this way means the item doesn’t clog up your inbox in the interim.
Once you have set this up it makes it really quick to process email and feel good about not losing track of things you need to follow up.
