Host your existing WordPress Blog on Windows Azure
You have a self-hosted WordPress blog and you want to move it to the Azure Platform? Have your WP site benefit from the reliable, enterprise grade infrastructure that Windows Azure offers to securely host web sites with high availability by default. Moving a WordPress site to Azure can't be any easier or faster. The whole process can take 15 minutes. Here are the steps taken in order to migrate a self-hosted WordPress site from a hosting account to Windows Azure:
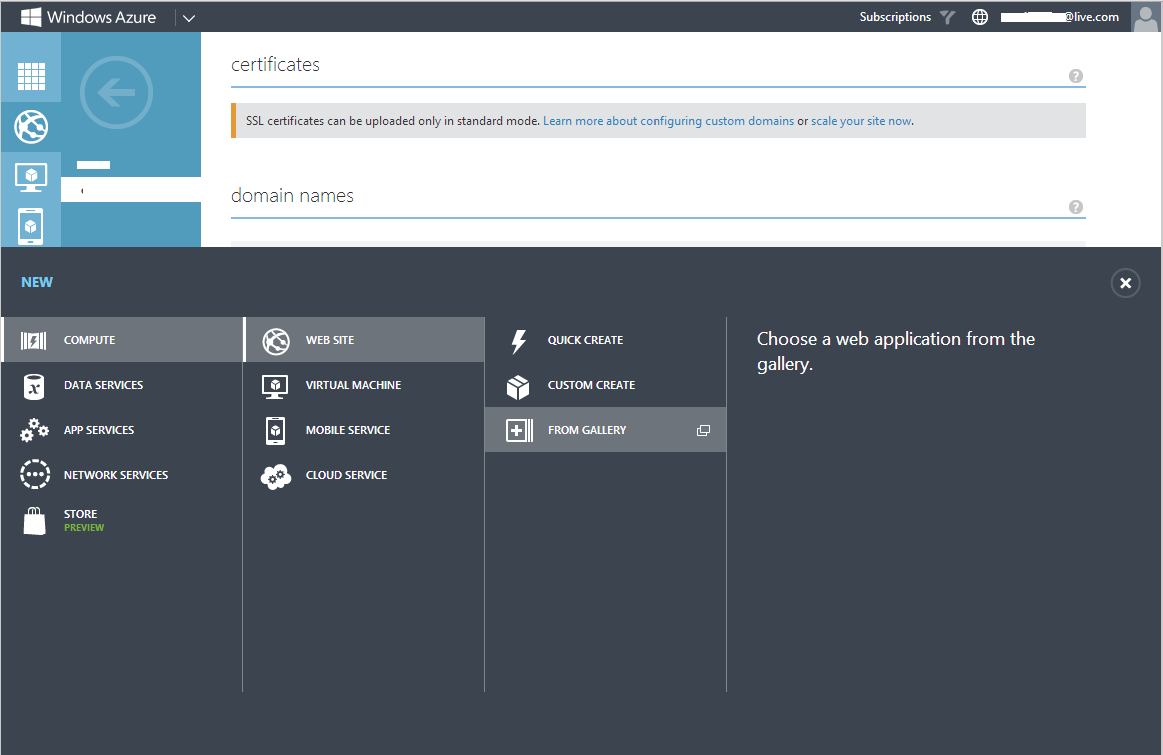
Create a new website on Windows Azure: The Windows Azure website gallery makes available a wide range of popular web applications developed by Microsoft, third party companies, and open source software initiatives, among which you can find WordPress. Web applications created from the gallery do not require installation of any software other than the browser used to connect to the Windows Azure Management Portal . In order to create a new WP site from the gallery, Click the " + New" button at the bottom of the page and from the dialog that appears select Compute | WEB SITE | FROM GALLERY, as the following screenshot shows:
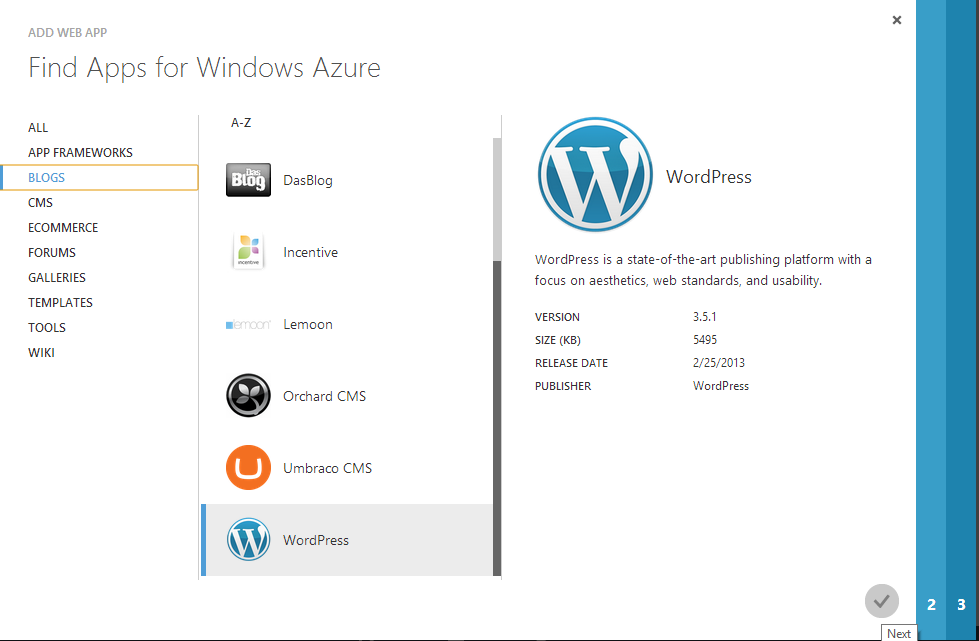
Then follow the wizard steps:Select WordPress From Gallery:
- Navigate to BLOGS
- Scroll through the list to find WordPress, alternatively you scroll through all the list of Apps to find WordPress if ALL was selected. The following screenshot shows the process:
Configure Your App:
- Enter a unique name for the site URL
- Choose to Create a new MYSQL database
- Select the REGION (aim for the one that is closest to you for better performance)
- Click the right arrow to proceed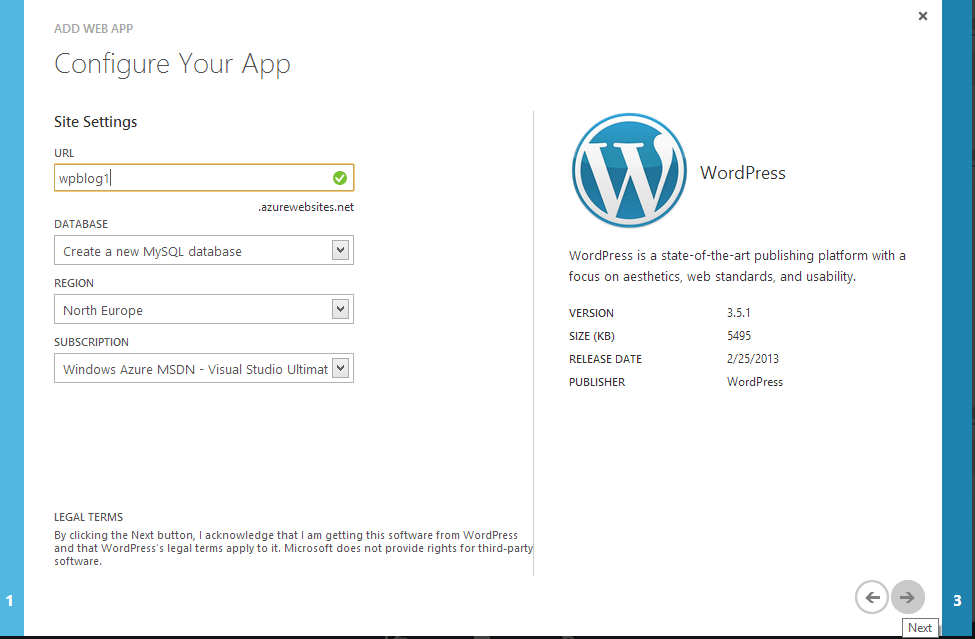
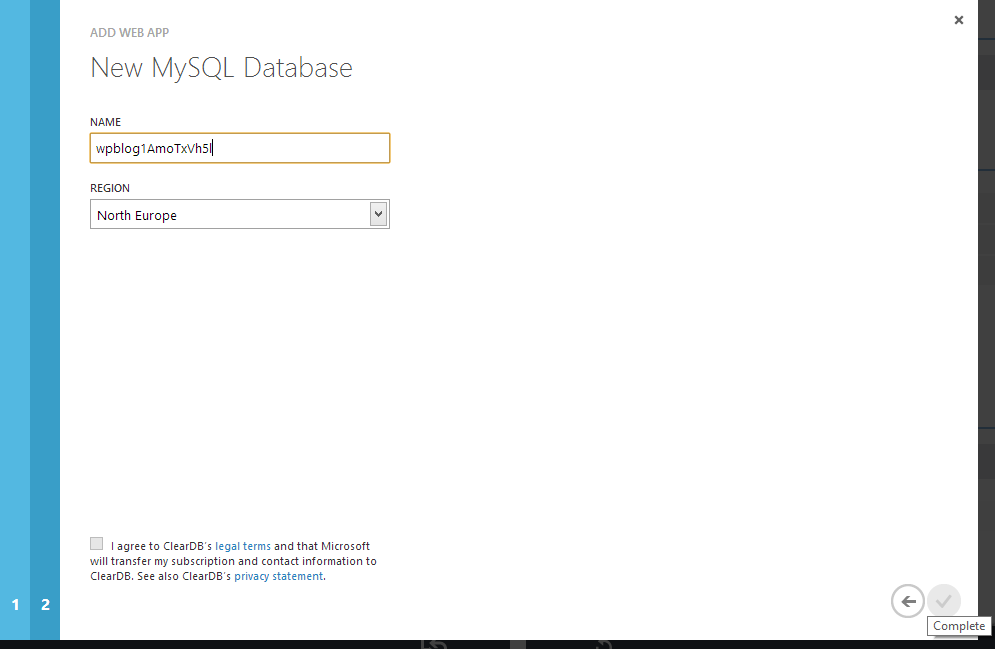
Create a new MYSQL Database: The NAME textbox will be populated with an auto-generated name, you can choose to keep the default name or specify a custom name. Region will be selected depending on your choice for the region in the previous step. - Select the box at the bottom to agree to ClearDB's usage terms for your hosted MySQL database. Then click the check to complete the process.
Setup the newly created WordPress site: After completing the wizard. You can navigate to the website using the website URL: xxxx.azurewebsites.net and you will be automatically directed to the WordPress Setup page. That's where you can enter the Blog name and admin username and password.
Install all existing plugins you have on your current WordPress site: Once done with the setup, you will be directed to the login page. From there, login to the admin interface and make sure you install and activate all the plugins you already have on your current blog.
Export all your posts from your current blog (xml file): Now go to your current blog and export your content (using the Tools | Export) from the left menu. This process will export your content including all posts to an xml file.
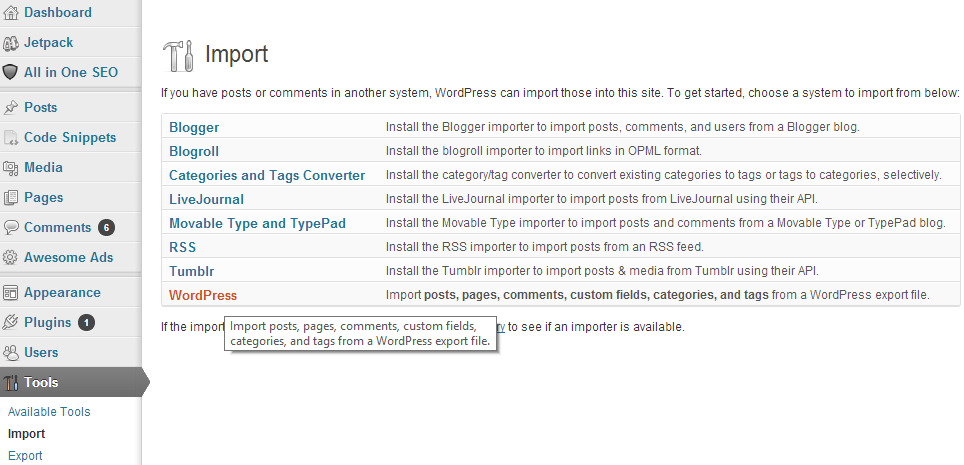
Import the exported content (.xml file) into your newly created WordPress site: Go to your newly created site and go to Tools | Import and import the xml file that you have exported. The following screenshot shows the process:
Install and setup the current theme of your current WP site (optional): This step is optional but I think its a good practice so that when you switch to new site and you go live, everything will resume smoothly with no interuptions. Go to Appearance | Themes install and activate the Theme of your choice.
Double check your new WP site for any errors or bugs: Go through your newly created blog and check that everything is working fine.
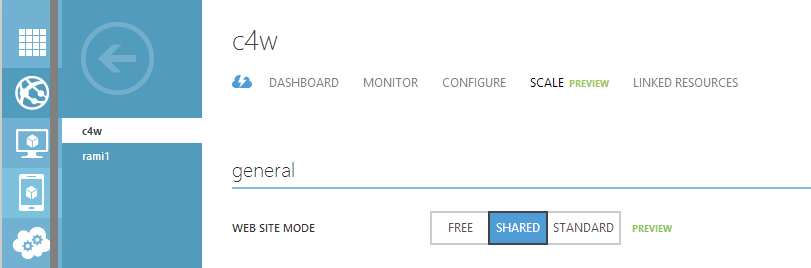
Adding your custom domain (for example: code4word.com): The website we created is hosted under the "azurewebsites.net" domain and in order to host our website under a custom domain we will need to upgrade the website to the Shared or Standard mode service tiers. The steps involved in setting up the custom domain include:
1.) Scale the web site on Windows Azure for shared or standard mode as the following screenshot shows:
 2.) Configure the CNAME record: Go to your domain registrar and from there point the custom domain names (CName/Alias) to your Windows Azure web sites. Windows Azure must verify that you are authorized to configure the custom domain name to point to your Windows Azure web site.
To verify authorization, Go to your domain name account create a CNAME resource record with your DNS provider that points from either www.yourdomain.com to xxx.azurewebsites.net, or from awverify.www.yourdomain.com to awverify.xxx.azurewebsites.net.
Change the A Record so that it points to your Public IP address: Either delete the existing A Record that has the alias "@" and points to the IP address of your previous hosting account and create a new "A" Record with the same alias "@" to replace the old one but make it point to your new website's Public IP address as specified in you website configuration on Azure portal.
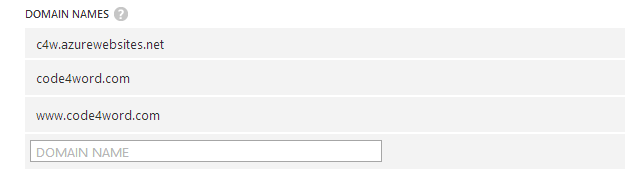
Set the domain name in the Windows Azure management portal: Go to Configure and scroll to domain names and click manage domains. From there, add your domain name (for example here, code4word.com). Windows Azure will check for the validity of this domain name by checking for the CName Record you created earlier.
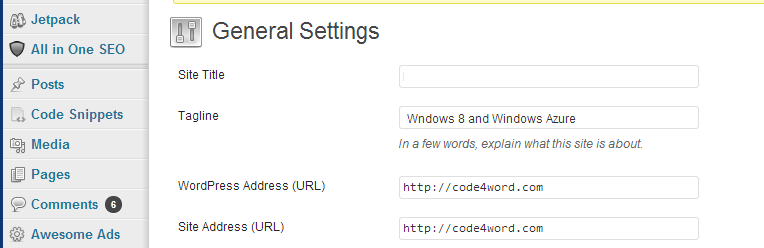
Change the WordPress URL in your new website: The final step is to make the WordPress site, listen and respond to your custom domain. In order to achieve that,go to your new WordPress site and login to your admin account and from the left menu click “Settings” and then “General”. There you have two entries the Site Url and the WordPress URL. Change both to listen to your custom domain as the following screenshot shows:
And that's it! We are done, your WordPress blog is now hosted on Windows Azure. Congratulations!