Bring your Custom JSON data to Log Analytics (OMS) with Twitter Data Example
SUMMARY: Learn how to use custom JSON data with OMS Log Analytics. This post uses Twitter data for a step by step example.
Hello Anurag Gupta here, we recently released the OMS Agent for Linux v1.1.0-217 that includes a host of new features including CollectD metrics, and Ubuntu 16.04 LTS support. In addition to these features, I am proud to announce we also now allow you to send arbitrary JSON data through the OMS Agent for Linux to be dynamically indexed in the powerful Log Analytics (OMS) platform.
This JSON data can range from the output of an arbitrary script such as `curl` or one of FluentD’s 300+ plugins.
Note: The JSON data that is being sent up to Log Analytics (OMS) must have a single level. Nested JSON is parsed as a single field. The OMS Agent for Linux also includes a Flatten Filter that allows you to pivot off a particular Key using a Ruby query.
This blog post goes over two scenarios:
- Using the `curl` command to get an HTTP Response every 30 seconds
- Sending data from the FluentD Twitter plugin.
Setup
For this blog I am using a Red Hat Enterprise Linux 7 Server running in Azure, but feel free to use any of the supported Linux OSes in Operations Management Suite. I have already onboarded this server to my Operations Management Suite workspace with the latest 1.1.0-217 Agent.
Configuring the OMS Agent for Linux to send arbitrary JSON is extremely simple. Once the OMS Agent for Linux is onboarded you can simply add an `oms.api` prefix to you required Data source and then route it through the `out_oms_api` output plugin – detailed here.
Example curl scenario
In this use case I am going to run a simple curl script on my web host every 30 seconds and ensure that I am receiving correct output. For this configuration I use FluentD’s native `in_exec` input plugin and run the following curl command: `curl MYWEBHOST`. This returns a simple json output of {“Heartbeat”: “Yes”}
- First I’ll first create a new configuration file under the following:
/etc/opt/microsoft/omsagent/conf/omsagent.d/ called output-json.conf
- Second, inside
output-json.confI’ll specify the exec plugin along with the output plugin. The contents of the file appear here:
output-json.conf <source>type execcommand 'curl localhost/json.output'format jsontag oms.api.httpresponserun_interval 30s</source><match oms.api.httpresponse>type out_oms_apilog_level infobuffer_chunk_limit 5mbuffer_type filebuffer_path /var/opt/microsoft/omsagent/state/out_oms_api_httpresponse*.bufferbuffer_queue_limit 10flush_interval 20sretry_limit 10retry_wait 30s</match>
- Third, I’ve specified the curl command to run every 30 seconds with the tag
oms.api.httpresponse.
NOTE: I have made the match tag and buffer_path similar as to not interfere with other plugins e.g. My Twitter plugin
- The fourth and last thing I do is that once I complete the above steps I restart the OMS Agent for Linux. Within 5-10 minutes the data should begin to flow into my OMS Workspace
Example two: Using a FluentD Plugin - Twitter
As most of FluentD’s plugins natively output in JSON, this allows us to easily one of the 300+ plugins and start collecting data. For the following example I’ll set up the Twitter FluentD plugin to stream Tweets containing the text `Microsoft`
Requirements:
- A Twitter Dev Account - more details can be found here
Steps:
- Install the pre-requisites for the Twitter FluentD plugin:
-
sudo yum -y install gcc gcc-c++ openssl-devel libcurl libcurl-devel
-
- Install the gems required for the Twitter FluentD plugin
sudo /opt/microsoft/omsagent/ruby/bin/fluent-gem install eventmachinesudo /opt/microsoft/omsagent/ruby/bin/fluent-gem install rubysl-nkf
- Install the Twitter FluentD plugin
sudo /opt/microsoft/omsagent/ruby/bin/fluent-gem install fluent-plugin-twitter
- Once this is installed I’ll add the following configuration to the following:
/etc/opt/microsoft/omsagent/conf/omsagent.d/twitter-oms.conf
twitter-oms.conf <source>type twitterconsumer_key XXXXXXXXXconsumer_secret XXXXXXXXXoauth_token XXXXXXXXXoauth_token_secret XXXXXXXXXtag oms.api.fluentdtwittertimeline samplingkeyword Microsoftoutput_format flat</source>
<match oms.api.fluentdtwitter>type out_oms_apilog_level info
buffer_chunk_limit 5mbuffer_type filebuffer_path /var/opt/microsoft/omsagent/state/out_oms_fluentdtwitter*.bufferbuffer_queue_limit 10flush_interval 20sretry_limit 10retry_wait 30s</match>
- Now that the plugin has been installed, configuration is set - I’ll restart the OMS Agent for Linux. To ensure that the plugin has been loaded correctly I’ll take a quick look at the log file
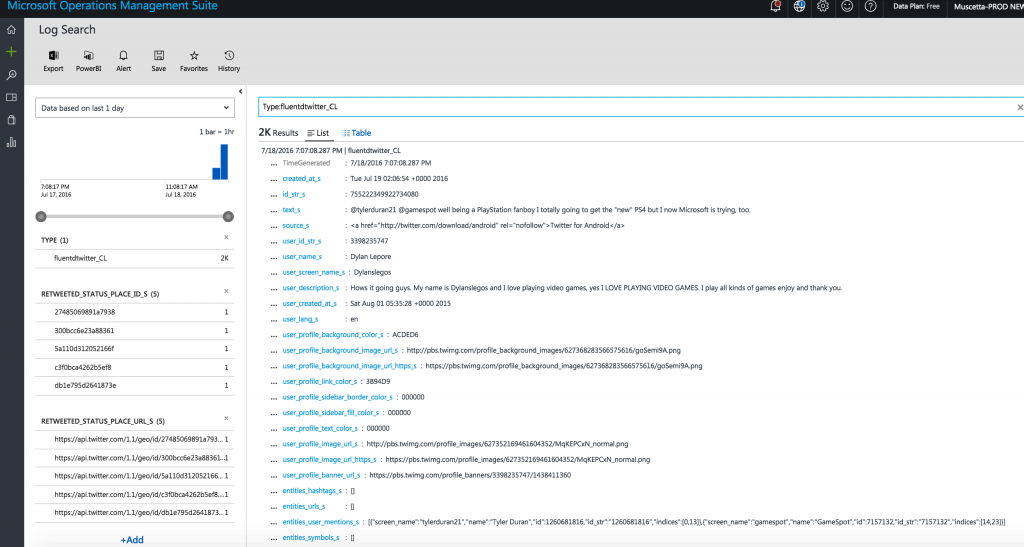
/var/opt/microsoft/omsagent/log/omsagent.log. In the following log I can see the following message pop up that the plugin has been loaded correctly and that the data has begun to stream. - Let’s view the Twitter data in Log Analytics. As we used the tag oms.api.fluentdtwitter, we’ll search by
Type:fluentdtwitter_CL- and after a few minutes we should see the data in Log Analytics
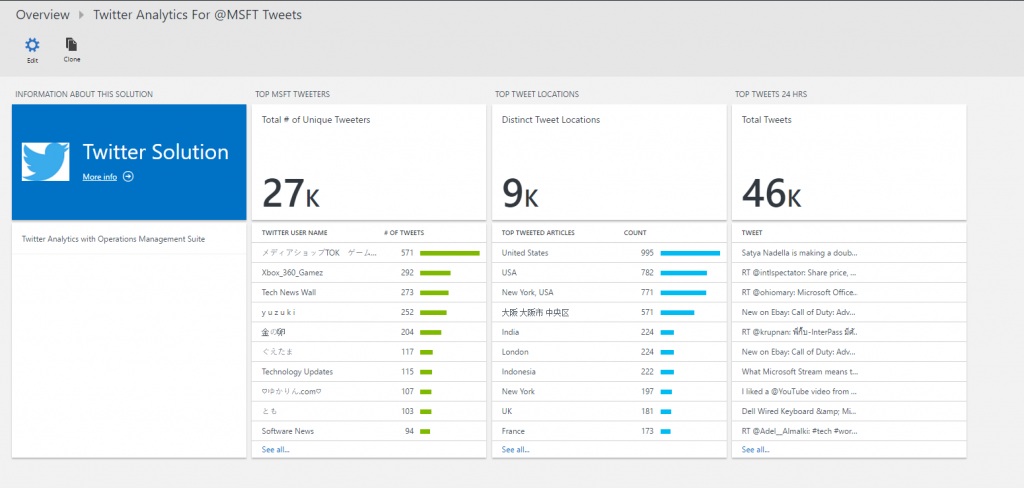
Bonus: Building Custom Views on top of Twitter
As an added bonus let’s create a custom view such that our application engineers can see tweets of the product alongside infrastructure and application metrics.
If you are not familiar with the View Designer definitely watch the following video to get acquainted with its power.
Thank you for reading the following blog - I hope you are now versed in bringing your Tweets and all other custom data into the Powerful Log Analytics (OMS) platform. Be sure to follow me on Twitter at @Agup007 or email me at anugup@microsoft.com if you have any questions. Until next time. If you would like to get a free demo version of OMS, you can do so from here.
Anurag Gupta
Program Manager, OMS Team