Part 1: Working with Office 365 Groups and Connectors
Editor’s note: The following post was written by Windows Development MVP Toni Pohl as part of our Technical Tuesday series with support from his technical editor, Office Development and Office Servers and Services MVP Stephane Eyskens.
Office 365 Groups has taken collaboration to the next level; through it, teams can share data and information and also easily view external data sources.
This article is about data integration and shows how to send data in Office 365 groups from any other external system. There are many use cases for such a scenario, such as batch jobs and scripts, in-house systems as CRM or Enterprise Resource Systems, or even public services as Bing, Twitter, Trello, Wunderlist and more.
This is part 1 of a 3-part article series.
A brief history of Office 365 Groups
In the past, we were used to working with various applications, each designed to solve specific tasks, and each used and administered independently.
If you wanted to provision a platform for a support team (for example) to work on a project in Office 365, there were a series of steps to fulfil for the IT personnel:
An administrator needed to create a new team site in SharePoint Online, set permissions for that web, create a distribution list for the team, assign members and needed to inform the users about how to access the project site.
Such a classic, yet involved, scenario can be challenging for users and administrators and is often guided by an internal workflow in order to accomplish all the necessary steps.
Well, of course all of this is all still in place today. But now, we have more and better options to simplify such scenarios. The requirements to have self-service tasks for users are growing and people need easier ways to collaborate with their teams
What are Office 365 groups?
Office 365 groups are based in the Azure Active Directory; they are born in the cloud and can be thought of as being like an umbrella, covering all the Office 365 services. Through these groups, Microsoft has created a management layer on top of the different Office 365 services, such as Office, Exchange, SharePoint, Skype, Yammer, Planner and others.
Today, in Office 365 we have Security Groups, Distribution Groups, Dynamic Groups and Office 365 groups, and each one of these groups fulfils a specific need. Basically, an Office 365 group creates a SharePoint site and an Exchange mailbox, providing all the necessary options for team collaboration.
All actions that take place in an Office 365 group also trigger an action in the Microsoft Graph, from which relevant analytics are generated automatically.
The following graphics shows an overview of the Office 365 services which integrate Office 365 groups. Currently, not all services fully support the new groups, but that’s coming in near future. 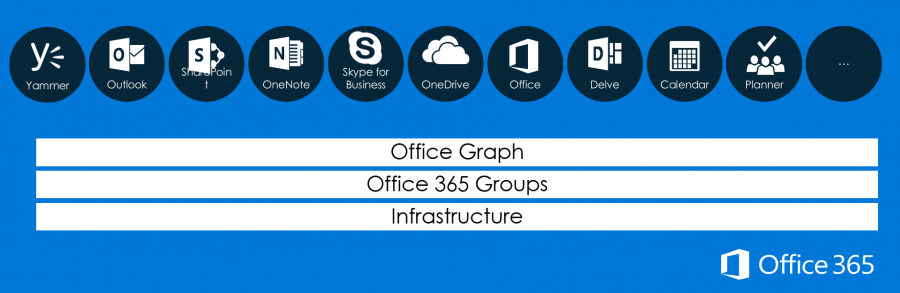
Office 365 groups only exist in Office 365. They can partly be used in on premises installations, but do not have the full functionality of Online Services.
Simplified Collaboration
The scenario described above is now entirely delegated to end users. Anyone can create a new Office 365 group and add members. All necessary tasks are automatically fulfilled for the user within seconds. Moreover, the owner of each Office 365 group can manage his or her group without the need of involving an admin.
Each group can be reached by an email, has a SharePoint site for documents, allows all members to access the group and also provides chat facilities, a OneNote notebook, and a shared calendar. For Administrators, there are Policies, PowerShell Commandlets and the Microsoft Graph API to assist in managing the group. That’s a huge benefit for the whole workflow and a team scan start instantly using the Office 365 group.
An Office 365 group can be added anytime by any user in Outlook 2016 or in Outlook for the web - and a wizard leads the group creator through all the necessary steps.
In this sample, Alan Steiner creates a new public group named “support” in Outlook for the web (https://outlook.office365.com). 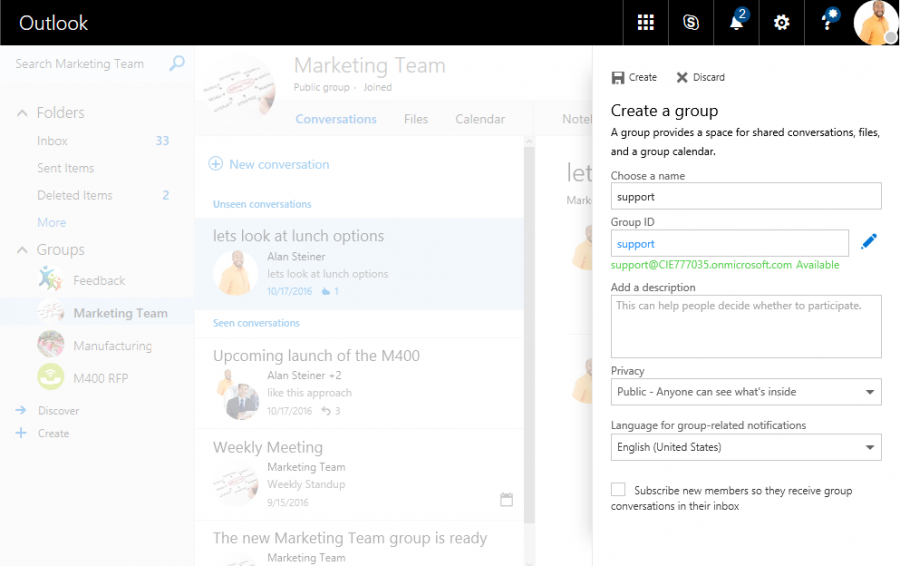
What are Connectors?
Our scenario
In our sample, we have a support group where customers report issues with a product or service. We simply use “Office365” as our company’s product.
There are multiple data sources we want to offer: Our customers can send an email to the group or send feedback from a form on our company’s website. Additionally, we are interested in getting feedback about our service from a blog and from Social Media.
What’s more, we want to see if tasks from a ticket system are created and we also have jobs running, where the support team needs to be informed about the success of the daily jobs within the Office 365 group. So, here’s a list of requirements:
- Emails to support group
- Integrate articles from a blog about our product
- Integrate tweets about our product from Twitter
- Task assignments for our product shall be visible in the group
- If a backup job fails, the support group shall be informed
- We want to integrate Office 365 Connectors in our own applications
Let’s have a look into the mechanics and start to implement these features in the support group.
The concept
Any member of an Office 365 group can add a connector (if not forbidden by the administrator). There are about 60 ready-to-use connectors for public services such as Bing, Trello, Twitter, Wunderlist and more. Additionally, there are custom connectors to use with your own applications.
First, we are going use the ready-to-use (or built-in) connectors.
An Office 365 group provides an endpoint for external services. The data is sent to that endpoint with a HTTP POST request. For security, most of the ready-to-use connectors need authorization from the user who configures the connector. For custom connectors, there’s an endpoint with a unique ID created. We will see that later in this article.
Working with Connectors
As mentioned above, any member of an Office 365 group can add a connector. There are some simple rules: If a user adds a connector, he’s the owner of that connector. This means:
- Only the owner can configure and modify his connector.
- Other users can see the connector and the configuration, but cannot change the configuration. Of course, passwords are not shown.
- Other users can delete a connector, even if the connector was not created by themselves.
- These rules also apply to Administrators.
- Administrators can restrict that users add connectors, per group or for the whole Office 365 tenant.
- The same connector can be added multiple times in a group. For example, user A adds a connector for Twitter following hashtag A and user B adds another connector for Twitter following hashtag B.
Adding a Connector
Connectors can be added in Outlook 2016 and in Outlook for the web through the “Connectors” menu. 
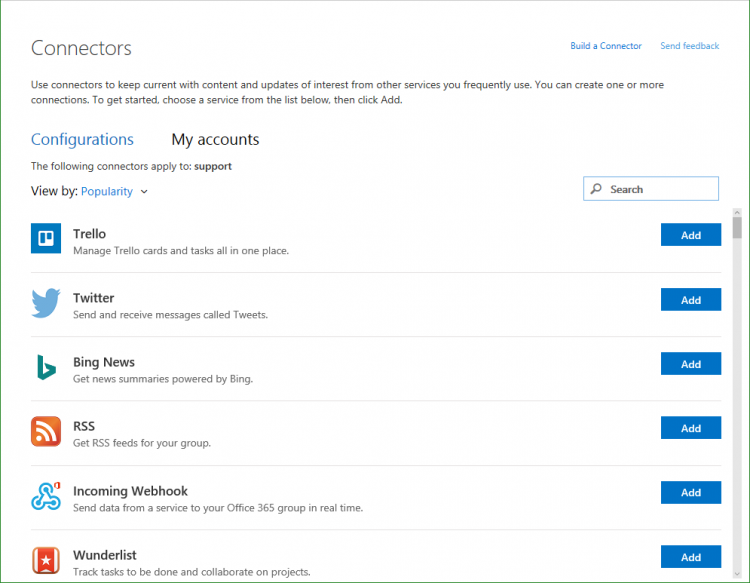
By clicking “Add”, the selected connector will be added to the current Office 365 group. Most of the connectors require an authentication in the app for sending data to the connector. For example, if you want to add a connector for Wunderlist, you need to have an account for Wunderlist. A configuration wizard let you connect to your service, simply follow that steps to finish the configuration. For custom connectors, the endpoint URL is the key to send data to a group.
Emails
For sending an email to an Office 365 group, there’s no connector needed. Go to the “settings” menu and open “Edit group” to change any group properties. Just, if you want the group be mail enabled from outside your organization, the owner needs to set the corresponding flag “Let people outside the organization email the group” in the group settings as shown here. 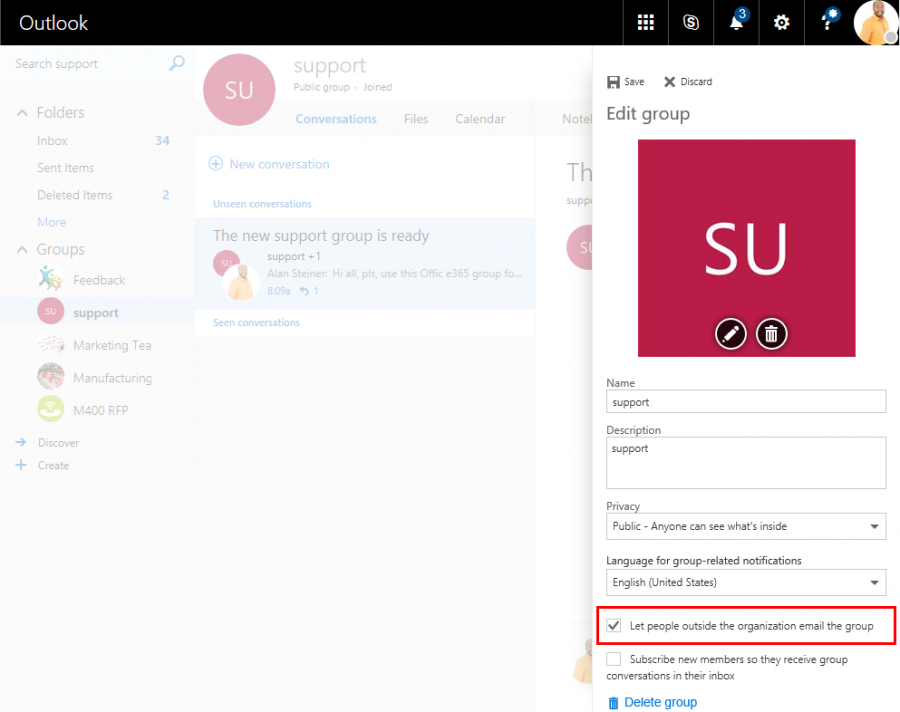
The email integration is described here for completeness. By default, the Office 365 tenant domain name *. onmicrosoft.com is used. To change that, an administrator needs to execute the Commandlet for the group as here:
Set-UnifiedGroup "support" -PrimarySmtpAddress support@contoso.com
Find all parameters of that command at https://technet.microsoft.com/en-us/library/mt238274(v=exchg.160).aspx .
In this case, we’re done without any connector. Every email sent to that group shows up in the conversation automatically.
Integrate an RSS feed - using an anonymous connector.
If data is provided publicly, it can be consumed without authentication (an RSS feed connector, for example).
In our scenario, we add the RSS feed from the Office 365 blog. We just need the URL which is https://blogs.office.com/feed/ and add this to the RSS connector. 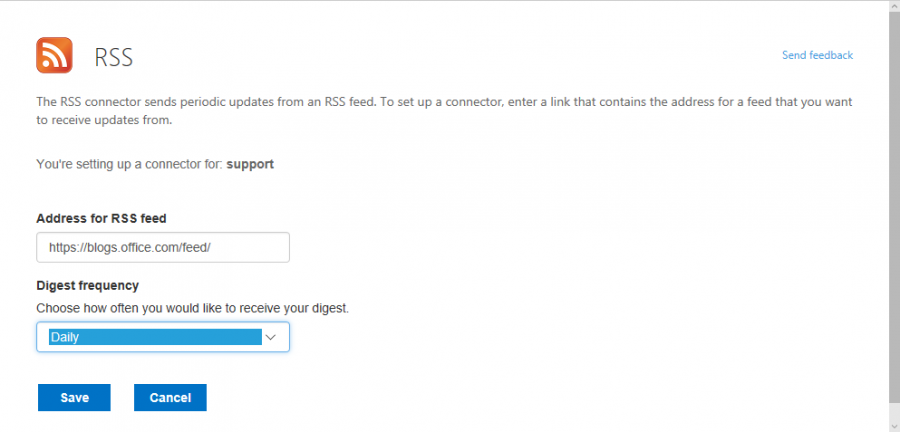
From now on, each new article will be sent from the connector into our support group. All members will see corresponding news. If there are many blog posts, the connector combines multiple articles into one post.
The Twitter connector
The user needs to authenticate and allow the Twitter app to send data to the connector. The user must give permission to the Connector, via logging into the app.
Once this is done, you can configure it to follow users and/or hashtags, or both with the connector. 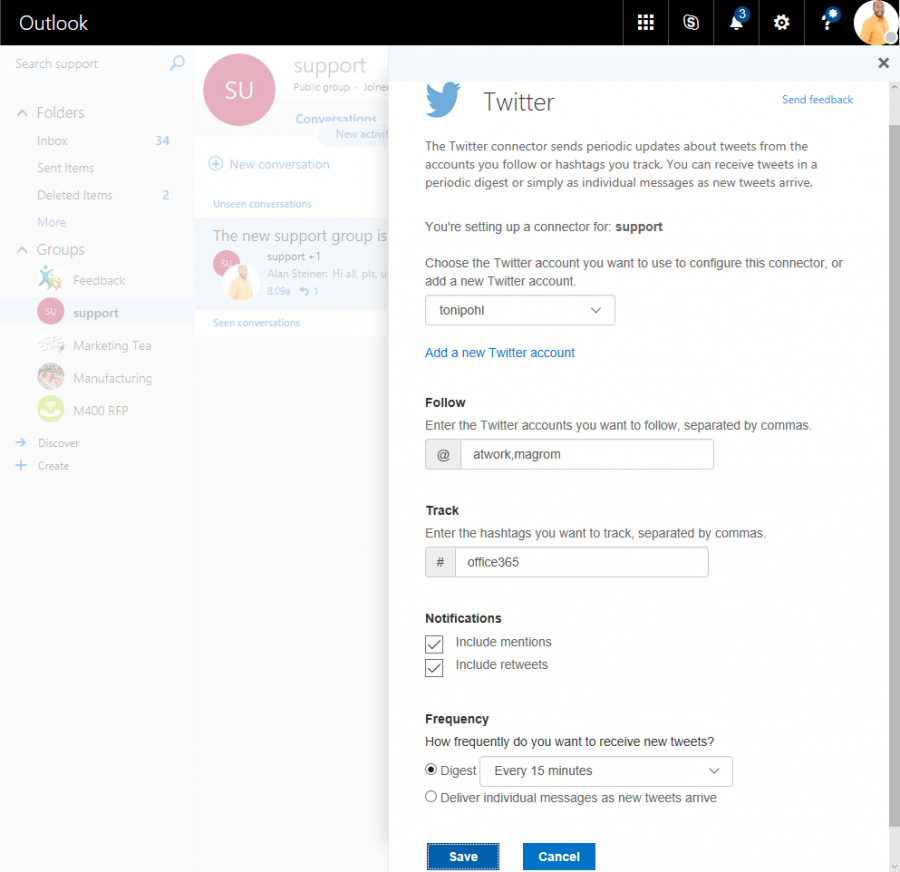
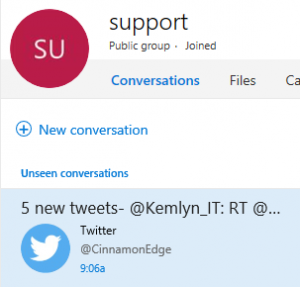
Each tweet, including the hashtag #Office365, will be sent to the connector that transfers it combined into our support group. Easy and without the need of developing any interface.
Credentials
The group stores the credentials of the user to access the data from the source application. The owner can manage his credentials in the credentials menu anytime. This is important to know, if the login was changed or if the user wants to delete his credentials or use other login data. Additionally, a user does not need to authenticate more than once for each app using a connector. 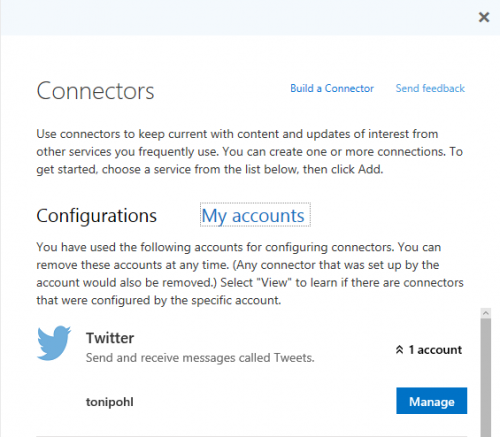
By clicking “Manage”, the user can remove his credentials and re-authenticate with another login. If a user adds more than one connector for the same app, the stored credentials are used automatically.
If you don’t feel comfortable about the fact that your credentials are stored, you might consider using “service accounts.” For instance, you can create a dedicated account only to be used by the Twitter Connector.
Confirmation
Every connector configuration added is shown in the conversation list, so that other group members see who added additional data sources to the group.
Also, the “Connectors” menu shows the configured connectors and allows to reconfigure them (for the owner of the connector) or remove them (by any member of that group). 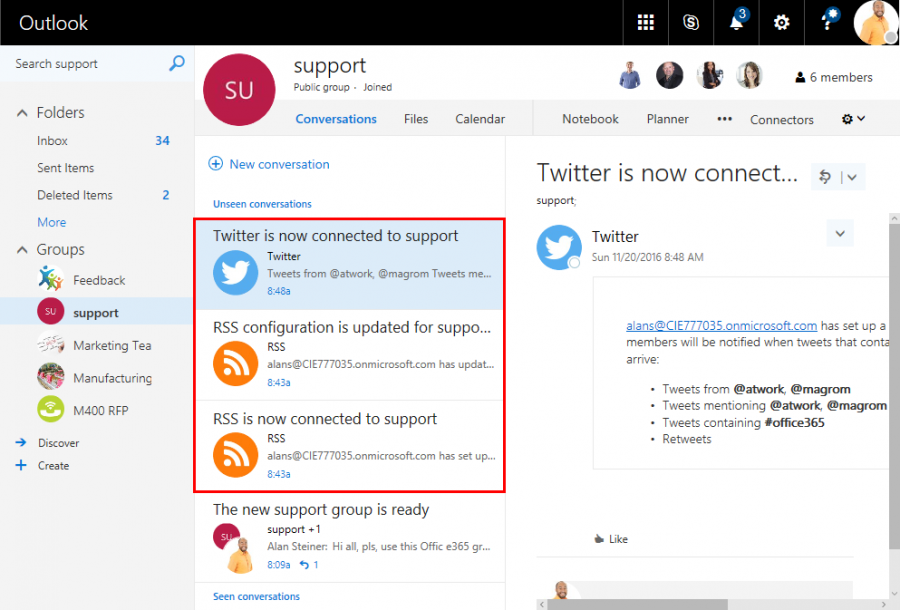
Adding tasks from Wunderlist
The same story goes for other connectors. Depending on the apps sending data to the connector, various properties can be defined. We want to add tasks being assigned to Wunderlist for specific users. You see the configuration is similar as the Twitter configuration. By the way, if you have an office 365 license, you can use Wunderlist with your Office 365 account for free, just sign in to wunderlist.com with your Work or School account. 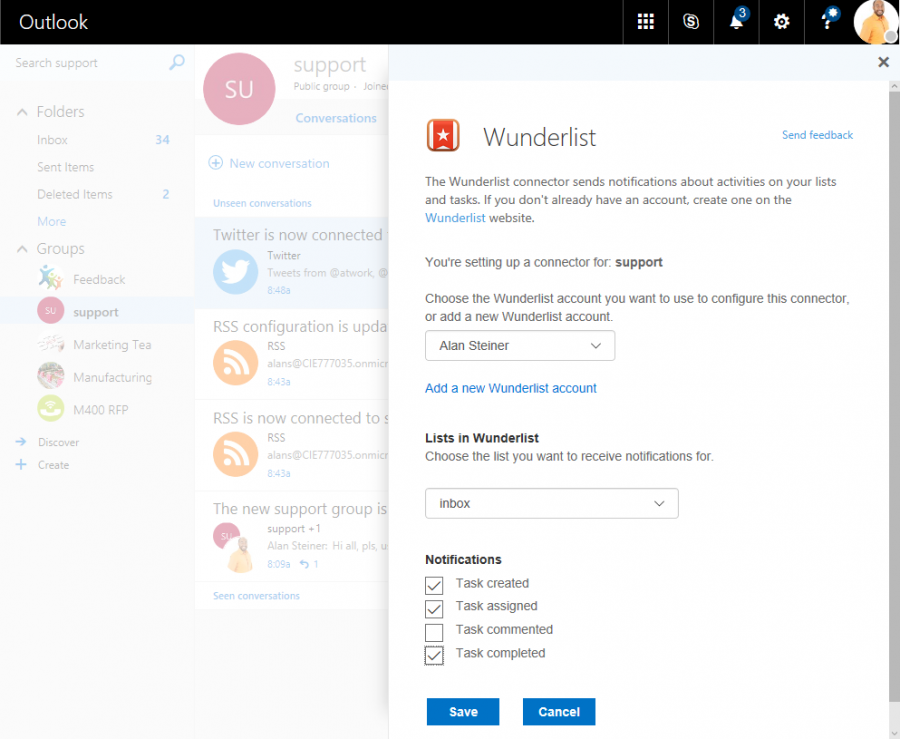
If a task now is assigned in Wunderlist, that information is sent instantly to the group. 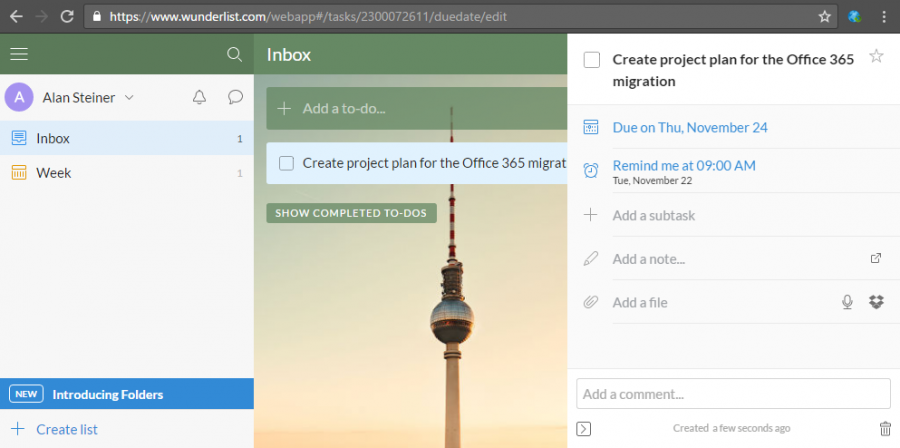
Members are now automatically informed about tasks of their colleagues as in this sample. The Connector has pushed this task to the group instantly. 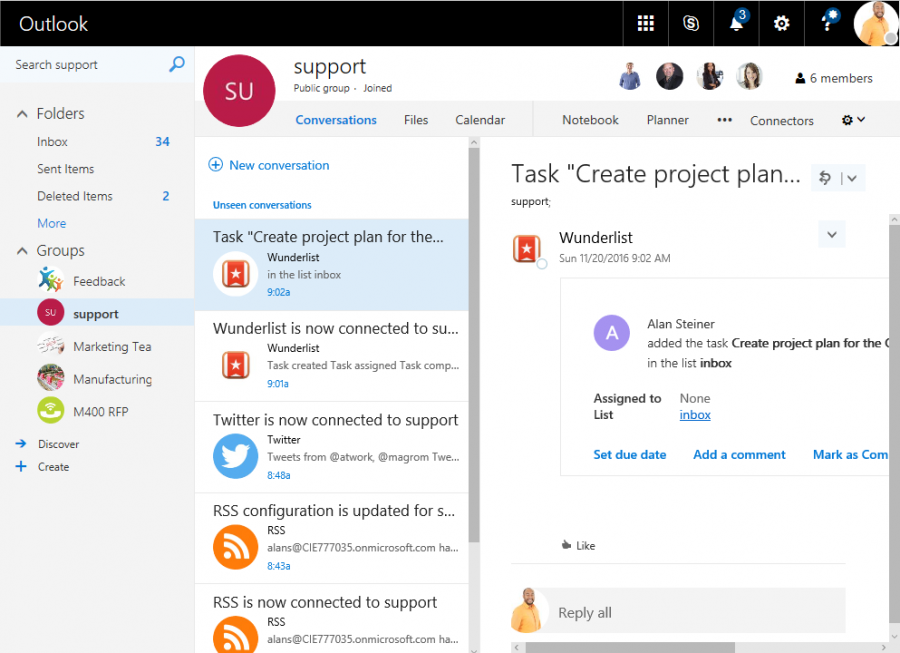
Connectors to go
 As you have seen in this part, it’s very easy to add ready to use connectors to a group. Depending on the source service, you need to authenticate or to configure the connector to work properly. Once the connector is established, it will start populating your group with data sent from another system.
Some connectors combine data into one single conversation to show the content clearer. For example, the Twitter connector shows 5 tweets in one conversation while others produce one conversation per task.
Summary
This article showed how Office 365 groups basically work and how easy Connectors can be used by any user in an Office 365 tenant. We configured our “support” group for the requirements of our organization and used ready-to-use connectors.
In part two we will see how custom connectors work to send data from outside systems as scripts or other systems into an Office 365 group.
 Toni Pohl is a Windows Development MVP and a Principal at atwork.at living in Vienna, Austria. He has worked in the IT industry for 20 years in various roles, including as a consultant, blogger, author, as well as a conference presenter. Toni is an expert in the development of online technologies, Office 365 and Azure. Find more about Toni at https://about.me/toni.pohl.
Follow him on Twitter @atwork