How to connect to VM using Remote Desktop(RDP) on Windows Azure (Cloud)
Starting from Windows Azure SDK 1.3, customers can connect to their VM’s on the cloud. Below is the step-by-step article to configure, connect to VM’s via remote desktop.
1) Create simple cloud project with ASP.net role


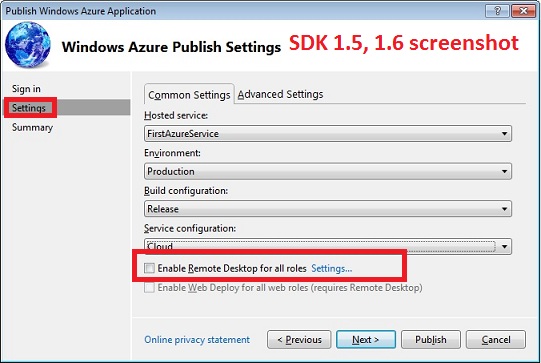
2) In Visual Studio Solution Explorer, right click on the Cloud Service Project and Click “Publish”, It will bring up screen similar to below. Now, Click on “Configure Remote Desktop Connections” as highlighted below.
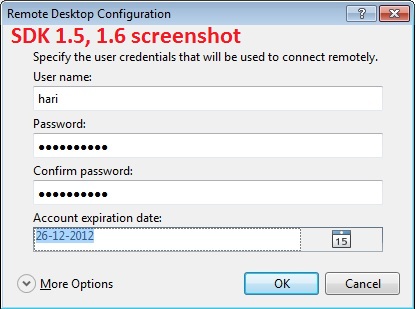
Note: If you are using SDK 1.5 or 1.6, right click on Cloud Service Project and Select "Configure Remote Desktop".

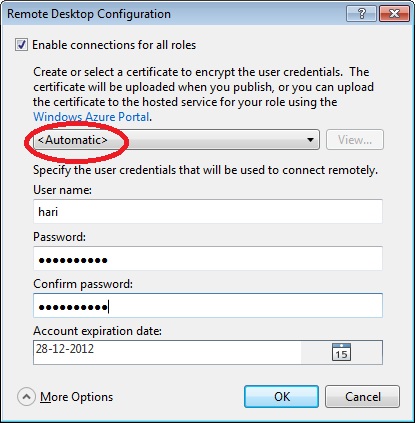
3) Select “Enable connections for all roles” checkbox, Create certificate or use existing certificate. This certificate will be used to encrypt the credentials.
Note: This step is not required for application that use SDK 1.5 or above(Unless you explictly want to create, upload the certificate manually).


Note: Certificate created in this step can be found in Current User\personal store.
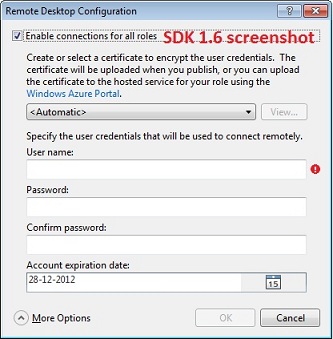
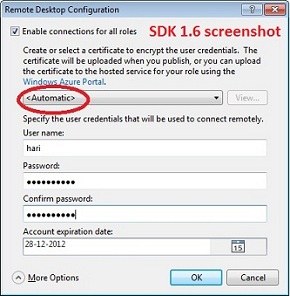
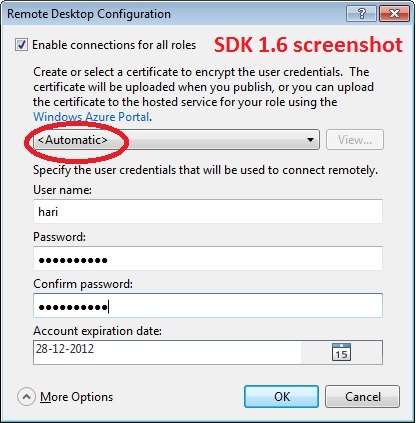
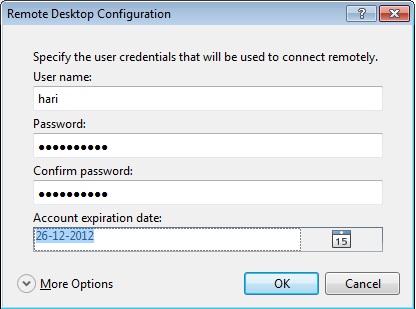
4) Configure Credentials, Expiry date as shown below

Note: Configure valid username, do not use special symbols, buit-in user account names, etc. For more details read this blog entry https://blogs.msdn.com/b/narahari/archive/2011/08/29/getting-quot-your-credentials-did-not-work-quot-when-connecting-to-windows-azure-vm-s.aspx
5) ServiceConfiguration.cscfg , ServiceDefinition.csdef looks similar to below. In case you would like to manually configure the settings, below highlighted settings should be configured to enable remote desktop connection.
ServiceConfiguration.cscfg
<?xml version="1.0" encoding="utf-8"?>
<ServiceConfiguration serviceName="RemoteConnect" xmlns="https://schemas.microsoft.com/ServiceHosting/2008/10/ServiceConfiguration" osFamily="1" osVersion="*">
<Role name="HelloCloud">
<Instances count="1" />
<ConfigurationSettings>
<Setting name="Microsoft.WindowsAzure.Plugins.Diagnostics.ConnectionString" value="UseDevelopmentStorage=true" />
<Setting name="Microsoft.WindowsAzure.Plugins.RemoteAccess.Enabled" value="true" />
<Setting name="Microsoft.WindowsAzure.Plugins.RemoteAccess.AccountUsername" value="user" />
<Setting name="Microsoft.WindowsAzure.Plugins.RemoteAccess.AccountEncryptedPassword" value="MIIBnQYJKoZIhvcNAQcDoIIBjjCCAYoCAQAxggFOMIIBSgIBADAyMB4xHDAaBgNVBAMME1dpbmRvd3MgQXp1cmUgVG9vbHMCECY7YujxTkiRToi1balVmo8wDQYJKoZIhvcNAQEBBQAEggEAPqVUbmF5jkFaLnsK1o1VowCgBT/5VYrI7HiVCmKh8OAnqLarN/YVvisqGVmL0XSjBxbk9JfRd/dS3kH9/JYp+G1STWoG4TsWGNRy6LX6OMQao/1t/QbUtaIreMAflYVjrF+AiUMPsLWwABphx9x48hNX970EXIylmINfpCLXpUtSCatoafS2Z260tS9ngszvjj+VD98Qn1GvRi6FwVQW8LQASEB3/h5n1M8oRFIXpAJx57Kj4IwTxGagKCucvMFO05vxFJGdNMGxmfP5mKRCLzXx6BxyiKmV4fMn/2PCJr7W4sSGycGzBXQz3e8JmDTsc7668Hida5147B78zHCvejAzBgkqhkiG9w0BBwEwFAYIKoZIhvcNAwcECBujO0y+1cv8gBCNjmulM1+bvMPGdWpkBfOO" />
<Setting name="Microsoft.WindowsAzure.Plugins.RemoteAccess.AccountExpiration" value="2011-01-01T23:59:59.0000000+05:30" />
<Setting name="Microsoft.WindowsAzure.Plugins.RemoteForwarder.Enabled" value="true" />
</ConfigurationSettings>
<Certificates>
<Certificate name="Microsoft.WindowsAzure.Plugins.RemoteAccess.PasswordEncryption" thumbprint="E5B7C551309D21D26DEA8464380C61D7EC8FC4D1" thumbprintAlgorithm="sha1" />
</Certificates>
</Role>
</ServiceConfiguration>
Note: You would need to specify the encrypted password if you are configuring AccountEncryptedPassword manually. Following this article to encrypt the password using PowerShell.
ServiceDefinition.csdef
<?xml version="1.0" encoding="utf-8"?>
<ServiceDefinition name="RemoteConnect" xmlns="https://schemas.microsoft.com/ServiceHosting/2008/10/ServiceDefinition">
<WebRole name="HelloCloud">
<Sites>
<Site name="Web">
<Bindings>
<Binding name="Endpoint1" endpointName="Endpoint1" />
</Bindings>
</Site>
</Sites>
<Endpoints>
<InputEndpoint name="Endpoint1" protocol="http" port="80" />
</Endpoints>
<Imports>
<Import moduleName="Diagnostics" />
<Import moduleName="RemoteAccess" />
<Import moduleName="RemoteForwarder" />
</Imports>
</WebRole>
</ServiceDefinition>
Note: If you are configuring these settings manually, remember to add certificate to web role
6) Export the certificate created in step 3 to pfx format (Ignore this step for SDK 1.6 if you have used "Automatic" option while configuring certificate)
a) Open certificate snap in for “My user account” (current user)
b) Navigate to Current User\Personal\Certificates
c) Right click on the certificate that we created in step 3
d) Choose All Tasks è Export è Choose Next
e) Choose options as shown in screen shots


7) Upload the certificate to the Windows Azure portal (Ignore this step for SDK 1.6)
8) Deploy the application to cloud either via portal or VS2010 Publish option
9) Once the deployment is successful, Go to Windows Azure portal
10) Click on Connect to create .RDP file , save it locally and open the rdp file by double clicking on it

11) When prompted for credentials, specify the credentials mentioned in step 4
Voila! Connected to the VM! Comments are welcome..