VSTS CI to Build and Test Node.js app with Gulp and Mocha
In this post, we will see how to configure Visual Studio Team Services (VSTS) Continuous Integration (CI) Build for Node.js application. This post is extension of my previous post, where I've covered Setting up node application with TypeScript in VS Code — using mocha, chai, mochawesome, gulp, travis
If you are looking for setting up node project with TypeScript, Gulp and Mocha, first refer previous post and then continue below for configuring VSTS CI build for Node.js app with Gulp and Mocha tests. In below post, we'll import existing project from Github to VSTS and then configure VSTS CI build using web only steps.
If you are already using VSTS for your team project, directly start from step 3 below.
Note: The entire VS Code project used in this post is available at GitHub.
Prerequisites
- Node application with Mocha tests, configured build using gulp: Refer one of my previous post which covers step by step how to setup this: Setting up node application with TypeScript in VS Code — using mocha, chai, mochawesome, gulp, travis
- VSTS account: create one for free or use existing one. Make sure you have administrator access for the team project on which you are configuring CI build.
Let’s get started!
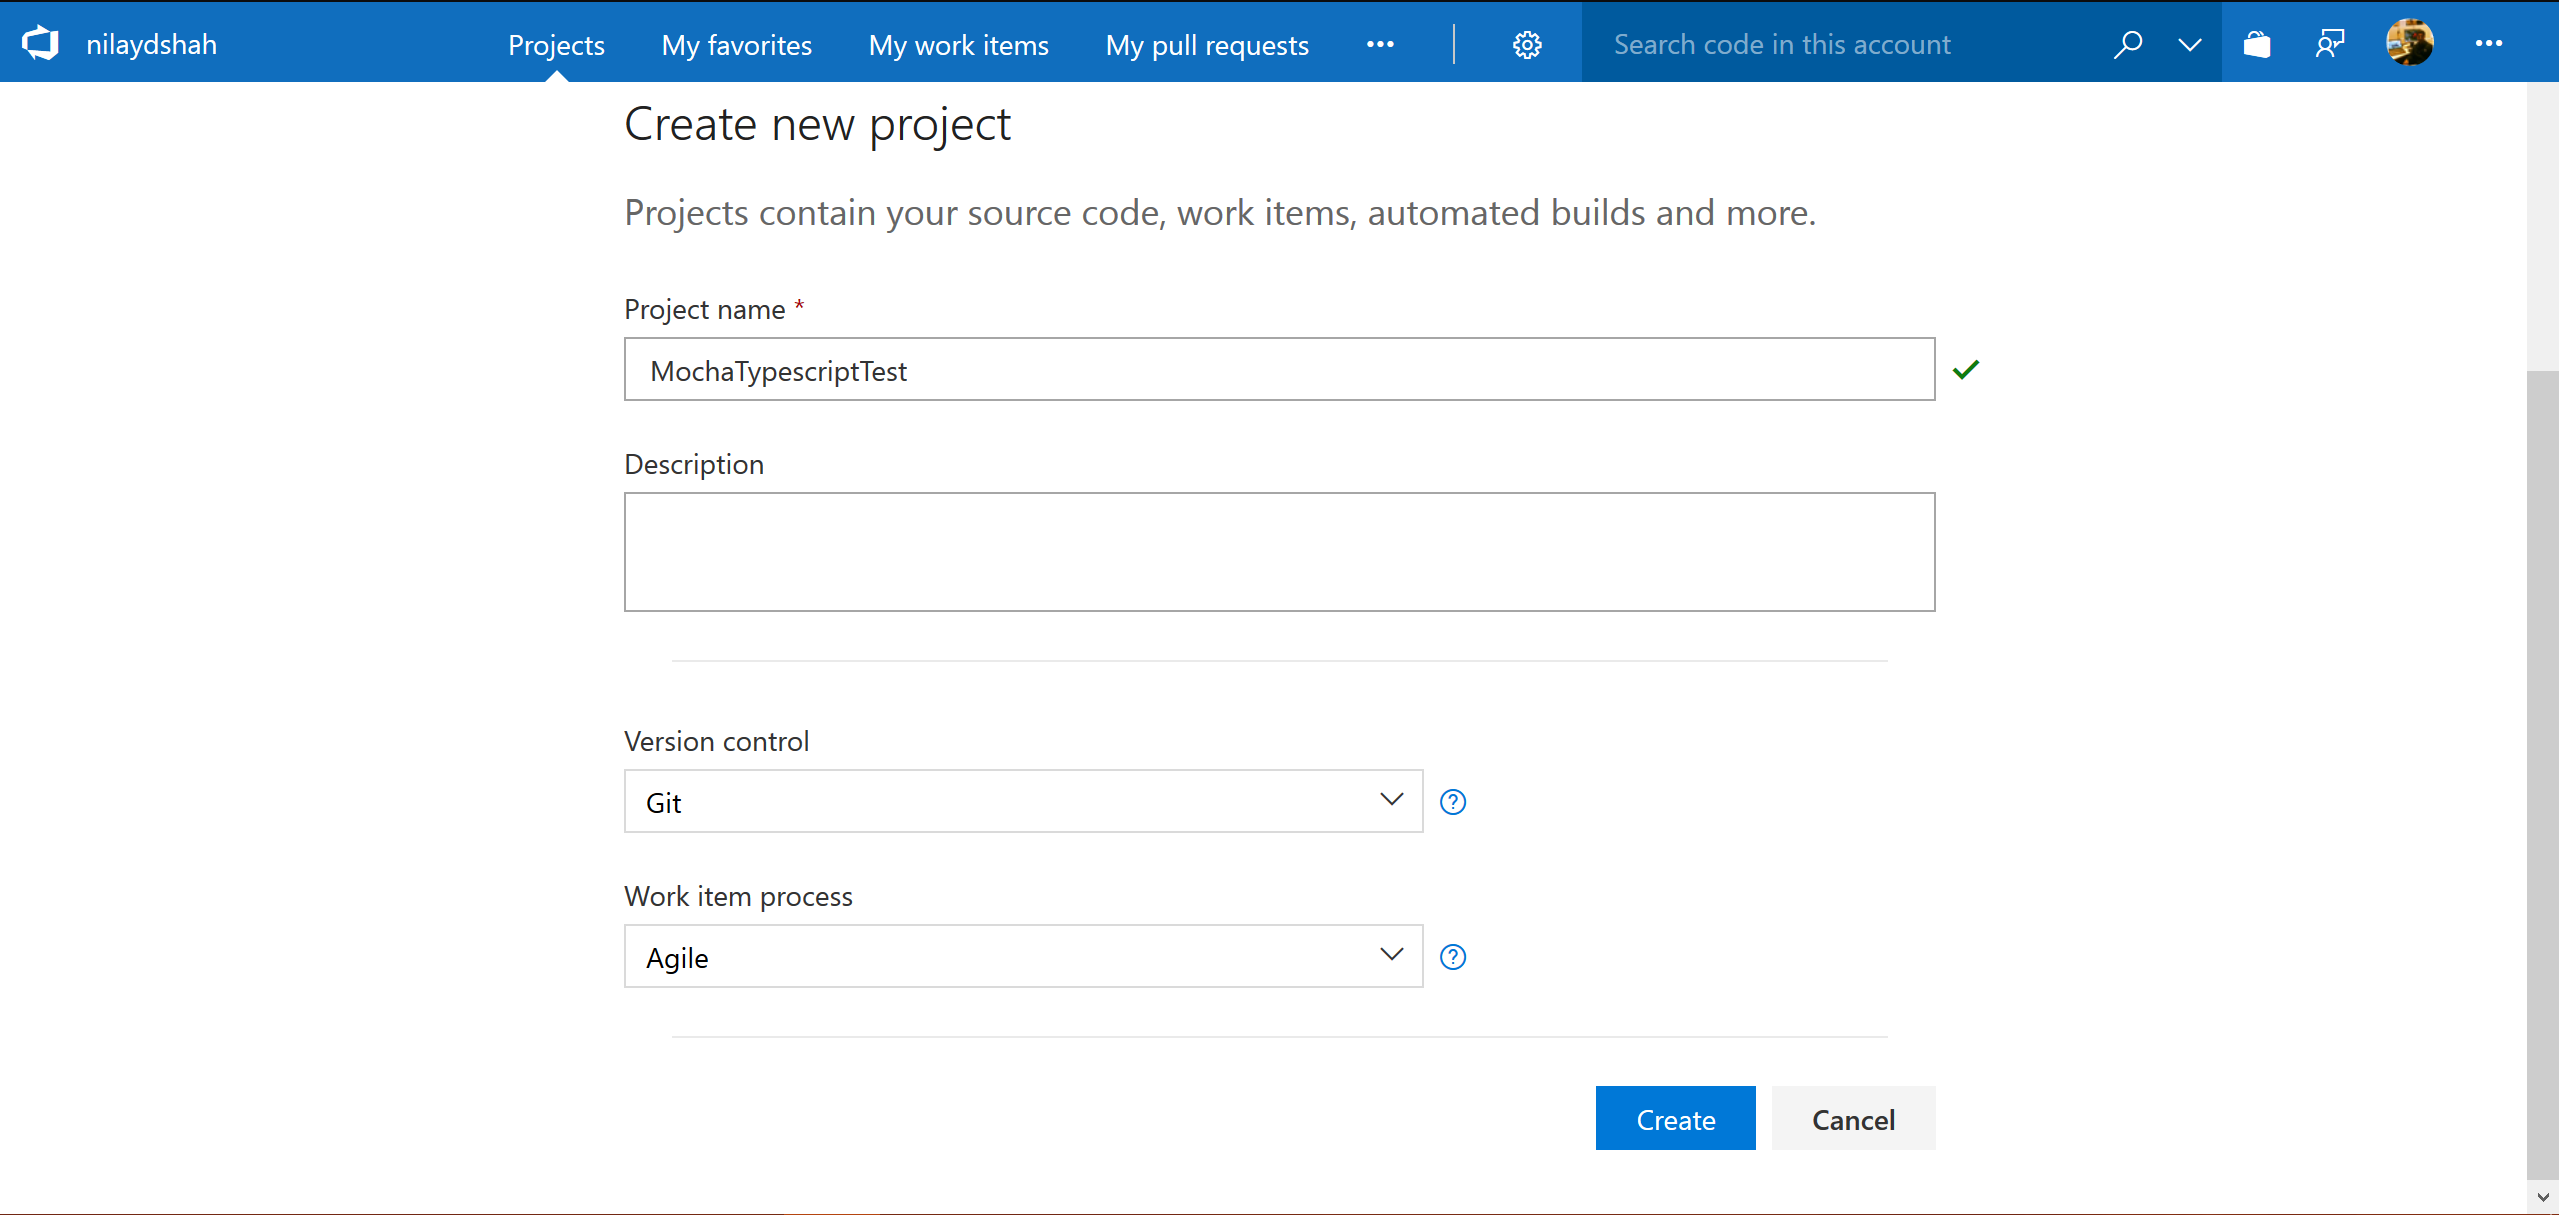
1. Create new project in VSTS
- Start with creating new Project.
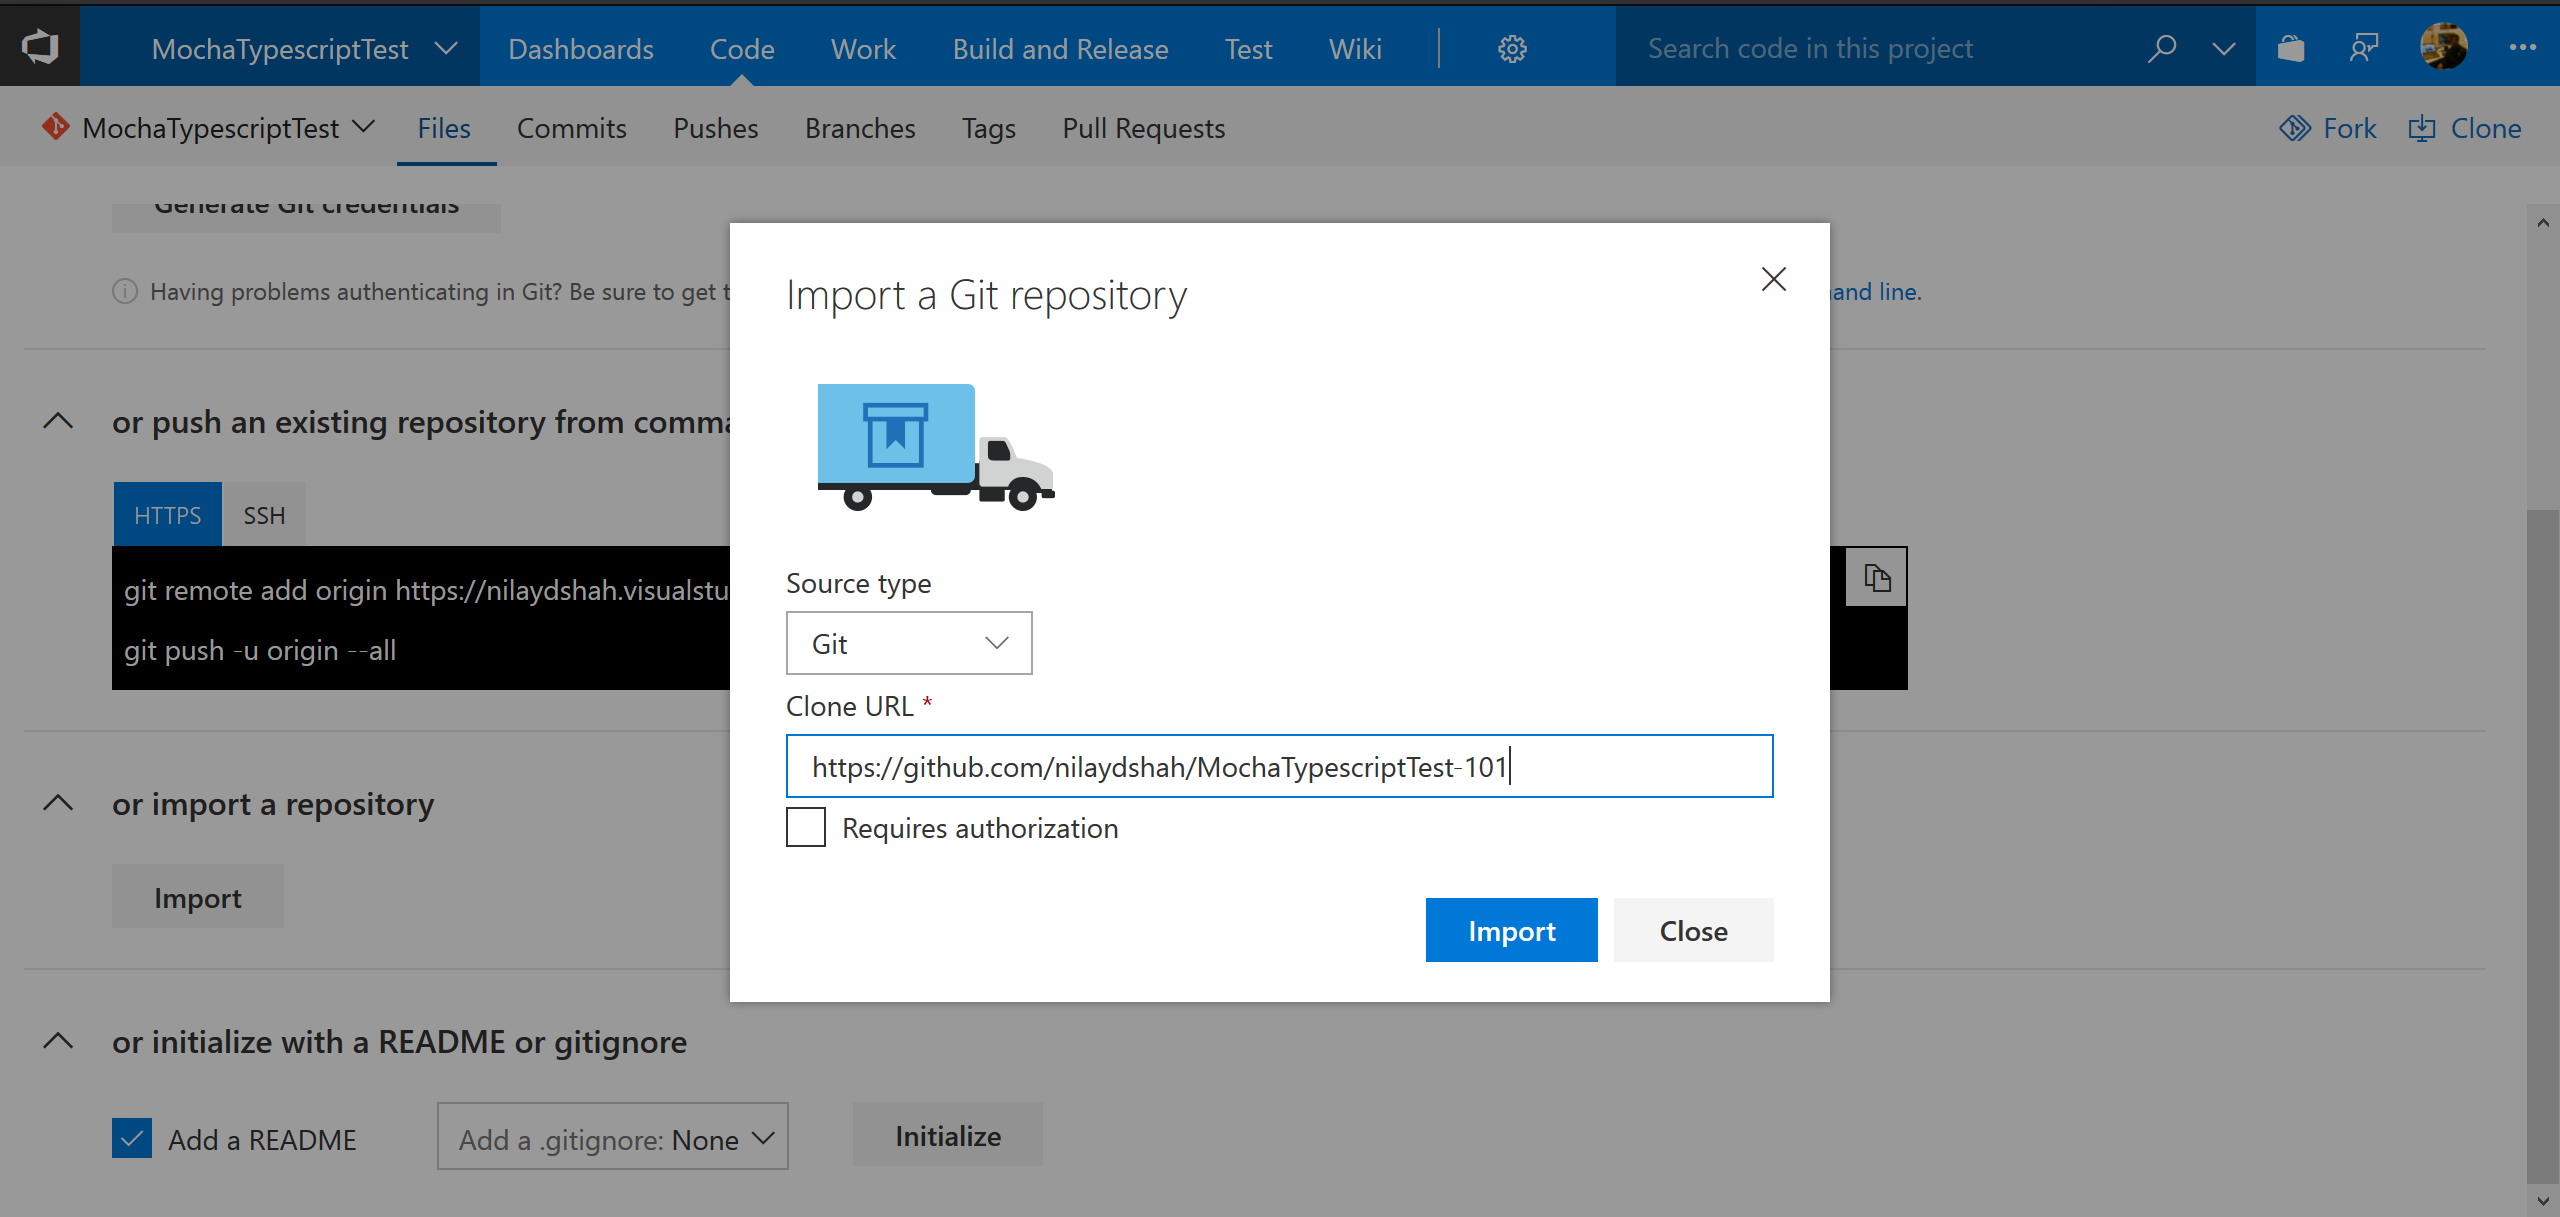
2. Import Github project to VSTS
- Select import existing project from Github. (since I have existing project in Github I'm importing existing project, otherwise we can start with creating empty project and add necessary project files.)
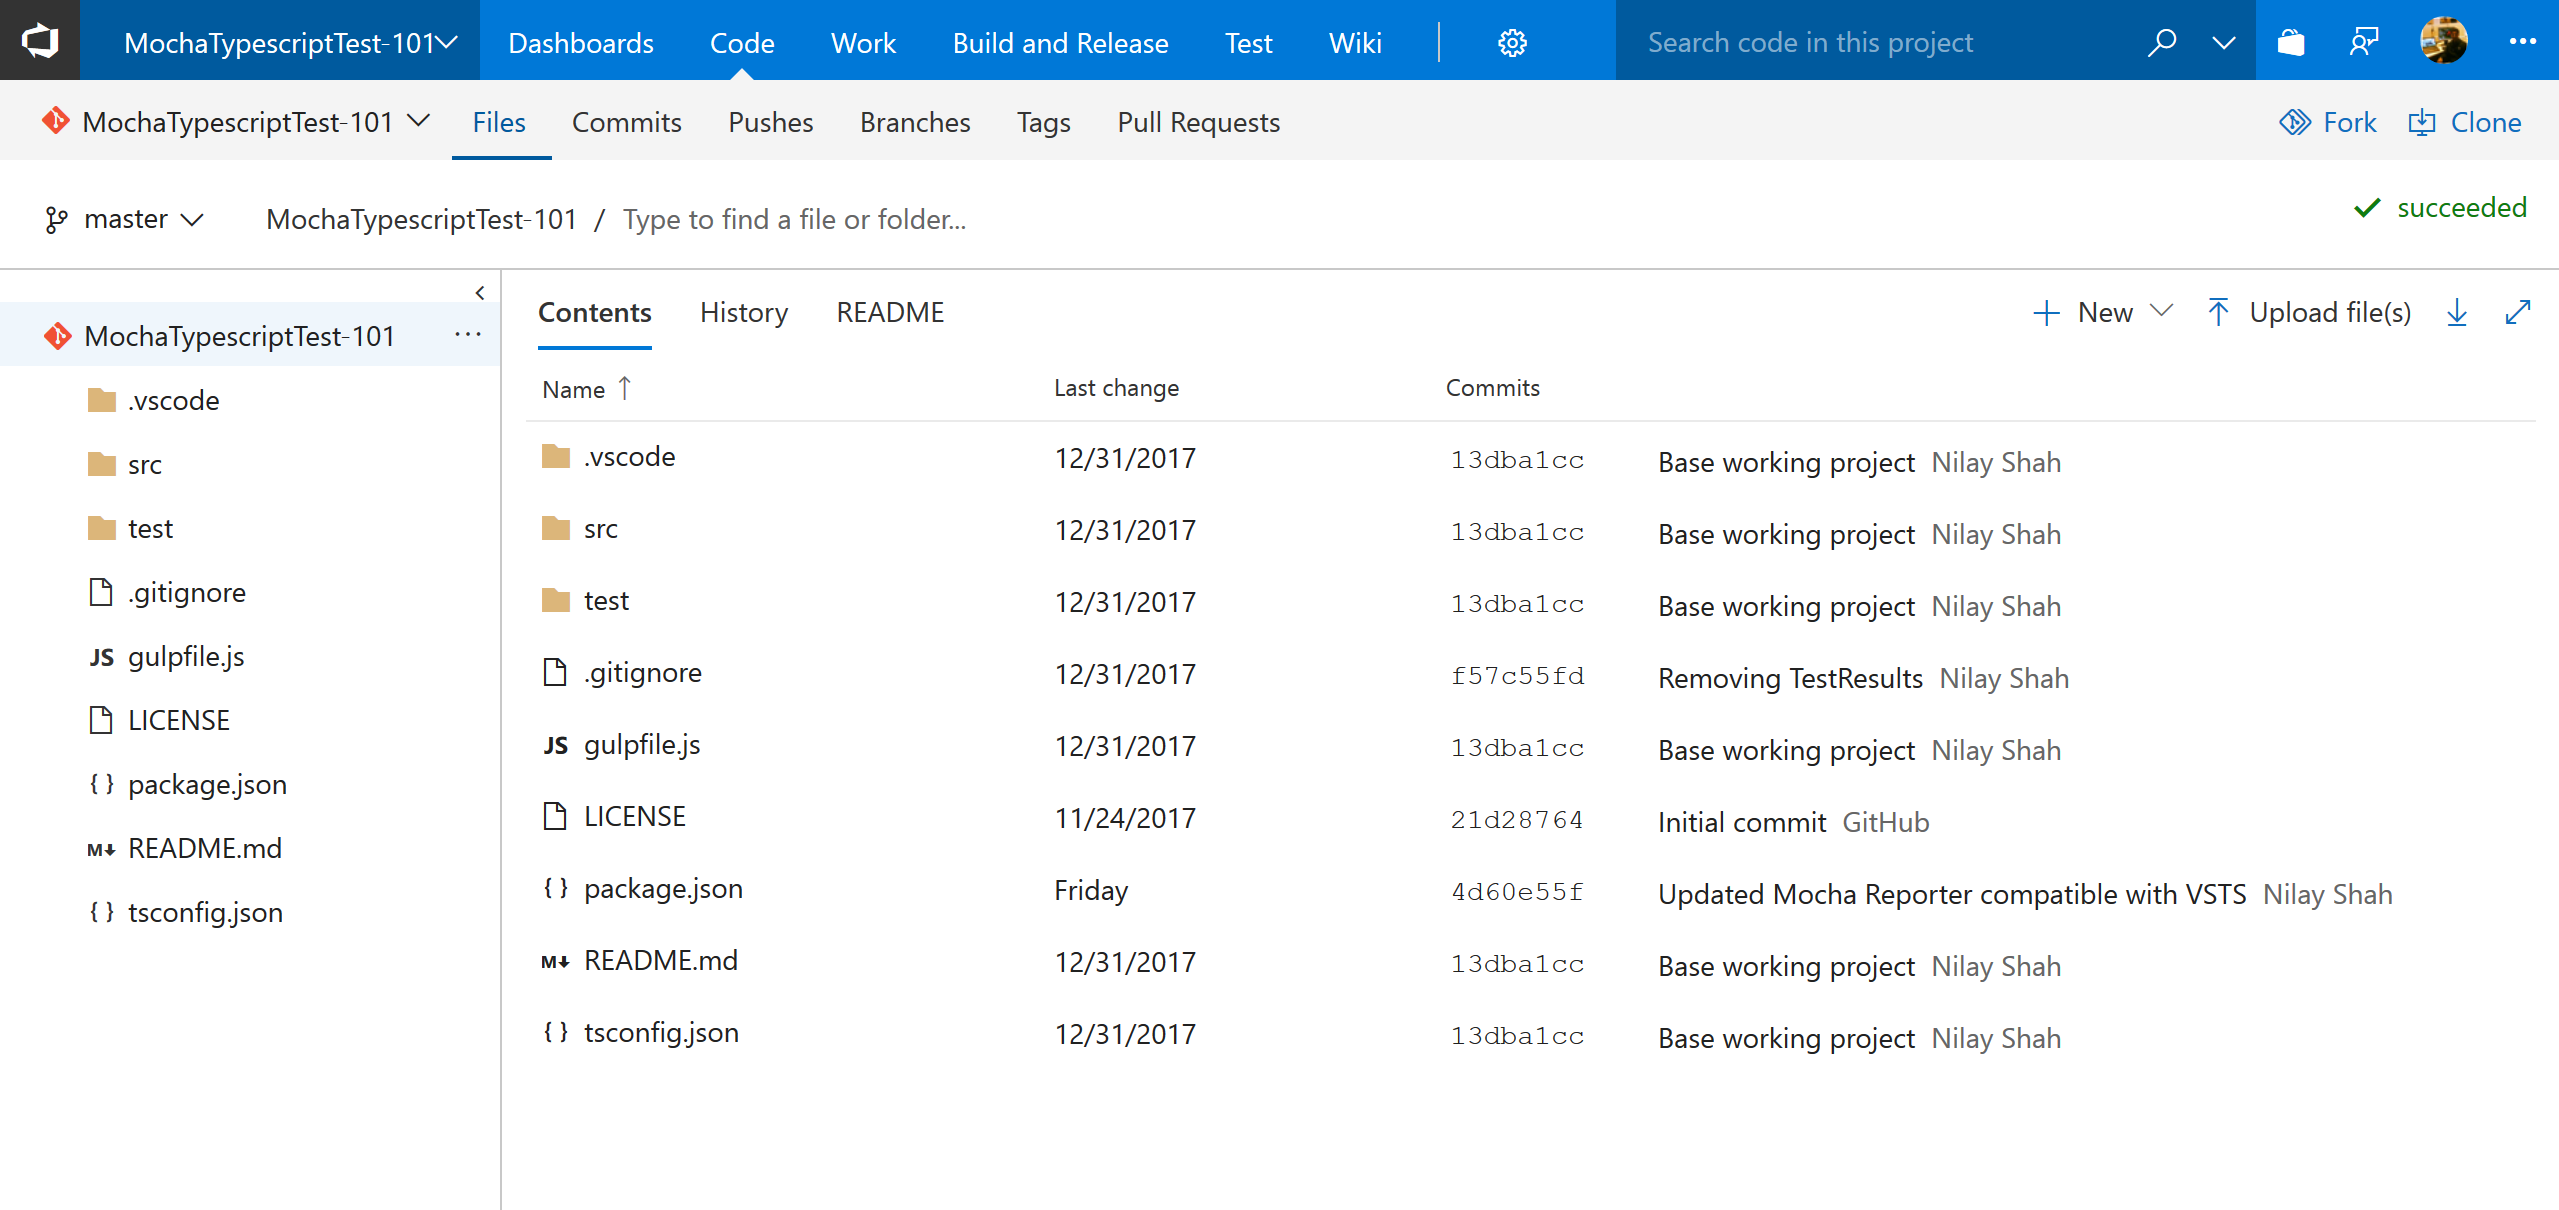
- Now go to Code tab, see all project code is now imported to our newly created VSTS team project.
3. Configure CI build for project
3.1 Create New Build Definition for project
- Go to Build and Release >> Build tab and create new build definition. (Click +New)
- I have already created one, hence you can see one definition already exist in below screen. If you are creating for the first time, there won't be any build definition present.

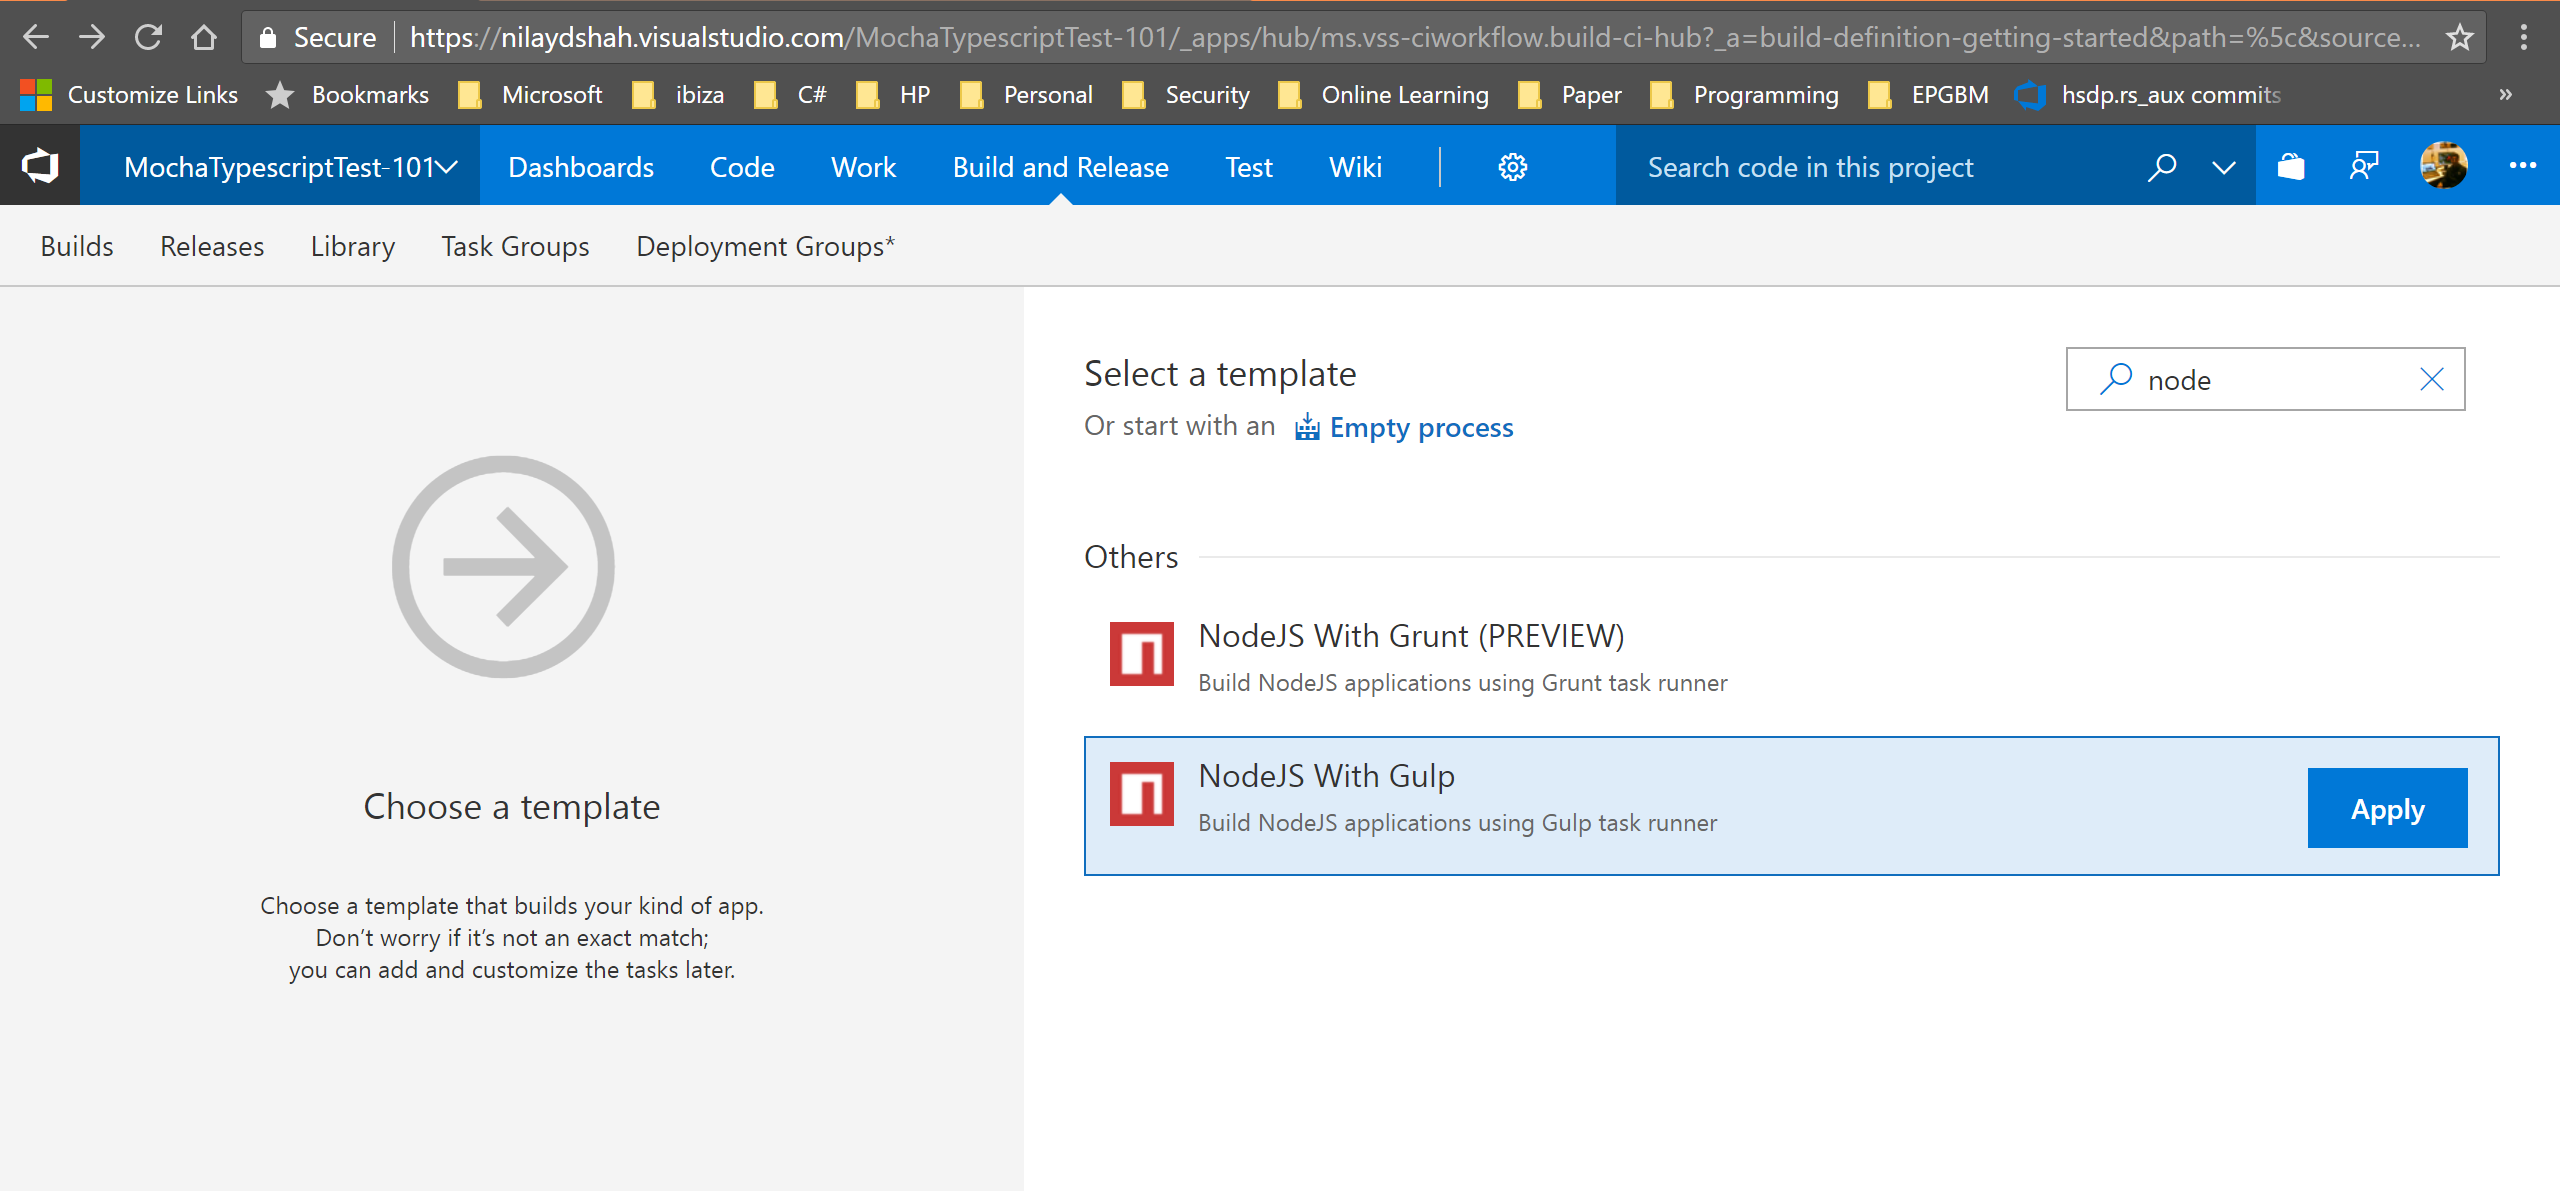
3.2. Select NodeJS with Gulp template
- Upon clicking +New on the page, you can either choose to start with an empty process or select an template. VSTS gives us varieties of templates. For node application, VSTS gives two templates: NodeJS with Grunt and NodeJS with Gulp. Let's select NodeJS with Gulp.
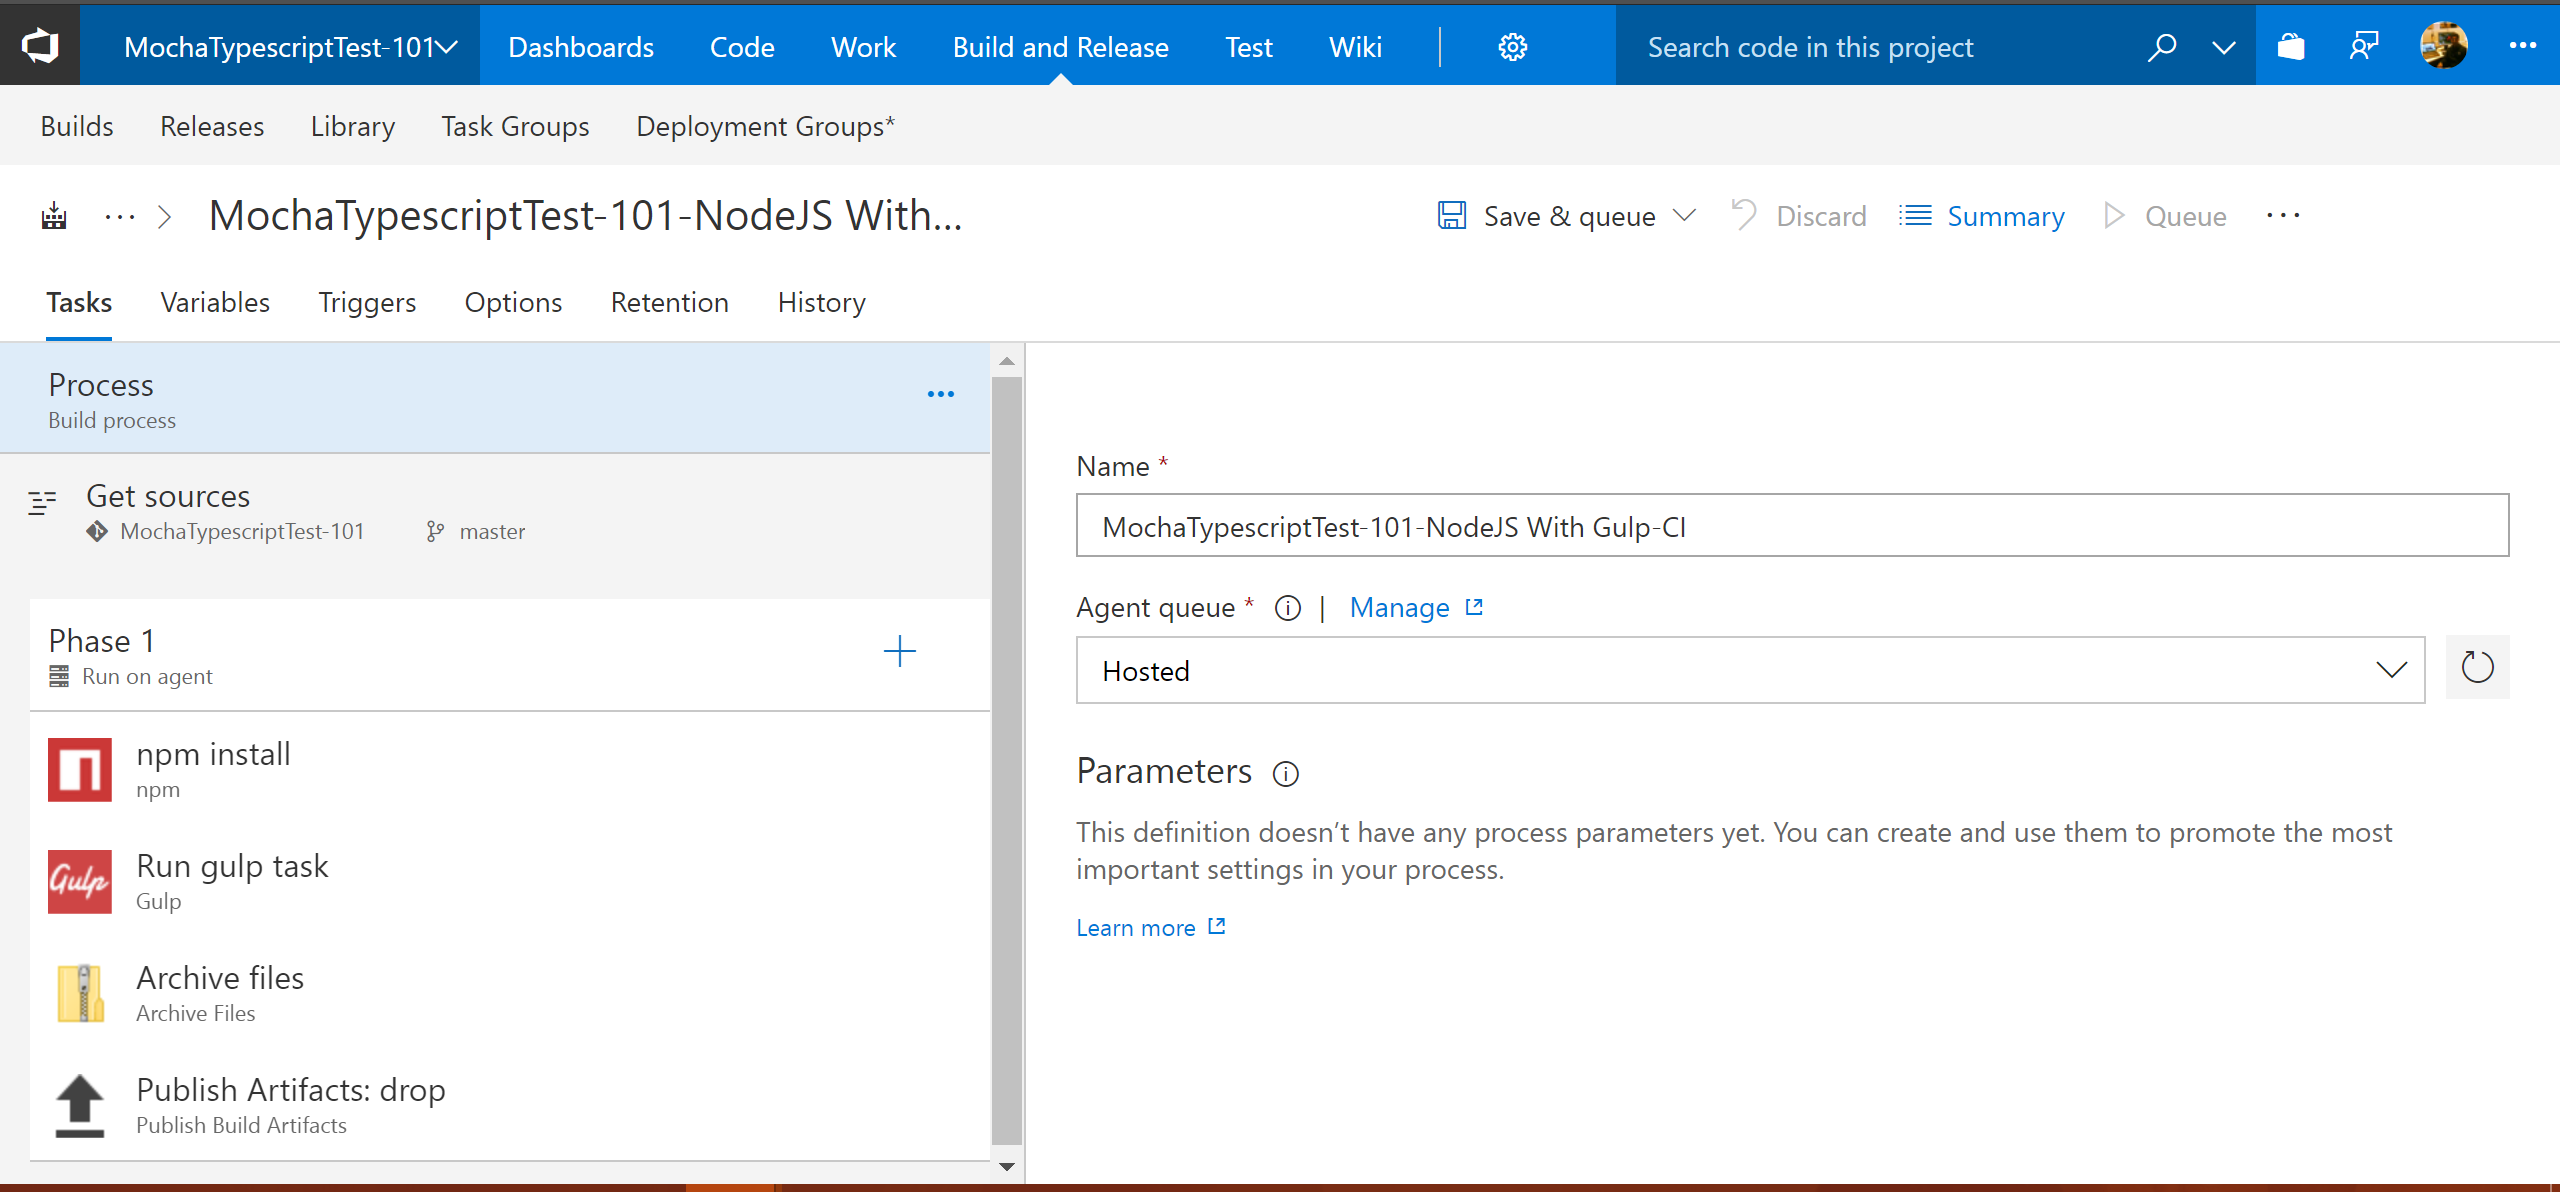
3.3. Start with build process
- Name the build definition. (Keep remaining things as default)
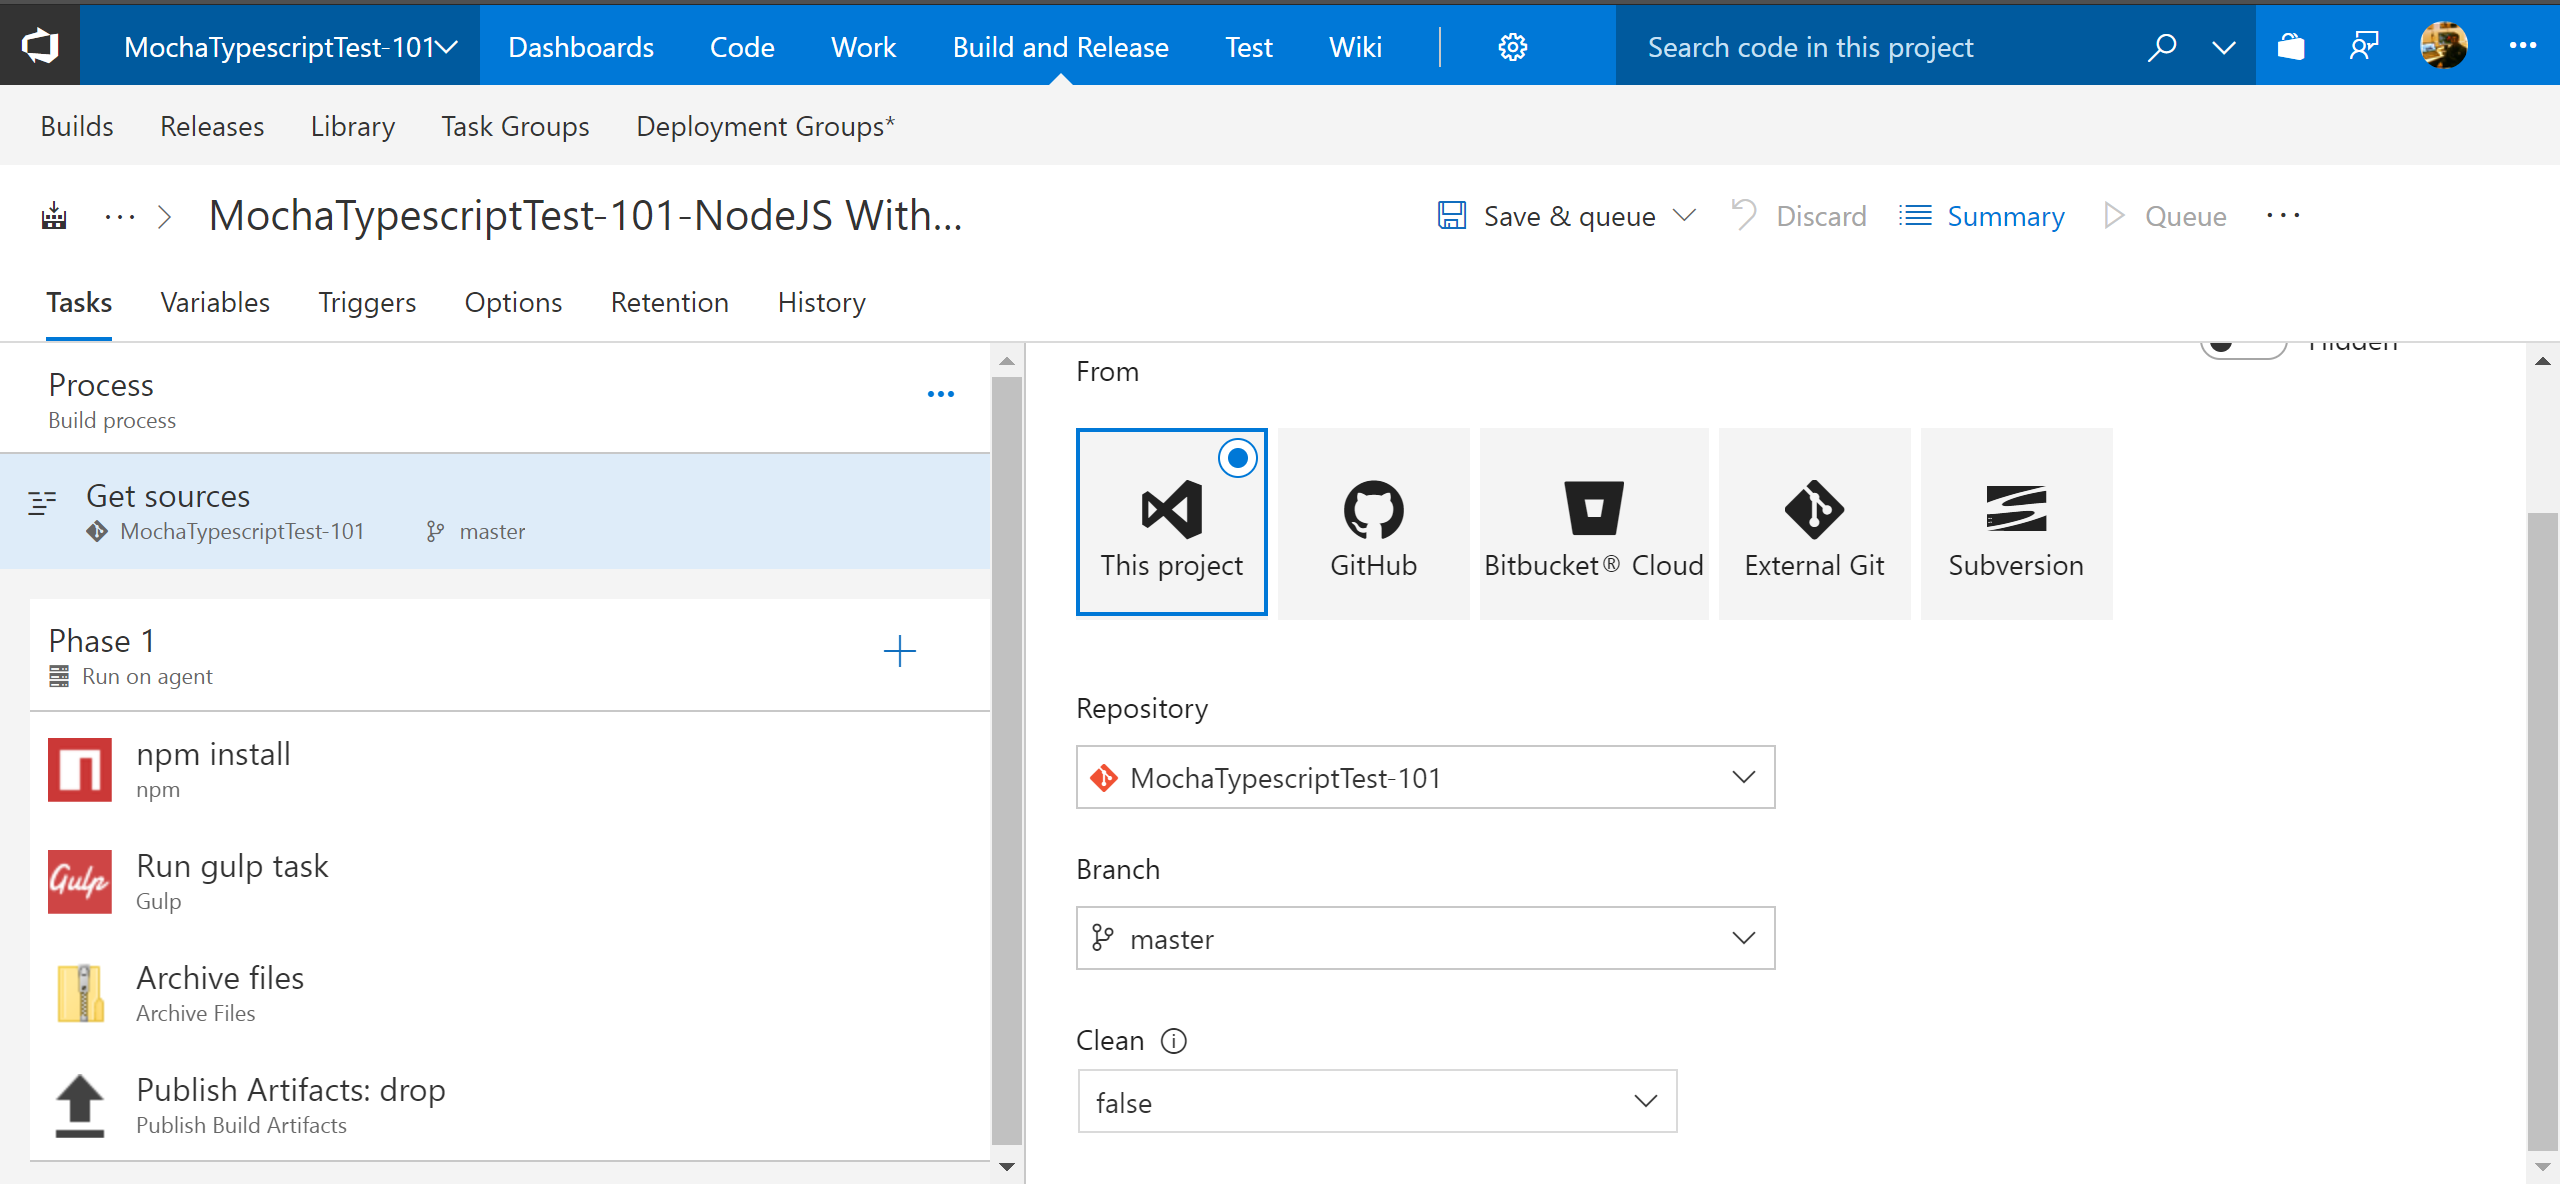
3.4. Select project repository and branch for which configuring build
- Since we have already imported project from Github to VSTS, we'll choose This project. And also choose repository and branch for which we are configuring CI.
3.5. npm install
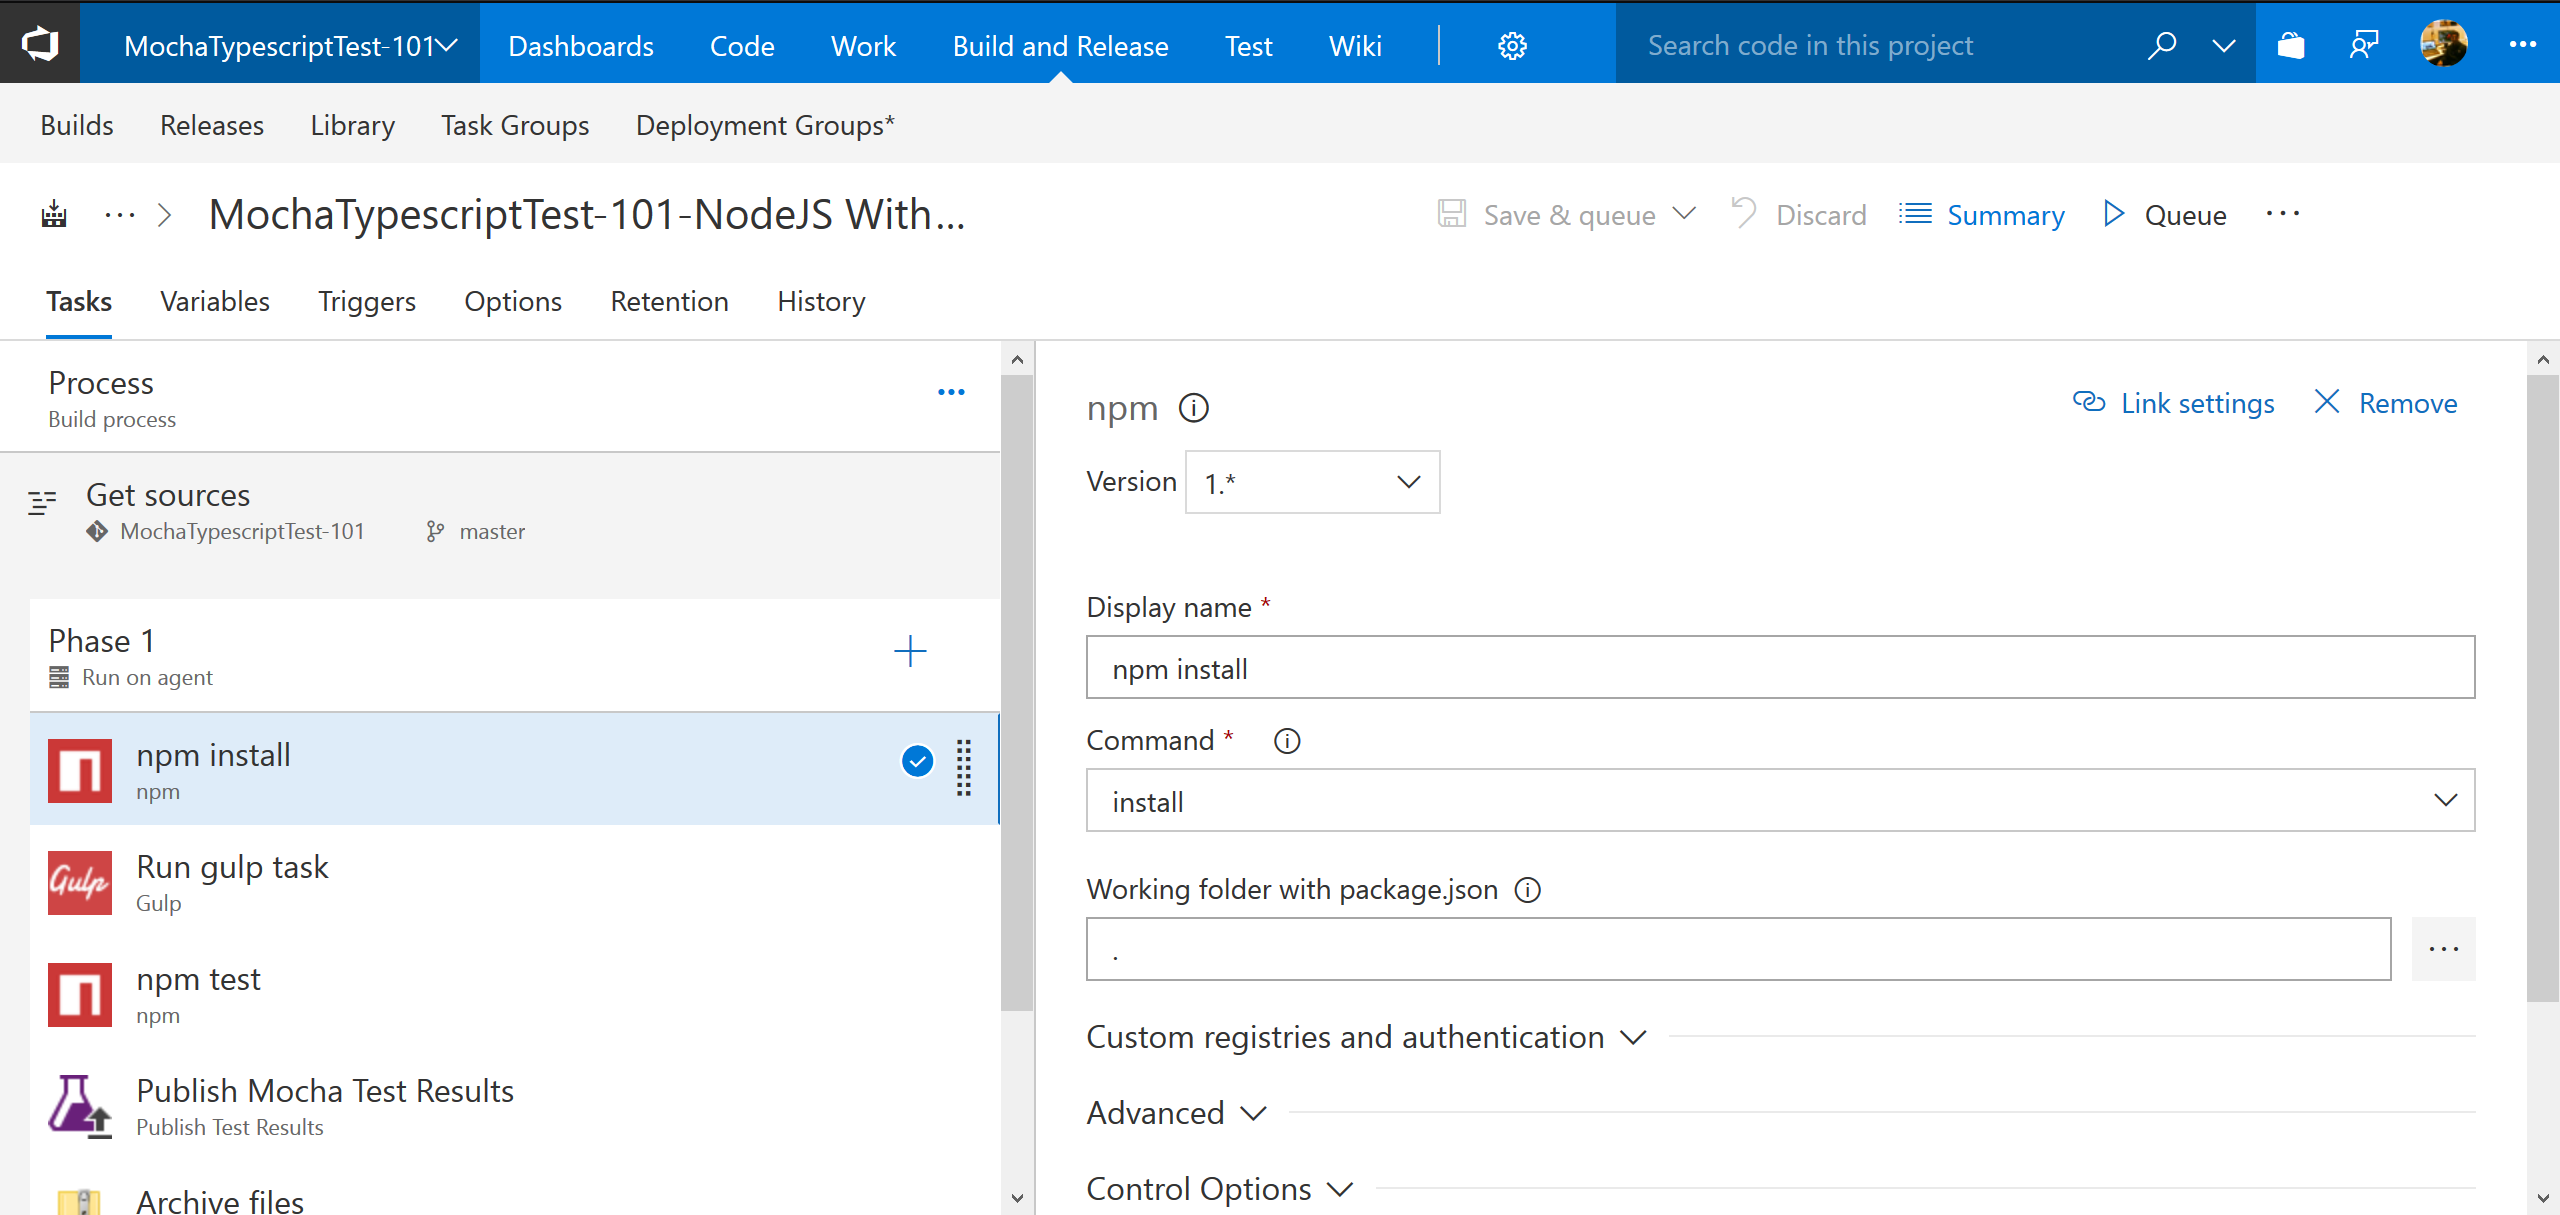
- Now that we have selected which resources to be built (project, repo, branch etc), we'll have to configure steps for build the project. We can have multiple phases in build and each phases can have multiple tasks. For simplicity let's have single Phase i.e. Phase 1 which will have all the tasks to get the build and tests run.
- Since we have used VSTS template NodeJS with Gulp, we can see npm install and Gulp are already added under Phase 1. Remaining tasks can be added simply by + icon next to Phase 1.
- Let's configure npm install. As shown in below screen configure display name, command and working folder with package.json. (Remember: Don't pick path of package.json, but pick a path to package.json's parent folder. If package.json is at root folder, just use current directory: .)
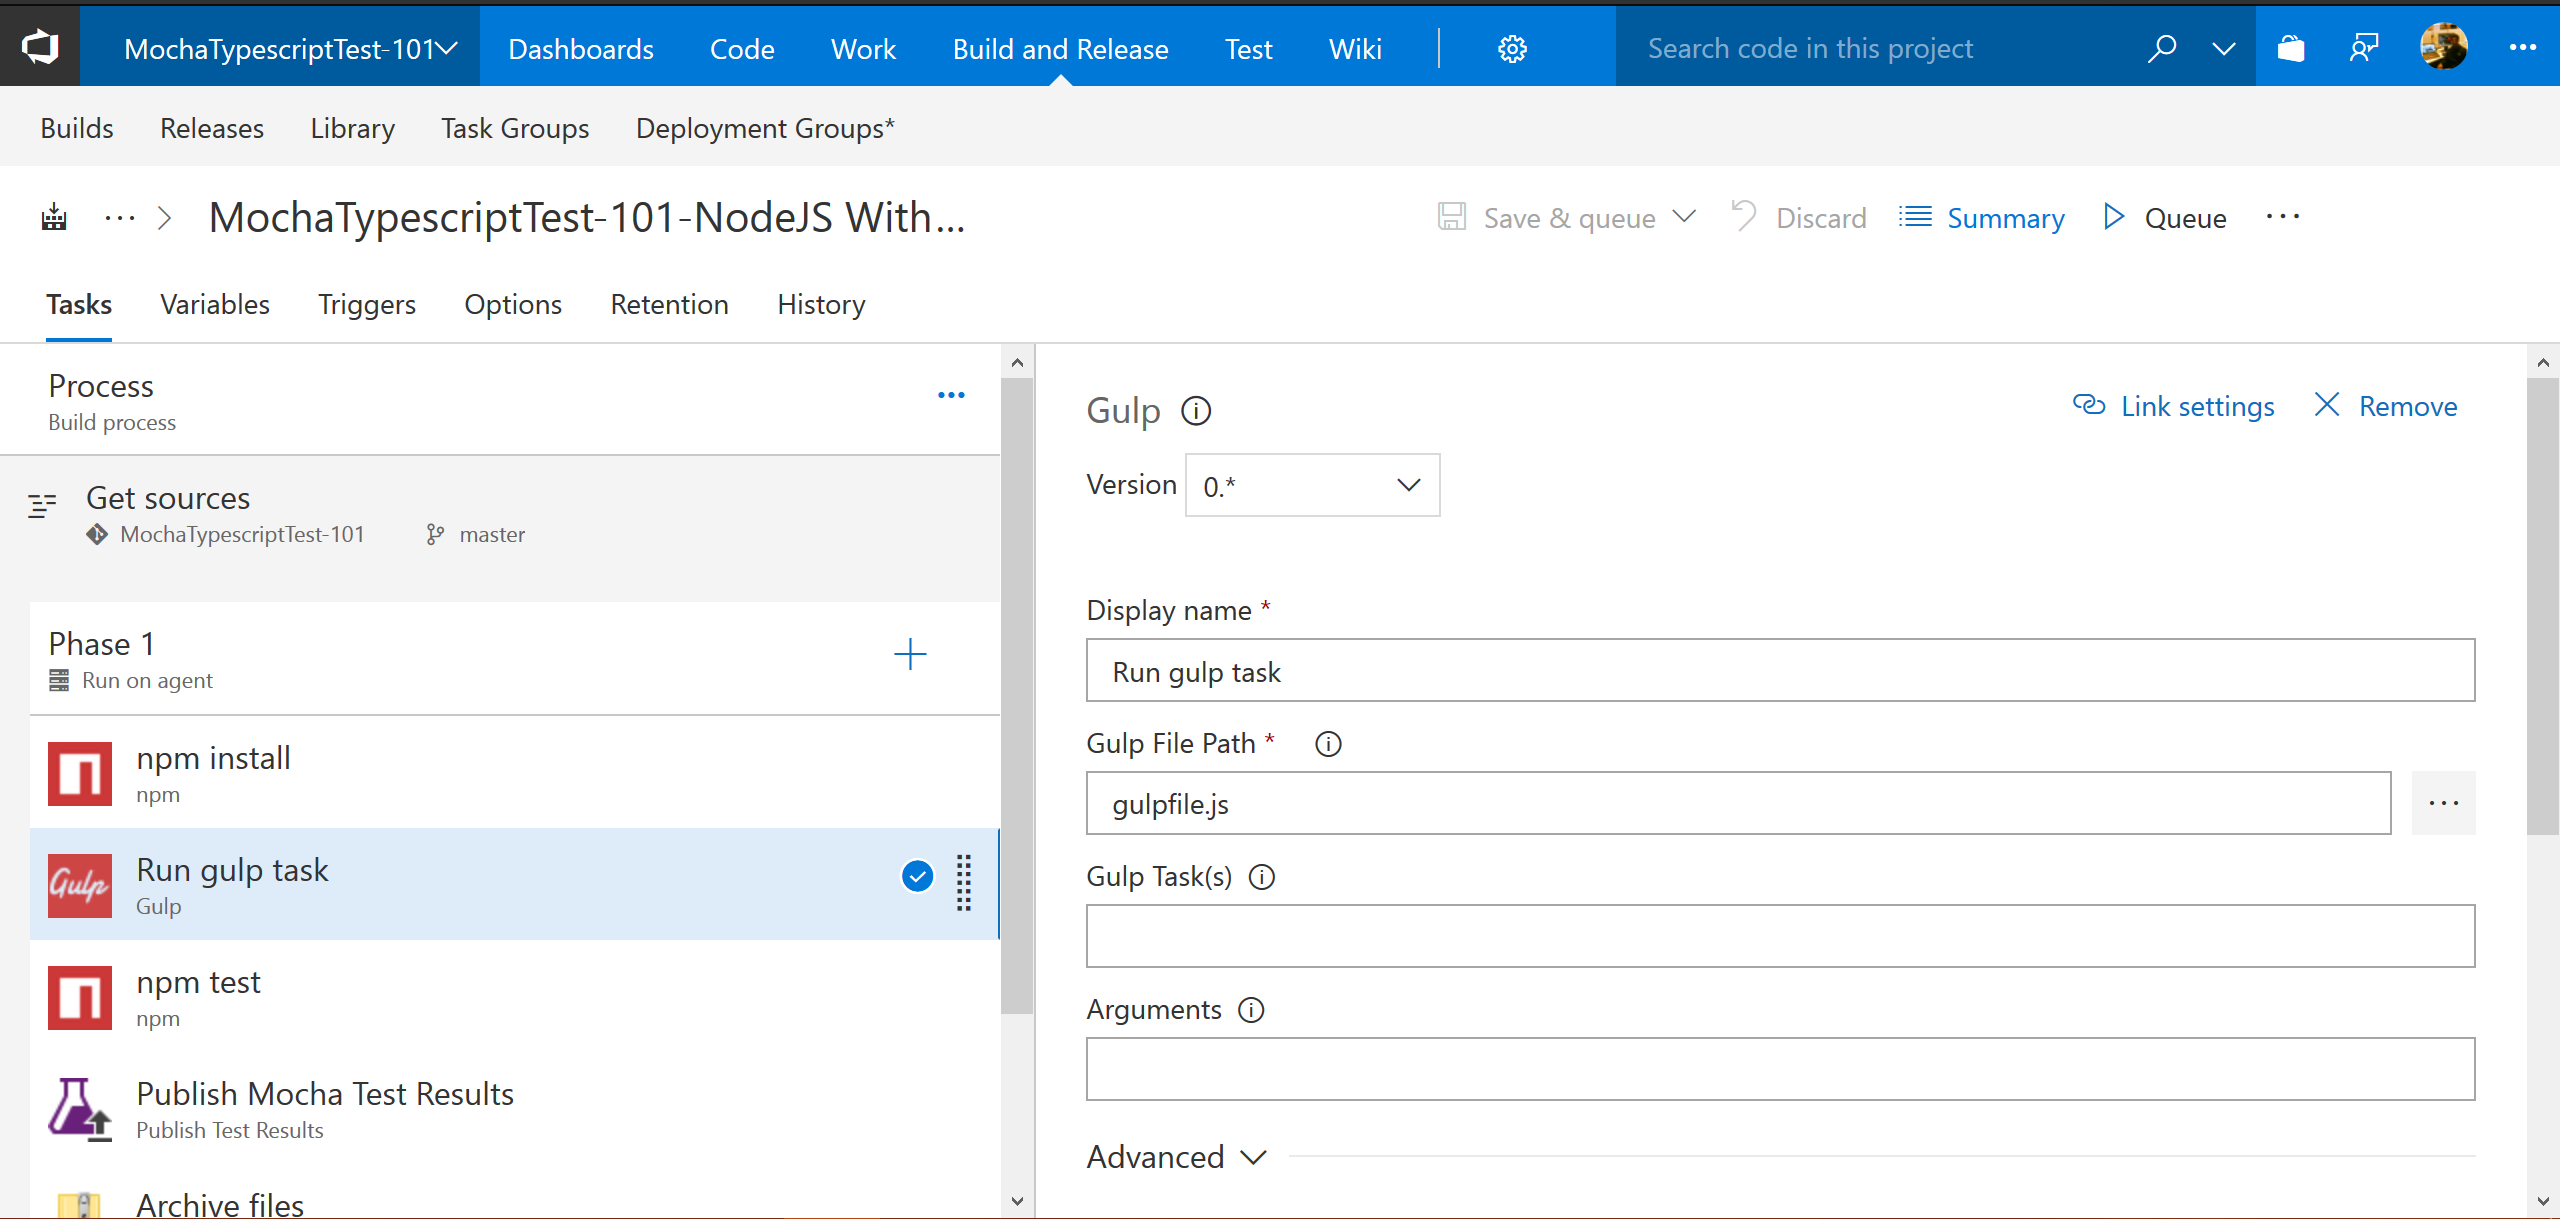
3.6. Run gulp task
- Second step in build would be gulp task configuration. Pick path to gulpfile.js and mention the task name to be run as part of build. Leave blank in task name if you want to run gulp default task.
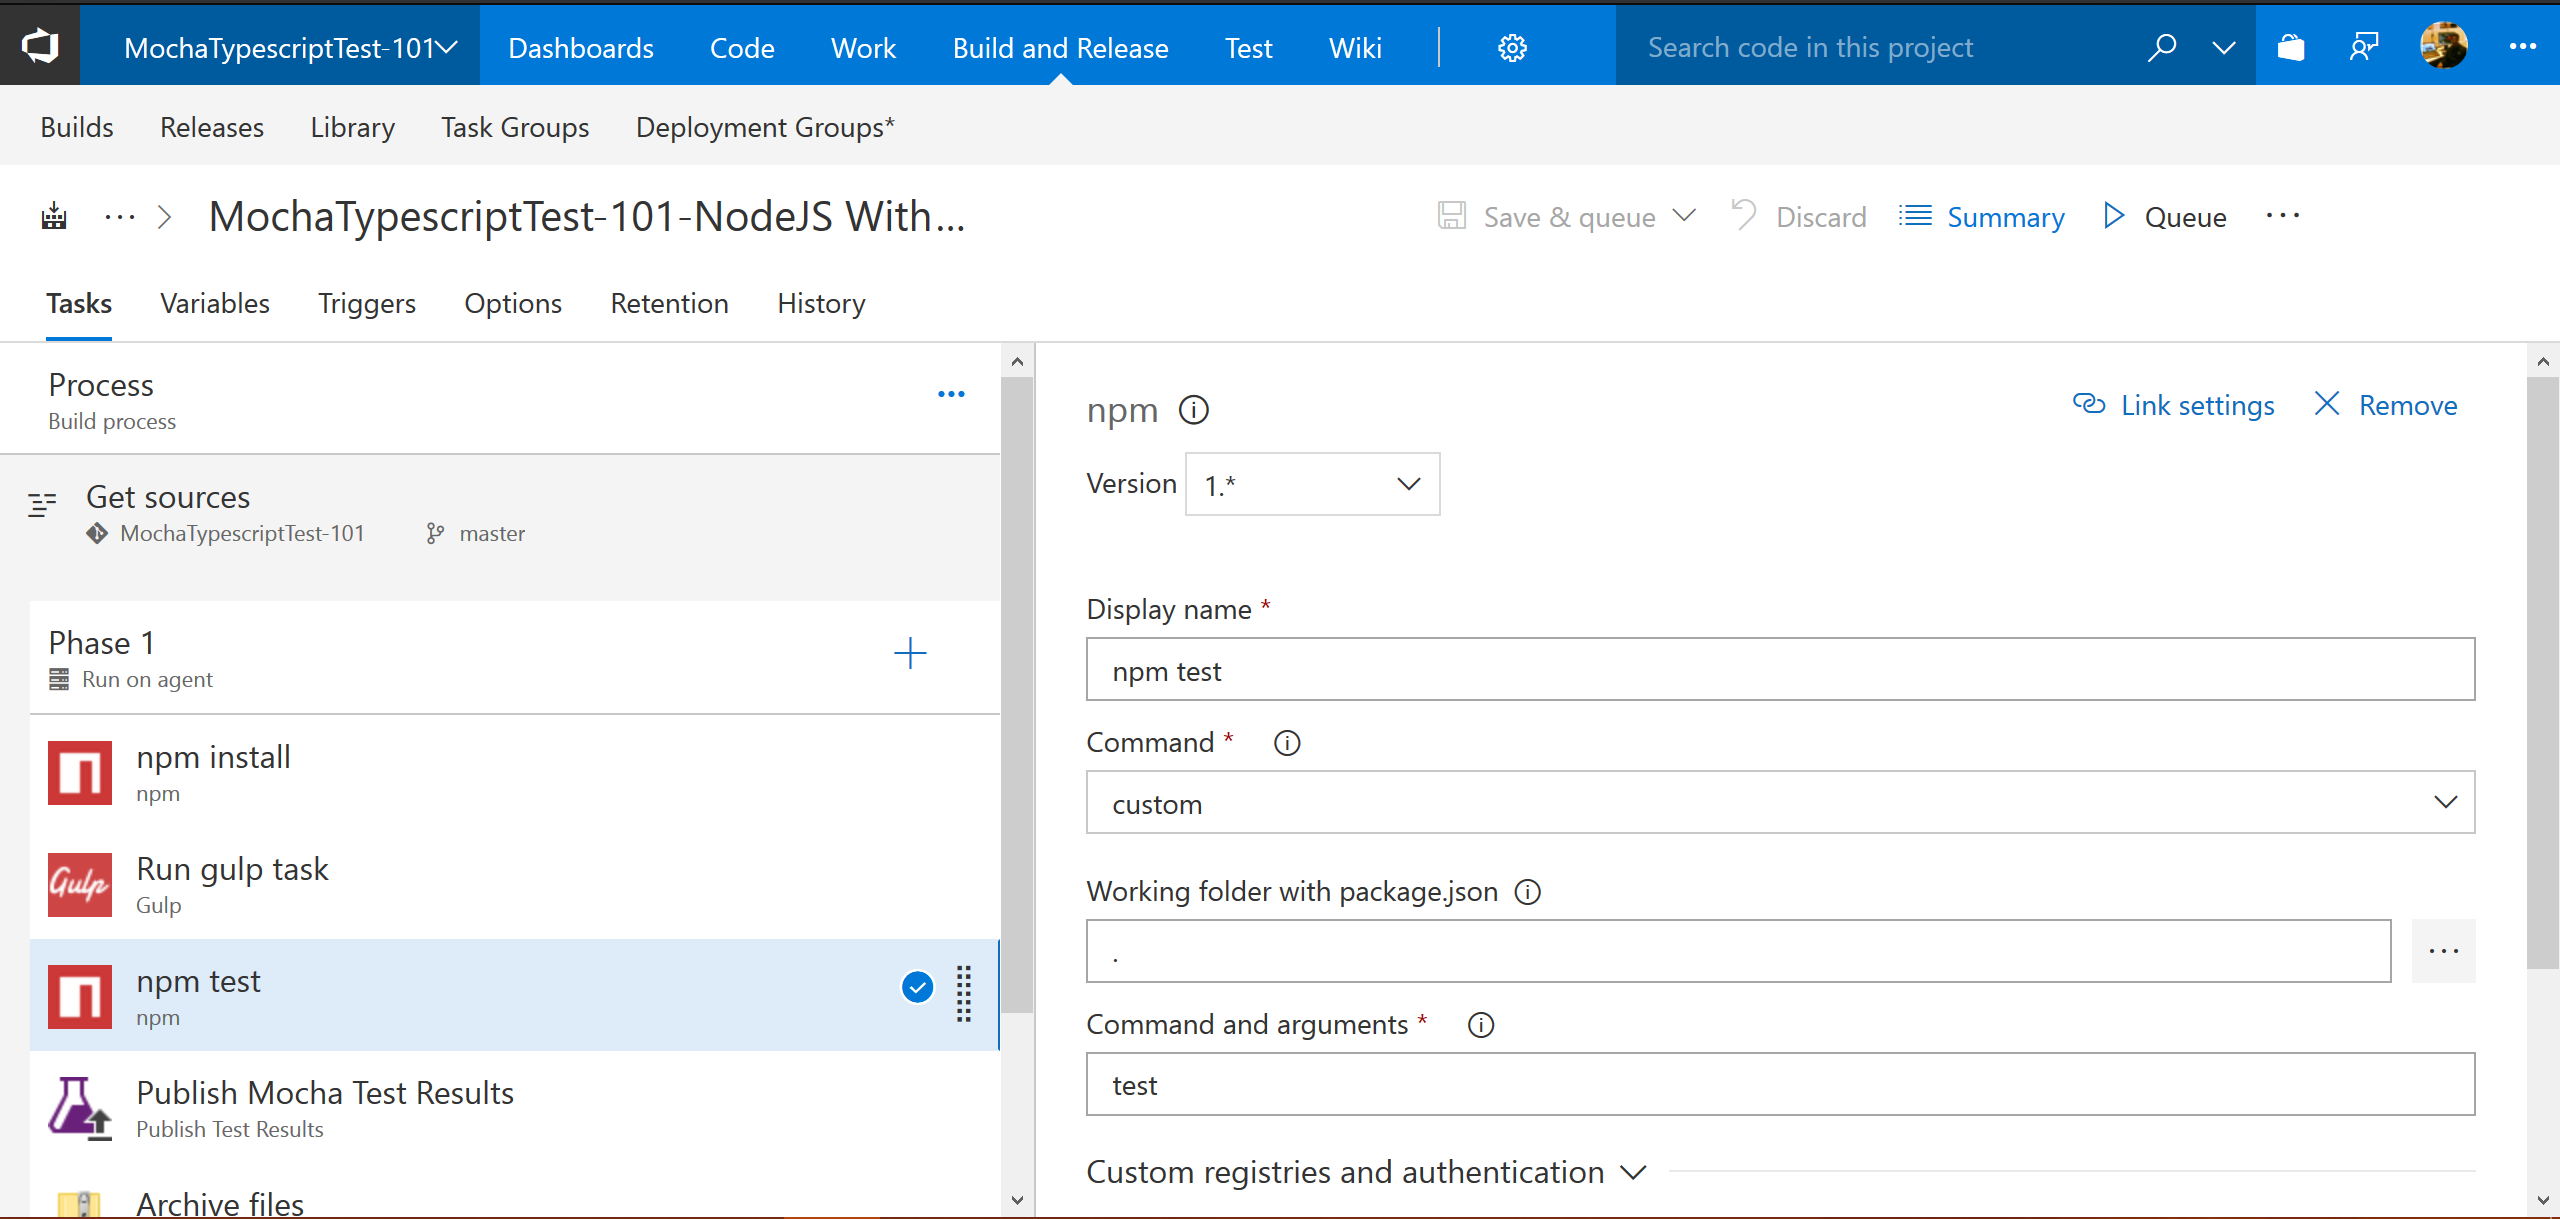
3.7. npm test
- npm test should run all mocha tests as part of the build. Also to see mocha tests report in VSTS build report, you need to use mocha-junit-reporter. (Yes, we are not talking about Java. It's javascript/typescript tests in mocha.)
- Configure mocha tests to run as part of npm test as shown below. Refer complete file: package-vsts.json
- Add mocha-junit-reporter dependency in package.json
"mocha-junit-reporter": "^1.17.0"
- Add test script to run mocha tests with mocha-junit-reporter in package.json
- Below will run all mocha tests under lib/test/ directory and test report will be saved in file: ./TestResults/TEST-RESULT.xml in junit report format.
 "scripts": {
     "test": "mocha lib/test/**/*.js --reporter mocha-junit-reporter --reporter-options     mochaFile=./TestResults/TEST-RESULT.xml"
 }
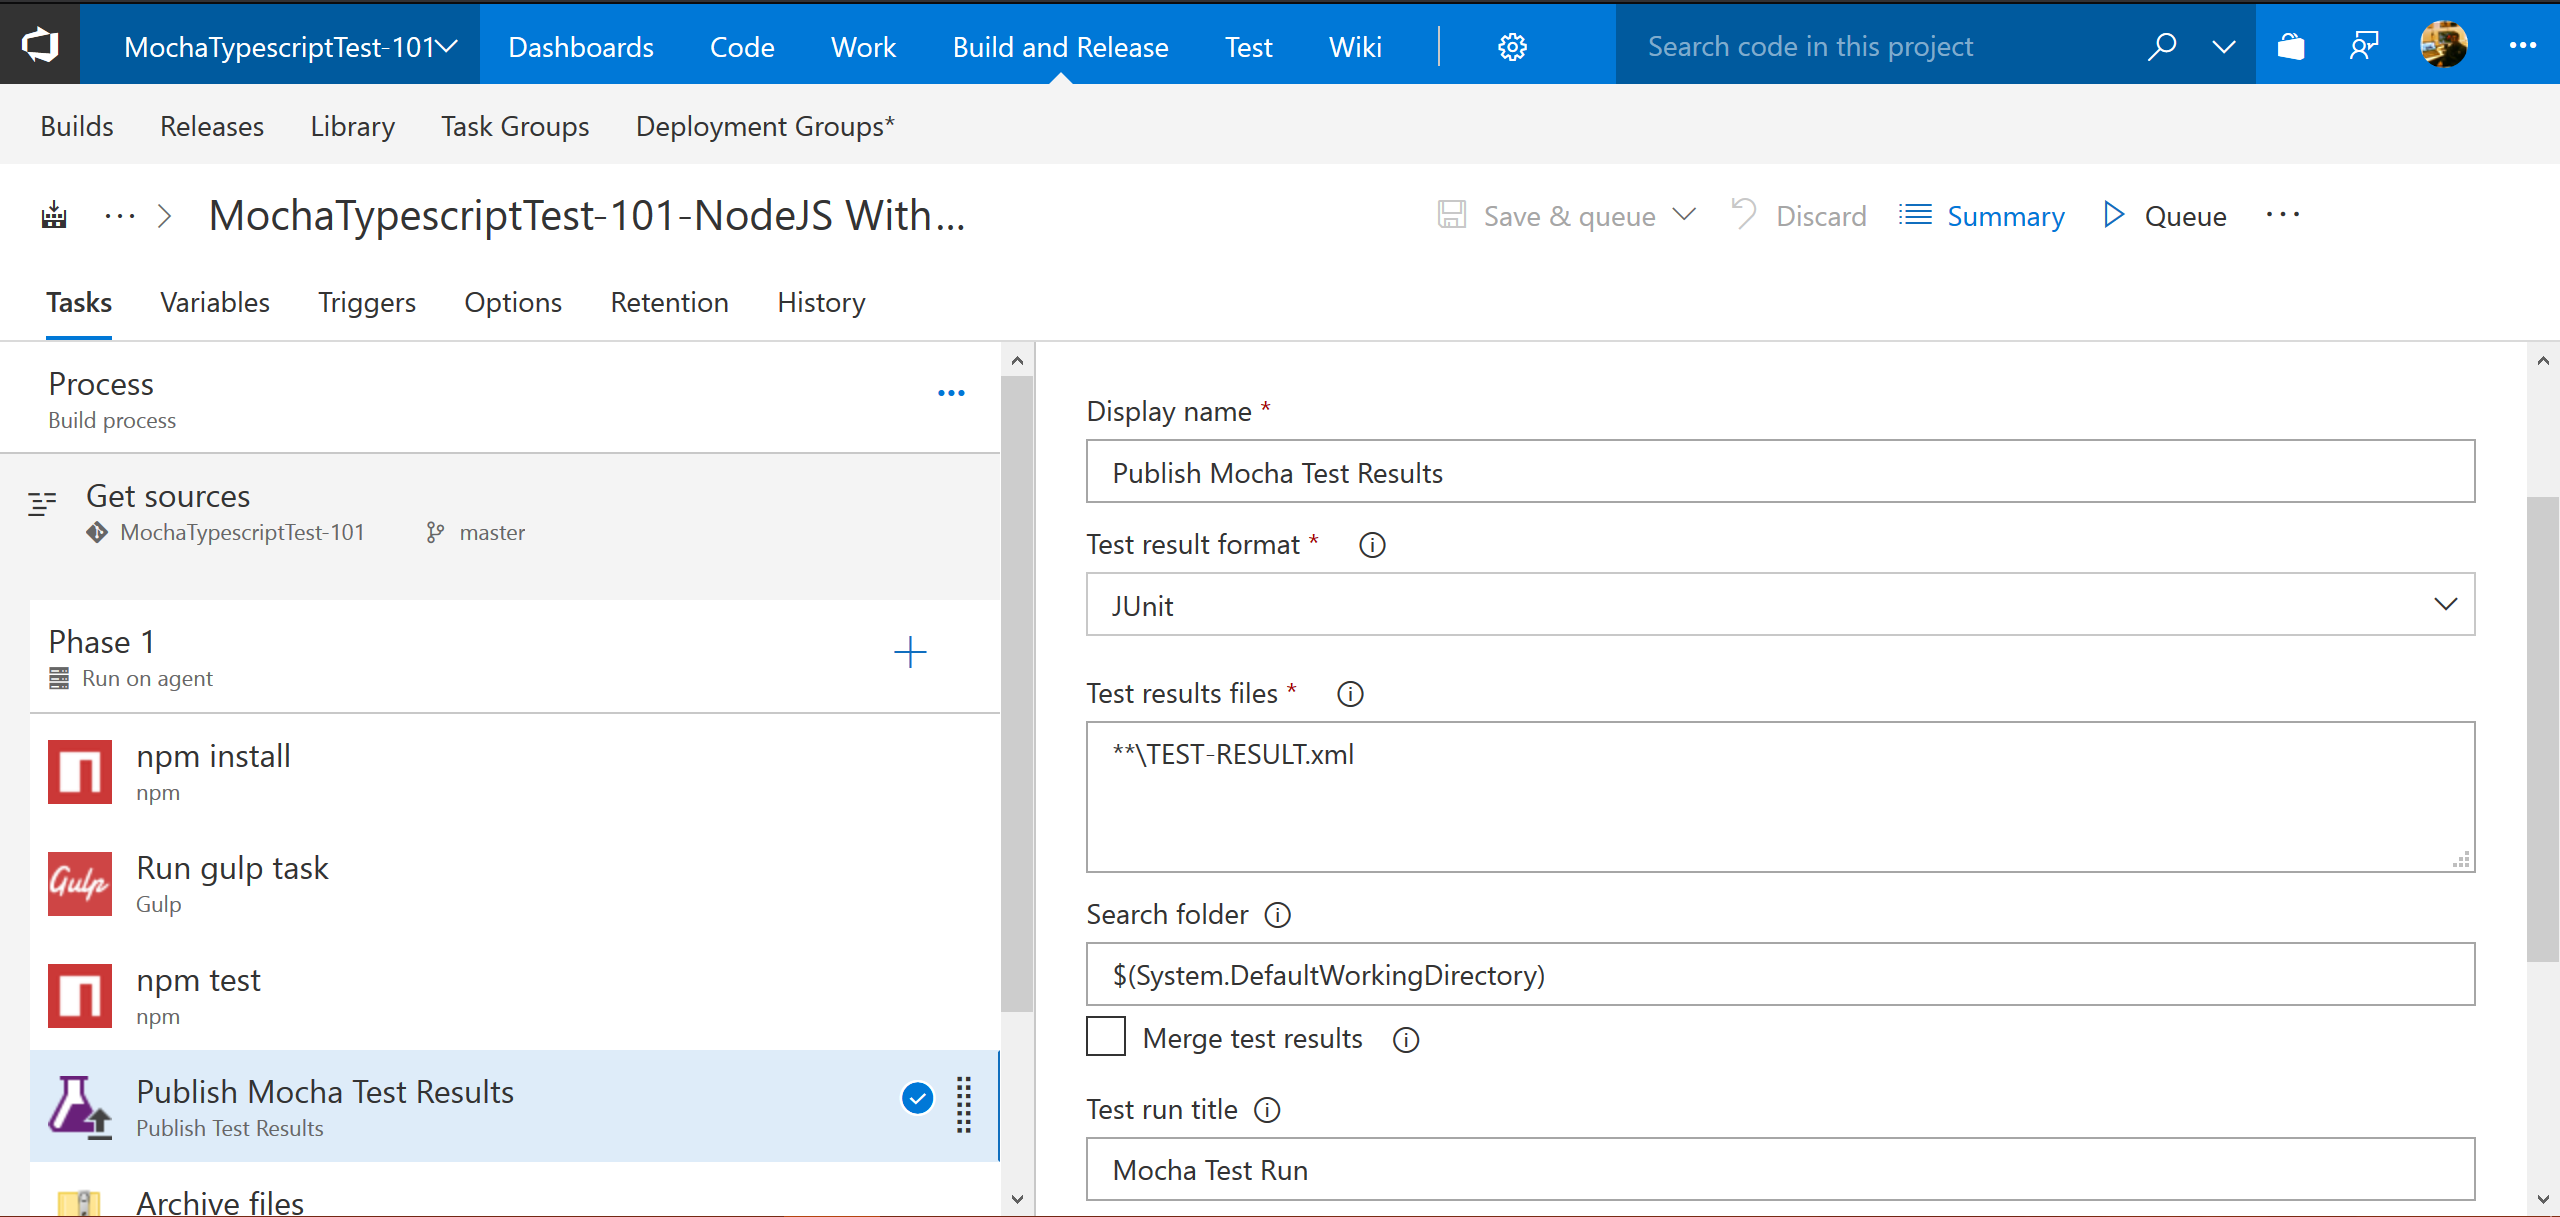
3.8. Publish Mocha Test Results
- Now that npm test will run mocha tests and get the reports in JUnit format in file ./TestResults/TEST-RESULT.xml, let's add a task to publish Mocha Test Results. (Click on + next to phase 1 and search for Publish Mocha Test Results)
- Configure Publish Mocha Test Results task as shown below, and save the build definition.
- Test result format should be: JUnit
- Test results files should match the pattern/fileName given in mocha test run command, for our example: **\TEST-RESULT.xml
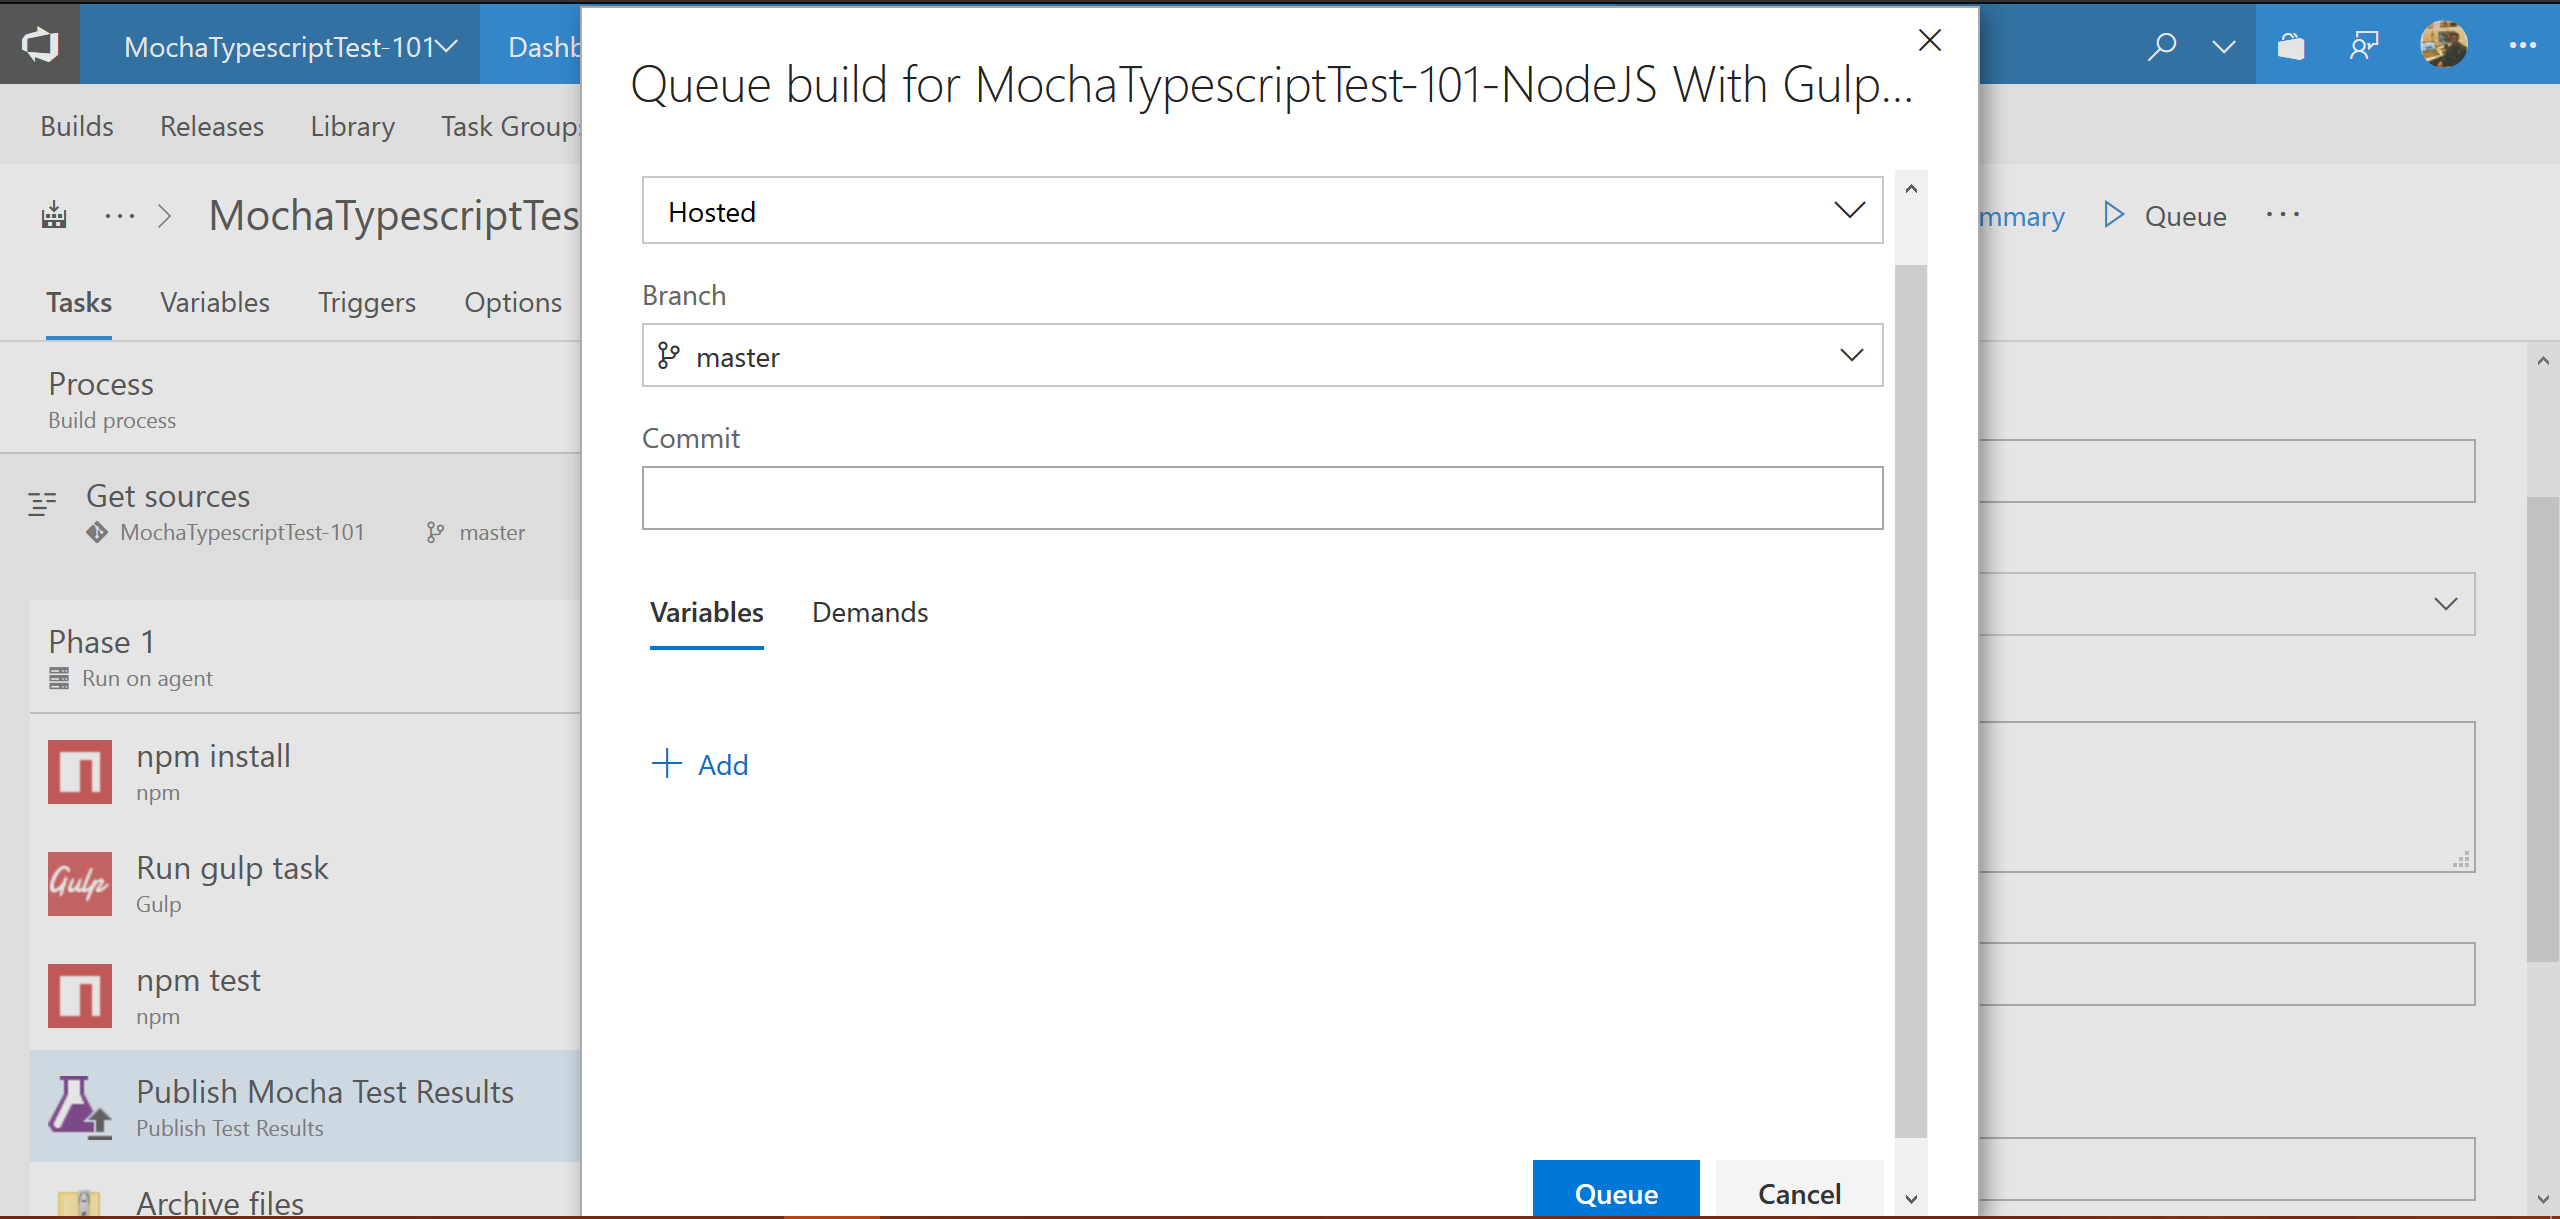
4. Trigger a build
- Click on Queue new build after saving build definition.
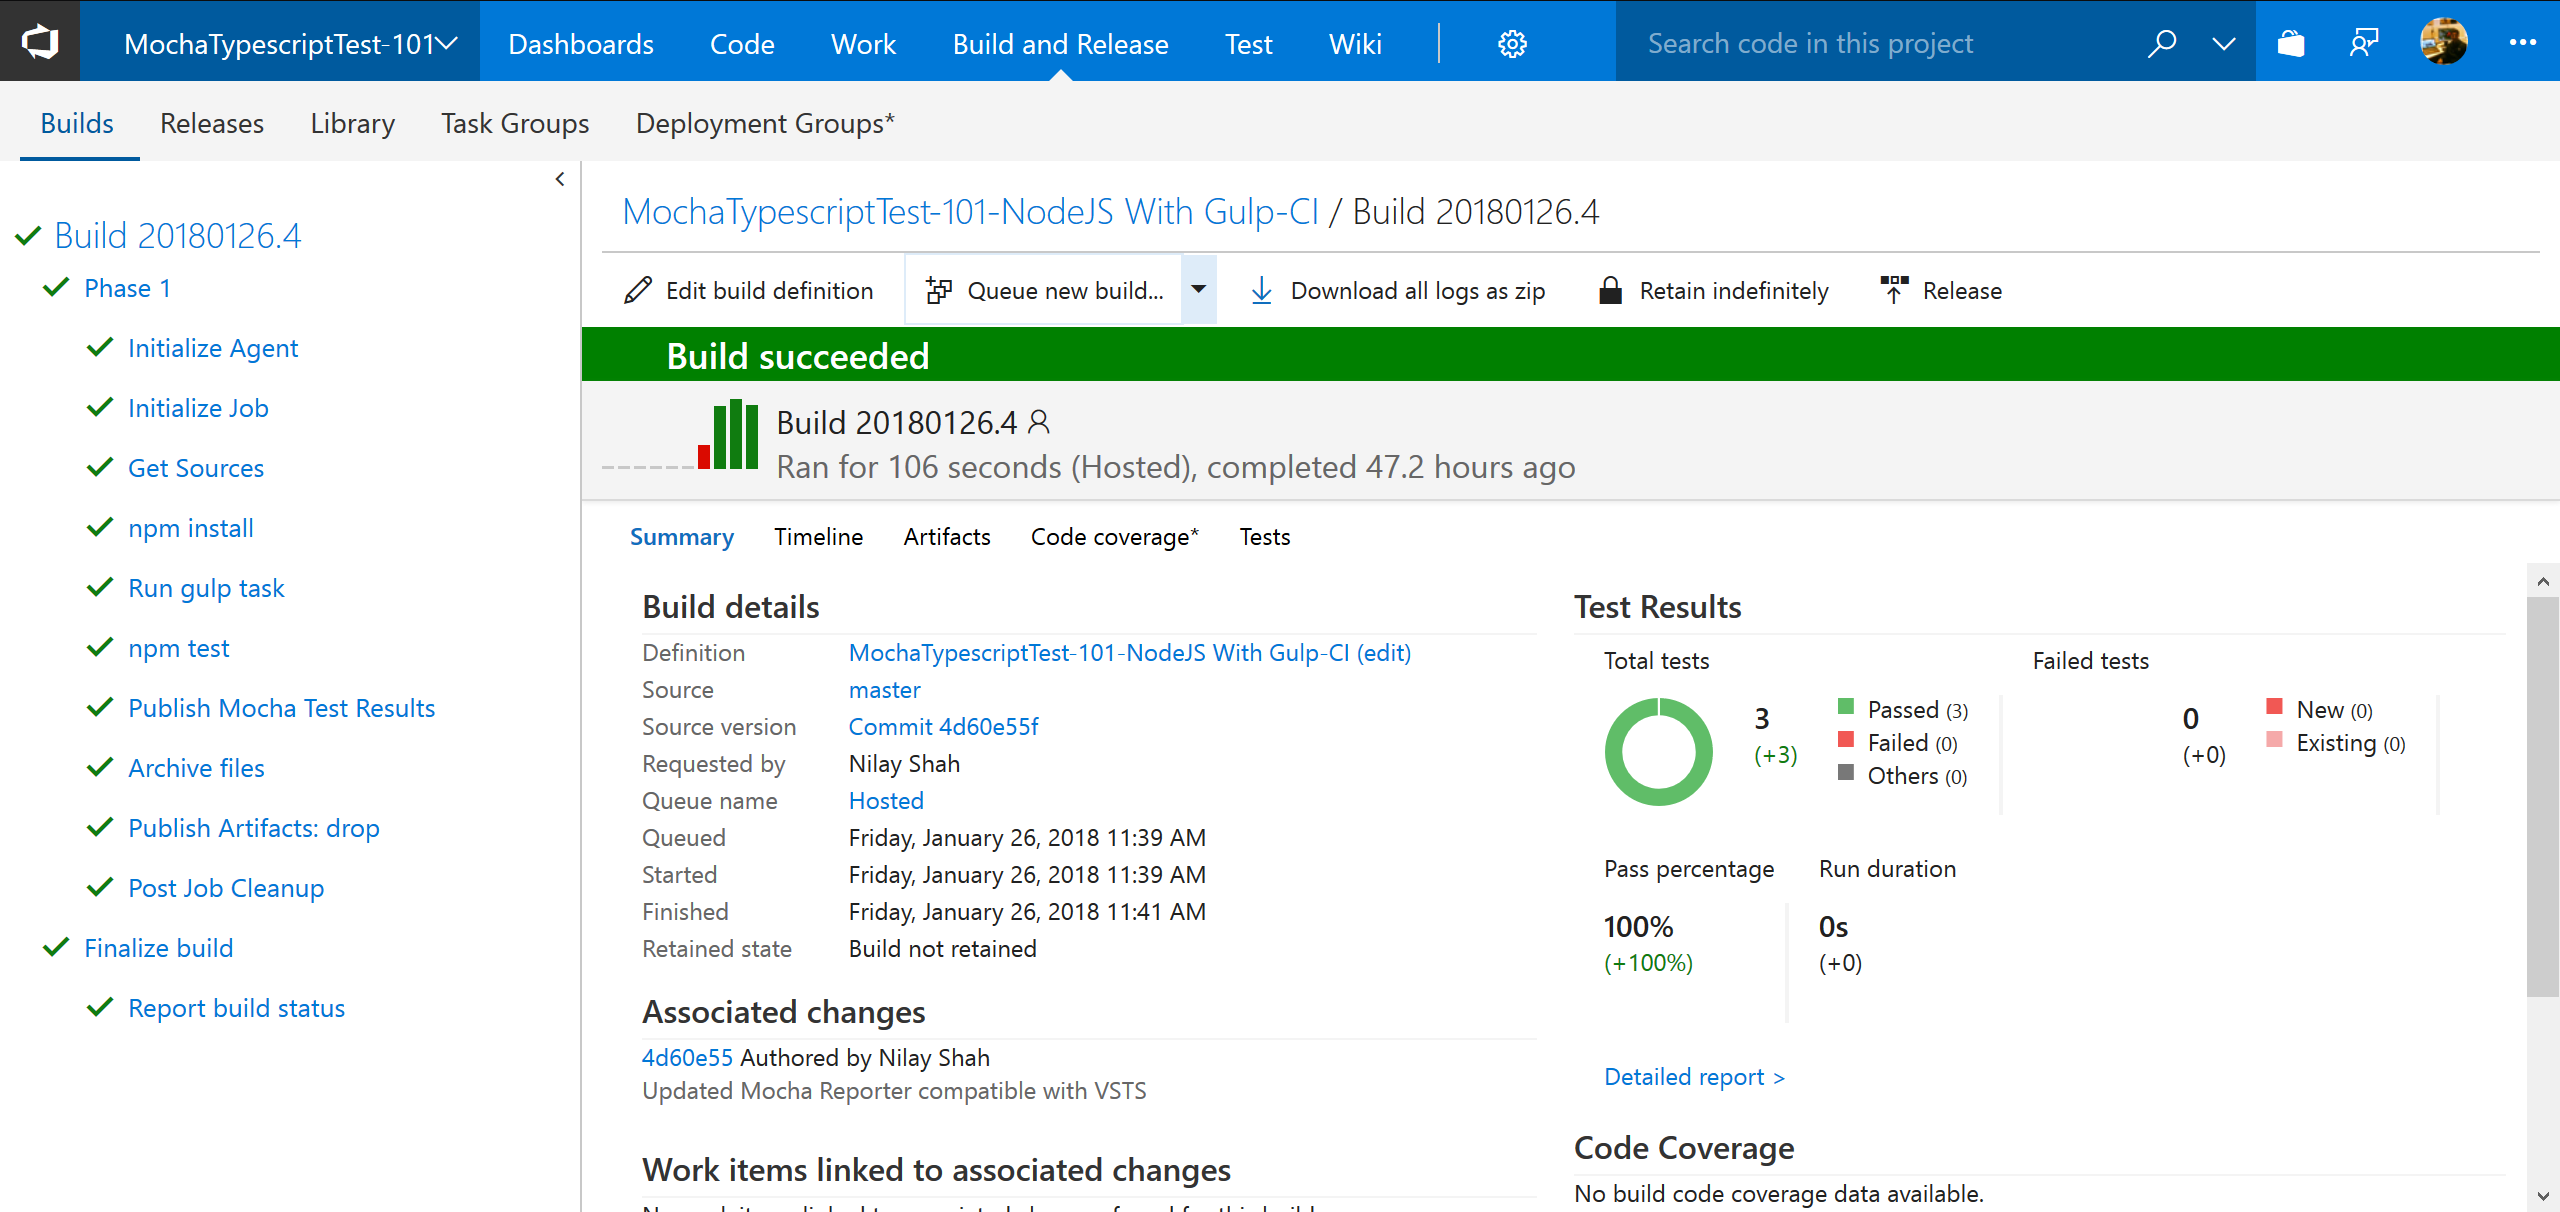
5. See Build summary
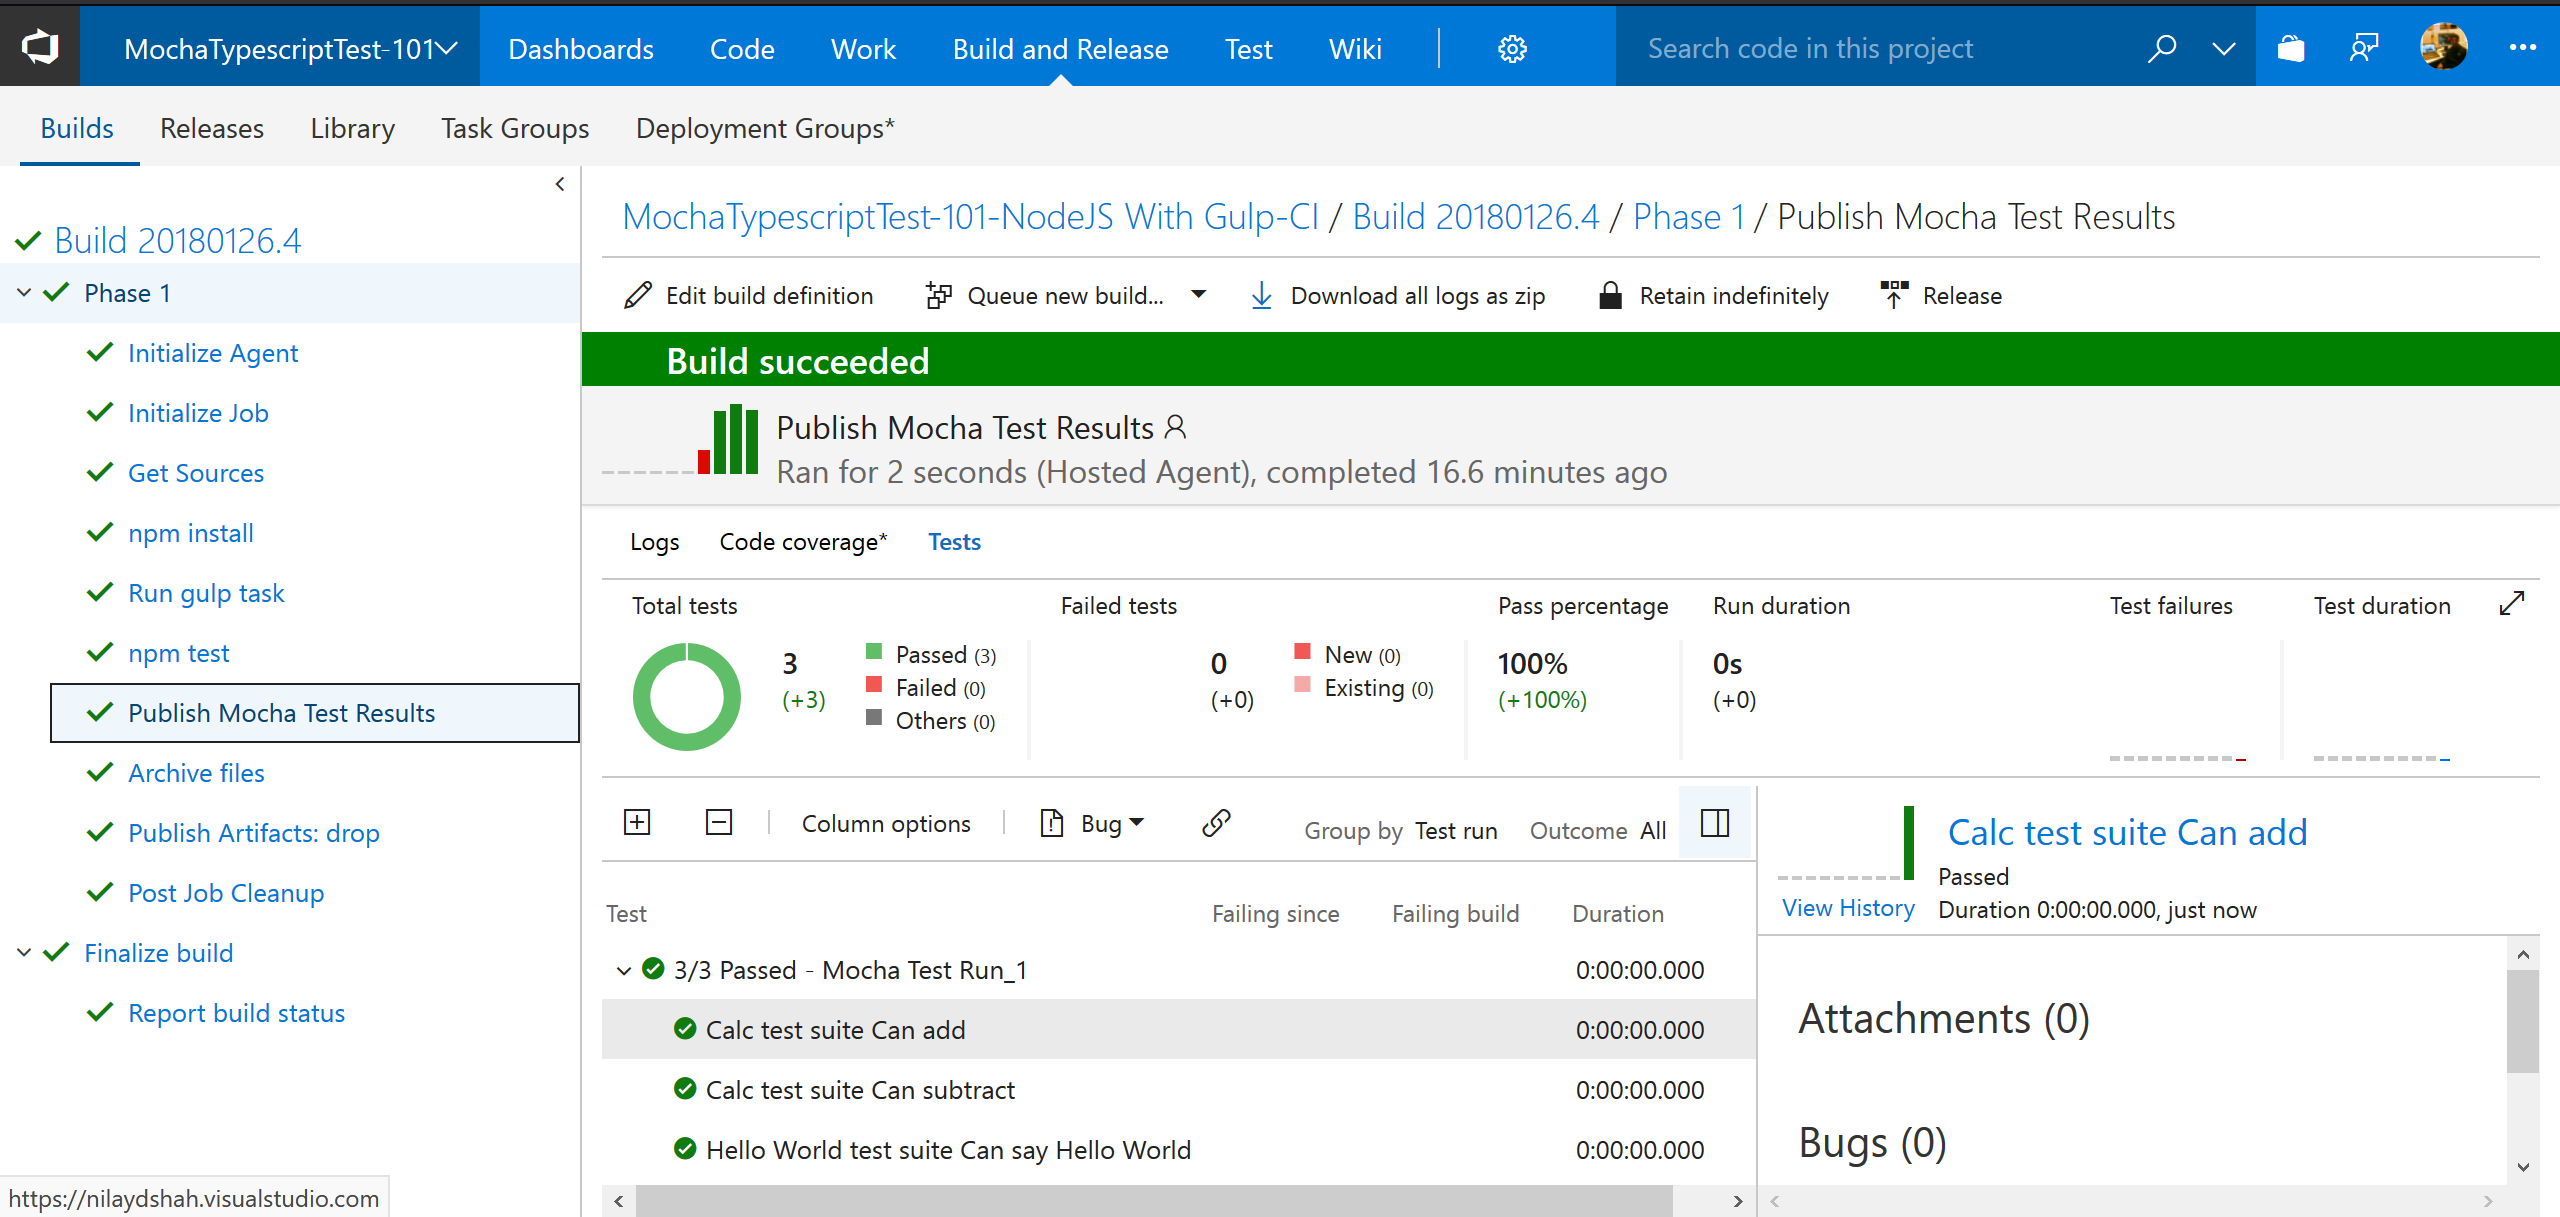
- Once build has ran successfully, we can see below screen as build summary report. (Click on each step for detailed logs etc)
- Click on Tests tab to see details about test report. (By default only Failed tests will be displayed. To see all tests, click on Outcome:ALL)
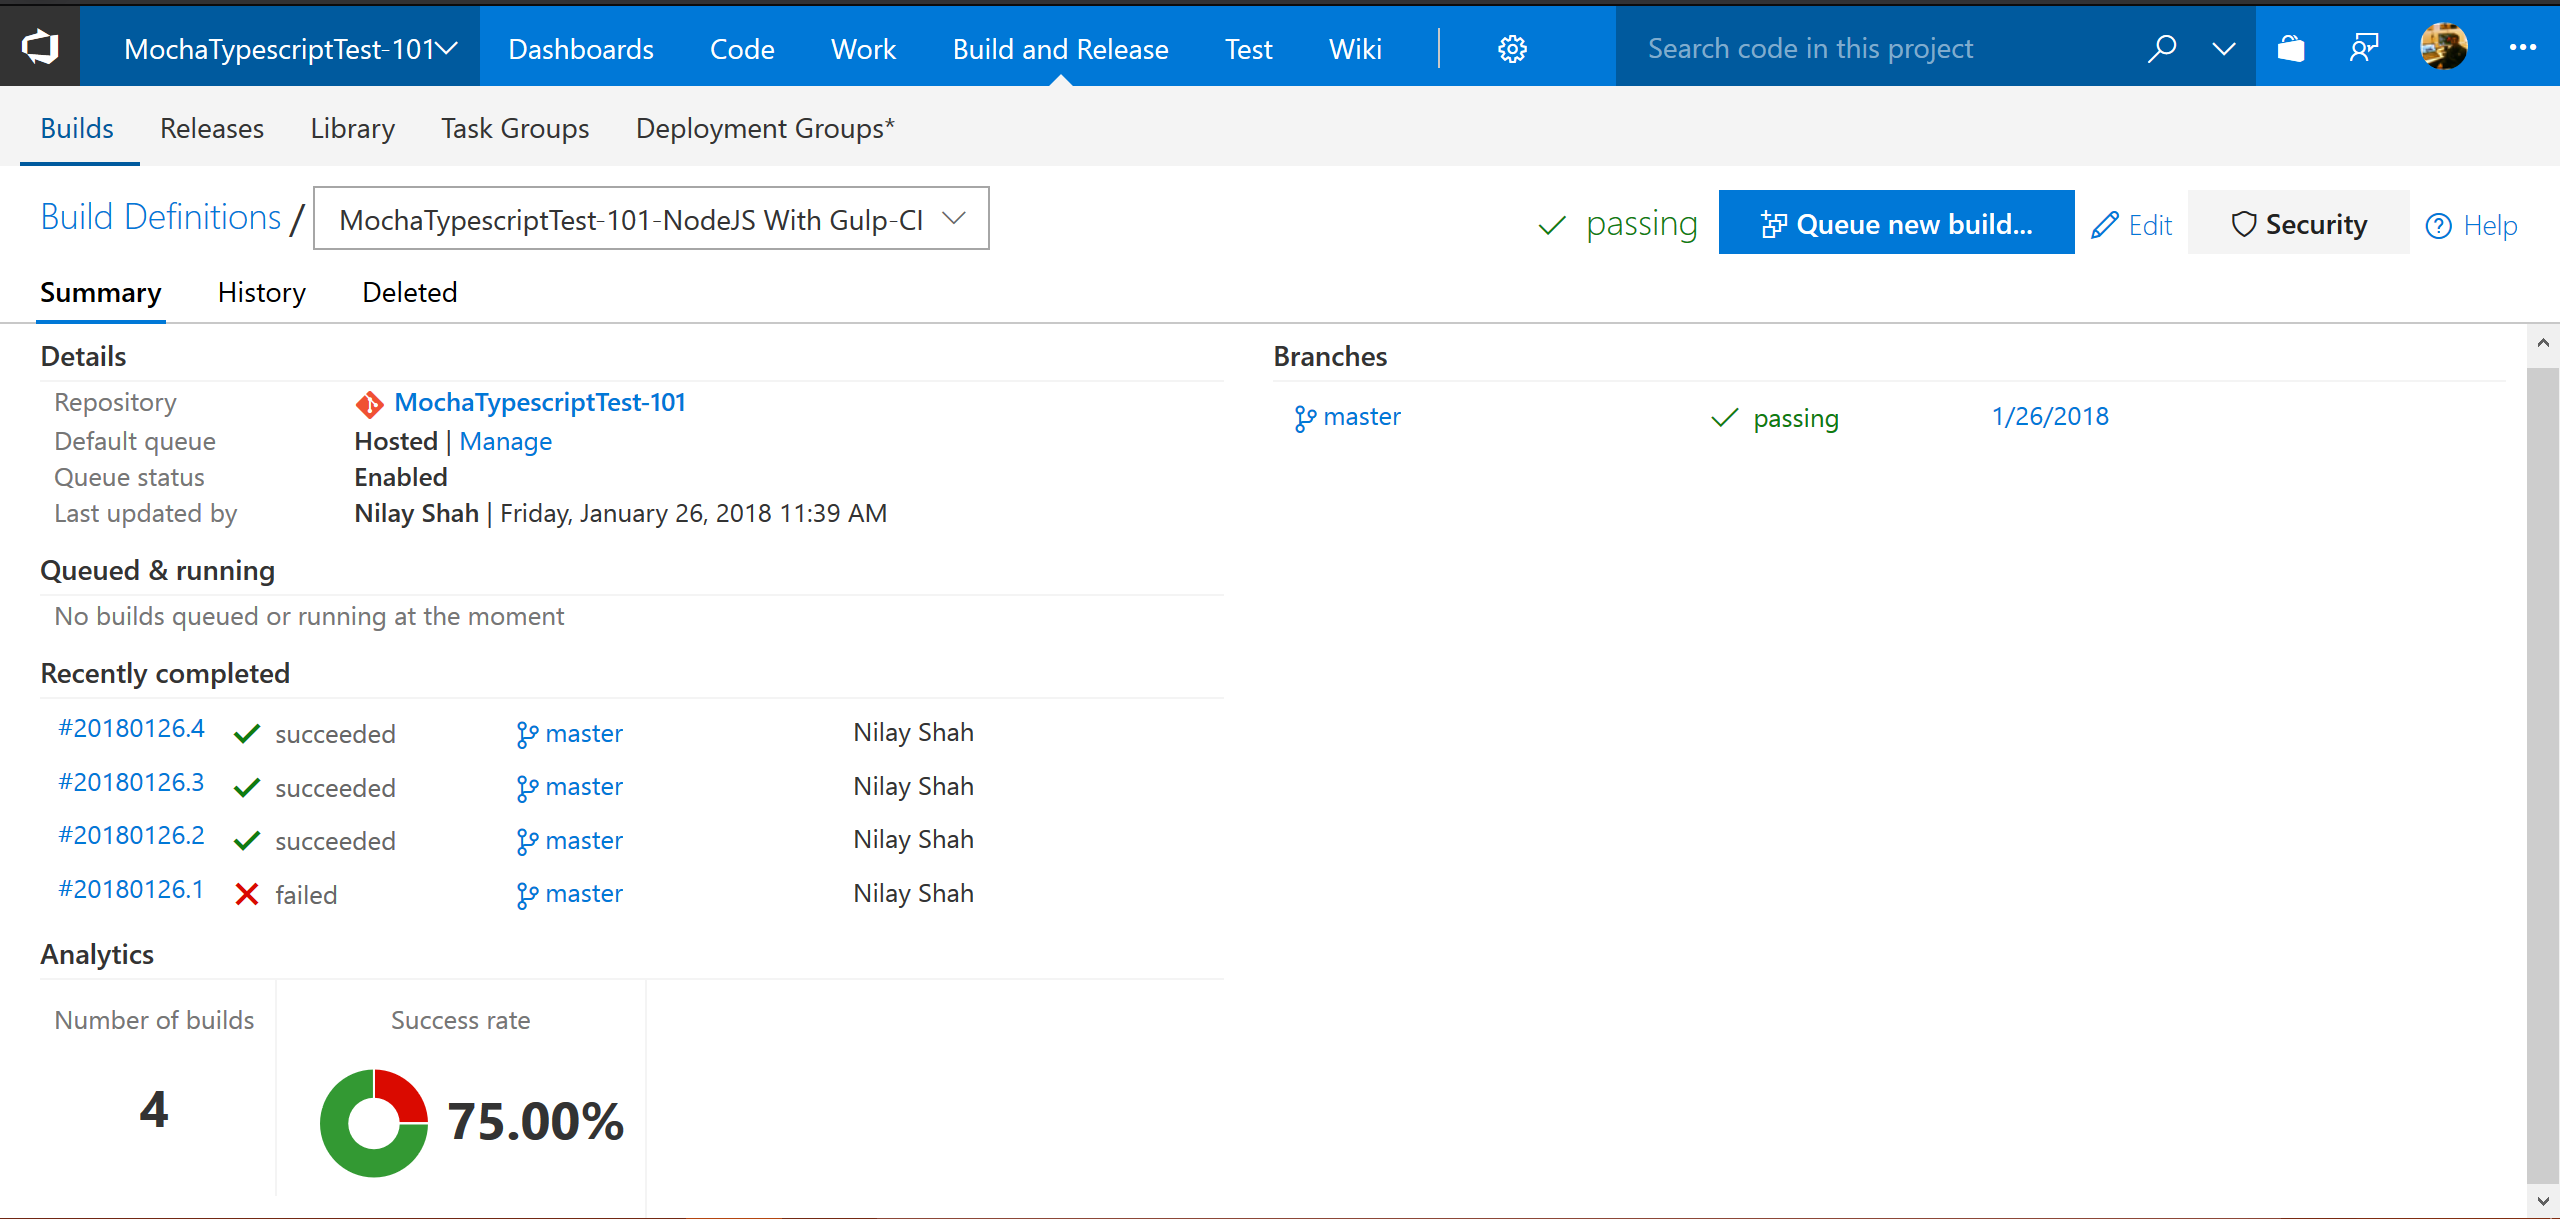
- Build runs summary for given build definition - shows builds history summary at glance (Go to Build and Release >> Builds >> Select build definition)
6. Summary
- This post covered VSTS CI configuration for Node.js app with Gulp and Mocha. Refer Microsoft's documentation at link for this topic.
- VSTS can also be used as Continuous Delivery or Continuous Deployment which is not covered in this post. Refer this link for Continuous Deployment (CD) using Release Definitions.
Please share your thoughts using comments on this post. Also let me know if there are particular things that you would enjoy reading further. Please feel free to connect me @nilaydshah.