OpenXML Styles 101 - Understanding Table Style Conditional Formatting
Introduction
This is the second in a series of articles covering various OpenXML topics. This article provides an example of creating some simple table styles that use conditional formatting, the pitfalls that you would probably encounter, and how to get the results you're expecting. We will be using an example created in Microsoft Word 2016 and then manually modifying the package contents.
By simply reading through this blog you should be able to grasp how to manually create your own custom table styles with conditional formatting. However, nothing beats getting some actual hands-on experience. I highly encourage you to perform the steps as they are presented here and experiment on your own.
Resources
This article will refer to information contained in ISO/IEC 29500-1 and a few other documents as necessary. The latest version of ISO/IEC 29500-1, as of this article's release date, was published in September of 2012 and can be downloaded from the following location.
https://standards.iso.org/ittf/PubliclyAvailableStandards/index.html
Getting Started
We will start by creating a very simple document that contains a table. Use the Insert -> Table ribbon button and select the maximum size table from the UI (10x8). You don't have to make the table this large if you don't want to, but I find that having more rows and columns makes it easier to see the changes that we will be making. Your document should look something like this.
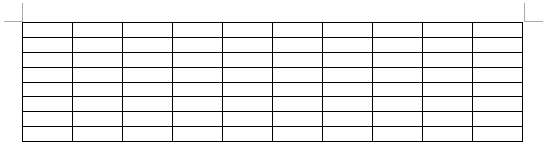
Figure 1: A new document containing an empty table.
Save the document and then rename the file with a .zip extension.
Note: It is assumed that you already understand that the .DOCX, .XLSX, and .PPTX file formats are actually special .ZIP packages that contain all of the XML files used to construct the document. ISO/IEC 29500-1 section 9 contains a summary of the package format. ISO/IEC 29500-2 deals exclusively with the Open Packaging Conventions (OPC) format.
Examining the Package Contents
Once you have renamed the file to have a .zip extension, go ahead and extract the contents. Open the folder and then examine the contents of the "word" folder. The contents should look similar to this.

Figure 2: The contents of the "word" folder.
The two files that we will be working with are document.xml and styles.xml. Go ahead and open the document.xml and styles.xml files in a basic text editor. The first thing you will notice is that the contents are one big blob of text without any kind of formatting unless you are using an application that was designed specifically for editing XML files. There are a few different ways to fix this, but if you are a Visual Studio user you can use the Edit -> Advanced -> Format Document command.
We will only be concerned with a few lines from the document.xml file. We won't be doing anything to it right away so you just need to locate them for now.
document.xml
<w:tblPr>
<w:tblStyle w:val="TableGrid"/>
<w:tblW w:w="0" w:type="auto"/>
<w:tblLook w:val="04A0" w:firstRow="1" w:lastRow="0" w:firstColumn="1"
w:lastColumn="0" w:noHBand="0" w:noVBand="1"/>
</w:tblPr>
Most of the work we will be doing is going to be in the styles.xml file. We will be making changes to the built-in TableGrid style. Currently, the style does not have any conditional formatting specified. We will add that in the next section.
styles.xml
<w:style w:type="table" w:styleId="TableGrid">
<w:name w:val="Table Grid"/>
<w:basedOn w:val="TableNormal"/>
<w:uiPriority w:val="39"/>
<w:rsid w:val="00131252"/>
<w:pPr>
<w:spacing w:after="0" w:line="240" w:lineRule="auto"/>
</w:pPr>
<w:tblPr>
<w:tblBorders>
<w:top w:val="single" w:sz="4" w:space="0" w:color="auto"/>
<w:left w:val="single" w:sz="4" w:space="0" w:color="auto"/>
<w:bottom w:val="single" w:sz="4" w:space="0" w:color="auto"/>
<w:right w:val="single" w:sz="4" w:space="0" w:color="auto"/>
<w:insideH w:val="single" w:sz="4" w:space="0" w:color="auto"/>
<w:insideV w:val="single" w:sz="4" w:space="0" w:color="auto"/>
</w:tblBorders>
</w:tblPr>
</w:style>
Note: If you have read my previous article, Creating Custom Styles and Understanding Style Inheritance, you may have noticed that the TableGrid style is based on the TableNormal style. However, we will not be making any changes to the TableNormal style and we are not concerned with any of the settings from it. You may still want to take a look it in order to understand the entire style that is being applied to the table though.
Table Styles and Row Banding
ISO/IEC 29500-1 section 17.7.6 and its related subsections contain the majority of the information that you need to know in order to be able to create table styles that use conditional formatting for things such as row and column banding. The element that you use to define the type of conditional formatting being applied is the tblStylePr element (section 17.7.6.6). For example, if we add the following to the TableGrid style it should add a shaded background to the odd numbered rows.
<w:tblStylePr w:type="band1Horz">
<w:tcPr>
<w:shd w:val="clear" w:color="auto" w:fill="AAAAAA" />
</w:tcPr>
</w:tblStylePr>
Note: Add this block of XML either right after the rsid element or after the pPr element block. If you add it after the tblPr element block that contains the tblBorders it won't show up correctly.
If you're following along and implementing this as you're reading through this article you are now probably wondering why the row banding doesn't seem to be working. I've intentionally left something out to illustrate a very important point when working with the ISO/IEC 29500 specification, which is that the Office products don't always behave according to the spec.
The issue here deals with tblStyleRowBandSize which is described in section 17.7.6.7. This element allows you specify how many rows will be grouped into a single band when conditional formatting is applied. If you look at the TableGrid style you'll notice that this element is not defined, and per the spec "If this element is omitted, then the default number of rows in a single row band shall be assumed to be 1." So, it shouldn't be a problem, right? Unfortunately, that's not the case here.
The lesson to learn from this is the following: When you encounter behavior that differs from, or seems to contradict the specification, it's probably because Word/Excel/PowerPoint is doing something different, which is exactly what is happening here.
The document to look at that describes these differences is MS-OI29500. Section 2.1, Normative Variations, contains almost 2,000 sections with information about how the Office implementations differ from what is described in ISO/IEC 29500. In this case, section 2.1.251 contains notes about how Word treats the tblStyleRowBandSize element and the first 2 items are what we care about.
a. The standard says the default for tblStyleRowBandSize is 1.
Word uses 0 as the default for tblStyleRowBandSize.
b. The standard does not specify the meaning if tblStyleRowBandSize is set to 0.
If tblStyleRowBandSize is set to 0, Word does not apply any banded row conditional formatting.
That should be self-explanatory. But if you're still not sure, it means that we need to add the tblStyleRowBandSize element to our style and give it a value of 1 or greater. Just to be safe, we should go ahead and add the tblStyleColBandSize element as well since it behaves exactly the same way. Once you add those the complete style should look similar to the following.
styles.xml
<w:style w:type="table" w:styleId="TableGrid">
<w:name w:val="Table Grid"/>
<w:basedOn w:val="TableNormal"/>
<w:uiPriority w:val="39"/>
<w:rsid w:val="00131252"/>
<w:tblStyleRowBandSize w:val="1"/>
<w:tblStyleColBandSize w:val="1"/>
<w:tblStylePr w:type="band1Horz">
<w:tcPr>
<w:shd w:val="clear" w:color="auto" w:fill="AAAAAA" />
</w:tcPr>
</w:tblStylePr>
<w:pPr>
<w:spacing w:after="0" w:line="240" w:lineRule="auto"/>
</w:pPr>
<w:tblPr>
<w:tblBorders>
<w:top w:val="single" w:sz="4" w:space="0" w:color="auto"/>
<w:left w:val="single" w:sz="4" w:space="0" w:color="auto"/>
<w:bottom w:val="single" w:sz="4" w:space="0" w:color="auto"/>
<w:right w:val="single" w:sz="4" w:space="0" w:color="auto"/>
<w:insideH w:val="single" w:sz="4" w:space="0" w:color="auto"/>
<w:insideV w:val="single" w:sz="4" w:space="0" w:color="auto"/>
</w:tblBorders>
</w:tblPr>
</w:style>
Now when you open the document in Word it should look something like this.
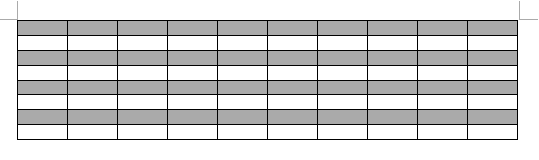
Figure 3: A table with odd row banding applied.
Column Banding
In addition to row banding you can add column bands as well. It works almost exactly the same way as row banding in that you just need to add a tblStylePr element with the right type and that's almost all there is to it. Let's add odd column banding and set it to a slightly lighter shade of gray.
<w:tblStylePr w:type="band1Vert">
<w:tcPr>
<w:shd w:val="clear" w:color="auto" w:fill="CCCCCC" />
</w:tcPr>
</w:tblStylePr>
Once again, if you're following along and testing each change we make you're probably wondering why the column banding isn't showing up. This is where we need to go back and look at the line from the document.xml file that looked like this.
<w:tblLook w:val="04A0" w:firstRow="1" w:lastRow="0" w:firstColumn="1" w:lastColumn="0" w:noHBand="0" w:noVBand="1"/>
The details about this element are in section 17.4.55. But if you examine the values for the different attributes in the line above the problem should jump out at you. The noVBand attribute is set to 1, or true. This means that "the vertical banding conditional formatting shall not be applied to the table." The fix should be equally as obvious, setting noVBand to 0 (similar to noHBand) tells word to apply any conditional formatting for columns. The table should now look like this.
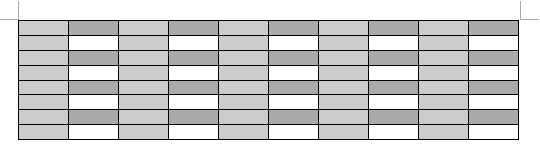
Figure 4: A table with both row and column banding applied.
One Last Thing
The last issue may not be obvious and it’s likely that most people would never notice or even care, but it's something that you should be aware of. Did you notice how the column banding is overwriting the row banding? Regardless of whether or not that was the behavior you we're expecting, that's the result. But why? If we take a look at the description of how the different conditional formatting options are applied (section 17.7.6.6) we see that is tells us the following:
When specified, these conditional formats shall be applied in the following order (therefore subsequent formats override properties on previous formats):
- Whole table
- Banded columns, even column banding
- Banded rows, even row banding
- First row, last row
- First column, last column
- Top left, top right, bottom left, bottom right
The problem should be a little more clear at this point. According to the specification, row banding should be applied after column banding. So why do we see the opposite behavior? This is another one of those cases where Word behaves differently from the spec. As we did previously, we should look in MS-OI29500 to see if has anything to say about this, and it does. Section 2.1.250 is the entry for the tblStylePr element and it states the following:
a. The standard specifies the precedence order in which conditional formatting should be applied.
When specified, Office applies conditional formats in the following order (therefore subsequent formats override properties on previous formats):
-
- Whole table
- Banded rows, even row banding
- Banded columns, even column banding
- First column, last column
- First row, last row
- Top left, top right, bottom left, bottom right
As you can see, Word actually applies the column banding after the row banding which is why the table looks the way it does.
Summary
Thank you for taking the time to read through this article. I hope that you found it useful and that it may have answered a few questions you had on table styles or how conditional formatting works.
I encourage you to send any feedback or questions regarding this article, or any other Open XML related topics to Microsoft Interoperability Support at dochelp@microsoft.com or post on the Office XML, ODF, and Binary File Formats forum on MSDN.