Test Generation from a Compiled Assembly
Visual Studio 2008 (Codename "Orcas") can generate a basic test project including test classes and test methods from your C#, VB, or managed C++ source code. But did you know it can also generate the same test project/classes/methods against a compiled assembly?
In order to generate these tests, you will first need to compile an assembly. The assembly may be compiled from C#, Visual Basic .NET, or managed C++. Once you have your compiled assembly handy, open Visual Studio 2008, show the “Test View” tool window if it is not already showing (Test|Windows|Test View) and click on the “Create New Test” hyperlink in the middle of the tool window. You will get a dialog like:
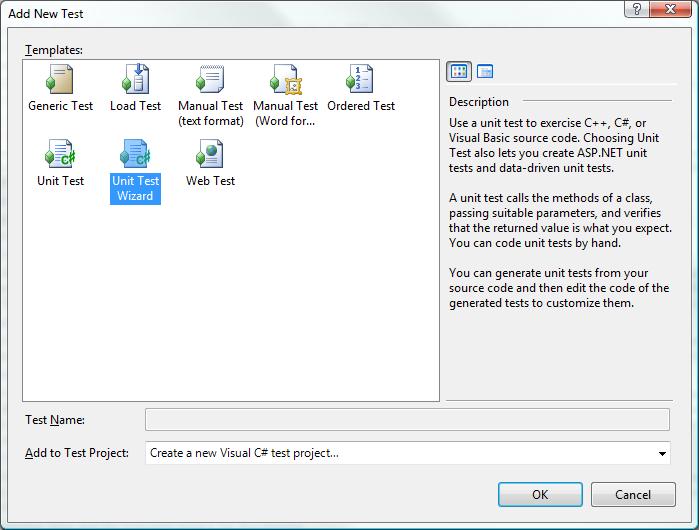
Figure 1: Add New Test Dialog
Choose “Unit Test Wizard” and click “OK.” You will be prompted for a project name with a preset value. Once you have named your new project, click “OK” again and you will be taken to the “Create Unit Test” dialog:
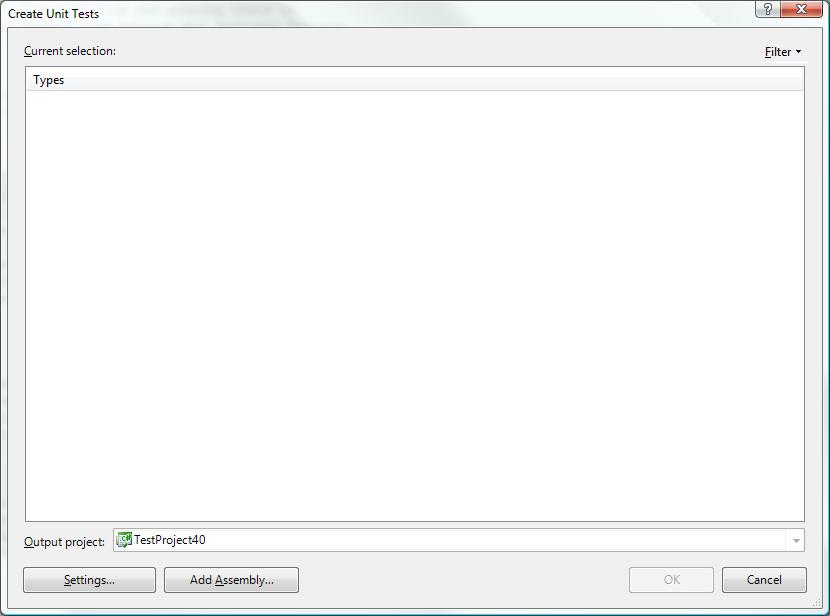
Figure 2: Create Unit Test Dialog
On the “Create Unit Test” dialog you will see a button at the bottom labeled “Add Assembly.” This feature will allow you to add a managed assembly to the list of assemblies currently displayed in the tree view above. Click the “Add Assembly…” button and choose your assembly. After clicking “OK” in the file chooser dialog you will be taken back to the “Create Unit Test” dialog and it will be populated with the types and members (in hierarchical order) from your assembly.
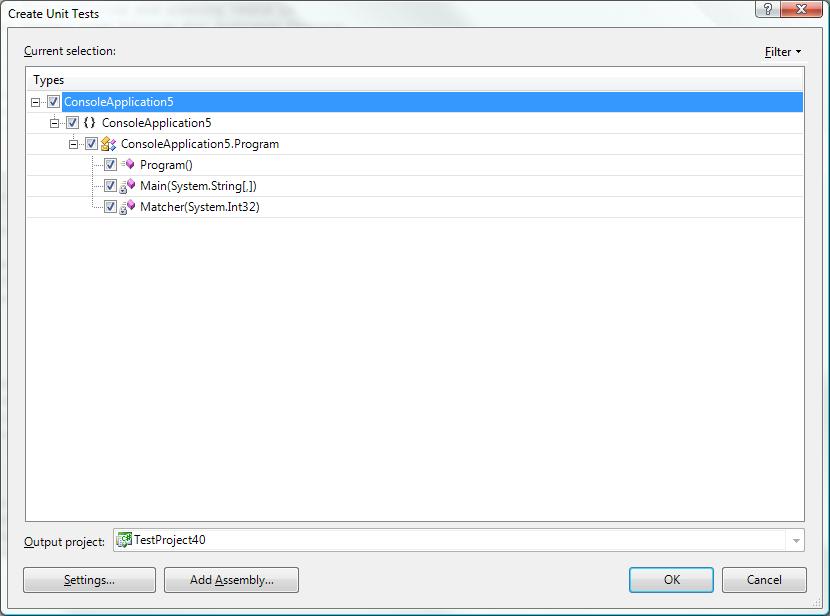
Figure 3: Create Unit Test Dialog with Types
You can choose the members for which you would like to generate tests by clicking the checkbox next to each name. Once you have chosen the types you want to generate, click “OK” and the test generation engine will create a new test project in a new solution and generate basic test methods for all the types chosen in the types tree. Below is a sample test project created for a compiled assembly:
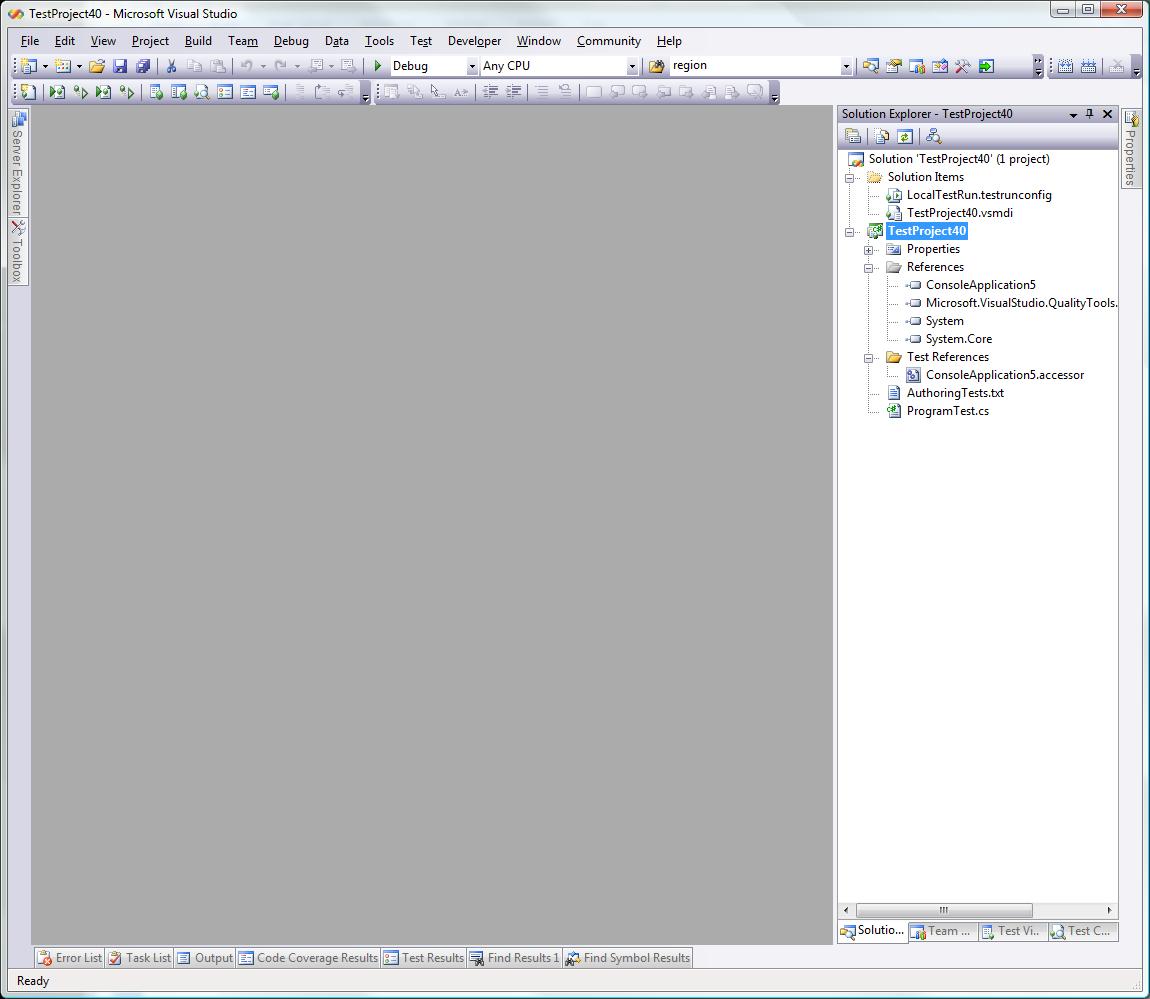
Figure 4: Visual Studio with Test Project
You will have a test class file for each class in your CUT—Code Under Test—assembly. In each test class file, you will see a test method for each method in your CUT class with the suffix “Test.”
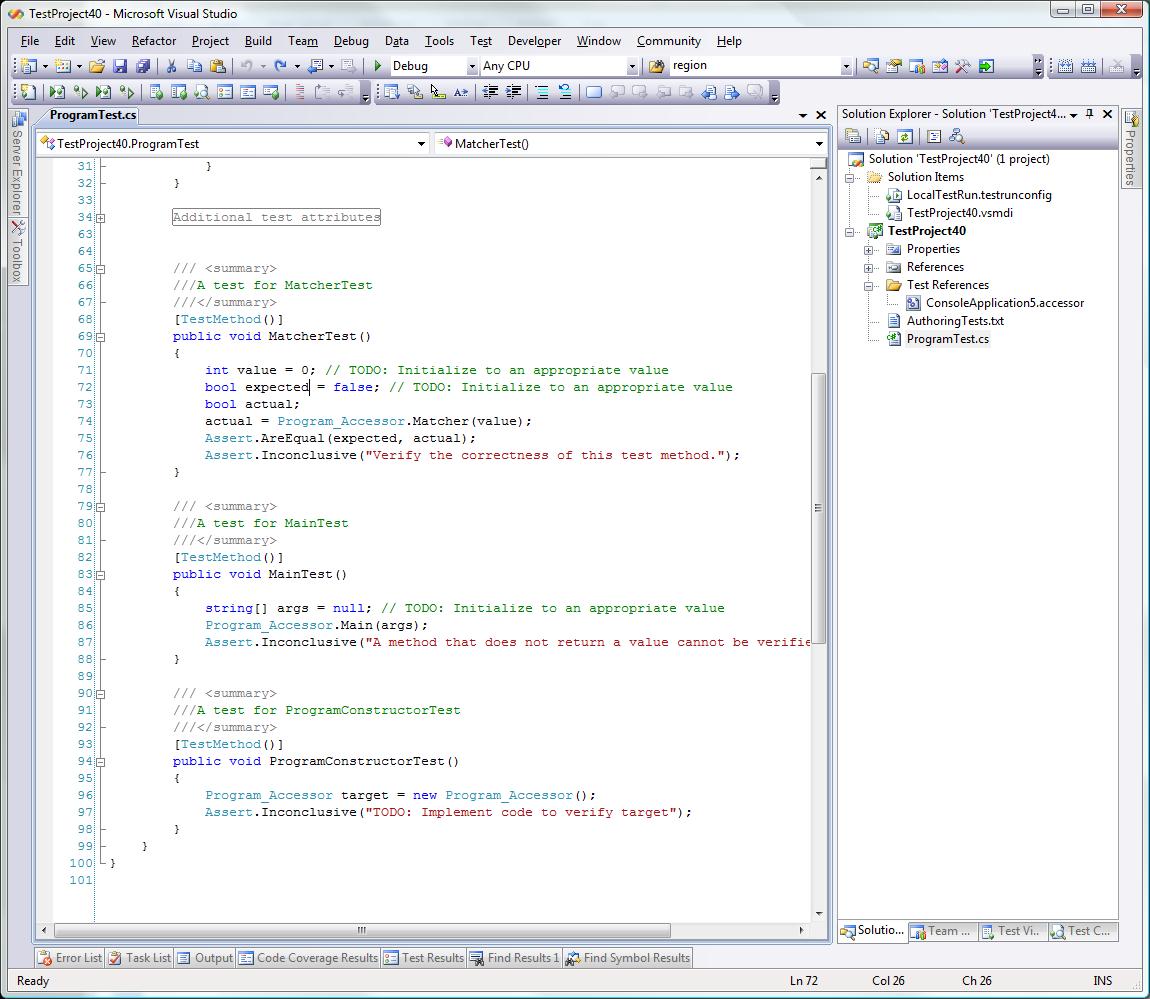
Figure 5: Visual Studio with Open Test Class
If your assembly contains private types, our private accessor engine will create a “wrapper” assembly around your private types allowing you to test them via the test project. In the sample above, notice that there is a Test Reference called “ConsoleApplication5.accessor” in your solution explorer. This is a reference to the wrapper assembly—called an Accessor assembly—and will be what you use in your test code instead of the CUT type name when you want to author tests against a private type in the CUT assembly. We add Inconclusive assertions to each of the test methods generated to be a reminder that you may need to add valid arguments and assertions inside each test method for testing the corresponding CUT method. An example of this is in Figure 5 at the bottom of the ProgramConstructorTest method. The assertion
Assert.Inconclusive("TODO: Implement code to verify target");
is added by the test generation engine to remind you that you need to fill out the rest of the test method. In this case, you need to make sure that your target object reference contains a valid object reference:
Assert.IsNotNull(target);
You can run the test project at any time, including before you have completed the remaining test methods. Below are a couple of screen shots taken before and after all the remaining test methods are filled in:
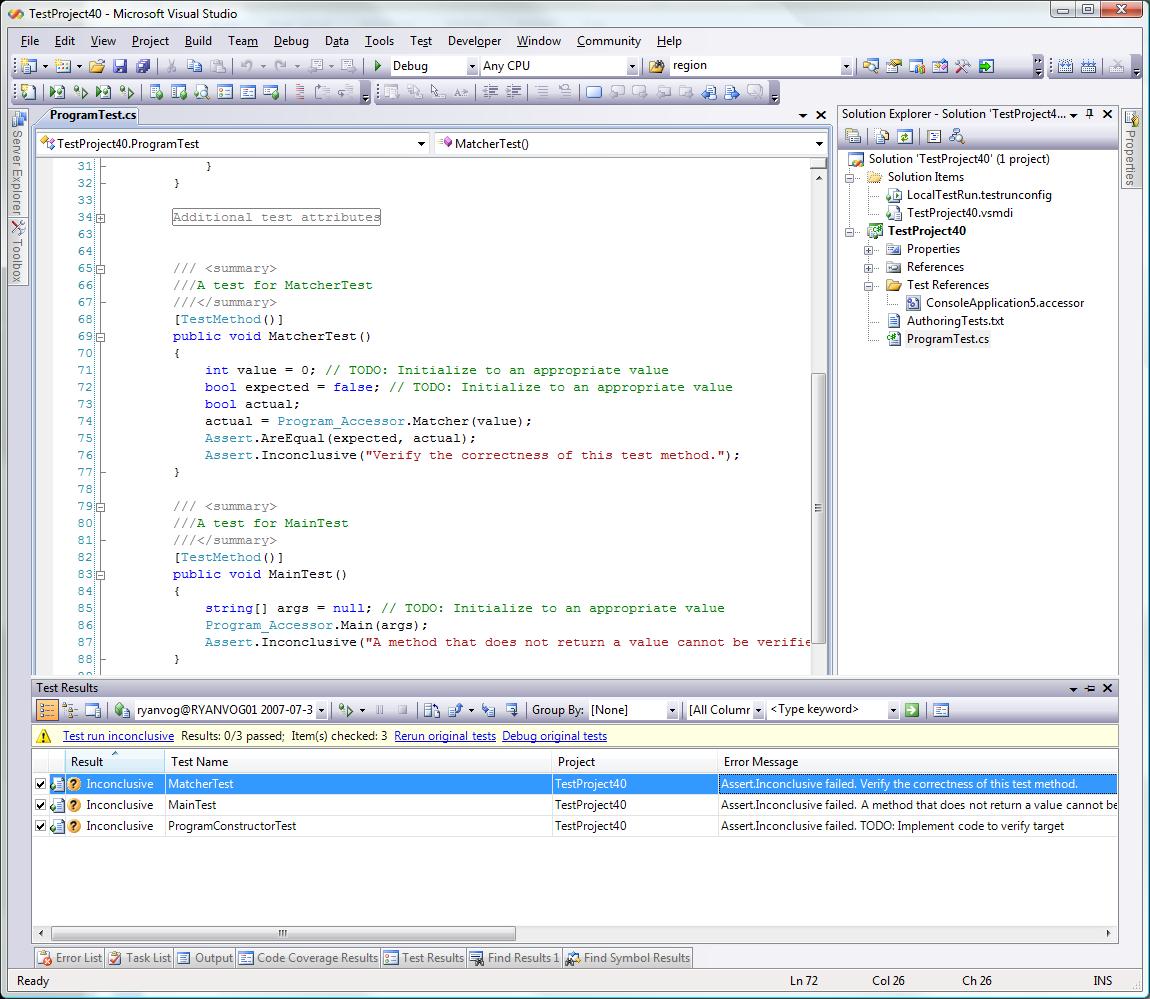
Figure 6: Test Results before Completing Test Methods
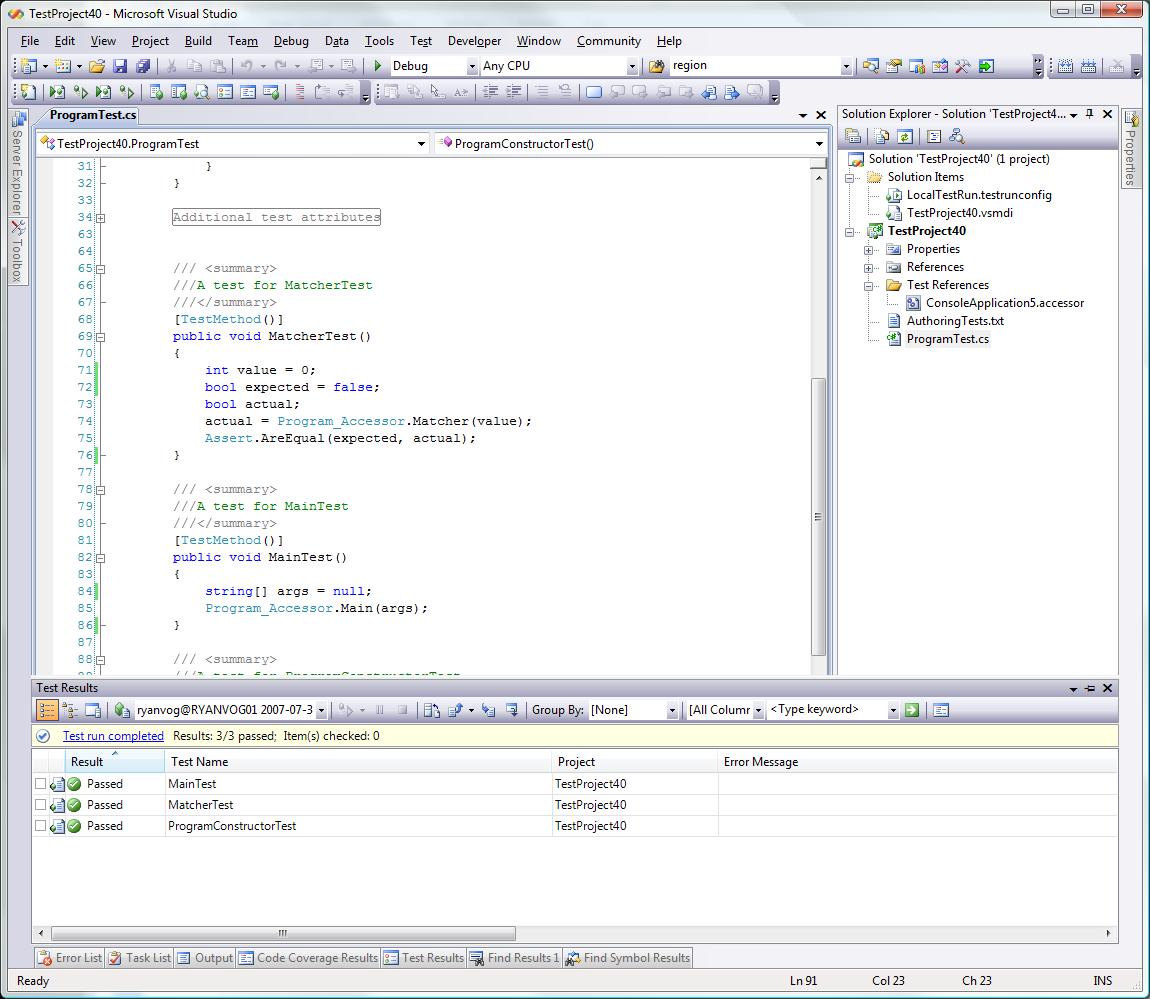
Figure 7: Test Results after Completing Test Methods
That’s it! You can now write test code against a compiled assembly including testing private/internal types and members via the private accessor wrapper type.