How To–Load Exchange Management Shell into PowerShell ISE
1. Introduction
This post provides you with the method to load the Exchange Management Shell into ISE.
The ingredients we're using for this trick are:
- the ISE console
- the ISE PowerShell profile
- the PowerShell script that loads into the Exchange Management Shell default shortcut
2. Prerequisites
The prerequisites are that your Exchange Management Tools, for Exchange 2010, Exchange 2013 or Exchange 2016, must be installed on that machine (which can be a desktop, a server dedicated for Exchange management or an Exchange server itself) – See this link to check which OS are supported to Install the Exchange Management Tools.
And see this link about how to install Exchange Management Tools (from the Exchange setup files, use something like Setup.exe /Role:ManagementTools /IAcceptExchangeServerLicenseTerms)
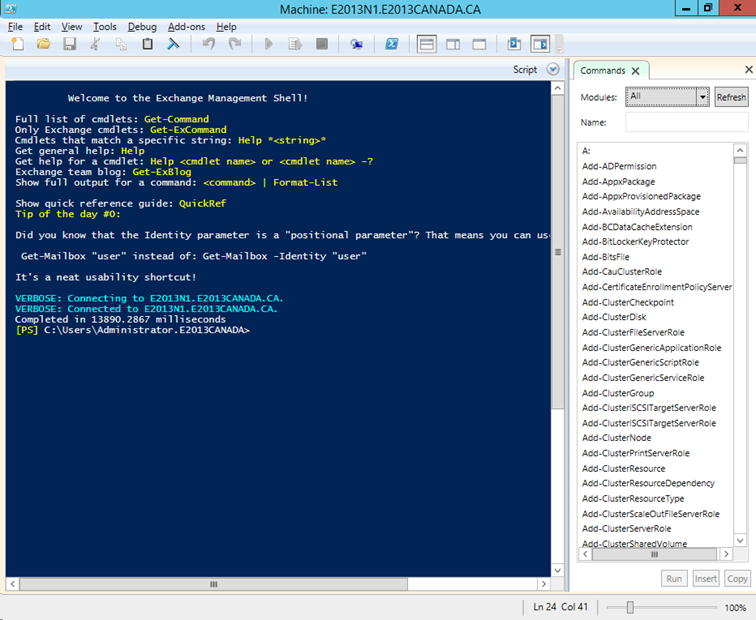
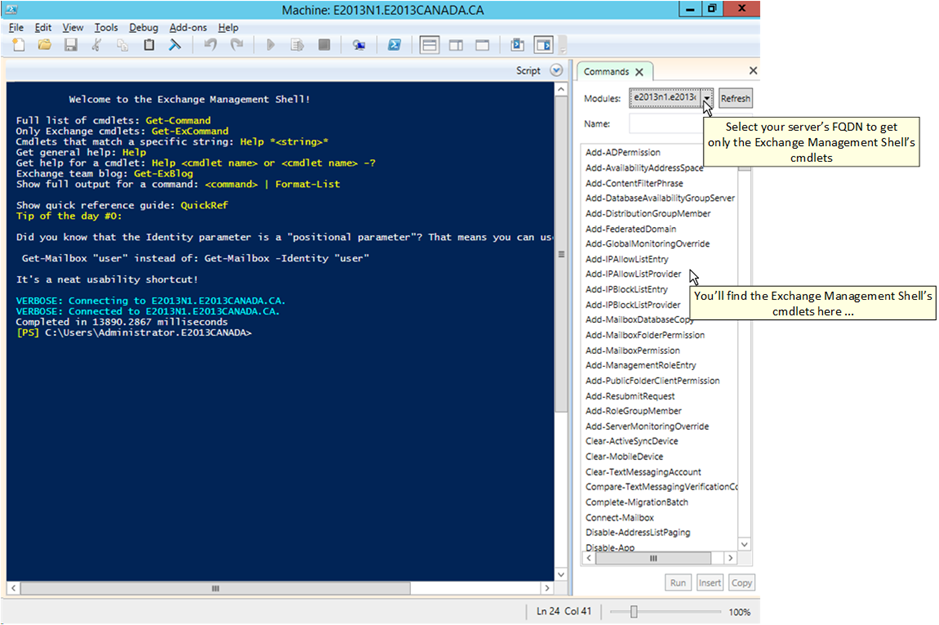
Note that if you don't have / don't want to install the Exchange Management tools on your management server/desktop, you can also choose to import a remote Powershell session from an Exchange 2010/2013/2016 environment to bring in the Exchange Powershell commands, but there are some limitations also - there are less Exchange cmdlets (784 Exchange cmdlets brought by remoting PowerShell into an Exchange session, versus 963 Exchange cmdlets brought by the Exchange Management Shell - that's for Exchange 2013 just to give you an idea), and both methods have their pros and cons. This article is about opening the ISE PowerShell console and load the Exchange Cmdlets exactly like the Exchange Management Shell console shortcut (2010, 2013 and/or 2016), and not using Remote PSSessions - that is another topic which Technet cover quite clearly for Exchange 2010, 2013 and 2016 and I summarize these TechNet articles in a Blog Post as well, and you have as well my friend Rhoderick who describes this in one of his awesome posts specifically with ISE, many resources on this topic for all tastes.
3. Principle
Basically what we do here is that we just copy the Exchange Management Shell "traditional" shortcut definition on the ISE profile file. In the below script, we also test that Exchange cmdlets are not already present before loading the Exchange Management cmdlets – for more information about ISE profile, see this link.
What I find convenient with ISE is that you can use intellisense and color highlight when editing your Exchange PowerShell Management scripts, and also copy/paste color-coded Exchange instructions for your blogging or documentation purposes, which I did for my last posts.
Also, with Powershell ISE, you have an action pane that drills down all the cmdlets that are loaded with your current session – loading the Exchange Management Shell within ISE will also provide you all the available Exchange (2010, 2013, 2016) cmdlets available for Exchange management. Note that this "action pane" in ISE also loads all O365 and/or Azure cmdlets if you import a Powershell Session where you are connected to your O365/Azure tenant.
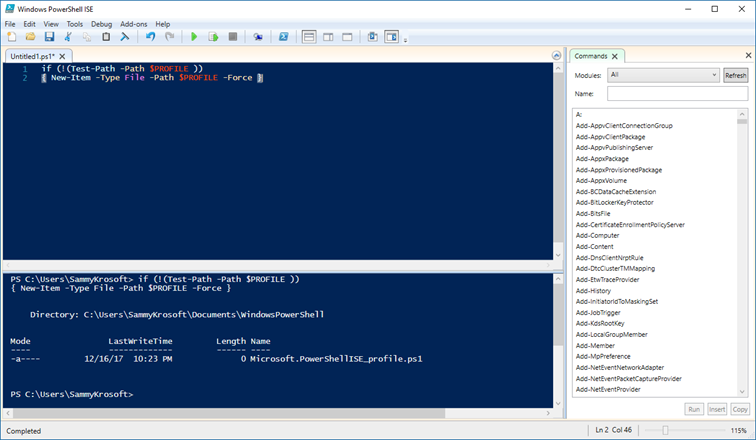
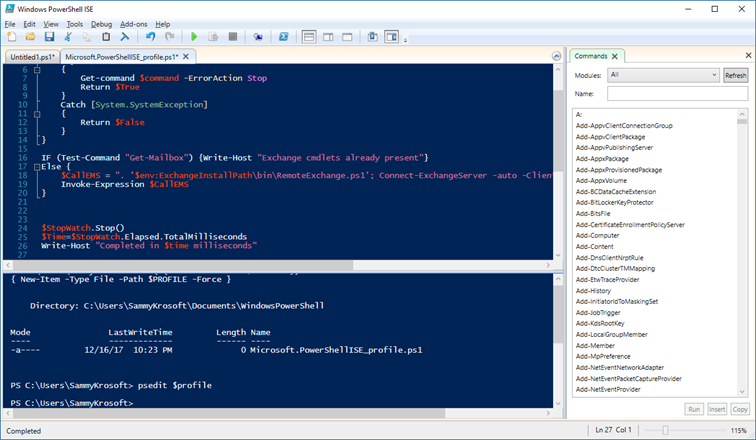
#1- First start by forcing the creation of your PowerShell ISE profile file if it doesn't exist
Type or paste the below directly on the command part of your ISE console and press "Enter" (or paste it on the script pane and then press "F5", which I did on the below screenshot)
if (!(Test-Path -Path $PROFILE ))
{ New-Item -Type File -Path $PROFILE -Force }
See here for more details about ISE PowerShell profile…
#2- Second, within your ISE console, type the following
psEdit $profile
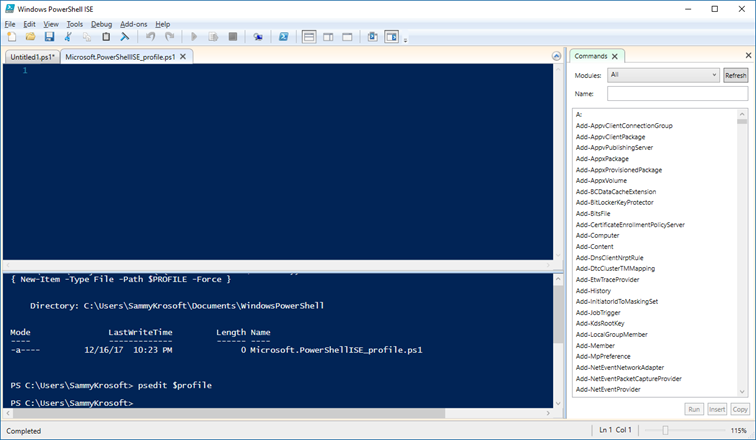
Note 1: this will open your $profile (for ISE $profile is Microsoft.PowerShellISE_Profile.ps1 as you can notice in the script pane's title that just opened – again for more information about ISE profile, see this link) in the ISE script pane.
Note 2: this psEdit command is available in ISE only, not in the text-based PowerShell console.
#3- in the script pane, just copy/paste the below blue script
The below script goes a little further than just loading the Exchange Management Shell into ISE:
- The Test-Command ($Command) function enables us the ability to test if a cmdlet is already loaded in the current session – we just call Test-Command with a well known command from the Exchange module, "Get-Mailbox" for example, and if we don't CATCH any error (Test-Command("cmdlet") returns $true), that means that Exchange tools are already loaded and we just print "Exchange cmdlets already present", ELSE we load the Exchange Management Tools by just calling the regular Exchange Management Shell loading scripts.
- For the fun, I just added a .NET standard "StopWatch" object just to measure the loading time – starting a new one while defining the $StopWatch variable $StopWatch = [System.Diagnostics.StopWatch]::StartNew() – and stopping it with $StopWatch.Stop(), then storing the Elapsed time in Milliseconds in a variable with $Time=$StopWatch.Elapsed.TotalMilliseconds, and printing it to the console using Write-Host…
$StopWatch = [System.Diagnostics.StopWatch]::StartNew()
Function Test-Command ($Command)
{
    Try
    {
        Get-command $command -ErrorAction Stop
        Return $True
    }
    Catch \[System.SystemException\]
    {
        Return $False
    }
}

IF (Test-Command "Get-Mailbox") {Write-Host "Exchange cmdlets already present"}
Else {
    $CallEMS = ". '$env:ExchangeInstallPath\\bin\\RemoteExchange.ps1'; Connect-ExchangeServer -auto -ClientApplication:ManagementShell "
    Invoke-Expression $CallEMS

$stopwatch.Stop()
$msg = "\`n\`nThe script took $(\[math\]::round($($StopWatch.Elapsed.TotalSeconds),2)) seconds to execute..."
Write-Host $msg
$msg = $null
$StopWatch = $null
}
The ISE window will look like the below:
#4- Just save it, close your ISE, et voilà !
Now every time you open it, ISE will load the Exchange Management Tools like below, and even indicate the time it took to load the Exchange Management tools… Maybe milliseconds is a bit overkill, then just use the "TotalSeconds" property instead of "TotalMilliseconds" property in $Time=$StopWatch.Elapsed.TotalMilliseconds line within your ISE's $Profile …