Publishing OMA (Outlook Mobile Access) with UAG
OMA has been a feature of exchange for many years. Unfortunately, UAG does not have a built in template to publish it, and it’s an unsupported scenario. However, if you need to publish it, and don’t mind the risks of being in unsupported territory, here’s how to publish it.
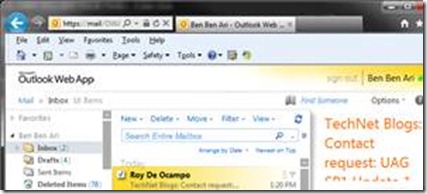
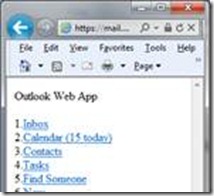
The key to OMA is that you simply append /OMA to your Outlook Web Access (OWA) URL. For example, if you were to access OWA internally (not via UAG!) using the URL https://ExchSrv01/owa/, then to access OMA on the same server you would simply type in https://ExchSrv01/owa/oma into your browser...and you would get your inbox in the OMA format:
When publishing Outlook Web Access with UAG, it simply publishes the /OWA/ virtual directory on the Exchange CAS, so all you have to do is append /oma to the URL, and it takes you to the OMA view. However, one caveat is that UAG is not designed to permit access to the /oma/ URL. A second issue is that you can’t expect all your users to manually edit the URL every time they need OMA.
To solve the 1st issue, simple edit the URL set on the UAG server. To do so, you need to create an access rule to permit any URL that begins with /owa/oma. Creating a new URL set rule in UAG is simple, but it has to match the same application type that your normal OWA is published with. If this is Exchange 2010, then the rule name has to be “ExchangePub2010_Rule99”. If it’s Exchange 2007, then it would be “ExchangePub2007_Rule99”. Here’s how such a rule would look on the advanced trunk configuration:
The steps:
1. Open the trunk’s advanced trunk configuration
2. Switch to the URL Set tab
3. Click Add Primary
4. Type the rule name as “ExchangePub2010_Rule99” (if it’s Exchange 2010)
5. Change the action to “Accept”
6. Type the URL as “/owa/oma.* ”
7. Set the parameters to “ignore”
8. Open the methods drop-down, and click on GET. Hold the CTRL key and click on POST.
9. Click OK
10. The placement of the rule on the list does not matter, so no need to move it up or down.
The next thing is to provide a link on the portal for users to click-on. Since you already have the application published, all we have to do is create a dummy application that doesn’t actually publish any servers, and has a hard-coded “portal link” to the OMA URL. Here are the steps:
1. On the trunk’s main page, click ADD
2. From the application list’s Web group, select “Other Web App(Portal Hostname) ”
3. Type the application name, as you would want it to appear on the portal. For example “Outlook Mobile Access”
4. Type some application type. It can be anything, as it won’t be used in any configuration.
5. In step 3, select “configure an application server” and click next
6. In step 4, type a name of some internal server. It will not be used in any way, and can be anything, but it’s advisable to use a real name. If you don’t, the activation will take longer as UAG tries to resolve a non-existing name.
7. In step 5, leave SSO disabled
8. In step 6, change the application URL to the actual public hostname used by your OWA, and append /OMA to it. For example, if your normal external OWA** link is https://uag.contoso.com/owa, type in https://uag.contoso.com/owa/oma
9. Finish the wizard and activate the configuration.
**If you’re not sure what’s your external OWA URL is, simply open the OWA application published on your portal, and go to the Portal Link tab. Copy the “application URL” setting from that, and append /OMA to it.


