Account confirmation and password recovery in ASP.NET Core
By Rick Anderson, Ponant, and Joe Audette
This tutorial shows how to build an ASP.NET Core app with email confirmation and password reset. This tutorial is not a beginning topic. You should be familiar with:
For Blazor guidance, see Account confirmation and password recovery in ASP.NET Core Blazor.
Prerequisites
- .NET Core 6.0 SDK or later
- Successfully send email from a C# console app.
Create and test a web app with authentication
Run the following commands to create a web app with authentication.
dotnet new webapp -au Individual -o WebPWrecover
cd WebPWrecover
dotnet run
Register user with simulated email confirmation
Run the app, select the Register link, and register a user. Once registered, you are redirected to the to /Identity/Account/RegisterConfirmation page which contains a link to simulate email confirmation:
- Select the
Click here to confirm your accountlink. - Select the Login link and sign-in with the same credentials.
- Select the
Hello YourEmail@provider.com!link, which redirects to the/Identity/Account/Manage/PersonalDatapage. - Select the Personal data tab on the left, and then select Delete.
The Click here to confirm your account link is displayed because an IEmailSender has not been implemented and registered with the dependency injection container. See the RegisterConfirmation source.
Note
Documentation links to .NET reference source usually load the repository's default branch, which represents the current development for the next release of .NET. To select a tag for a specific release, use the Switch branches or tags dropdown list. For more information, see How to select a version tag of ASP.NET Core source code (dotnet/AspNetCore.Docs #26205).
Configure an email provider
In this tutorial, SendGrid is used to send email. A SendGrid account and key is needed to send email. We recommend using SendGrid or another email service to send email rather than SMTP. SMTP is difficult to secure and set up correctly.
The SendGrid account may require adding a Sender.
Create a class to fetch the secure email key. For this sample, create Services/AuthMessageSenderOptions.cs:
namespace WebPWrecover.Services;

public class AuthMessageSenderOptions
{
    public string? SendGridKey { get; set; }
}
Configure SendGrid user secrets
Set the SendGridKey with the secret-manager tool. For example:
dotnet user-secrets set SendGridKey <key>

Successfully saved SendGridKey to the secret store.
On Windows, Secret Manager stores keys/value pairs in a secrets.json file in the %APPDATA%/Microsoft/UserSecrets/<WebAppName-userSecretsId> directory.
The contents of the secrets.json file aren't encrypted. The following markup shows the secrets.json file. The SendGridKey value has been removed.
{
  "SendGridKey": "<key removed>"
}
For more information, see the Options pattern and configuration.
Install SendGrid
This tutorial shows how to add email notifications through SendGrid, but other email providers can be used.
Install the SendGrid NuGet package:
From the Package Manager Console, enter the following command:
Install-Package SendGrid
See Get Started with SendGrid for Free to register for a free SendGrid account.
Implement IEmailSender
To Implement IEmailSender, create Services/EmailSender.cs with code similar to the following:
using Microsoft.AspNetCore.Identity.UI.Services;
using Microsoft.Extensions.Options;
using SendGrid;
using SendGrid.Helpers.Mail;

namespace WebPWrecover.Services;

public class EmailSender : IEmailSender
{
    private readonly ILogger _logger;

    public EmailSender(IOptions<AuthMessageSenderOptions> optionsAccessor,
                       ILogger<EmailSender> logger)
    {
        Options = optionsAccessor.Value;
        _logger = logger;
    }

    public AuthMessageSenderOptions Options { get; } //Set with Secret Manager.

    public async Task SendEmailAsync(string toEmail, string subject, string message)
    {
        if (string.IsNullOrEmpty(Options.SendGridKey))
        {
            throw new Exception("Null SendGridKey");
        }
        await Execute(Options.SendGridKey, subject, message, toEmail);
    }

    public async Task Execute(string apiKey, string subject, string message, string toEmail)
    {
        var client = new SendGridClient(apiKey);
        var msg = new SendGridMessage()
        {
            From = new EmailAddress("Joe@contoso.com", "Password Recovery"),
            Subject = subject,
            PlainTextContent = message,
            HtmlContent = message
        };
        msg.AddTo(new EmailAddress(toEmail));

        // Disable click tracking.
        // See https://sendgrid.com/docs/User_Guide/Settings/tracking.html
        msg.SetClickTracking(false, false);
        var response = await client.SendEmailAsync(msg);
        _logger.LogInformation(response.IsSuccessStatusCode
                               ? $"Email to {toEmail} queued successfully!"
                               : $"Failure Email to {toEmail}");
    }
}
Configure app to support email
Add the following code to the Program.cs file:
- Add
EmailSenderas a transient service. - Register the
AuthMessageSenderOptionsconfiguration instance.
using Microsoft.AspNetCore.Identity;
using Microsoft.AspNetCore.Identity.UI.Services;
using Microsoft.EntityFrameworkCore;
using WebPWrecover.Data;
using WebPWrecover.Services;

var builder = WebApplication.CreateBuilder(args);

var connectionString = builder.Configuration.GetConnectionString("DefaultConnection");
builder.Services.AddDbContext<ApplicationDbContext>(options =>
    options.UseSqlite(connectionString));
builder.Services.AddDatabaseDeveloperPageExceptionFilter();

builder.Services.AddDefaultIdentity<IdentityUser>(options => options.SignIn.RequireConfirmedAccount = true)
    .AddEntityFrameworkStores<ApplicationDbContext>();
builder.Services.AddRazorPages();

builder.Services.AddTransient<IEmailSender, EmailSender>();
builder.Services.Configure<AuthMessageSenderOptions>(builder.Configuration);

var app = builder.Build();

if (app.Environment.IsDevelopment())
{
    app.UseMigrationsEndPoint();
}
else
{
    app.UseExceptionHandler("/Error");
    app.UseHsts();
}

app.UseHttpsRedirection();
app.UseStaticFiles();

app.UseRouting();

app.UseAuthentication();
app.UseAuthorization();

app.MapRazorPages();

app.Run();
Disable default account verification when Account.RegisterConfirmation has been scaffolded
This section only applies when Account.RegisterConfirmation is scaffolded. Skip this section if you have not scaffolded Account.RegisterConfirmation.
The user is redirected to the Account.RegisterConfirmation where they can select a link to have the account confirmed. The default Account.RegisterConfirmation is used only for testing, automatic account verification should be disabled in a production app.
To require a confirmed account and prevent immediate login at registration, set DisplayConfirmAccountLink = false in the scaffolded /Areas/Identity/Pages/Account/RegisterConfirmation.cshtml.cs file:
// Licensed to the .NET Foundation under one or more agreements.
// The .NET Foundation licenses this file to you under the MIT license.
#nullable disable

using System;
using System.Text;
using System.Threading.Tasks;
using Microsoft.AspNetCore.Authorization;
using Microsoft.AspNetCore.Identity;
using Microsoft.AspNetCore.Identity.UI.Services;
using Microsoft.AspNetCore.Mvc;
using Microsoft.AspNetCore.Mvc.RazorPages;
using Microsoft.AspNetCore.WebUtilities;

namespace WebPWrecover.Areas.Identity.Pages.Account
{
    [AllowAnonymous]
    public class RegisterConfirmationModel : PageModel
    {
        private readonly UserManager<IdentityUser> _userManager;
        private readonly IEmailSender _sender;

        public RegisterConfirmationModel(UserManager<IdentityUser> userManager, IEmailSender sender)
        {
            _userManager = userManager;
            _sender = sender;
        }

        /// <summary>
        ///     This API supports the ASP.NET Core Identity default UI infrastructure and is not intended to be used
        ///     directly from your code. This API may change or be removed in future releases.
        /// </summary>
        public string Email { get; set; }

        /// <summary>
        ///     This API supports the ASP.NET Core Identity default UI infrastructure and is not intended to be used
        ///     directly from your code. This API may change or be removed in future releases.
        /// </summary>
        public bool DisplayConfirmAccountLink { get; set; }

        /// <summary>
        ///     This API supports the ASP.NET Core Identity default UI infrastructure and is not intended to be used
        ///     directly from your code. This API may change or be removed in future releases.
        /// </summary>
        public string EmailConfirmationUrl { get; set; }

        public async Task<IActionResult> OnGetAsync(string email, string returnUrl = null)
        {
            if (email == null)
            {
                return RedirectToPage("/Index");
            }
            returnUrl = returnUrl ?? Url.Content("~/");

            var user = await _userManager.FindByEmailAsync(email);
            if (user == null)
            {
                return NotFound($"Unable to load user with email '{email}'.");
            }

            Email = email;
            // Once you add a real email sender, you should remove this code that lets you confirm the account
            DisplayConfirmAccountLink = false;
            if (DisplayConfirmAccountLink)
            {
                var userId = await _userManager.GetUserIdAsync(user);
                var code = await _userManager.GenerateEmailConfirmationTokenAsync(user);
                code = WebEncoders.Base64UrlEncode(Encoding.UTF8.GetBytes(code));
                EmailConfirmationUrl = Url.Page(
                    "/Account/ConfirmEmail",
                    pageHandler: null,
                    values: new { area = "Identity", userId = userId, code = code, returnUrl = returnUrl },
                    protocol: Request.Scheme);
            }

            return Page();
        }
    }
}
This step is only necessary when Account.RegisterConfirmation is scaffolded. The non-scaffolded RegisterConfirmation automatically detects when an IEmailSender has been implemented and registered with the dependency injection container.
Register, confirm email, and reset password
Run the web app, and test the account confirmation and password recovery flow.
- Run the app and register a new user
- Check your email for the account confirmation link. See Debug email if you don't get the email.
- Click the link to confirm your email.
- Sign in with your email and password.
- Sign out.
Test password reset
- If you're signed in, select Logout.
- Select the Log in link and select the Forgot your password? link.
- Enter the email you used to register the account.
- An email with a link to reset your password is sent. Check your email and click the link to reset your password. After your password has been successfully reset, you can sign in with your email and new password.
Resend email confirmation
Select the Resend email confirmation link on the Login page.
Change email and activity timeout
The default inactivity timeout is 14 days. The following code sets the inactivity timeout to 5 days:
using Microsoft.AspNetCore.Identity;
using Microsoft.AspNetCore.Identity.UI.Services;
using Microsoft.EntityFrameworkCore;
using WebPWrecover.Data;
using WebPWrecover.Services;

var builder = WebApplication.CreateBuilder(args);

var connectionString = builder.Configuration.GetConnectionString("DefaultConnection");
builder.Services.AddDbContext<ApplicationDbContext>(options =>
    options.UseSqlite(connectionString));
builder.Services.AddDatabaseDeveloperPageExceptionFilter();

builder.Services.AddDefaultIdentity<IdentityUser>(options => options.SignIn.RequireConfirmedAccount = true)
    .AddEntityFrameworkStores<ApplicationDbContext>();
builder.Services.AddRazorPages();

builder.Services.AddTransient<IEmailSender, EmailSender>();
builder.Services.Configure<AuthMessageSenderOptions>(builder.Configuration);

builder.Services.ConfigureApplicationCookie(o => {
    o.ExpireTimeSpan = TimeSpan.FromDays(5);
    o.SlidingExpiration = true;
});

var app = builder.Build();

// Code removed for brevity
Change all data protection token lifespans
The following code changes all data protection tokens timeout period to 3 hours:
using Microsoft.AspNetCore.Identity;
using Microsoft.AspNetCore.Identity.UI.Services;
using Microsoft.EntityFrameworkCore;
using WebPWrecover.Data;
using WebPWrecover.Services;

var builder = WebApplication.CreateBuilder(args);

var connectionString = builder.Configuration.GetConnectionString("DefaultConnection");
builder.Services.AddDbContext<ApplicationDbContext>(options =>
    options.UseSqlite(connectionString));
builder.Services.AddDatabaseDeveloperPageExceptionFilter();

builder.Services.AddDefaultIdentity<IdentityUser>(options => options.SignIn.RequireConfirmedAccount = true)
    .AddEntityFrameworkStores<ApplicationDbContext>();
builder.Services.AddRazorPages();

builder.Services.AddTransient<IEmailSender, EmailSender>();
builder.Services.Configure<AuthMessageSenderOptions>(builder.Configuration);

builder.Services.Configure<DataProtectionTokenProviderOptions>(o =>
       o.TokenLifespan = TimeSpan.FromHours(3));

var app = builder.Build();

// Code removed for brevity.
The built in Identity user tokens (see AspNetCore/src/Identity/Extensions.Core/src/TokenOptions.cs )have a one day timeout.
Change the email token lifespan
The default token lifespan of the Identity user tokens is one day. This section shows how to change the email token lifespan.
Add a custom DataProtectorTokenProvider<TUser> and DataProtectionTokenProviderOptions:
public class CustomEmailConfirmationTokenProvider<TUser>
                              :  DataProtectorTokenProvider<TUser> where TUser : class
{
    public CustomEmailConfirmationTokenProvider(
        IDataProtectionProvider dataProtectionProvider,
        IOptions<EmailConfirmationTokenProviderOptions> options,
        ILogger<DataProtectorTokenProvider<TUser>> logger)
                                       : base(dataProtectionProvider, options, logger)
    {

    }
}
public class EmailConfirmationTokenProviderOptions : DataProtectionTokenProviderOptions
{
    public EmailConfirmationTokenProviderOptions()
    {
        Name = "EmailDataProtectorTokenProvider";
        TokenLifespan = TimeSpan.FromHours(4);
    }
}
Add the custom provider to the service container:
using Microsoft.AspNetCore.Identity;
using Microsoft.AspNetCore.Identity.UI.Services;
using Microsoft.EntityFrameworkCore;
using WebPWrecover.Data;
using WebPWrecover.Services;
using WebPWrecover.TokenProviders;

var builder = WebApplication.CreateBuilder(args);

var connectionString = builder.Configuration.GetConnectionString("DefaultConnection");
builder.Services.AddDbContext<ApplicationDbContext>(options =>
    options.UseSqlite(connectionString));
builder.Services.AddDatabaseDeveloperPageExceptionFilter();

builder.Services.AddDefaultIdentity<IdentityUser>(config =>
{
    config.SignIn.RequireConfirmedEmail = true;
    config.Tokens.ProviderMap.Add("CustomEmailConfirmation",
        new TokenProviderDescriptor(
            typeof(CustomEmailConfirmationTokenProvider<IdentityUser>)));
    config.Tokens.EmailConfirmationTokenProvider = "CustomEmailConfirmation";
}).AddEntityFrameworkStores<ApplicationDbContext>();

builder.Services.AddTransient<CustomEmailConfirmationTokenProvider<IdentityUser>>();

builder.Services.AddRazorPages();

builder.Services.AddTransient<IEmailSender, EmailSender>();
builder.Services.Configure<AuthMessageSenderOptions>(builder.Configuration);

var app = builder.Build();

// Code removed for brevity.
Debug email
If you can't get email working:
- Set a breakpoint in
EmailSender.Executeto verifySendGridClient.SendEmailAsyncis called. - Create a console app to send email using similar code to
EmailSender.Execute. - Review the Email Activity page.
- Check your spam folder.
- Try another email alias on a different email provider (Microsoft, Yahoo, Gmail, etc.)
- Try sending to different email accounts.
A security best practice is to not use production secrets in test and development. If you publish the app to Azure, set the SendGrid secrets as application settings in the Azure Web App portal. The configuration system is set up to read keys from environment variables.
Combine social and local login accounts
To complete this section, you must first enable an external authentication provider. See Facebook, Google, and external provider authentication.
You can combine local and social accounts by clicking on your email link. In the following sequence, "RickAndMSFT@gmail.com" is first created as a local login; however, you can create the account as a social login first, then add a local login.
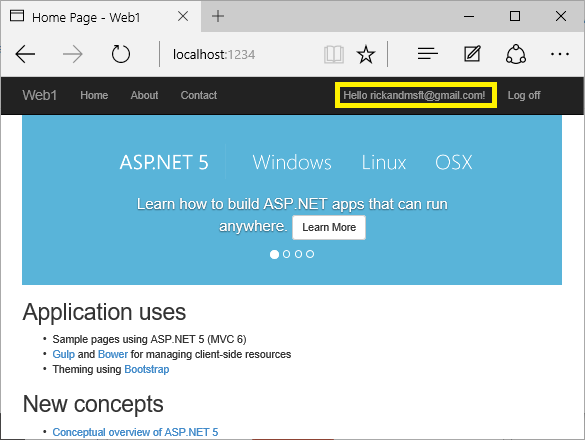
Click on the Manage link. Note the 0 external (social logins) associated with this account.

Click the link to another login service and accept the app requests. In the following image, Facebook is the external authentication provider:
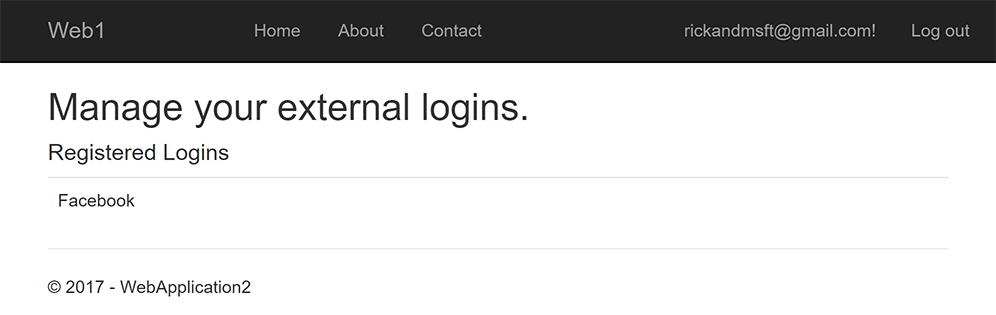
The two accounts have been combined. You are able to sign in with either account. You might want your users to add local accounts in case their social login authentication service is down, or more likely they've lost access to their social account.
Enable account confirmation after a site has users
Enabling account confirmation on a site with users locks out all the existing users. Existing users are locked out because their accounts aren't confirmed. To work around existing user lockout, use one of the following approaches:
- Update the database to mark all existing users as being confirmed.
- Confirm existing users. For example, batch-send emails with confirmation links.
Prerequisites
Create and test a web app with authentication
Run the following commands to create a web app with authentication.
dotnet new webapp -au Individual -uld -o WebPWrecover
cd WebPWrecover
dotnet run
Run the app, select the Register link, and register a user. Once registered, you are redirected to the to /Identity/Account/RegisterConfirmation page which contains a link to simulate email confirmation:
- Select the
Click here to confirm your accountlink. - Select the Login link and sign-in with the same credentials.
- Select the
Hello YourEmail@provider.com!link, which redirects you to the/Identity/Account/Manage/PersonalDatapage. - Select the Personal data tab on the left, and then select Delete.
Configure an email provider
In this tutorial, SendGrid is used to send email. You can use other email providers. We recommend you use SendGrid or another email service to send email. SMTP is difficult to configure so mail is not marked as spam.
The SendGrid account may require adding a Sender.
Create a class to fetch the secure email key. For this sample, create Services/AuthMessageSenderOptions.cs:
namespace WebPWrecover.Services;

public class AuthMessageSenderOptions
{
    public string? SendGridKey { get; set; }
}
Configure SendGrid user secrets
Set the SendGridKey with the secret-manager tool. For example:
dotnet user-secrets set SendGridKey <SG.key>

Successfully saved SendGridKey = SG.keyVal to the secret store.
On Windows, Secret Manager stores keys/value pairs in a secrets.json file in the %APPDATA%/Microsoft/UserSecrets/<WebAppName-userSecretsId> directory.
The contents of the secrets.json file aren't encrypted. The following markup shows the secrets.json file. The SendGridKey value has been removed.
{
  "SendGridKey": "<key removed>"
}
For more information, see the Options pattern and configuration.
Install SendGrid
This tutorial shows how to add email notifications through SendGrid, but you can send email using SMTP and other mechanisms.
Install the SendGrid NuGet package:
From the Package Manager Console, enter the following command:
Install-Package SendGrid
See Get Started with SendGrid for Free to register for a free SendGrid account.
Implement IEmailSender
To Implement IEmailSender, create Services/EmailSender.cs with code similar to the following:
using Microsoft.AspNetCore.Identity.UI.Services;
using Microsoft.Extensions.Options;
using SendGrid;
using SendGrid.Helpers.Mail;

namespace WebPWrecover.Services;

public class EmailSender : IEmailSender
{
    private readonly ILogger _logger;

    public EmailSender(IOptions<AuthMessageSenderOptions> optionsAccessor,
                       ILogger<EmailSender> logger)
    {
        Options = optionsAccessor.Value;
        _logger = logger;
    }

    public AuthMessageSenderOptions Options { get; } //Set with Secret Manager.

    public async Task SendEmailAsync(string toEmail, string subject, string message)
    {
        if (string.IsNullOrEmpty(Options.SendGridKey))
        {
            throw new Exception("Null SendGridKey");
        }
        await Execute(Options.SendGridKey, subject, message, toEmail);
    }

    public async Task Execute(string apiKey, string subject, string message, string toEmail)
    {
        var client = new SendGridClient(apiKey);
        var msg = new SendGridMessage()
        {
            From = new EmailAddress("Joe@contoso.com", "Password Recovery"),
            Subject = subject,
            PlainTextContent = message,
            HtmlContent = message
        };
        msg.AddTo(new EmailAddress(toEmail));

        // Disable click tracking.
        // See https://sendgrid.com/docs/User_Guide/Settings/tracking.html
        msg.SetClickTracking(false, false);
        var response = await client.SendEmailAsync(msg);
        _logger.LogInformation(response.IsSuccessStatusCode
                               ? $"Email to {toEmail} queued successfully!"
                               : $"Failure Email to {toEmail}");
    }
}
Configure startup to support email
Add the following code to the ConfigureServices method in the Startup.cs file:
- Add
EmailSenderas a transient service. - Register the
AuthMessageSenderOptionsconfiguration instance.
using Microsoft.AspNetCore.Identity;
using Microsoft.AspNetCore.Identity.UI.Services;
using Microsoft.EntityFrameworkCore;
using WebPWrecover.Data;
using WebPWrecover.Services;

var builder = WebApplication.CreateBuilder(args);

var connectionString = builder.Configuration.GetConnectionString("DefaultConnection");
builder.Services.AddDbContext<ApplicationDbContext>(options =>
    options.UseSqlite(connectionString));
builder.Services.AddDatabaseDeveloperPageExceptionFilter();

builder.Services.AddDefaultIdentity<IdentityUser>(options => options.SignIn.RequireConfirmedAccount = true)
    .AddEntityFrameworkStores<ApplicationDbContext>();
builder.Services.AddRazorPages();

builder.Services.AddTransient<IEmailSender, EmailSender>();
builder.Services.Configure<AuthMessageSenderOptions>(builder.Configuration);

var app = builder.Build();

if (app.Environment.IsDevelopment())
{
    app.UseMigrationsEndPoint();
}
else
{
    app.UseExceptionHandler("/Error");
    app.UseHsts();
}

app.UseHttpsRedirection();
app.UseStaticFiles();

app.UseRouting();

app.UseAuthentication();
app.UseAuthorization();

app.MapRazorPages();

app.Run();
Scaffold RegisterConfirmation
Follow the instructions for Scaffold Identity and scaffold Account\RegisterConfirmation.
Disable default account verification when Account.RegisterConfirmation has been scaffolded
This section only applies when Account.RegisterConfirmation is scaffolded. Skip this section if you have not scaffolded Account.RegisterConfirmation.
The user is redirected to the Account.RegisterConfirmation where they can select a link to have the account confirmed. The default Account.RegisterConfirmation is used only for testing, automatic account verification should be disabled in a production app.
To require a confirmed account and prevent immediate login at registration, set DisplayConfirmAccountLink = false in the scaffolded /Areas/Identity/Pages/Account/RegisterConfirmation.cshtml.cs file:
// Licensed to the .NET Foundation under one or more agreements.
// The .NET Foundation licenses this file to you under the MIT license.
#nullable disable

using System;
using System.Text;
using System.Threading.Tasks;
using Microsoft.AspNetCore.Authorization;
using Microsoft.AspNetCore.Identity;
using Microsoft.AspNetCore.Identity.UI.Services;
using Microsoft.AspNetCore.Mvc;
using Microsoft.AspNetCore.Mvc.RazorPages;
using Microsoft.AspNetCore.WebUtilities;

namespace WebPWrecover.Areas.Identity.Pages.Account
{
    [AllowAnonymous]
    public class RegisterConfirmationModel : PageModel
    {
        private readonly UserManager<IdentityUser> _userManager;
        private readonly IEmailSender _sender;

        public RegisterConfirmationModel(UserManager<IdentityUser> userManager, IEmailSender sender)
        {
            _userManager = userManager;
            _sender = sender;
        }

        /// <summary>
        ///     This API supports the ASP.NET Core Identity default UI infrastructure and is not intended to be used
        ///     directly from your code. This API may change or be removed in future releases.
        /// </summary>
        public string Email { get; set; }

        /// <summary>
        ///     This API supports the ASP.NET Core Identity default UI infrastructure and is not intended to be used
        ///     directly from your code. This API may change or be removed in future releases.
        /// </summary>
        public bool DisplayConfirmAccountLink { get; set; }

        /// <summary>
        ///     This API supports the ASP.NET Core Identity default UI infrastructure and is not intended to be used
        ///     directly from your code. This API may change or be removed in future releases.
        /// </summary>
        public string EmailConfirmationUrl { get; set; }

        public async Task<IActionResult> OnGetAsync(string email, string returnUrl = null)
        {
            if (email == null)
            {
                return RedirectToPage("/Index");
            }
            returnUrl = returnUrl ?? Url.Content("~/");

            var user = await _userManager.FindByEmailAsync(email);
            if (user == null)
            {
                return NotFound($"Unable to load user with email '{email}'.");
            }

            Email = email;
            // Once you add a real email sender, you should remove this code that lets you confirm the account
            DisplayConfirmAccountLink = false;
            if (DisplayConfirmAccountLink)
            {
                var userId = await _userManager.GetUserIdAsync(user);
                var code = await _userManager.GenerateEmailConfirmationTokenAsync(user);
                code = WebEncoders.Base64UrlEncode(Encoding.UTF8.GetBytes(code));
                EmailConfirmationUrl = Url.Page(
                    "/Account/ConfirmEmail",
                    pageHandler: null,
                    values: new { area = "Identity", userId = userId, code = code, returnUrl = returnUrl },
                    protocol: Request.Scheme);
            }

            return Page();
        }
    }
}
This step is only necessary when Account.RegisterConfirmation is scaffolded. The non-scaffolded RegisterConfirmation automatically detects when an IEmailSender has been implemented and registered with the dependency injection container.
Register, confirm email, and reset password
Run the web app, and test the account confirmation and password recovery flow.
- Run the app and register a new user
- Check your email for the account confirmation link. See Debug email if you don't get the email.
- Click the link to confirm your email.
- Sign in with your email and password.
- Sign out.
Test password reset
- If you're signed in, select Logout.
- Select the Log in link and select the Forgot your password? link.
- Enter the email you used to register the account.
- An email with a link to reset your password is sent. Check your email and click the link to reset your password. After your password has been successfully reset, you can sign in with your email and new password.
Resend email confirmation
In ASP.NET Core 5.0 and later, select the Resend email confirmation link on the Login page.
Change email and activity timeout
The default inactivity timeout is 14 days. The following code sets the inactivity timeout to 5 days:
services.ConfigureApplicationCookie(o => {
    o.ExpireTimeSpan = TimeSpan.FromDays(5);
    o.SlidingExpiration = true;
});
Change all data protection token lifespans
The following code changes all data protection tokens timeout period to 3 hours:
public void ConfigureServices(IServiceCollection services)
{

    services.AddDbContext<ApplicationDbContext>(options =>
        options.UseSqlServer(
            Configuration.GetConnectionString("DefaultConnection")));
    services.AddDefaultIdentity<IdentityUser>(
                  options => options.SignIn.RequireConfirmedAccount = true)
        .AddEntityFrameworkStores<ApplicationDbContext>();

    services.Configure<DataProtectionTokenProviderOptions>(o =>
       o.TokenLifespan = TimeSpan.FromHours(3));

    services.AddTransient<IEmailSender, EmailSender>();
    services.Configure<AuthMessageSenderOptions>(Configuration);

    services.AddRazorPages();
}
The built in Identity user tokens (see AspNetCore/src/Identity/Extensions.Core/src/TokenOptions.cs )have a one day timeout.
Change the email token lifespan
The default token lifespan of the Identity user tokens is one day. This section shows how to change the email token lifespan.
Add a custom DataProtectorTokenProvider<TUser> and DataProtectionTokenProviderOptions:
public class CustomEmailConfirmationTokenProvider<TUser>
                                       : DataProtectorTokenProvider<TUser> where TUser : class
{
    public CustomEmailConfirmationTokenProvider(IDataProtectionProvider dataProtectionProvider,
        IOptions<EmailConfirmationTokenProviderOptions> options,
        ILogger<DataProtectorTokenProvider<TUser>> logger)
                                          : base(dataProtectionProvider, options, logger)
    {

    }
}
public class EmailConfirmationTokenProviderOptions : DataProtectionTokenProviderOptions
{
    public EmailConfirmationTokenProviderOptions()
    {
        Name = "EmailDataProtectorTokenProvider";
        TokenLifespan = TimeSpan.FromHours(4);
    }
}
Add the custom provider to the service container:
public void ConfigureServices(IServiceCollection services)
{

    services.AddDbContext<ApplicationDbContext>(options =>
        options.UseSqlServer(
            Configuration.GetConnectionString("DefaultConnection")));
    services.AddDefaultIdentity<IdentityUser>(config =>
    {
        config.SignIn.RequireConfirmedEmail = true;
        config.Tokens.ProviderMap.Add("CustomEmailConfirmation",
            new TokenProviderDescriptor(
                typeof(CustomEmailConfirmationTokenProvider<IdentityUser>)));
        config.Tokens.EmailConfirmationTokenProvider = "CustomEmailConfirmation";
      }).AddEntityFrameworkStores<ApplicationDbContext>();

    services.AddTransient<CustomEmailConfirmationTokenProvider<IdentityUser>>();

    services.AddTransient<IEmailSender, EmailSender>();
    services.Configure<AuthMessageSenderOptions>(Configuration);

    services.AddRazorPages();
}
Debug email
If you can't get email working:
- Set a breakpoint in
EmailSender.Executeto verifySendGridClient.SendEmailAsyncis called. - Create a console app to send email using similar code to
EmailSender.Execute. - Review the Email Activity page.
- Check your spam folder.
- Try another email alias on a different email provider (Microsoft, Yahoo, Gmail, etc.)
- Try sending to different email accounts.
A security best practice is to not use production secrets in test and development. If you publish the app to Azure, set the SendGrid secrets as application settings in the Azure Web App portal. The configuration system is set up to read keys from environment variables.
Combine social and local login accounts
To complete this section, you must first enable an external authentication provider. See Facebook, Google, and external provider authentication.
You can combine local and social accounts by clicking on your email link. In the following sequence, "RickAndMSFT@gmail.com" is first created as a local login; however, you can create the account as a social login first, then add a local login.
Click on the Manage link. Note the 0 external (social logins) associated with this account.
Click the link to another login service and accept the app requests. In the following image, Facebook is the external authentication provider:
The two accounts have been combined. You are able to sign in with either account. You might want your users to add local accounts in case their social login authentication service is down, or more likely they've lost access to their social account.
Enable account confirmation after a site has users
Enabling account confirmation on a site with users locks out all the existing users. Existing users are locked out because their accounts aren't confirmed. To work around existing user lockout, use one of the following approaches:
- Update the database to mark all existing users as being confirmed.
- Confirm existing users. For example, batch-send emails with confirmation links.
ASP.NET Core
Feedback
Coming soon: Throughout 2024 we will be phasing out GitHub Issues as the feedback mechanism for content and replacing it with a new feedback system. For more information see: https://aka.ms/ContentUserFeedback.
Submit and view feedback for