Connect to Azure Stack Hub using Azure Account Extension in Visual Studio Code
This article describes how to connect to Azure Stack Hub using the Azure Account extension, which enables you to use Azure directly from Visual Studio Code. You will need to update your Visual Studio Code (VS Code) settings.
VS Code is a lightweight editor for building and debug web and cloud applications. ASP.NET Core, Python, NodeJS, Go, and other developers use VS Code. With the Azure Account extension, you can use a single Azure sign-in with subscription filtering for other Azure extensions. The extension makes the Azure Cloud Shell available in the VS Code-integrated terminal. Using the extension, you can connect to your Azure Stack Hub subscription using both Microsoft Entra ID and Active Directory Federated Services (AD FS) for your identity manager. You can sign in to Azure Stack Hub, select your subscription, and open a new command line in a Cloud Shell.
Note
You can use the steps in this article for an Active Directory Federated Services (AD FS) environment. Use your AD FS credentials and endpoints.
Visual Studio Code and Azure Stack Hub
In addition to the Azure Account extension for Visual Studio, a number of other Azure extensions are supported for use with Azure Stack Hub and Visual Studio Code. These include:
- Visual Studio Code Azure Storage extension
- Visual Studio Code Azure Resources extension (requires version 0.4.0 or earlier)
- Visual Studio Code Azure Virtual Machines extension
Pre-requisites for Azure Account Extension
- An Azure Stack Hub environment.
- Visual Studio Code.
- Azure Account Extension.
- An Azure Stack Hub subscription and credentials with access to Azure Stack Hub.
- An environment with PowerShell using the AZ modules for Azure Stack Hub. For instructions, see Install PowerShell Az module for Azure Stack Hub.
Get your credentials
In this section you will use your credentials to get your tenant ID. You will need your Azure Stack Hub resource manager URL and tenant ID.
The Azure Stack Hub Resource Manager is a management framework that allows you to deploy, manage, and monitor Azure resources.
- The Resource Manager URL for the Azure Stack Development Kit (ASDK) is:
https://management.local.azurestack.external/ - The Resource Manager URL for an integrated system is:
https://management.region.<fqdn>/, where<fqdn>is your fully qualified domain name.
Open PowerShell with an elevated prompt, and run the following cmdlets:
Add-AzEnvironment -Name "<username@contoso.com>" -ArmEndpoint "https://management.region.<fqdn>"Name Resource Manager Url ActiveDirectory Authority ---- -------------------- ------------------------- username@contoso.com https://management.region.<fqdn> https://login.microsoftonline.com/Run the following cmdlets in the same session:
$AuthEndpoint = (Get-AzEnvironment -Name "sethm@microsoft.com").ActiveDirectoryAuthority.TrimEnd('/')
$AADTenantName = "masselfhost.onmicrosoft.com"
$TenantId = (invoke-restmethod "$($AuthEndpoint)/$($AADTenantName)/.well-known/openid-configuration").issuer.TrimEnd('/').Split('/')[-1]
Add-AzAccount -EnvironmentName "sethm@microsoft.com" -TenantId $TenantId
Account SubscriptionName TenantId Environment ------- ---------------- -------- ----------- username@contoso.com azure-stack-sub 6d5ff183-b37f-4a5b-9a2f-19959cb4224a username@contoso.comMake a note of the tenant ID. You will need it when adding the JSON section that configures the Azure Account extension.
Set up the Azure Account extension
Open VS Code.
Select Extensions on the left-side corner.
In the search box, enter
Azure Account.Select Azure Account and select Install.
Restart VS Code to load the extension.
Press Ctrl+Shift+P, and select Preferences: Open User Settings (JSON).
In the code editor, update the following JSON snippet with the values for your environment, and then paste snippet into the settings block.
Values:
Parameter Description azure.cloudYou must use the literal constant "AzureCustomCloud" for this parameter. azure.tenantThe value of your Azure Stack Hub tenant ID. azure.customCloud.resourceManagerEndpointUrlThis is the root URL for the Azure Resource Manager for Azure Stack Hub. validateAuthorityYou can leave out this parameter if you are using Microsoft Entra ID as your identity manager. Add the parameter with a value of falseif you are using AD FS.JSON snippet:
  "azure.cloud": "AzureCustomCloud",
  "azure.customCloud.resourceManagerEndpointUrl": "https://management.region.<fqdn>",
  "azure.tenant": "<your-tenant-ID>",
Save the user settings (JSON) and use Ctrl+Shift+P once again. Select Azure: Sign in. The authentication page loads in your browser. Sign in to your endpoint.
To test that you have successfully logged into your Azure Stack Hub subscription, use Ctrl+Shift+ P and select Azure: Select Subscription and see if the subscription you have is available.

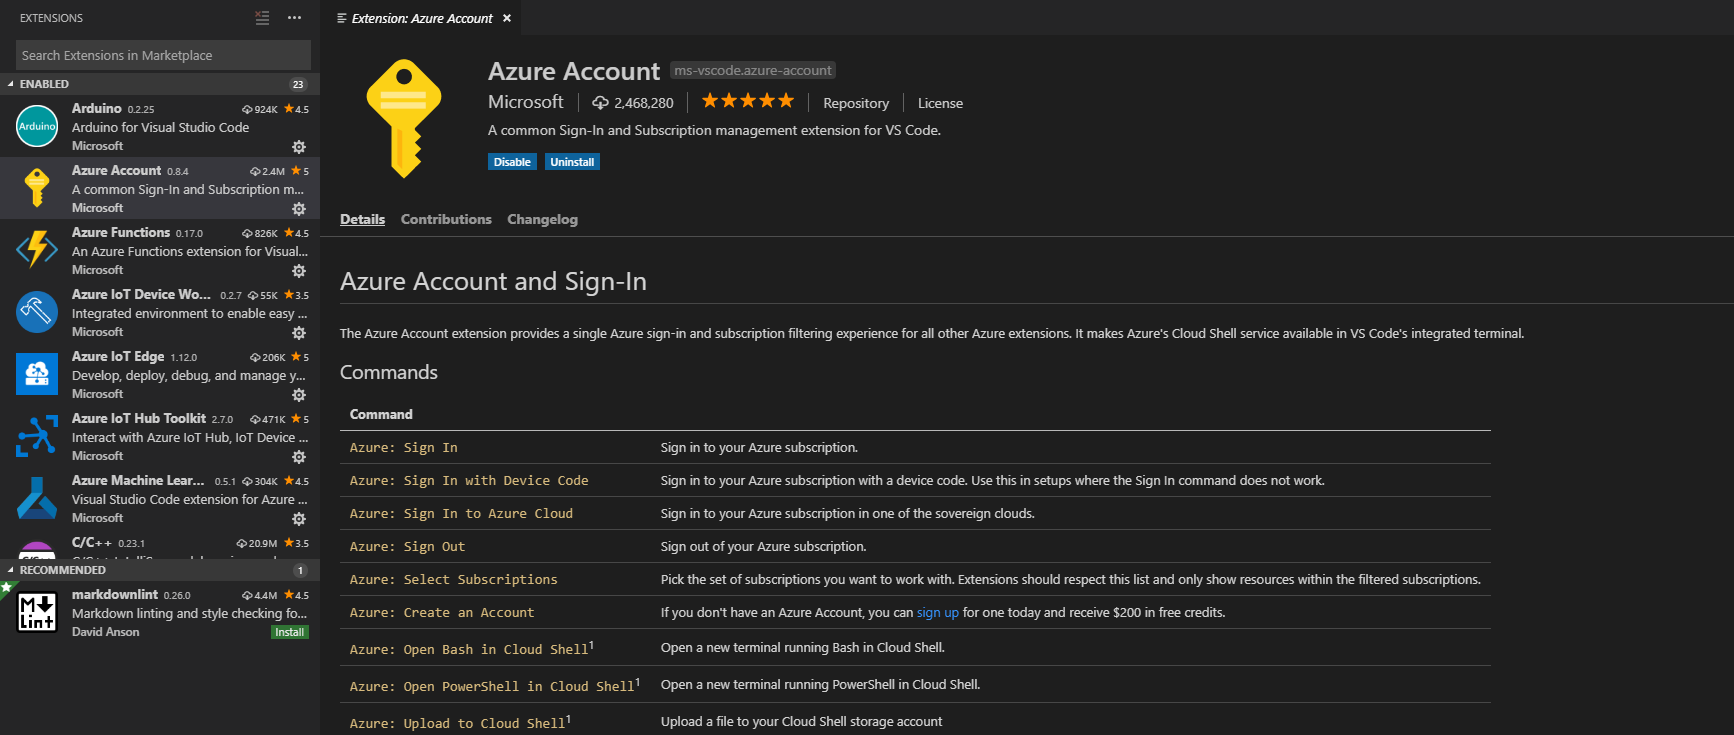
Commands
| Azure: Sign In | Sign in to your Azure subscription |
|---|---|
| Azure: Sign In with Device Code | Sign in to your Azure subscription with a device code. Use a device code in setups where the Sign In command doesn't work. |
| Azure: Sign In to Azure Cloud | Sign in to your Azure subscription in one of the sovereign clouds. |
| Azure: Sign Out | Sign out of your Azure subscription. |
| Azure: Select Subscriptions | Pick the set of subscriptions you want to work with. The extension only shows resources within the filtered subscriptions. |
| Azure: Create an Account | If you don't have an Azure Account, you can sign up for one today and receive $200 in free credits. |
| Azure: Open Bash in Cloud Shell | Open a new terminal running Bash in Cloud Shell. |
| Azure: Open PowerShell in Cloud Shell | Open a new terminal running PowerShell in Cloud Shell. |
| Azure: Upload to Cloud Shell | Upload a file to your Cloud Shell storage account. |
Next steps
Set up a development environment in Azure Stack Hub
Set up Azure Storage in your Azure Stack Hub from Visual Studio Code
Feedback
Coming soon: Throughout 2024 we will be phasing out GitHub Issues as the feedback mechanism for content and replacing it with a new feedback system. For more information see: https://aka.ms/ContentUserFeedback.
Submit and view feedback for