Activate your group membership or ownership in Privileged Identity Management
You can use Privileged Identity Management (PIM) In Microsoft Entra ID to have just-in-time membership in the group or just-in-time ownership of the group.
This article is for eligible members or owners who want to activate their group membership or ownership in PIM.
Important
When a group membership or ownership is activated, Microsoft Entra PIM temporarily adds an active assignment. Microsoft Entra PIM creates an active assignment (adds user as member or owner of the group) within seconds. When deactivation (manual or through activation time expiration) happens, Microsoft Entra PIM removes user’s group membership or ownership within seconds as well.
Application may provide access to users based on their group membership. In some situations, application access may not immediately reflect the fact that user was added to the group or removed from it. If application previously cached the fact that user is not member of the group – when user tries to access application again, access may not be provided. Similarly, if application previously cached the fact that user is member of the group – when group membership is deactivated, user may still get access. Specific situation depends on the application’s architecture. For some applications, signing out and signing back in may help to get access added or removed.
Activate a role
When you need to take on a group membership or ownership, you can request activation by using the My roles navigation option in PIM.
Sign in to the Microsoft Entra admin center as at least a Privileged role administrator.
Browse to Identity governance > Privileged Identity Management > My roles > Groups.
Note
You may also use this short link to open the My roles page directly.
Using Eligible assignments blade, review the list of groups that you have eligible membership or ownership for.
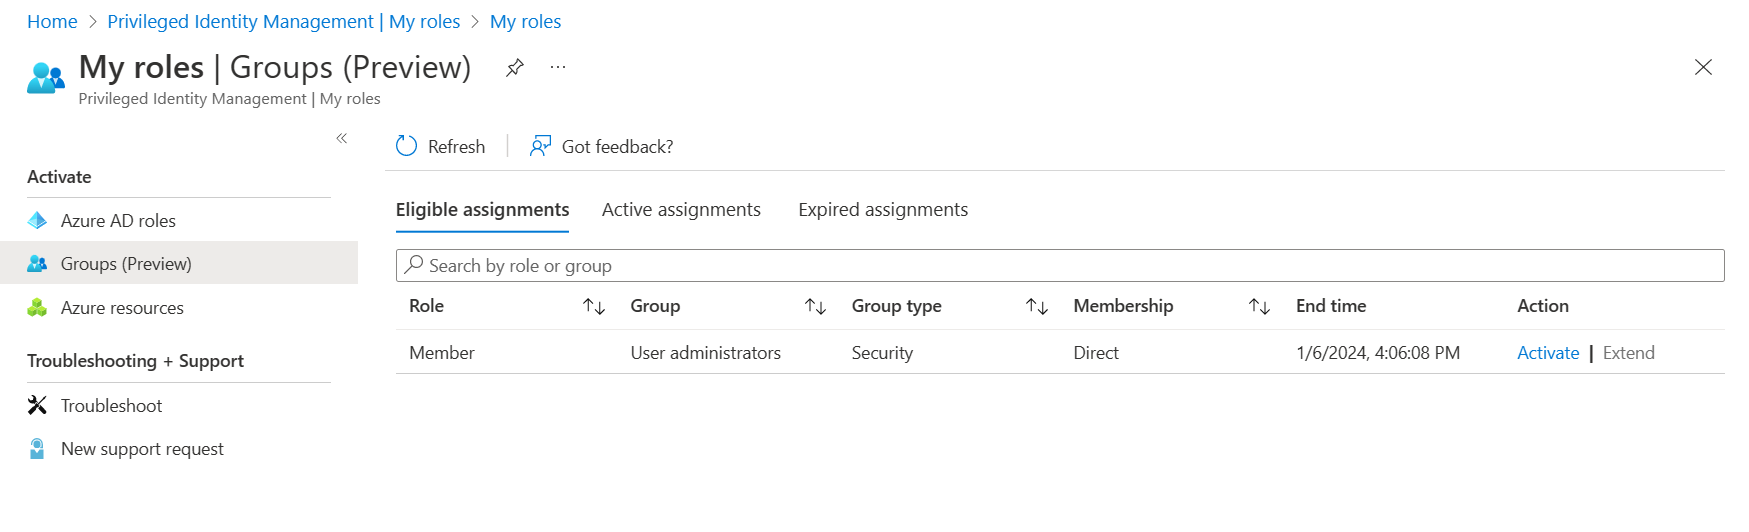
Select Activate for the eligible assignment you want to activate.
Depending on the group’s setting, you may be asked to provide multi-factor authentication or another form of credential.
If necessary, specify a custom activation start time. The membership or ownership is to be activated only after the selected time.
Depending on the group’s setting, justification for activation may be required. If needed, provide the justification in the Reason box.

Select Activate.


If the role requires approval to activate, an Azure notification appears in the upper right corner of your browser informing you the request is pending approval.
View the status of your requests
You can view the status of your pending requests to activate. It is important when your requests undergo approval of another person.
Sign in to the Microsoft Entra admin center.
Browse to Identity governance > Privileged Identity Management > My requests Groups.
Review list of requests.


Cancel a pending request
Sign in to the Microsoft Entra admin center.
Browse to Identity governance > Privileged Identity Management > My requests Groups.
For the request that you want to cancel, select Cancel.
When you select Cancel, the request is canceled. To activate the role again, you have to submit a new request for activation.
Next steps
Feedback
Coming soon: Throughout 2024 we will be phasing out GitHub Issues as the feedback mechanism for content and replacing it with a new feedback system. For more information see: https://aka.ms/ContentUserFeedback.
Submit and view feedback for