Overview of the developer portal
APPLIES TO: Developer | Basic | Basic v2 | Standard | Standard v2 | Premium
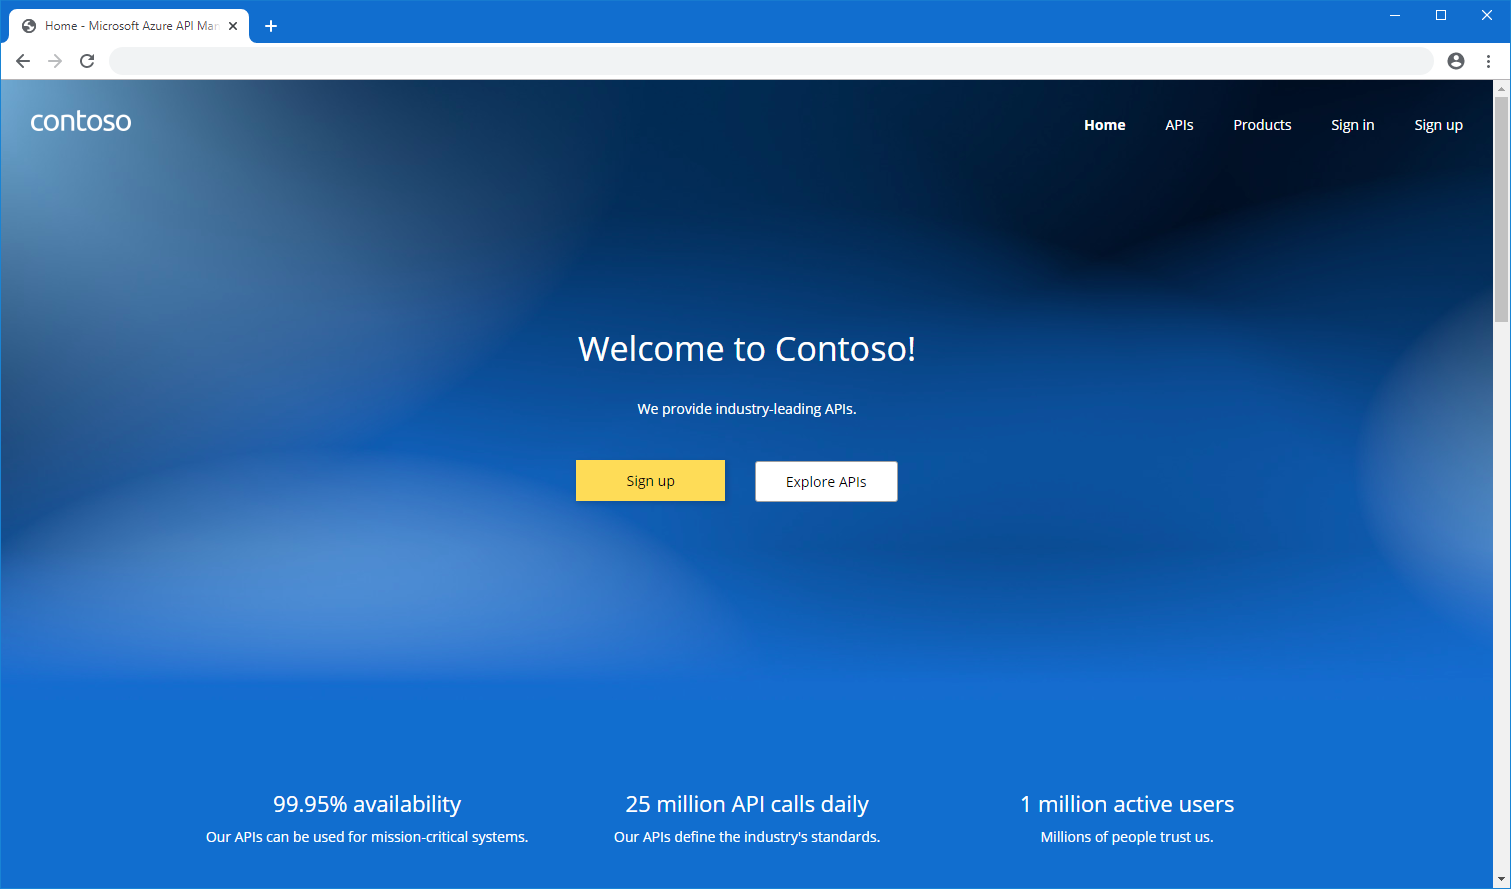
The API Management developer portal is an automatically generated, fully customizable website with the documentation of your APIs. It's where API consumers can discover your APIs, learn how to use them, request access, and try them out.
This article introduces features of the developer portal, the types of content the portal presents, and options to manage and extend the developer portal for your specific users and scenarios.
Note
We recently improved the portal editor interface to boost your productivity and enhance the interactions with your favorite features and tools. We also redesigned the API and product details widgets to elevate the portal experience for visitors.
APPLIES TO: Developer | Basic | Standard | Premium
Developer portal architectural concepts
The portal components can be logically divided into two categories: code and content.
Code
Code is maintained in the API Management developer portal GitHub repository and includes:
- Widgets - represent visual elements and combine HTML, JavaScript, styling ability, settings, and content mapping. Examples are an image, a text paragraph, a form, a list of APIs etc.
- Styling definitions - specify how widgets can be styled
- Engine - which generates static webpages from portal content and is written in JavaScript
- Visual editor - allows for in-browser customization and authoring experience
Content
Content is divided into two subcategories: portal content and API Management data.
Portal content is specific to the portal website and includes:
Pages - for example, landing page, API tutorials, blog posts
Media - images, animations, and other file-based content
Layouts - templates that are matched against a URL and define how pages are displayed
Styles - values for styling definitions, such as fonts, colors, borders
Settings - configurations such as favicon, website metadata
Portal content, except for media, is expressed as JSON documents.
API Management data includes entities such as APIs, Operations, Products, and Subscriptions that are managed in your API Management instance.
Customize and style the portal
Out of the box, the developer portal is already populated with your published APIs and products and ready to be customized for your needs. As an API publisher, you use the developer portal's administrative interface to customize the appearance and functionality of the developer portal.
If you're accessing the portal for the first time, the portal includes placeholder pages, content, and navigation menus. The placeholder content you see has been designed to showcase the portal's capabilities and minimize the customizations needed to personalize your portal.
For a step-by-step walkthrough of customizing and publishing the developer portal, see Tutorial: Access and customize the developer portal.
Important
- Access to the developer portal by API publishers and consumers requires network connectivity to both the developer portal's endpoint (default:
https://<apim-instance-name>.portal.azure-api.net) and the API Management instance's management endpoint (default:https://<apim-instance-name>.management.azure-api.net). - Publishing the developer portal requires additional connectivity to blob storage managed by API Management in the West US region.
- If the API Management instance is deployed in a VNet, ensure that the hostnames of the developer portal and management endpoint resolve properly and that you enable connectivity to required dependencies for the developer portal. Learn more.
Visual editor
The developer portal's administrative interface provides a visual editor for publishers to customize the portal's content and styling. Using the visual editor, you can add, remove, and rearrange pages, sections, and widgets. You can also change the styling of the portal's elements, such as fonts, colors, and spacing.
As an administrator, you can customize the content of the portal using the visual editor.
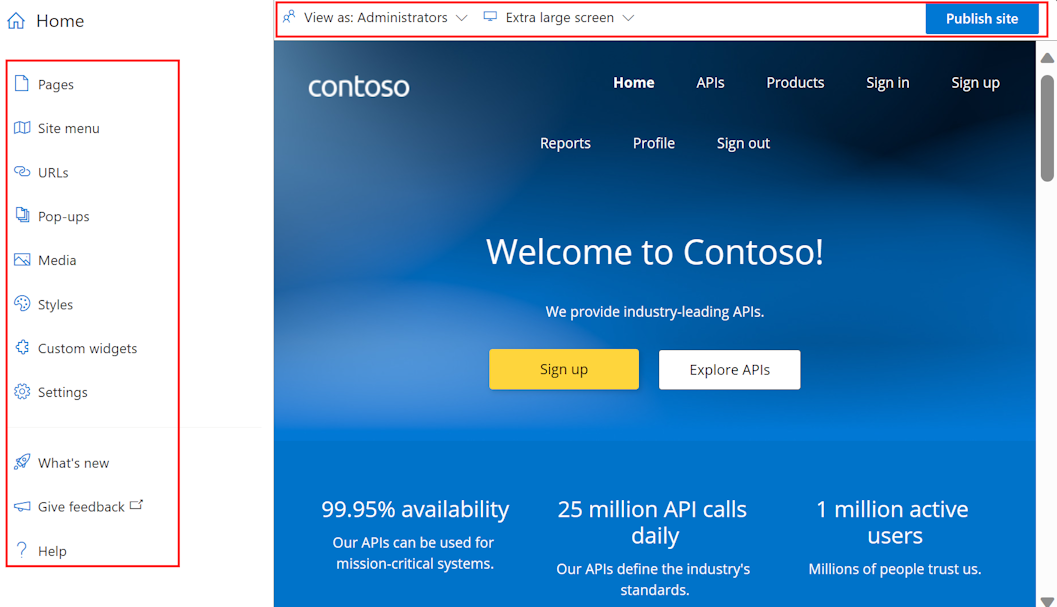
Use the menu options on the left to create or modify pages, media, layouts, menus, styles, or website settings.
On the top, switch between viewports (for screens of different sizes), or view the elements of the portal visible to users in different groups. For example, you might want to display certain pages only to groups that are associated with particular products, or to users that can access specific APIs.
Also, save or undo changes you make, or publish the website.
Select existing text and heading elements to edit and format content.
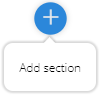
Add a section to a page by hovering over a blank area then click a blue icon with a plus sign. Choose from among several section layouts.
Add a widget (for example, text, image, custom widget, or APIs list) by hovering over a blank area, then click a gray icon with a plus sign.

Rearrange items in a page by drag-and-drop.
Layouts and pages
Layouts define how pages are displayed. For example, in the default content, there are two layouts: one applies to the home page, and the other to all remaining pages. You can modify these layouts and add more layouts to suit your needs.
A layout gets applied to a page by matching its URL template to the page's URL. For example, a layout with a URL template of /wiki/* is applied to every page with the /wiki/ segment in the URL: /wiki/getting-started, /wiki/styles, etc.
In the following image, content belonging to the layout is outlined in blue, while the page-specific content is outlined in red.

The pre-provisioned content in the developer portal showcases pages with commonly used features. You can modify the content of these pages or add new ones to suit your needs.
Note
Due to integration considerations, the following pages can't be removed or moved under a different URL: /404, /500, /captcha, /change-password, /config.json, /confirm/invitation, /confirm-v2/identities/basic/signup, /confirm-v2/password, /internal-status-0123456789abcdef, /publish, /signin, /signin-sso, /signup.
Styles

The Styles panel is created with designers in mind. Use styles to manage and customize all the visual elements in your portal, such as fonts used in headings and menus and button colors. The styling is hierarchical - many elements inherit properties from other elements. For example, button elements use colors for text and background. To change a button's color, you need to change the original color variant.
To edit a variant, select it and select Edit style in the options that appear on top of it. After you make the changes in the pop-up window, close it.
Extend portal functionality
In some cases you might need functionality beyond the customization and styling options provided in the managed developer portal. If you need to implement custom logic, which isn't supported out-of-the-box, you have several options:
- Add custom HTML directly through a developer portal widget designed for small customizations - for example, add HTML for a form or to embed a video player. The custom code is rendered in an inline frame (IFrame).
- Create and upload a custom widget to develop and add more complex custom portal features.
- Self-host the portal, only if you need to make modifications to the core of the developer portal codebase. This option requires advanced configuration. Azure Support's assistance is limited only to the basic setup of self-hosted portals.
Note
Because the API Management developer portal codebase is maintained on GitHub, you can open issues and make pull requests for the API Management team to merge new functionality at any time.
Control access to portal content
The developer portal synchronizes with your API Management instance to display content such as the APIs, operations, products, subscriptions, and user profiles. APIs and products must be in a published state to be visible in the developer portal.
Content visibility and access
In API Management, groups of users are used to manage the visibility of products and their associated APIs to developers. In addition to using built-in groups, you can create custom groups to suit your needs. Products are first made visible to groups, and then developers in those groups can view and subscribe to the products that are associated with the groups.
You can also control how other portal content (such as pages and sections) appears to different users, based on their identity. For example, you might want to display certain pages only to users who have access to a specific product or API. Or, make a section of a page appear only for certain groups of users. The developer portal has built-in controls for these needs.
Note
Visibility and access controls are supported only in the managed developer portal. They aren't supported in the self-hosted portal.
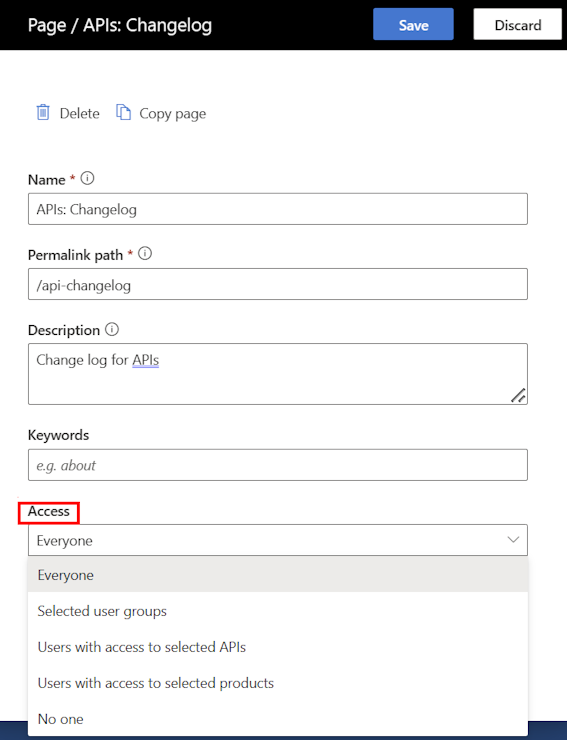
When you add a page or edit the settings of an existing page, make a selection under Access to control the users or groups that can see the page
Tip
To edit the settings of an existing page, select the gear icon next to the page name on the Pages tab.
When you select page content such as a page section, menu, or button for editing, select the Change access icon to control the users or groups that can see the element on the page

You can change the visibility of the following page content: sections, menus, buttons, and sign-in for OAuth authorization.
Media files such as images on a page inherit the visibility of the elements that contain them.
When a user visits the developer portal with visibility and access controls applied:
The developer portal automatically hides buttons or navigation items that point to pages that a user doesn't have access to.
An attempt by a user to access a page they aren't authorized to access results in a 404 Not Found error.
Tip
Using the administrative interface, you can preview pages as a user associated with any built-in or custom group by selecting View as in the menu at the top.
Content security policy
You can enable a content security policy to add a layer of security to your developer portal and help mitigate certain types of attacks including cross-site scripting and data injection. With a content security policy, the developer portal on the browser will only load resources from trusted locations that you specify, such as your corporate website or other trusted domains.
To enable a content security policy:
- In the Azure portal, navigate to your API Management instance.
- In the left menu, under Developer portal, select Portal settings.
- On the Content security policy tab, select Enabled.
- Under Allowed sources, add one or more hostnames that specify trusted locations that the developer portal can load resources from. You can also specify a wildcard character to allow all subdomains of a domain. For example,
*.contoso.comallows all subdomains ofcontoso.com. - Select Save.
Interactive test console
The developer portal provides a "Try it" capability on the API reference pages so that portal visitors can test your APIs directly through an interactive console.
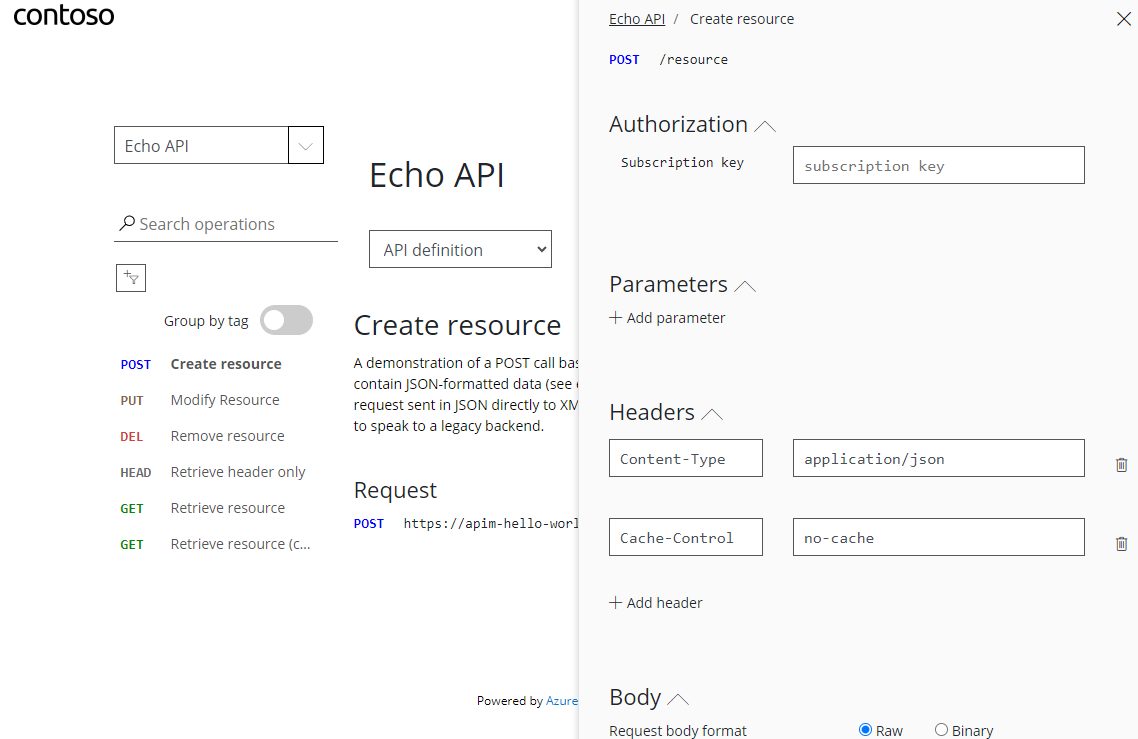
The test console supports APIs with different authorization models - for example, APIs that require no authorization, or that require a subscription key or OAuth 2.0 authorization. In the latter case, you can configure the test console to generate a valid OAuth token on behalf of the test console user. For more information, see How to authorize test console of developer portal by configuring OAuth 2.0 user authorization.
Important
To let the visitors of your portal test the APIs through the built-in interactive console, enable a CORS (cross-origin resource sharing) policy on your APIs. For details, see Enable CORS for interactive console in the API Management developer portal.
Manage user sign-up and sign-in
By default, the developer portal enables anonymous access. This means that anyone can view the portal and its content without signing in, although access to certain content and functionality such as using the test console may be restricted. You can enable a developer portal website setting to require users to sign in to access the portal.
The portal supports several options for user sign-up and sign-in:
Basic authentication for developers to sign in with credentials for API Management user accounts. Developers can sign up for an account directly through the portal, or you can create accounts for them.
Depending on your scenarios, restrict access to the portal by requiring users to sign up or sign in with a Microsoft Entra ID or Azure AD B2C account.
If you already manage developer sign-up and sign-in through an existing website, delegate authentication instead of using the developer portal's built-in authentication.
Learn more about options to secure user sign-up and sign-in to the developer portal.
Reports for users
The developer portal generates reports for authenticated users to view their individual API usage, data transfer, and response times, including aggregated use by specific products and subscriptions. Users can view the reports by selecting Reports in the default navigation menu for authenticated users. Users can filter reports by time interval, up to the most recent 90 days.
Note
Reports in the developer portal only show data for the authenticated user. API publishers and administrators can access usage data for all users of the API Management instance - for example, by setting up monitoring features such as Azure Application Insights in the portal.
Save and publish website content
After you update the developer portal content or configuration, you need to save and publish your changes to make them available to portal visitors. The developer portal maintains a record of the content you've published, and you can revert to a previous portal revision when you need to.
Save changes

Whenever you make a change in the portal, you need to save it manually by selecting the Save button in the menu at the top, or press [Ctrl]+[S]. If you need to, you can Undo your last saved changes. Saved changes are visible only to you and aren't visible to portal visitors until you publish them.
Note
The managed developer portal receives and applies software updates automatically. Changes that you've saved but not published to the developer portal remain in that state during an update.
Publish the portal
To make your portal and its latest changes available to visitors, you need to publish it. You publish the portal within the portal's administrative interface or from the Azure portal.
Important
You need to publish the portal any time you want to expose changes to the portal's content or styling. The portal also needs to be republished after API Management service configuration changes that affect the developer portal. For example, republish the portal after assigning a custom domain, updating the identity providers, setting delegation, or specifying sign-in and product terms.
Publish from the administrative interface
Make sure you saved your changes by selecting the Save button.
In the menu at the top, select Publish site. This operation may take a few minutes.

Publish from the Azure portal
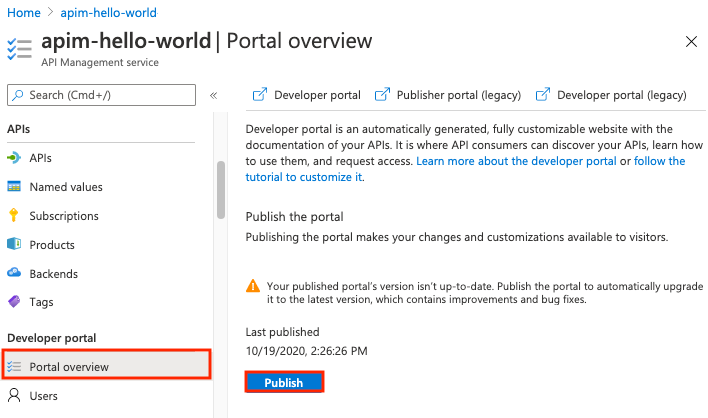
In the Azure portal, navigate to your API Management instance.
In the left menu, under Developer portal, select Portal overview.
In the Portal overview window, select Publish.
Restore a previous portal revision
Each time you publish the developer portal, a corresponding portal revision is saved. You can republish a previous portal revision at any time. For example, you might want to roll back a change you introduced when you last published the portal.
Note
Developer portal software updates are applied automatically when you restore a revision. Changes saved but not published in the administrative interface remain in that state when you publish a revision.
To restore a previous portal revision:
- In the Azure portal, navigate to your API Management instance.
- In the left menu, under Developer portal, select Portal overview.
- On the Revisions tab, select the context menu (...) for a revision that you want to restore, and then select Make current and publish.
Reset the portal
If you want to discard all changes you've made to the developer portal, you can reset the website to its starting state. Resetting the portal deletes any changes you've made to the developer portal pages, layouts, customizations, and uploaded media.
Note
Resetting the developer portal doesn't delete the published version of the developer portal.
To reset the developer portal:
- In the administrative interface, in the menu at the left of the visual editor, select Settings.
- On the Advanced tab, select Yes, reset the website to default state.
- Select Save.
Related content
Learn more about the developer portal:
- Access and customize the managed developer portal
- Extend functionality of the managed developer portal
- Set up self-hosted version of the portal
Browse other resources:
Feedback
Coming soon: Throughout 2024 we will be phasing out GitHub Issues as the feedback mechanism for content and replacing it with a new feedback system. For more information see: https://aka.ms/ContentUserFeedback.
Submit and view feedback for