Test the self-hosted developer portal
APPLIES TO: Developer | Basic | Basic v2 | Standard | Standard v2 | Premium
This article explains how to set up unit tests and end-to-end tests for your self-hosted portal.
Unit tests
A unit test is an approach to validate small pieces of functionality. It's done in isolation from other parts of the application.
Example scenario
In this scenario, you're testing a password input control. It only accepts passwords containing at least:
One letter
One number
One special character
So, the test to validate these requirements looks like this:
const passwordInput = new PasswordInput();

passwordInput.value = "";
expect(passwordInput.isValid).to.equal(false);

passwordInput.value = "password";
expect(passwordInput.isValid).to.equal(false);

passwordInput.value = "p@ssw0rd";
expect(passwordInput.isValid.to.equal(true);
Project structure
It's common to keep a unit test next to the component it's supposed to validate.
component.ts
component.spec.ts
Mock HTTP requests
There are cases when you expect a component to make HTTP requests. The component should react properly to different kind of responses. To simulate specific HTTP responses, use MockHttpClient. It implements the HttpClient interface used by many other components of the project.
const httpClient = new MockHttpClient();

httpClient.mock()
    .get("/users/jane")
    .reply(200, {
        firstName: "Jane",
        lastName: "Doe"
    });
End-to-end tests
An end-to-end test executes a particular user scenario taking exact steps that you expect the user to carry out. In a web application like te Azure API Management developer portal, the user scrolls through the content and selects options to achieve certain results.
To replicate user navigation, you can use browser manipulation helper libraries like Puppeteer. It lets you simulate user actions and automate assumed scenarios. Puppeteer also automatically takes screenshots of pages or components at any stage of the test. Compare them later with previous results to catch deviations and potential regressions.
Example scenario
In this scenario, you need to validate a user sign-in flow. This scenario would require the following steps:
Open browser and navigate to the sign-in page.
Enter the email address.
Enter the password.
Select Sign-in.
Verify that user got redirected to Home page.
Verify that the page includes the Profile menu item. It's one of the possible indicators that you successfully signed in.
To run the test automatically, create a script with exactly the same steps:
// 1. Open browser and navigate to the sign-in page.
const page = await browser.newPage();
await page.goto("https://contoso.com/signin");

// 2. Enter email.
await this.page.type("#email", "john.doe@contoso.com");

// 3. Enter password.
await this.page.type("#password", "p@s$w0rd");

// 4. Click Sign-in.
await this.page.click("#signin");

// 5. Verify that user got redirected to Home page.
expect(page.url()).to.equal("https://contoso.com");

// 6. Verify that the page includes the Profile menu item.
const profileMenuItem = await this.page.$("#profile");
expect(profileMenuItem).not.equals(null);
Note
Strings such as "#email", "#password" and "#signin" are CSS-like selectors that identify HTML elements on the page. See the Selectors Level 3 W3C specification to learn more.
UI component maps
User flows often go through the same pages or components. A good example is the main website menu that is present on every page.
Create a UI component map to avoid configuring and updating the same selectors for every test. For example, you could replace steps 2 through 6 in the preceding example with just two lines:
const signInWidget = new SigninBasicWidget(page);
await signInWidget.signInWithBasic({ email: "...", password: "..." });
Test configuration
Certain scenarios may require pre-created data or configuration. For example, you may need to automate user sign-in with social media accounts. It's hard to create that data quickly or easily.
For this purpose, you could add a special configuration file to your test scenario. The test scripts can pick up required data from the file. Depending on the build and test pipeline, the tests can pull the secrets from a named secure store.
Here's an example of a validate.config.json that would be stored in the src folder of your project.
{
    "environment": "validation",
    "urls": {
        "home": "https://contoso.com",
        "signin": "https://contoso.com/signin",
        "signup": "https://contoso.com/signup/"
    },
    "signin": {
        "firstName": "John",
        "lastName": "Doe",
        "credentials": {
            "basic": {
                "email": "johndoe@contoso.com",
                "password": "< password >"
            },
            "aadB2C": {
                "email": "johndoe@contoso.com",
                "password": "< password >"
            }
        }
    },
    "signup": {
        "firstName": "John",
        "lastName": "Doe",
        "credentials": {
            "basic": {
                "email": "johndoe@contoso.com",
                "password": "< password >"
            }
        }
    }
}
Headless vs normal tests
Modern browsers such as Chrome or Microsoft Edge allows you to run automation in both headless mode and normal mode. The browser operates without a graphical user interface in headless mode. It still carries out the same page and Document Object Model (DOM) manipulations. The browser UI usually isn't needed in delivery pipelines. In that case, running tests in headless mode is a great option.
When you develop a test script, it's useful to see what exactly is happening in the browser. That's a good time to use normal mode.
To switch between the modes, change the option headless option in the constants.ts file. It's in the tests folder in your project:
export const LaunchOptions = {
    headless: false
};
Another useful option is slowMo. It pauses the execution of the test between each action:
export const LaunchOptions = {
    slowMo: 200 // milliseconds
};
Run tests
There are two built-in ways to execute tests in this project:
npm command
npm run test
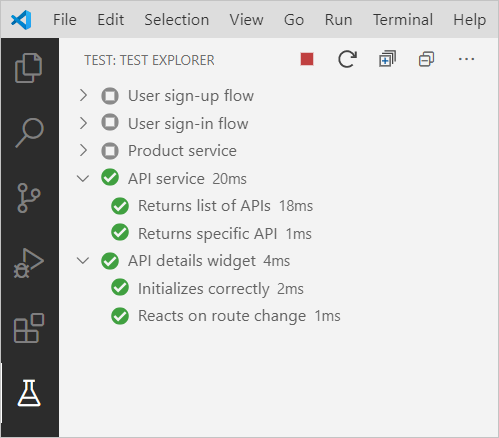
Test Explorer
The Test Explorer extension for VS Code (for example, Mocha Test Explorer) has a convenient UI and an option to run tests automatically on every change of the source code:
Next steps
Learn more about the developer portal:
Feedback
Coming soon: Throughout 2024 we will be phasing out GitHub Issues as the feedback mechanism for content and replacing it with a new feedback system. For more information see: https://aka.ms/ContentUserFeedback.
Submit and view feedback for